Welcome, Guest
Username: Password: Remember me

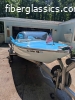
TOPIC: restoration project make/mode/year unknown

restoration project make/mode/year unknown 2 years 5 months ago #145675

  • Fatlenny
  • Fatlenny's Avatar Topic Author
  • Offline
  • Senior Boarder
  • Senior Boarder
  • Posts: 241
  • Karma: 3
  • Thank you received: 17
Hello all, fairly new member here.

I purchased this 14 foot boat for a project the end of this summer and wanted to share my experiences here and hope to get any feed back as I am new to the boating world all together, and hoping that someone can help me identify the make and year of this project.

I purchased this boat on a whim when I recently took a small vacation with my wife and rekindled my love for fishing and was actually looking for a fishing boat. I couldn't seem to turn down the price of $500 when the outboard motor (1971 Johnson 50) seemed in such good condition mechanically.

After discovering issues with incorrect ignition wiring and a problem with a broken shift switch in the remote (temp fix was using a 3 way toggle switch to shift, NOT SAFE, I KNOW) We was able to take it out 3 times this season for testing. She runs great. She seems to sit a bit low in the water and heavy due to waterlogged materials under floor but all in all seems like it will be a fun little boat.

I have looked for many hours at images of similar boats but cant seem to find any thing that is a match for what I have. The HIN number has not yet been found on it yet. I hope to find something stripping off the paint the previous owner has added to all of this boat and hope it was not sanded down or was on a plate that was removed. I have found images of the sale of this boat but make model and year is still unknown. first pic is from one of them I have found on line from a previous listing. seems this boat has gone to auction and i got it from a dealer who purchased it for a project that he decided against and sold as is.

I have now started the project by removing the old "fix" of the rotted floor the previous owner had added. a piece of 3/4 plywood screwed to the original floor. Found 3 screws that was screwed all the way through the hull. Marked them with white paint on the outside of the hull to remind me there are holes. Don't want to forget to fill them for sure. Then continued to remove the original floor. There was nothing at all solid on the original floor. most of it was scooped up by hand and vacuumed out of the hull. Then removed the waterlogged foam. After seeing the stringer and transom is need of replacement, I have decided to remove the cap to much more easily remove the floor under the bow and to replace the transom. So next steps are to get my outboard stand built so I can move forward.

More (better) photos to come as this project proceeds.
Attachments:

Please Log in or Create an account to join the conversation.

restoration project make/mode/year unknown 2 years 5 months ago #145681

HIN's were not required prior to 1972. If the boat pre-dates 1972 there's a good chance it won't have one.

Please Log in or Create an account to join the conversation.

restoration project make/mode/year unknown 2 years 5 months ago #145682

Great job so far.....almost like you have been down this road before!

Please Log in or Create an account to join the conversation.

restoration project make/mode/year unknown 2 years 5 months ago #145684

  • Fatlenny
  • Fatlenny's Avatar Topic Author
  • Offline
  • Senior Boarder
  • Senior Boarder
  • Posts: 241
  • Karma: 3
  • Thank you received: 17
Thanks, I have spent a few "minutes" watching some videos and reading some other online information on what it takes to dig into these old boats and the issues they can have. I never would have guessed the foam under the floor could become waterlogged. I didn't think about it until after I had already sent the garbage to the road to get all the weights. but I did weigh the contractor bag of foam that removed and it was 57lbs. I want to guess that the other bag of waterlogged debris along with the sheet of soaked/rotted plywood on top of the floor was almost another 100 or more lbs.

All this is a new experience for me. The only thing I am nervous about is working with the fiberglass when I finish cutting out the floor under the bow and cut out and replace the stringer as I have never used fiberglass or resin before. Another place of concern for me is going to be the finish, applying a gelcoat. seems simple enough but I'm afraid I will find a way to mess it up the first time so I will have to do it twice.

Please Log in or Create an account to join the conversation.

restoration project make/mode/year unknown 2 years 5 months ago #145685

here is video that may help ? Boatworkstoday.com has really good videos of the entire process.
The following user(s) said Thank You: Fatlenny

Please Log in or Create an account to join the conversation.

restoration project make/mode/year unknown 2 years 5 months ago #145687

  • Fatlenny
  • Fatlenny's Avatar Topic Author
  • Offline
  • Senior Boarder
  • Senior Boarder
  • Posts: 241
  • Karma: 3
  • Thank you received: 17
thanks for the suggestion. i have came across this youtuber and believe he will be informative for me in this adventure.

Please Log in or Create an account to join the conversation.

restoration project make/mode/year unknown 2 years 4 months ago #145706

  • Fatlenny
  • Fatlenny's Avatar Topic Author
  • Offline
  • Senior Boarder
  • Senior Boarder
  • Posts: 241
  • Karma: 3
  • Thank you received: 17
Good evening everyone,
Work has been keeping me away from the messy garage and slowed me down for a bit on the project but finally made it to Home Depot to get some fasteners to get the outboard stand built. I used a old cart from work and shortened the top shelf. This cart was rated for 250 lbs. each shelf. Im sure it will handle this old Johnson 50.

Now if I can just get one of the kids to come over and help me set this old motor on it...

Attachments:

Please Log in or Create an account to join the conversation.

restoration project make/mode/year unknown 2 years 4 months ago #145707

Excellent, that should work great t!!!

Bob

Please Log in or Create an account to join the conversation.

restoration project make/mode/year unknown 2 years 4 months ago #145715

  • Fatlenny
  • Fatlenny's Avatar Topic Author
  • Offline
  • Senior Boarder
  • Senior Boarder
  • Posts: 241
  • Karma: 3
  • Thank you received: 17
Well I recruited the wife (almost a mistake as it was almost too much for us to handle by hand) to pick up the outboard and place it on the stand. mounted the controls, fuel tank, and battery.


Then proceeded to remove all the screws in the rub rail to remove the cap. Got the wife to help again removing the cap. (this was much lighter LOL)

Still hoping this will catch some ones attention and maybe recognize the make and model of this 14 foot boat.


Next is to finish cutting out the old floor in the bow and stern, then tackle removing the transom.


Quick question, should this be in the members project section. I noticed that there was a section for that. If it is fine here then its all good. If not, how could it be moved?
Attachments:

Please Log in or Create an account to join the conversation.

restoration project make/mode/year unknown 2 years 4 months ago #145717

The wife... errrr Admiral helped you put the motor on the stand ?
either you're lucky she didn't kill you ? Or she really likes you ? Ha-Ha-Ha !

Please Log in or Create an account to join the conversation.

restoration project make/mode/year unknown 2 years 4 months ago #145732

  • Dr.Go!
  • Dr.Go!'s Avatar
  • Offline
  • Contributing Member
  • Contributing Member
  • Posts: 1719
  • Karma: 19
  • Thank you received: 125
That is a great stand… and fortunate to have help from your wife. Mine helps with car and Jeep motor replacements, but when she tells people of our boat salvage stories… trying to get an ice filled boat square on a trailer to bring home in a snowstorm, she told her sister… I almost died that day hanging off the bow off the ground while husband used an 8 foot 2 by 6 to lift the stern over to center. We gotter home though. Your boat deck still puzzles me as to what brand. Though I grew up a boat nut in this era, this site makes me realize I have only seen a tiny fraction of the boats made. Yours is a pretty cool boat, so nice that you are saving it!

Please Log in or Create an account to join the conversation.

Dr.Go!

restoration project make/mode/year unknown 2 years 4 months ago #145740

  • Fatlenny
  • Fatlenny's Avatar Topic Author
  • Offline
  • Senior Boarder
  • Senior Boarder
  • Posts: 241
  • Karma: 3
  • Thank you received: 17
getting another project boat real cheap off my son in-law. its bay liner bass boat ($200 for boat motor and trailer). more like what i wanted in the first place. considering transferring/swapping the 85hp outboard to this little toy boat. i don't know the true max HP this 14 foot boat can handle but i wonder if it really will be too much "fun" for this 14 foot boat or not. the motor would weigh about 60 more lbs than the 50hp Johnson, maybe relocate the fuel tank and battery under the bow. what do you all think?

Please Log in or Create an account to join the conversation.

restoration project make/mode/year unknown 2 years 4 months ago #145742

If it was the son in law who suggested transferring engines he is trying to kill you...

Please Log in or Create an account to join the conversation.

restoration project make/mode/year unknown 2 years 4 months ago #145743

  • 63 Sabre
  • 63 Sabre's Avatar
  • Offline
  • Contributing Member
  • Contributing Member
  • Posts: 4676
  • Karma: 147
  • Thank you received: 167
Hell ya, go for it. Put the 85 on the 14 footer and have some fun. Ski, tube, etc. Most definatly put the gas and maybe the battery up front but don't make 'em permanent until you put it in the water to see how she balances out and planes. Ya only go around once and there are plenty of guys on this site who gofer speed and fun. Most definatly life jackets are a requirement though. And hook up a kill switch to the motor to attach to your wrist.......ya know, just in case.......
I had a 135 'Rude on a 15 footer Tomahawk and I would leave some of the older bass boats scratchin' their heads B)
Really had to watch those turns though.

Please Log in or Create an account to join the conversation.

restoration project make/mode/year unknown 2 years 4 months ago #145752

  • Fatlenny
  • Fatlenny's Avatar Topic Author
  • Offline
  • Senior Boarder
  • Senior Boarder
  • Posts: 241
  • Karma: 3
  • Thank you received: 17
Picked up the Bass boat today. Turns out to be a 1989 Bay liner bass trophy 1710. After further consideration of wanting to use the bass boat next summer, we will be using the 50HP Johnson for this current project. I am still shooting for a top end around 40mph on this little 14 footer LOL.

I will start a thread in the projects section when I start cleaning up and gutting the floors out of the bass boat.
Looking into it so far it is needing:
heavy cleaning and buffing of the exterior.
Full replacement of the floors and seats recovered.
Transom looks good, have to see what it looks like under the floor.
A few minor electrical repairs. (Trim switch is known to be bad.)
Replacement windshields bought or made.

Great, now I have 2 winter projects.

Please Log in or Create an account to join the conversation.

restoration project make/mode/year unknown 2 years 4 months ago #145753

Right on fatlenny. Hopefully you saw some humour in my last post. Good luck, and be sure to make the son in law help out.:)
The following user(s) said Thank You: Fatlenny

Please Log in or Create an account to join the conversation.

restoration project make/mode/year unknown 2 years 4 months ago #145754

  • Fatlenny
  • Fatlenny's Avatar Topic Author
  • Offline
  • Senior Boarder
  • Senior Boarder
  • Posts: 241
  • Karma: 3
  • Thank you received: 17
Got some more work done today. finished cutting the floor out in the bow and got the transom removed. The transom delaminated from the fiberglass much better than I had hoped. No damage to the fiberglass other than the 14 old holes from previous motor instillations that need to be patched and the wood is in good enough shape to use a template for cutting the new one. Next up is removal of the stringer, but first I think it is beer thirty.


Attachments:

Please Log in or Create an account to join the conversation.

restoration project make/mode/year unknown 2 years 4 months ago #145755

  • Fatlenny
  • Fatlenny's Avatar Topic Author
  • Offline
  • Senior Boarder
  • Senior Boarder
  • Posts: 241
  • Karma: 3
  • Thank you received: 17
Stringer is removed again in pieces I can use as a template to cut the new one.


One thing I did not expect when pulling out the 2 piece stringer was that the bottom piece was cut at an angle on both sides to match the shape of the V-hull. I guess I was expecting just a 3/4 x 3 inch board and the bottom of the hull to be filled in with resin to be flat. I guess I will have to dig out the table saw to cut to match the hull shape.


Images seem to be turned for me for some reason. Think I need a drink.

So I think the tare down process is complete. Now on to purchasing the wood, resin, and fiberglass to start putting her back together. I was thinking of using Plywood for the stringer but as it is just over a 10 foot length I assume I have to go with solid wood to make that happen unless someone has a suggestion on how to make a strong stringer that would have a seam somewhere in it. Would it make any sense to use 3/4 ply doubled up, staggering the seam?
Attachments:

Please Log in or Create an account to join the conversation.

restoration project make/mode/year unknown 2 years 4 months ago #145757

  • Nautilus
  • Nautilus's Avatar
  • Offline
  • Contributing Member
  • Contributing Member
  • Posts: 1575
  • Karma: 87
  • Thank you received: 58
You might consider using pressure treated lumber for the stringers...coated with clear penetrating epoxy sealer. (CPES) You will find that making the stringers conform to the hull is, well, a bitch. You will need to use "junk" wood for making patterns to contour the hull. (they won't be the same...never are.) Make sure they are wider than the finished deck height will be. After you get both made to contour, set them in place and put temporary cross pieces in to hold them there. Cut slots in both...forward and toward the stern...to allow you to use a straight edge to span across from gunwhale to gunwhale and mark the heights. Remove the stringers and draw lines to connect the marks and then cut straight. Finished stringers go back in seated in 3M 5200....use the temporary bracing again while it sets up for a few days. After that, install any/all secondary framing matching the height of the stringers. Piece of cake? No. You'll ruin wood and probably throw a hammer across the shop before it's done. Might take you a week or so to get it right. Have fun!

Maybe a little "overframed" but here's one I just finished using Douglass fir. Photo shows the framing before CPES treatment and fiberglassing to the bilge. I made 1-1/2" thick "pads" for bolting down the seat pedestals.


Attachments:
The following user(s) said Thank You: Fatlenny

Please Log in or Create an account to join the conversation.

Website: NautilusRestorations.com

Mentor to the unenlightened!

"Never allow logic to interfere with a boat purchase." - J. S. Hadley
"Vintage quality beats new junk every time." - J. S. Hadley
"Anything supposed to do two things does both of them half-assed." - J. S. Hadley
"Success makes...

restoration project make/mode/year unknown 2 years 4 months ago #145758

  • Fatlenny
  • Fatlenny's Avatar Topic Author
  • Offline
  • Senior Boarder
  • Senior Boarder
  • Posts: 241
  • Karma: 3
  • Thank you received: 17
Thanks for the advice Nautilus. It is well received. I also planned on at the least doubling up the plywood (bottom side) of the floor where the seats will be mounted to give the mounting fasteners more to bite on, may use some scrap solid 3/4 wood. I was also thinking about adding a few supports from side to side as all that was originally was one wood stringer and the 2 fiberglass stringers. I do have a few comments and questions to ask.

*I am considering something like the image below by removing the fiberglass stringers (a bit flimsy IMO) I only am worried about keeping the weight as minimal as possible.
*Do you think this is overkill for this little boat and may add more weight than I want? or should I just keep it like it was and rely on only the original style stringer and the pour foam for the hull and floor support?
*The treated wood available here is very wet when purchased from the chemical process to treat it, how dry does it have to be before sealing like you suggested or would using untreated wood sealing like you suggested be ok in this situation and last another 30 or more years?
*Lastly, (for now) for the floor, should I use 3/4 marine grade ply or can I use thinner (3/8) to reduce weight and rely on the foam again for floor support?

Attachments:

Please Log in or Create an account to join the conversation.

restoration project make/mode/year unknown 2 years 4 months ago #145759

  • Nautilus
  • Nautilus's Avatar
  • Offline
  • Contributing Member
  • Contributing Member
  • Posts: 1575
  • Karma: 87
  • Thank you received: 58
WOW! Lots of questions...

Leave the fiberglass stringers. They will help keep things stiff. Just build around/next to them. You don't need a center stringer or those secondary pieces that form a V along the bottom as shown in your drawing. Just span port to starboard using the stringers as support in the middle. And don't worry about weight. You could build everything out of oak 2x4s and it still wouldn't be as heavy as a fat chick riding along with you.

I buy my treated 1Xs and 2Xs from the local Home Depot. Some is a little wet, most is not. Pick through. Actually, Douglas fir will work if you seal it with CPES. It won't last forever but it will outlast you...if you fiberglass the floor in well.
I use 3/8" marine plywood. Cut foam to deck level as seen in the photo below.

I buy my marine plywood here: www.worldpanel.com/
Foam, fiberglass cloth and resin from here: www.uscomposites.com/
3M 5200 (buy at least 4 10 oz. tubes) from here: shop.hamiltonmarine.com/
CPES: www.shiptoshoremarine.com/products/smiths-clear-penetrating-epoxy

Tips: Buy yourself an air fed caulk gun and soak the 5200 tubes in hot water to soften it. Saves cussing.
The fumes of the CPES are strong. Use in a well-ventilated area.
I use a "high tech" tool to cut the foam level...a 24" piece of an old band saw blade with mean teeth. Wrap duct tape on the end for a handle that will allow you to cut when you pull, not push.

If none of this works, you can always take up golf.

Attachments:

Please Log in or Create an account to join the conversation.

Website: NautilusRestorations.com

Mentor to the unenlightened!

"Never allow logic to interfere with a boat purchase." - J. S. Hadley
"Vintage quality beats new junk every time." - J. S. Hadley
"Anything supposed to do two things does both of them half-assed." - J. S. Hadley
"Success makes...

restoration project make/mode/year unknown 2 years 4 months ago #145760

  • Fatlenny
  • Fatlenny's Avatar Topic Author
  • Offline
  • Senior Boarder
  • Senior Boarder
  • Posts: 241
  • Karma: 3
  • Thank you received: 17
Thanks for the info again. I have one more question on one of your first statements "You don't need a center stringer." there was a center stringer that I removed (seen in some of the previous pics) so with your suggestion, should 3 going port to starboard be enough or get a 4th one in there? Adding a pic shortly to see if I understand what you suggest.

Also it is funny you mentioned taking up golf. I was outside hooking up the power washer to spray off the moss growing on a project bass boat before i cover it until I can get to it. My wife steps outside and asks "what you doing?" me being a glutton for punishment I replied with wand in hand, "practicing my golf swing, what's it look like?" I got a dirty look and she went back inside LOL.

Please Log in or Create an account to join the conversation.

restoration project make/mode/year unknown 2 years 4 months ago #145761

  • Nautilus
  • Nautilus's Avatar
  • Offline
  • Contributing Member
  • Contributing Member
  • Posts: 1575
  • Karma: 87
  • Thank you received: 58
You're right. Yes, make a center stringer. You don't need any framing going port/starboard except for nailers where the plywood seams are. (I work strictly with inboard boats which need two stringers.) The area to be covered is narrow and won't need additional support. Another idea...I would build the center stringer to a height that would allow the plywood to rest on the fiberglass at the gunwhales to give you a solid and level base at the edges. Use 1/2" marine plywood for the flooring. Feather in with 5200. That will raise the floor 1/2" but so what? That plan, along with the foam filling, will yield a rock solid base.

Failing that, you could just fill the bilge with concrete and trowel level. Tell people it's ballast. BTW...your motor is butt ugly!

Maybe I should start a consulting business. If you agree, send me a retainer.

Please Log in or Create an account to join the conversation.

Website: NautilusRestorations.com

Mentor to the unenlightened!

"Never allow logic to interfere with a boat purchase." - J. S. Hadley
"Vintage quality beats new junk every time." - J. S. Hadley
"Anything supposed to do two things does both of them half-assed." - J. S. Hadley
"Success makes...

restoration project make/mode/year unknown 2 years 4 months ago #145762

  • Fatlenny
  • Fatlenny's Avatar Topic Author
  • Offline
  • Senior Boarder
  • Senior Boarder
  • Posts: 241
  • Karma: 3
  • Thank you received: 17
Im a little confused as well, I have only shown one boat and only mentioned another project. I have only posted photos of the same boat on this thread in different stages of disassembly.

Thanks for the clarification on the stringer issue I created in my head. I will proceed with reassembly of the stringer as it was from the manufacture, but I think I will pour the foam before I install the floor and cut like you suggest. (foam I removed was poorly placed IMO)

I am not sure I understand your idea of building the floor onto the fiberglass at the gunwales. forgive my ignorance on boating terms but isnt that the top edge of the sides of the boat?

P.S. love your sense of humor.

Please Log in or Create an account to join the conversation.

restoration project make/mode/year unknown 2 years 4 months ago #145763

  • Nautilus
  • Nautilus's Avatar
  • Offline
  • Contributing Member
  • Contributing Member
  • Posts: 1575
  • Karma: 87
  • Thank you received: 58
I corrected my post...yes, one boat. I meant chines, not gunwhales. I'm old. Give me a break! Anyway, take a look at how you have the plywood flooring placed. Now imagine the plywood a few inches wider and you'll see what I mean.

It's not possible to pour the foam after the floor is in. Even with several "pour holes" drilled, the foam will not completely fill the voids and can actually raise/move/shift the framing. I know...another one of my failed experiments.

Please Log in or Create an account to join the conversation.

Website: NautilusRestorations.com

Mentor to the unenlightened!

"Never allow logic to interfere with a boat purchase." - J. S. Hadley
"Vintage quality beats new junk every time." - J. S. Hadley
"Anything supposed to do two things does both of them half-assed." - J. S. Hadley
"Success makes...

restoration project make/mode/year unknown 2 years 4 months ago #145765

  • Fatlenny
  • Fatlenny's Avatar Topic Author
  • Offline
  • Senior Boarder
  • Senior Boarder
  • Posts: 241
  • Karma: 3
  • Thank you received: 17
good to know on the foam pouring, i was concerned about that. And you get all the breaks you want as you are "old". you said it not me. but with age comes wisdom that is greatly appreciated that you are sharing, without a retainer!

moving the floor out to the chines I think is a decent idea but consider this and tell me your opinion. this option would take the floor from 3ft 4in wide to 5ft 7in wide. making it so multiple sheets of ply would need to be cut and placed going from needing one sheet to two sheets. (plus the small piece that already needed to be scabbed in under the bow) this would also bring the floor up another 2 inches needing that much more foam to fill the void. I really am considering this as a valid change giving the floor a little bit more walking room without stepping on the unsupported fiberglass. Do you think this is worth the extra work, wood, foam on this little 14 foot toy boat I will most likely use to play on the lake and tow the grand kids around on? Will most likely sell in the end to keep this new found hobby of working on old boats going.

Please Log in or Create an account to join the conversation.

restoration project make/mode/year unknown 2 years 4 months ago #145766

  • Nautilus
  • Nautilus's Avatar
  • Offline
  • Contributing Member
  • Contributing Member
  • Posts: 1575
  • Karma: 87
  • Thank you received: 58
You don't need to go all the way to the bulkheads...just about 1" onto the fiberglass. If it's 3'-4" wide now, it would be about 3'-6", not more than 4'. Cut the foam level from there to the stringer. Fasten the edges to the hull with copius 5200, 5200 on the top of the stringer as well. Add weight to all the contact points...old batteries, barbells, cement blocks, whatever...until the 5200 sets up, at least four or five days. Doing it that way will only raise the floor 1/2" above where it was originally and give you all the stability you need.

The work you describe would take me two days to complete working alone. That's $1,280 labor plus the cost of materials. Tell your wife how much money you're "saving." Wives love a bargain...maybe you'll get lucky.
The following user(s) said Thank You: Fatlenny

Please Log in or Create an account to join the conversation.

Website: NautilusRestorations.com

Mentor to the unenlightened!

"Never allow logic to interfere with a boat purchase." - J. S. Hadley
"Vintage quality beats new junk every time." - J. S. Hadley
"Anything supposed to do two things does both of them half-assed." - J. S. Hadley
"Success makes...

restoration project make/mode/year unknown 2 years 4 months ago #145774

  • Fatlenny
  • Fatlenny's Avatar Topic Author
  • Offline
  • Senior Boarder
  • Senior Boarder
  • Posts: 241
  • Karma: 3
  • Thank you received: 17
Got my wife to come out to the garage and we got her off the trailer and turned over and setting upside down on some old saw horses. (THE BOAT HULL GUYS, NOT THE WIFE, get your head out of the gutter) Started with sanding and prepping screw holes the previous owner had ran through the hull and filling them with fiberglass resin.(beveled the holes inside and out and placed a small piece of tape on the inside to hold the resin until it set) I started to sand on a couple places where repairs had been poorly done in the past. I say poorly because they was ugly, although they looked like they did the job by keeping water out. One of the repairs looks like they used bondo body filler to fill a damaged spot. I assume I will have to get the grinder out and remove all this and repair with fiberglass. Also found 2 more screw holes through the hull that will have to be repaired as well.

I am wondering if I should just sand all of this rattle can black paint off or go get some stripper and deal with the mess of removing the paint that way. Either way its going to be a mess I would assume the black paint needs to go before I am ready to prime and re gelcoat.


Attachments:

Please Log in or Create an account to join the conversation.

restoration project make/mode/year unknown 2 years 4 months ago #145778

  • Nautilus
  • Nautilus's Avatar
  • Offline
  • Contributing Member
  • Contributing Member
  • Posts: 1575
  • Karma: 87
  • Thank you received: 58
The beginning of a great story but you had to ruin it with a disclaimer! I had the whole sawhorse scene picured!

(You should have bought two of those hats.)

Yes, grind out that pink Bondo and replace it with this: www.jamestowndistributors.com/product/product-detail/97775

If the black is that hard to remove, I'd say sand the hull smooth then prime. Whatever black stays, stays. Some guys have used Rustoleum with the roll and tip method. Here are a couple videos. Lots more on Youtube.

Please Log in or Create an account to join the conversation.

Website: NautilusRestorations.com

Mentor to the unenlightened!

"Never allow logic to interfere with a boat purchase." - J. S. Hadley
"Vintage quality beats new junk every time." - J. S. Hadley
"Anything supposed to do two things does both of them half-assed." - J. S. Hadley
"Success makes...

restoration project make/mode/year unknown 2 years 4 months ago #145804

  • Fatlenny
  • Fatlenny's Avatar Topic Author
  • Offline
  • Senior Boarder
  • Senior Boarder
  • Posts: 241
  • Karma: 3
  • Thank you received: 17
Good evening all. Had a great idea to burn my last 3 vacation days up. I put in for this Friday, next Friday (then get the weekends off) and the following Thursday as then the shop is closed for the holiday and returning to work on the 4th.

So I stopped and checked out some strippers... not the dancing type, again Nautilus, get your head out of the gutter! Planning on getting some more work done here on the boat so I stopped at the Home Depot and started looking at paint strippers. didnt find anything that said safe to use on fiberglass so I went with something that I haven't tried before.


it states DO NOT USE ON FIBERGLASS, PLASTIC OR VINAL. but I figure that is just a recommendation LOL. I tested on a small area, instructions state to let sit for 30 min (up to 24 hours) so I set my timer for 15 min and made a drink. (Bacardi and Coke is my drink of choice) Scraped off the material and washed with acetone and did a really good job in my opinion and had no STINK.


I am tempted to put a glob on a corner of the transom area next to where a previous owner had cut it down to put a short shaft on it and I have to do some fiberglass replacement and leave it on over night covered with plastic (as recommended) to see what it does to the Gelcoat and fiberglass there. If it damages the fiberglass or gelcoat then so what, plan on doing a repair there anyhow right?
Attachments:

Please Log in or Create an account to join the conversation.

restoration project make/mode/year unknown 2 years 4 months ago #145861

  • Fatlenny
  • Fatlenny's Avatar Topic Author
  • Offline
  • Senior Boarder
  • Senior Boarder
  • Posts: 241
  • Karma: 3
  • Thank you received: 17
Working on the hull a little at a time. Finally hit the half way point on stripping/sanding the hull tonight. Maybe I can get the wife to help me turn the boat around so I can get to work on the other side.

I really should cover the bike.

Attachments:

Please Log in or Create an account to join the conversation.

restoration project make/mode/year unknown 2 years 4 months ago #145868

  • Nautilus
  • Nautilus's Avatar
  • Offline
  • Contributing Member
  • Contributing Member
  • Posts: 1575
  • Karma: 87
  • Thank you received: 58
Get rid of the stripper and sand it; spray paint with something like Awlgrip. Rum and Coke is for girls. Your hat is ugly.

Please Log in or Create an account to join the conversation.

Website: NautilusRestorations.com

Mentor to the unenlightened!

"Never allow logic to interfere with a boat purchase." - J. S. Hadley
"Vintage quality beats new junk every time." - J. S. Hadley
"Anything supposed to do two things does both of them half-assed." - J. S. Hadley
"Success makes...

restoration project make/mode/year unknown 2 years 4 months ago #145870

  • Fatlenny
  • Fatlenny's Avatar Topic Author
  • Offline
  • Senior Boarder
  • Senior Boarder
  • Posts: 241
  • Karma: 3
  • Thank you received: 17
WOW Nautilus, contrary to popular belief, I do have feelings and you hurt both of them, LOL.

1. The hull is stripped, this reduced the amount of sanding that needed to be done. I felt it was worth it.
2. I want to "roll and tip" a paint on the boat. I am not set up to spray a paint at this time. I do have a question in this area though. With the roll and tip method, how much coverage will a gallon really cover in your experience?
3. "Rum and Coke is for girls" Ouch! Maybe I am not "Man enough" to drink rum like a pirate, straight out the bottle, but I don't know any women who drink it. At least I don't drink it with diet coke.
4. I love "ugly" hats, but I can change my profile pic just to please you and shop for some new ones.

My biggest issue at this time is colors. I do plan on a Lime Green for the top of the boat, I just keep going back and forth on what color to do the hull, going back to black or keeping it more of the original white. I love the look of black, but concerned about how it would show any damage if I scrape it up during use. I want to assume that when finished, the paint will be much more durable that what ever the previous owner used that looked like crap on the hull.

Thanks again for all your advice!

Please Log in or Create an account to join the conversation.

restoration project make/mode/year unknown 2 years 3 months ago #145876

  • Nautilus
  • Nautilus's Avatar
  • Offline
  • Contributing Member
  • Contributing Member
  • Posts: 1575
  • Karma: 87
  • Thank you received: 58
Real boaters drink beer...good beer, not that Bud Light crap. I've never understood how Anheuser-Busch has managed to train all those cats to piss into a beer bottle.

I think you should go for the Yul Brynner look. Your choice of hats is worse than your choice of colors! Lime green? Are you planning to name it "Kermit?" Why not just go full John Deere on it and paint the hull yellow? You don't come onto a classic boating site and say things like "lime green."

The topsides should be white. However, if you must use screaming lime green, go this route. Just tell people you're color blind.

The following user(s) said Thank You: Fatlenny

Please Log in or Create an account to join the conversation.

Website: NautilusRestorations.com

Mentor to the unenlightened!

"Never allow logic to interfere with a boat purchase." - J. S. Hadley
"Vintage quality beats new junk every time." - J. S. Hadley
"Anything supposed to do two things does both of them half-assed." - J. S. Hadley
"Success makes...

restoration project make/mode/year unknown 2 years 3 months ago #145904

  • Fatlenny
  • Fatlenny's Avatar Topic Author
  • Offline
  • Senior Boarder
  • Senior Boarder
  • Posts: 241
  • Karma: 3
  • Thank you received: 17
I received a Ebay purchased control unit yesterday and hooked it up. Everything seems to be working great. Even operates much more smoothly than my original one that came with the boat. I am glad I opted for this instead of only buying the needed shift switch.

I also started to work on the hull repairs, Screw holes in the bottom and digging further into the bondo spot. This ended up being much more than I expected.


Well, I guess its off to YouTube fiberglass repair school. Here is what I have so far. I started by laminating 3 layers of glass mat on the inside then another 3 layers on the outside. The outside looks like I could build it up more with fiberglass but am wondering if the 6 layers should be good enough for strength and just build it up the remainder with fairing or should I layer more glass up to minimize the amount of filler to make everything smooth.

EDIT: Now that I posted this I see in my haste that I hadn't ground enough out. I see I left MANY cracks unattended to. Sigh. Guess I let this set up, and get the grinder back out tomorrow.

Attachments:

Please Log in or Create an account to join the conversation.

restoration project make/mode/year unknown 2 years 3 months ago #145905

  • Nautilus
  • Nautilus's Avatar
  • Offline
  • Contributing Member
  • Contributing Member
  • Posts: 1575
  • Karma: 87
  • Thank you received: 58
You're a lot better looking than I thought and the bandana looks much better than the hats. Who's that ugly guy with you?
The following user(s) said Thank You: Fatlenny

Please Log in or Create an account to join the conversation.

Website: NautilusRestorations.com

Mentor to the unenlightened!

"Never allow logic to interfere with a boat purchase." - J. S. Hadley
"Vintage quality beats new junk every time." - J. S. Hadley
"Anything supposed to do two things does both of them half-assed." - J. S. Hadley
"Success makes...

restoration project make/mode/year unknown 2 years 3 months ago #145906

  • Fatlenny
  • Fatlenny's Avatar Topic Author
  • Offline
  • Senior Boarder
  • Senior Boarder
  • Posts: 241
  • Karma: 3
  • Thank you received: 17
Damn you. You got me good. I started to read your comment and thought weird but ok as long as he is not flirting with me,,, then I stopped and scrolled up because I didn't remember wearing a bandana in that photo with my wife and saw I wasn't, then of course I finish reading your statement.

You are something else, I don't know what, but something.

Thanks for the laugh Nautilus.

Please Log in or Create an account to join the conversation.

restoration project make/mode/year unknown 2 years 3 months ago #145907

  • 63 Sabre
  • 63 Sabre's Avatar
  • Offline
  • Contributing Member
  • Contributing Member
  • Posts: 4676
  • Karma: 147
  • Thank you received: 167
Ya, Jan's a real piece of work. Site gets a little boreing without him.
Go to his website and appreciate his craftmanship.
Merry Christmas to all.
www.nautilusrestorations.com/

Please Log in or Create an account to join the conversation.

restoration project make/mode/year unknown 2 years 3 months ago #145908

  • Fatlenny
  • Fatlenny's Avatar Topic Author
  • Offline
  • Senior Boarder
  • Senior Boarder
  • Posts: 241
  • Karma: 3
  • Thank you received: 17
Still have the question Nautilus, I direct this to you as you was the one to chime in on my looks yet again, but anyone can answer.

Using a roll and tip method of painting the hull, how far will one gallon really get me?

Please Log in or Create an account to join the conversation.

restoration project make/mode/year unknown 2 years 3 months ago #145909

  • 63 Sabre
  • 63 Sabre's Avatar
  • Offline
  • Contributing Member
  • Contributing Member
  • Posts: 4676
  • Karma: 147
  • Thank you received: 167
How many boats do you need to paint? If it's 14-16 ft. two quarts would do nicely. I found that rustoleum gloss enamil works perfect. If you want a custom color ie light blue or sunrise yellow or off red you can mix. Plenty of roll and tip videos on the net and I've done several boats this way. Lot cleaner and less messy than spray. Use a catalyst hardener and mix only what you can use in a 20 minute pot life. Don't over work the area and don't worry about brush strokes they will flow out smooth. Some buffing with polishing sturr like Meguires will get a glass finish. With the hardner you can sand and recoat the next day.
Here's two pics boats I've done with rusto. People swear it's gelcoat or spray.
Attachments:
The following user(s) said Thank You: Fatlenny

Please Log in or Create an account to join the conversation.

Time to create page: 0.382 seconds

Donate

Please consider supporting our efforts.

FG Login

Glassified Ads

FiberGoogle

Who's Online

We have 7963 guests and 2 members online