Welcome, Guest
Username: Password: Remember me

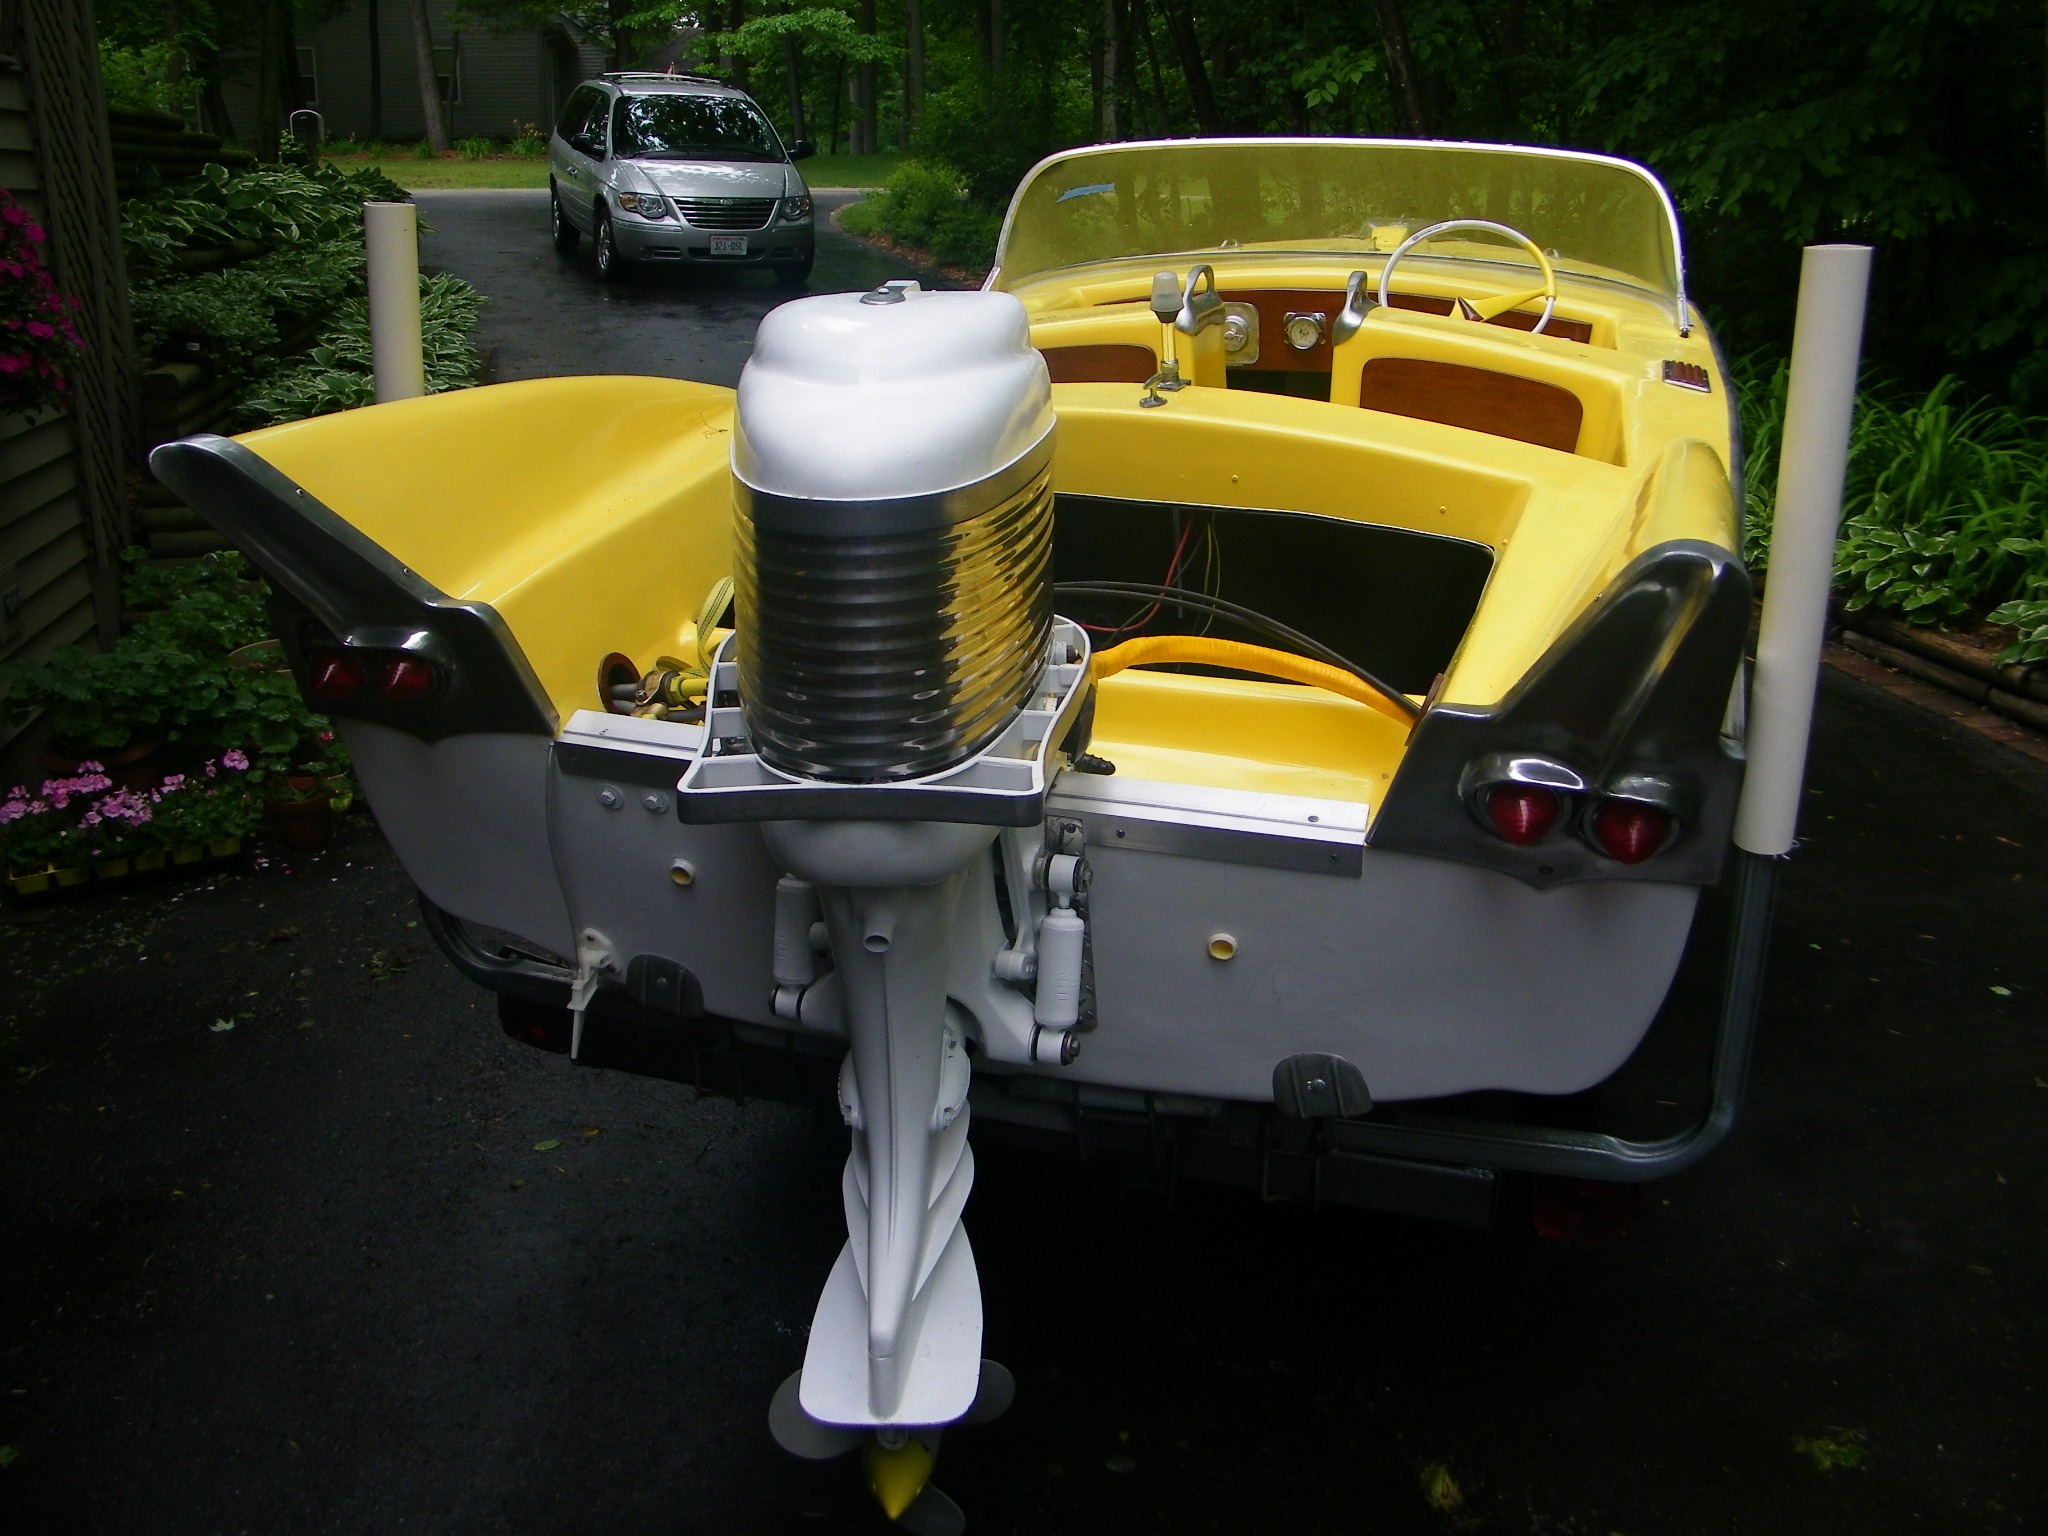
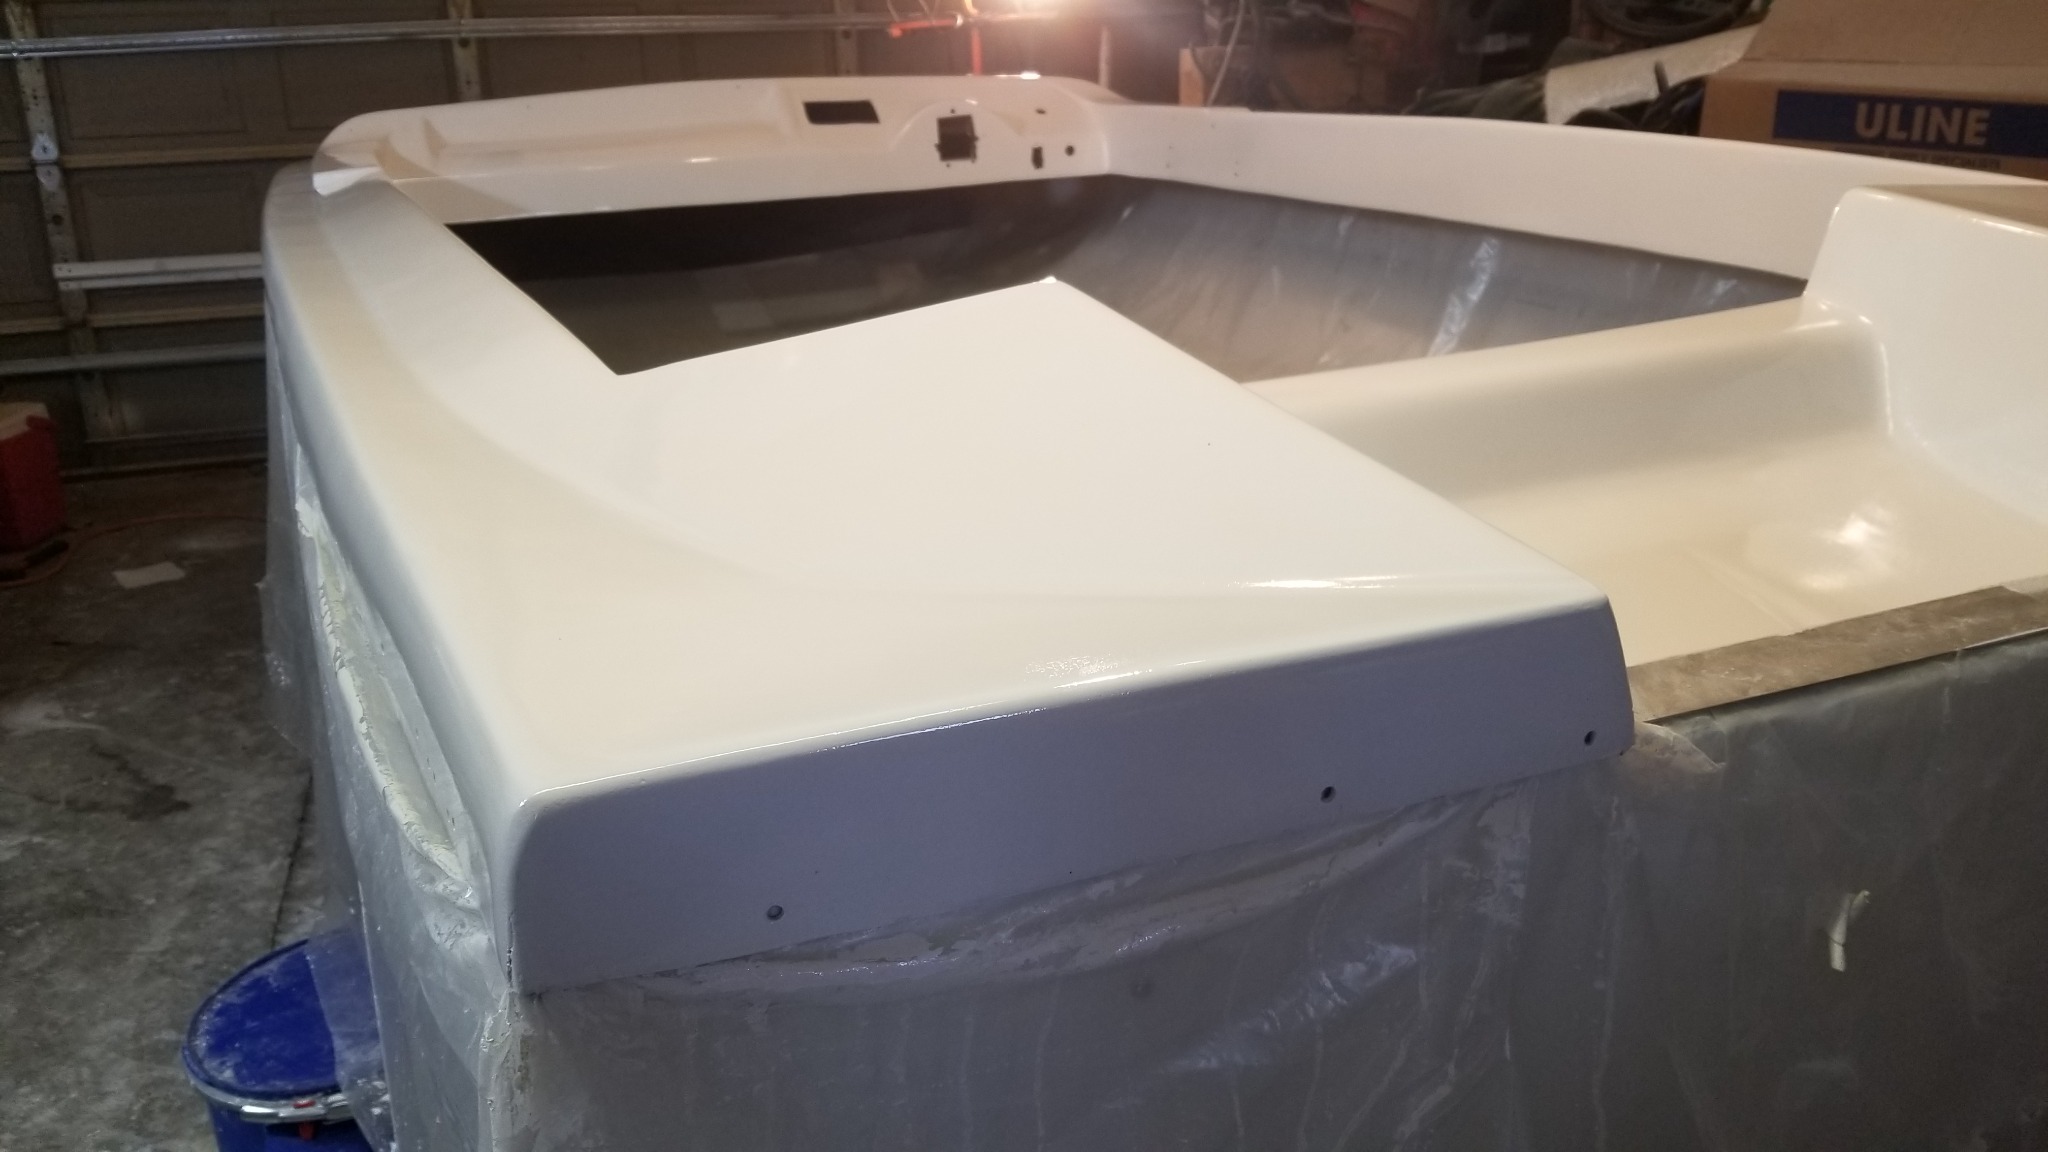
TOPIC: restoration project make/mode/year unknown

restoration project make/mode/year unknown 1 year 2 months ago #147548

  • Fatlenny
  • Fatlenny's Avatar Topic Author
  • Offline
  • Senior Boarder
  • Senior Boarder
  • Posts: 241
  • Karma: 3
  • Thank you received: 17
Got the first coat of primer on it. Tomorrow I will do a light sanding and see if anything needs further fairing.

Attachments:

Please Log in or Create an account to join the conversation.

restoration project make/mode/year unknown 1 year 2 months ago #147580

  • Fatlenny
  • Fatlenny's Avatar Topic Author
  • Offline
  • Senior Boarder
  • Senior Boarder
  • Posts: 241
  • Karma: 3
  • Thank you received: 17
My son-in-law came over this morning and we tried our hand in the roll and tip method of painting. I figured the bottom of the boat would be a great place to start and learn on this method. I can say that this went much faster than I had thought it would. There was a few things that we discovered, first that a thin as you can get it coat with the roller goes a long way. we have more than a few runs to get sanded out of the first coat, but not a horrible amount. lesson learned, get more paint out of the roller prior to applying. Second is there is a lot more animal hair and dust flying around my garage than I thought. Many particles in this first coat. Prior to second coat I will do a bit of floor cleaning and maybe wet the floor down with water to keep things from kicking up. Lastly as I am new to any type of painting other than interior house painting, I assumed the paint would "fill" in a bit more of the orange peel that I didnt fully remove sanding out the primer. I am not horribly worried about this on the bottom of the boat, but will take much more care on getting the primed surface of the cap of the boat as smooth as possible prior to applying paint.

Attachments:

Please Log in or Create an account to join the conversation.

restoration project make/mode/year unknown 1 year 2 months ago #147590

  • Fatlenny
  • Fatlenny's Avatar Topic Author
  • Offline
  • Senior Boarder
  • Senior Boarder
  • Posts: 241
  • Karma: 3
  • Thank you received: 17
We got a bit of weather here in Michigan yesterday so I set my alarm 30 minutes earlier just in case the roads was bad on the way into work. Got up and did my morning routine with no issues, or so I thought. Warmed up the truck and then headed down the road. One mile on my normally 45 minute trip to work I realized that I had forgot that today was trash day and I didn't take it to the road. Oh well, I thought, we didn't have much anyway, it can wait another week. As I continued traveling down the road I took care, as the roads was not horrible but not great either. I was able to cruise at about 55 on the highway comfortably. About 35 minutes in I was thinking about how I forgot to take out the trash and how normally my wife will take the trash out of the kitchen on Wednesday night and leave it in the garage by the door. This has always been a great reminder that was missed this week. I was wondering if I was getting forgetful in my less than old years, then it hit me. One other important thing I had forgotten and just remembered as I was a little bit more than half way to my destination. I am covering one of my employees vacation on second shift today and tomorrow. So back home I went.

I was hoping to do a coat of paint on the hull yesterday, but as the roads and traffic was bad last night, it took a bit longer to get home, I decided to hold of till another day. I guess I have time now that I am awake and dont have to leave for work for another 6 and a half hours. Time to get some old painting clothes on and be productive.

Please Log in or Create an account to join the conversation.

restoration project make/mode/year unknown 1 year 2 months ago #147591

  • Fatlenny
  • Fatlenny's Avatar Topic Author
  • Offline
  • Senior Boarder
  • Senior Boarder
  • Posts: 241
  • Karma: 3
  • Thank you received: 17
Well, I am a little bit more that disappointed in my results. although I think I can learn and make corrections now. I am so glad I started painting on the hull. It turns out I didnt do enough research on painting and prep using the roll and tip method with Totalboat wet edge topside paint. I figured I needed to sand in-between coats, but as my preferred educational journeys tend to be youtube, I found that the information there was only on the roll and tip technique (this part was helpful) but none of the videos I had watched talked about multiple coats and the prep in-between. After a short search online I stopped on the first place I found talking about sanding in-between coats. The recommendation was lightly sanding with 120 grit. I had thought " damn, that's aggressive" but I was thinking, it was on the internet, it must be true. Sigh. I thought that maybe the process of roll and tip was applying thick enough paint that may cover up the scratches created by 120. Well I had some 120 for my orbital but thought that would be too much and need to hand sand it. got into my garage and found I had some 180 and 320 wet sand paper. worked with the 180 and went well. Sanded through to the primer in quite a few spots. BAH, I am learning, Its ok. we have 14 or so weeks left till boating season starts here. Now I had falsely assumed that paint will "fill" imperfections in my primer like the orange peal I had decided I didn't want to totally sand out. Not a big deal on the bottom but the sides of the hull I wanted to look nice. So I grabbed the 120 and went to town, down into the primer and smoothed it all out to look, well not perfect but a lot nicer than it was. Then did a second turn at roll and tip. OMG the scratches! It is not the end of the world but disappointed. Did some research again. found the same post stating 120 grit. I was like no way in hell. Then found a few more stating 220 or 320 i think it was. that makes a lot more sense to me. Time to wet sand with the 180 and bring it up. I am not worried about the bottom of the boat, Will just work on trying to make the sides look much better.

Please Log in or Create an account to join the conversation.

restoration project make/mode/year unknown 1 year 2 months ago #147592

  • 63 Sabre
  • 63 Sabre's Avatar
  • Offline
  • Contributing Member
  • Contributing Member
  • Posts: 4676
  • Karma: 147
  • Thank you received: 167
OH BOY. Nothing broken here so you're in good shape. I've done a few roll and tips back in the day.
Prep, prep, prep. Without a good foundation the house will fall.
Sand down with the 120 to where you will get a good tooth for the primer,...yes primer. Clean up your sanding with some thinner. You're going to have lots of hair scratches but here's the big butt. Get a quart of HIGH BUILD primer. Auto stores, Fleet, maybe even WallyWorld. Rustoleum makes it I think I used K2(??)something like that. The high build is key. It's a regular primer but thick enough to fill in those nasties. Several coats. It dries fast and can be sanded smooth with 220 etc. Do NOT wipe it with thinner, just a good wash with clear water. Put a light on edge and peek sideways and there should be no more scratches.
Now the paint. Don't piss away your $$$ on interlux, petit, etc. Rustoleum marine comes in lotsa colors. Key here is in the prep again. Did you use a catalyst ? you should, it's almost necessary. Called a "hardner" get it just about anywhere, Fleet, paint stores etc. Follow the directions on the hardner, it will thin the paint to where you want it, if not use a little laquer thinner or something. Don't mix any more than you can spread in about 20 minutes because with the hardner it will "set" an then you're screwed. It will touch dry in about an hour and you can actually sand in about two hours. Do several coats, a good day and you will be done. It will shine. DO NOT try to smooth it with a brush, it will flow out. At least three coats, the stuff goes a long way. The more coats the less you have to worry about buffing through. The next day you can buff with auto polish and shave in the reflection. I had people swear that I sprayed.
Here's a '59 Herters I did a while back. All roll and tip.
Attachments:
The following user(s) said Thank You: Fatlenny

Please Log in or Create an account to join the conversation.

restoration project make/mode/year unknown 1 year 2 months ago #147593

  • 63 Sabre
  • 63 Sabre's Avatar
  • Offline
  • Contributing Member
  • Contributing Member
  • Posts: 4676
  • Karma: 147
  • Thank you received: 167

Please Log in or Create an account to join the conversation.

restoration project make/mode/year unknown 1 year 1 month ago #147595

  • Fatlenny
  • Fatlenny's Avatar Topic Author
  • Offline
  • Senior Boarder
  • Senior Boarder
  • Posts: 241
  • Karma: 3
  • Thank you received: 17
Thank you for the advise. Well received.
You mention the paint "Rustoleum marine" and adding a hardener, I have already purchased Totalboat wet edge topside paint. This is a one-part polyurethane paint, are you suggesting adding a hardener to it?

Please Log in or Create an account to join the conversation.

restoration project make/mode/year unknown 1 year 1 month ago #147597

  • 63 Sabre
  • 63 Sabre's Avatar
  • Offline
  • Contributing Member
  • Contributing Member
  • Posts: 4676
  • Karma: 147
  • Thank you received: 167
www.ehow.com/how_5899615_apply-polyurethane-paint-hardener.html

Yup. Just for drill get a small .75cent throw away paint brush and maybe one of those 3oz dixie cups, mix a smidgeon of paint and hardener, lay it out on a cardboard or whatever and give it a few minutes- hour. you should be able to touch maybe even sand it. Just see how long it takes to set up before you commit. I used one of those hand held paint buckets with the disposable insert thingy. A soft varnish brush is a must and tilt the brush with your forward motion to help lessen brush marks. Don't keep going over it otherwise you will leave brush marks. I found that thinner is better, dries faster and you can recoat maybe three times in a day.
Not to say you will still be buffing after but it will just be for getting out the bugs and skeeters, maybe a brush hair. I used Mcquire's auto polish and a foam pad but just about any polish/scratch remover should work. Don't be tempted to "pull out" a brush hair, it's gunna leave a mess.
It's usually a two person job but I managed to do it alone. Just roll/tip a small 2ft. section at a time and drag the brush to your last section, it will flow out. Always keep a wet edge to brush into. Wish I could be there, miss those days.
Rots o' ruk.
The following user(s) said Thank You: Fatlenny

Please Log in or Create an account to join the conversation.

restoration project make/mode/year unknown 1 year 1 month ago #147598

  • Fatlenny
  • Fatlenny's Avatar Topic Author
  • Offline
  • Senior Boarder
  • Senior Boarder
  • Posts: 241
  • Karma: 3
  • Thank you received: 17
Thanks again for the advise. I will pick up some hardener and try out a test run in the next few days. The first coat roll and tip we did it with 2 people but I did the second coat solo. It took a little bit more than twice the time but is very doable.

I did pull out the orbital with some 180 and wet sanded a small section. Looks very promising. I again am not worried about the bottom but the sides will get worked out.

Im not too far from ya, your welcome to come over to Michigan and give a hand LOL.

Please Log in or Create an account to join the conversation.

restoration project make/mode/year unknown 1 year 1 month ago #147601

Maybe you need to add a bit of enticement like free room and board....good breakfast, lunch, and dinner menu? And.....all the work he can handle?
...........jus' sayin! B)

Please Log in or Create an account to join the conversation.

restoration project make/mode/year unknown 1 year 1 month ago #147602

  • Fatlenny
  • Fatlenny's Avatar Topic Author
  • Offline
  • Senior Boarder
  • Senior Boarder
  • Posts: 241
  • Karma: 3
  • Thank you received: 17
Pappy, I figured that went without saying. Bar open every night also.

Now back to the hardener, why is it necessary? Sure I can see the time if I had a full day to work on the boat, but that is never the case and letting it set up over night is cool with my situation. If there is another advantage I would love to know. My understanding is that you really cant "wet sand and polish" the final coat of Totalboat wet edge topside paint, at least it is not recommended by Totalboat. They say the one part paint is to soft to hold up to buffing it out with a wheel. Would a hardener added change this aspect of the paint?

Please Log in or Create an account to join the conversation.

restoration project make/mode/year unknown 1 year 1 month ago #147603

  • 63 Sabre
  • 63 Sabre's Avatar
  • Offline
  • Contributing Member
  • Contributing Member
  • Posts: 4676
  • Karma: 147
  • Thank you received: 167
The hardener allows you to wet sand and polish. Within hours. It "hardens" the soft finish paint so you can do this.
$14. for a 1/2 pint will get you through at least your project and probably have some left over for any interior stuff.
It's a chemical reaction, don't ask me how, I ain't knowledgeable enough.

Try the little test, nothing to lose and a whole lot to gain.
Attachments:

Please Log in or Create an account to join the conversation.

restoration project make/mode/year unknown 1 year 1 month ago #147649

  • Fatlenny
  • Fatlenny's Avatar Topic Author
  • Offline
  • Senior Boarder
  • Senior Boarder
  • Posts: 241
  • Karma: 3
  • Thank you received: 17
Got the Hull done, I think it looks pretty darn good. Learned a few things and will make sure the primer is much smoother on the cap.

I suspended the hull from the celling at the bow and stern and got the wife to help flip it back over. I texted my son in law and he came over and retrieved the cap from the barn out back. I covered the hull in some plastic to protect the finished hull and we set the cap on it. I would have preferred to not work over the finished hull and just set the cap on some saw horses to work on but we dont have the room to put the hull at this time. I didnt want to put it out in the weather. Today I worked on finishing some fiberglass repairs in the splash well area. Glassed in the many old motor mount holes that was added over her life and added back 3 inch section of fiberglass cut out where someone previously cut down the transom to mount a shorter motor. I also fabricated an aluminum cap to go over the transom out of a piece of 1.5" angle I had laying around to clean up this area, I will take that to work and see if I can get it welded up there, If not, off to a family friends I will go to get this done. I will add photos when complete. Over the next few days I will be sanding out this splash well area and fairing out everything there. Hoping to be able to prime it this next weekend.


Attachments:

Please Log in or Create an account to join the conversation.

restoration project make/mode/year unknown 1 year 1 month ago #147655

  • Fatlenny
  • Fatlenny's Avatar Topic Author
  • Offline
  • Senior Boarder
  • Senior Boarder
  • Posts: 241
  • Karma: 3
  • Thank you received: 17
So I got a coat of primer on the cap and sitting out here in the garage having a smoke or 6 and a drink (maybe enjoying the paint fumes) ordered some more primer as I just finished what I had on hand. Should arrive on Friday. As I was making my Amazon order, I saw a few other items I figured its time to order as well and some that can wait. I came across a few items I forgot about. See I found a local on Facebook market place that was selling some left over rub rail that happened to be long enough for what I needed, but It didnt come with the correct insert. I only paid them $25 and got a new old stock mirror for the dash as well. My thinking was I could find the insert that fits this rub rail much cheaper than if I bought a kit new. Well turns out this particular rub rail requires a 3/8" tube style insert. I would love a white insert but cant seem to find it. Well I did find some alternatives, a roll of 32' blue nylon tubing that would be a nice accent as the boat is being painted white with blue stripes. I also found a chrome trim piece that would fit nicely. Now in my paint fumed brain I wondered about putting in the rub rail a blue LED light strip.

Am I being really silly with that thought or should I just go with the chrome or blue alternative that I found online? (each of these are about a $20 item) Or does someone know where I can get a white 3/8 OD insert for the rub rail I have?

Please Log in or Create an account to join the conversation.

restoration project make/mode/year unknown 1 year 1 month ago #147656

  • 63 Sabre
  • 63 Sabre's Avatar
  • Offline
  • Contributing Member
  • Contributing Member
  • Posts: 4676
  • Karma: 147
  • Thank you received: 167
great progress!
Here's a suggestion you might want to consider for your side trim/bump rail. I've used it several times and it's tough.
www.brandsport.com/body-side-molding.html
If you go this route it's pretty easy to work with if you heat it. Be careful, once it's on....it's on for good.

Please Log in or Create an account to join the conversation.

restoration project make/mode/year unknown 1 year 1 month ago #147668

  • Fatlenny
  • Fatlenny's Avatar Topic Author
  • Offline
  • Senior Boarder
  • Senior Boarder
  • Posts: 241
  • Karma: 3
  • Thank you received: 17
I feel like I am going to be sanding this primer forever. Rolled it on with a foam roller to try to get it smooth as possible, but this Totalboat topside primer dries almost as fast as you put it on and is a PITA. It still leaves a textured, orange peel surface, difficult to get the roller marks out, and does not lay out at all. I have tried to thin it out but had no luck. Guess I will just spend a few days sanding it smooth and anyplace I end up sanding through I will touch up with a fine brush and hope I can sand that area without burning through the primer.

I think if I take on a project like this again, I will prep the garage for using a spray gun. I know I can get a much better finish that way.

Attachments:

Please Log in or Create an account to join the conversation.

restoration project make/mode/year unknown 1 year 1 month ago #147669

I had the same problem using the 2000E 2 part epoxy primer, but when I thinnned it a little it went on better but ended up putting on 6 coats then sanding it smooth. I sanded it down with 220 after 4 coats then added a couple more and sanded with 320. I didn't want to turn the agrage into a spraybooth and you end up using a lot more even if you use an HVLP. Of course the 2000e wasn't cheap and i am soo.....LOL

Bob

Please Log in or Create an account to join the conversation.

restoration project make/mode/year unknown 1 year 1 month ago #147670

  • Fatlenny
  • Fatlenny's Avatar Topic Author
  • Offline
  • Senior Boarder
  • Senior Boarder
  • Posts: 241
  • Karma: 3
  • Thank you received: 17
We are frugal, not cheap.

Please Log in or Create an account to join the conversation.

restoration project make/mode/year unknown 1 year 1 month ago #147671

  • 63 Sabre
  • 63 Sabre's Avatar
  • Offline
  • Contributing Member
  • Contributing Member
  • Posts: 4676
  • Karma: 147
  • Thank you received: 167
Low budget, tight, squeaky. I tried a total boat products once and swore I'd never make that mistake again. Not worth the price and twice as much work. Stick with the local paint store brands, Valspar, Krylon, Rustoleum, etc. Kleen strip thinners, laquer thinner, MEK works on everything including epoxy.
The following user(s) said Thank You: Fatlenny

Please Log in or Create an account to join the conversation.

restoration project make/mode/year unknown 1 year 1 month ago #147673

  • Fatlenny
  • Fatlenny's Avatar Topic Author
  • Offline
  • Senior Boarder
  • Senior Boarder
  • Posts: 241
  • Karma: 3
  • Thank you received: 17
local stores around me dont seem to sell marine topside paint. I think I read somewhere that rust-oleum farm & implement was same as topside paint. Is that correct?

Please Log in or Create an account to join the conversation.

restoration project make/mode/year unknown 1 year 1 month ago #147677

I think so. I used Rustoleum on the trailer ans added Valspar hardener. I got the hardener at Tractor Supply.

Bob
The following user(s) said Thank You: Fatlenny

Please Log in or Create an account to join the conversation.

restoration project make/mode/year unknown 1 year 1 month ago #147679

  • 63 Sabre
  • 63 Sabre's Avatar
  • Offline
  • Contributing Member
  • Contributing Member
  • Posts: 4676
  • Karma: 147
  • Thank you received: 167
www.rustoleum.com/product-catalog/consumer-brands/marine-coatings/topside-paint

Here ya go. Everyone has this stuff. wallyworld, home depot, fleet farm, lowes, etc. Even amazon. around 25 - 30 a qt. Two qts thinned would be more than enough for your project and you would have enough left over for the trailer to match. I would get white and then you could mix in some blue, green rustoleum to get the perfect shade you like. Like Bob said use the hardener, can't express this enough. So simple to use.
The following user(s) said Thank You: Fatlenny

Please Log in or Create an account to join the conversation.

restoration project make/mode/year unknown 1 year 1 month ago #147694

  • Fatlenny
  • Fatlenny's Avatar Topic Author
  • Offline
  • Senior Boarder
  • Senior Boarder
  • Posts: 241
  • Karma: 3
  • Thank you received: 17
Got the first coat of topside paint on the top. I cant wait to get her wet!

Attachments:

Please Log in or Create an account to join the conversation.

restoration project make/mode/year unknown 1 year 1 month ago #147697

Excellent!

Bob

Please Log in or Create an account to join the conversation.

restoration project make/mode/year unknown 1 year 1 month ago #147705

  • Fatlenny
  • Fatlenny's Avatar Topic Author
  • Offline
  • Senior Boarder
  • Senior Boarder
  • Posts: 241
  • Karma: 3
  • Thank you received: 17
Another angle

Attachments:

Please Log in or Create an account to join the conversation.

restoration project make/mode/year unknown 1 year 1 month ago #147706

Happy to see you get the tough work behind you. It looks beautiful!!

Please Log in or Create an account to join the conversation.

restoration project make/mode/year unknown 1 year 3 weeks ago #147714

  • Fatlenny
  • Fatlenny's Avatar Topic Author
  • Offline
  • Senior Boarder
  • Senior Boarder
  • Posts: 241
  • Karma: 3
  • Thank you received: 17
Looking for some more advise, as I am wet sanding and buffing out this paint on the cap, there are a couple spots I am not happy with including a little burn through the paint. My question is can totalboat one part topside paints be touched up and blended in with a light sand and buff on these individual spots, or does a whole new coat need to go over it?

Please Log in or Create an account to join the conversation.

restoration project make/mode/year unknown 1 year 3 weeks ago #147715

  • Fatlenny
  • Fatlenny's Avatar Topic Author
  • Offline
  • Senior Boarder
  • Senior Boarder
  • Posts: 241
  • Karma: 3
  • Thank you received: 17
Well I answered my own question. I painted a small spot and waited for it to dry a day and a half. light sanding to try to blend it in and,,, NOPE. looked like crap. So scuffed up the entire cap again with some 220 and got the spray gun out. I should have used the gun from the start. Looks great! Now to let her dry for a few days, then we will start putting her together. Next step will be cutting some wood strips to go on the inside of the hull to give the screws something to bite on while attaching the cap and rub rail. Not sure if I want to use plywood or something else like a PVC that will never rot.

Please Log in or Create an account to join the conversation.

restoration project make/mode/year unknown 1 year 3 weeks ago #147716

  • Fatlenny
  • Fatlenny's Avatar Topic Author
  • Offline
  • Senior Boarder
  • Senior Boarder
  • Posts: 241
  • Karma: 3
  • Thank you received: 17
I couldnt wait. I had a day with no plans so got the wife out to help me hang the cap in the garage for a little bit while I attached some backer boards to the inside of the hull for the cap/rub rail screws to bite into. Set the cap back on her and away we go! Got the cap on and the rub rail insert in. I mounted the steering wheel and other items I have into the dash. Still need to find a speedo and a tach, well at least a tach. Will any marine tachometer work or do I have to find one specific to work with my 1980 merc 800?


Think I am going to add black vinyl to the front of the faux scoop. Make it look like it does something. LOL.
Attachments:

Please Log in or Create an account to join the conversation.

restoration project make/mode/year unknown 1 year 3 weeks ago #147717

Looks great!
The following user(s) said Thank You: Fatlenny

Please Log in or Create an account to join the conversation.

restoration project make/mode/year unknown 1 year 3 weeks ago #147718

Excellent! Yeah I know how that goes. You get on a roll and know you need to stop fir the day but can't stop thinking about when you do so........

Bob
The following user(s) said Thank You: Fatlenny

Please Log in or Create an account to join the conversation.

restoration project make/mode/year unknown 1 year 3 weeks ago #147719

  • Fatlenny
  • Fatlenny's Avatar Topic Author
  • Offline
  • Senior Boarder
  • Senior Boarder
  • Posts: 241
  • Karma: 3
  • Thank you received: 17
Now on to the interior. going to stop at the HomeDepot to pick up some supplies and tackle the front seat mounts. I need/want to make a slight rise in the floor to mount the front seats. Have a plan in my head but im sure its subject to change how I complete this part of the project. The front bucket seats I purchased are a little large, but as im not a little man, I will make it work! Then onto the back seat. I always thought the bow looked like a little mustang with the scoop. I think the interior is going to be the same, little room up front and a back seat that has only enough room for kids. LOL.

More photos to come.

Please Log in or Create an account to join the conversation.

restoration project make/mode/year unknown 1 year 3 weeks ago #147720

For a 1980 pretty much any current tachometer should work.
The following user(s) said Thank You: Fatlenny

Please Log in or Create an account to join the conversation.

restoration project make/mode/year unknown 1 year 3 weeks ago #147721

  • Fatlenny
  • Fatlenny's Avatar Topic Author
  • Offline
  • Senior Boarder
  • Senior Boarder
  • Posts: 241
  • Karma: 3
  • Thank you received: 17
Just ordered a tach and speedo. I didnt make it to the store today to purchase parts for the mount as my plan changed how I would tackle this. I have an appointment to take the wife to tomorrow then I will be working on the front seat mount. It will be very low profile, I just need to level out the floor a bit as it has a bit of a valley in it so the seats sit level instead of the slight lean in towards each other. I have about a half inch I want to rise it to. The tough part is going to be plaining/feathering the mount out from 1/2" in the center to nothing on a 42" long 12" wide board.

Sure I planned the floor to have a slight valley in it for any water to easily make its way to the well. Ya, ya, that's it. I planned it that way.

Please Log in or Create an account to join the conversation.

restoration project make/mode/year unknown 1 year 2 weeks ago #147722

  • Fatlenny
  • Fatlenny's Avatar Topic Author
  • Offline
  • Senior Boarder
  • Senior Boarder
  • Posts: 241
  • Karma: 3
  • Thank you received: 17
Got the front seats mounted up today and cut down the back seat base so it sits just a few inches off the floor. I still have a small amount of storage space under the back seat. only about 4" in the front that tapers down to 2" in the back but better than nothing. Going to take a break from the interior for a couple days and work on a piece of stainless steel to make a transom plate that will go on prior to the motor. I probably really dont need one but may put the jack plate on it and or a bigger motor and would want to spread out the weight hanging off the back a little bit. I am planning on it having a U channel at the top to go over the top of the transom to finish that area off and add some strength to the transom at the top as well. I have the template cut out. Now the fun part of slowly cutting it with a angle grinder with a cut off wheel.


Expecting my Tach, Speedo, Bow and anchor lights to arrive by the end of the week. I will plan on installing all that and work on the wiring this next weekend. Then only a few more items that I can think of like laying the carpet, fabricating and installing bolsters, Installing an "OH SH!T" handle for the wife, Mounting the motor, fuel tank, and battery. Then finally sticker the numbers, name, and stripes. I dont remember if I have posted this before but I am going for the look of this Glastron Jetflite I came across on the interwebs. Not my boat, just the inspiration for this project.

Attachments:

Please Log in or Create an account to join the conversation.

restoration project make/mode/year unknown 1 year 2 weeks ago #147723

Great work! As good as that looks I would leave the carpet out or just add something that I can take in and out between the front and rear seats.
I expected to see a 1980 Merc 800 on the transom. Looked back in the posts and started scratching my head on that one.
One of the biggest boat shows in the country starts a week from Thursday in Tavares Florida... hurry up and finish and bring it down!

Please Log in or Create an account to join the conversation.

restoration project make/mode/year unknown 1 year 2 weeks ago #147724

  • 63 Sabre
  • 63 Sabre's Avatar
  • Offline
  • Contributing Member
  • Contributing Member
  • Posts: 4676
  • Karma: 147
  • Thank you received: 167
Agree with pappy. Pick a runner from home Depot that fits so you can take it out to clean otherwise you are stuck with a wet soggy sandy mess. The runners are long narrow carpets and come in bunches of colors and patterns. I picked up one from Kohls in the bathroom section. Rubber backing and they don't slip.

Please Log in or Create an account to join the conversation.

restoration project make/mode/year unknown 1 year 2 weeks ago #147725

Excellent, she looks great Yep! Yep concur, you want something you can remove and clean.

Bob

Please Log in or Create an account to join the conversation.

restoration project make/mode/year unknown 1 year 2 weeks ago #147726

  • Fatlenny
  • Fatlenny's Avatar Topic Author
  • Offline
  • Senior Boarder
  • Senior Boarder
  • Posts: 241
  • Karma: 3
  • Thank you received: 17
That is a great idea guys. I appreciate the advice here. I already have a large piece of carpet I planned on gluing down but I think now I will custom cut it to fit, hem the edges of a couple pieces to be able to pull out to clean and dry. I dont have the time to make the drive down to Florida, wish I did. My parents are down near Tampa. Its just not in the budget or a good time to miss so much work right now.

Please Log in or Create an account to join the conversation.

restoration project make/mode/year unknown 1 year 2 weeks ago #147740

  • Fatlenny
  • Fatlenny's Avatar Topic Author
  • Offline
  • Senior Boarder
  • Senior Boarder
  • Posts: 241
  • Karma: 3
  • Thank you received: 17

Pappy wrote: I expected to see a 1980 Merc 800 on the transom. Looked back in the posts and started scratching my head on that one.


Pappy, Why are you scratching your head? Are you looking at the last photo with the Johnson on it? That is not my boat, it is the inspiration for this project. I am planning on using the motor you mentioned. I just dont know if it is the last motor I will put on it. Now on to the updates.

Got the speedo and tach mounted in the dash. I am a bit concerned as after I drilled the holes I am hoping I still have room for the ignition switch. Another days issue if it is one.


Worked on the stainless steel transom plate and got the outboard mounting holes drilled. Set the jack on there debating on mounting this or just mounting the 800 merc directly to the transom. 12" setback may be a bit much and raise the bow way too much. Considering mounting the battery and portable fuel tank up under the bow to transfer the weight if I go the jack plate route. To me it looks a little cartoonish with this huge jack plate on it. But then again the hood scoop looks a little hotrod cartoonish to me as well. May be fitting, may not work. I also am not sure where we will put the name Knot Sure at this time. Im just playing with some areas. I will most likely wait until we splash her and see where the water line is and attach it back there on the port side of the transom.


Finally sat down and ordered the hardware to mount the side panels. Wont be here till mid week. I am a bit disappointed in my self for not ordering sooner as now I have the weekend to get some more work done and waiting on parts. I also am searching for a match of some vinyl to match the white of my seats. I have found the direct match but looking at another option that has 1/4" foam backing attached already. I have ordered a swatch to see how close the color matches before I order 3 yards. I rough cut out the panels and set them in place. I plan on adding a few holes for access to the space behind them to have a small amount of extra storage. I just haven't decided on how I want to do this or what is out there to install. So I guess I will do some research once I post this update and see what is out there.
Attachments:

Please Log in or Create an account to join the conversation.

Time to create page: 0.360 seconds

Donate

Please consider supporting our efforts.

FG Login

Glassified Ads

1975 16ft Cobalt
( / Boats)

1975 16ft Cobalt
03-27-2024

Homelie/Bearcat
( / Engines)

noimage
03-17-2024

Thunderbird Apache 1956 hardtop
( / Boats)

noimage
03-10-2024

FiberGoogle

Who's Online

We have 8945 guests and no members online