Welcome, Guest
Username: Password: Remember me

TOPIC: restoration project make/mode/year unknown

restoration project make/mode/year unknown 1 year 9 months ago #147741

  • 63 Sabre
  • 63 Sabre's Avatar
  • Offline
  • Contributing Member
  • Contributing Member
  • Posts: 4676
  • Karma: 147
  • Thank you received: 167
Holy sh...Looks great!
The following user(s) said Thank You: Fatlenny

Please Log in or Create an account to join the conversation.

restoration project make/mode/year unknown 1 year 9 months ago #147744

  • Fatlenny
  • Fatlenny's Avatar Topic Author
  • Offline
  • Senior Boarder
  • Senior Boarder
  • Posts: 241
  • Karma: 3
  • Thank you received: 17

63 Sabre wrote: Holy sh...Looks great!


I couldn't ask for a more well put compliment. Thanks!

Please Log in or Create an account to join the conversation.

restoration project make/mode/year unknown 1 year 9 months ago #147752

That's really coming together nicely!!

You're in great shape to hit the water in a couple months.

Please Log in or Create an account to join the conversation.

restoration project make/mode/year unknown 1 year 9 months ago #147760

  • Fatlenny
  • Fatlenny's Avatar Topic Author
  • Offline
  • Senior Boarder
  • Senior Boarder
  • Posts: 241
  • Karma: 3
  • Thank you received: 17
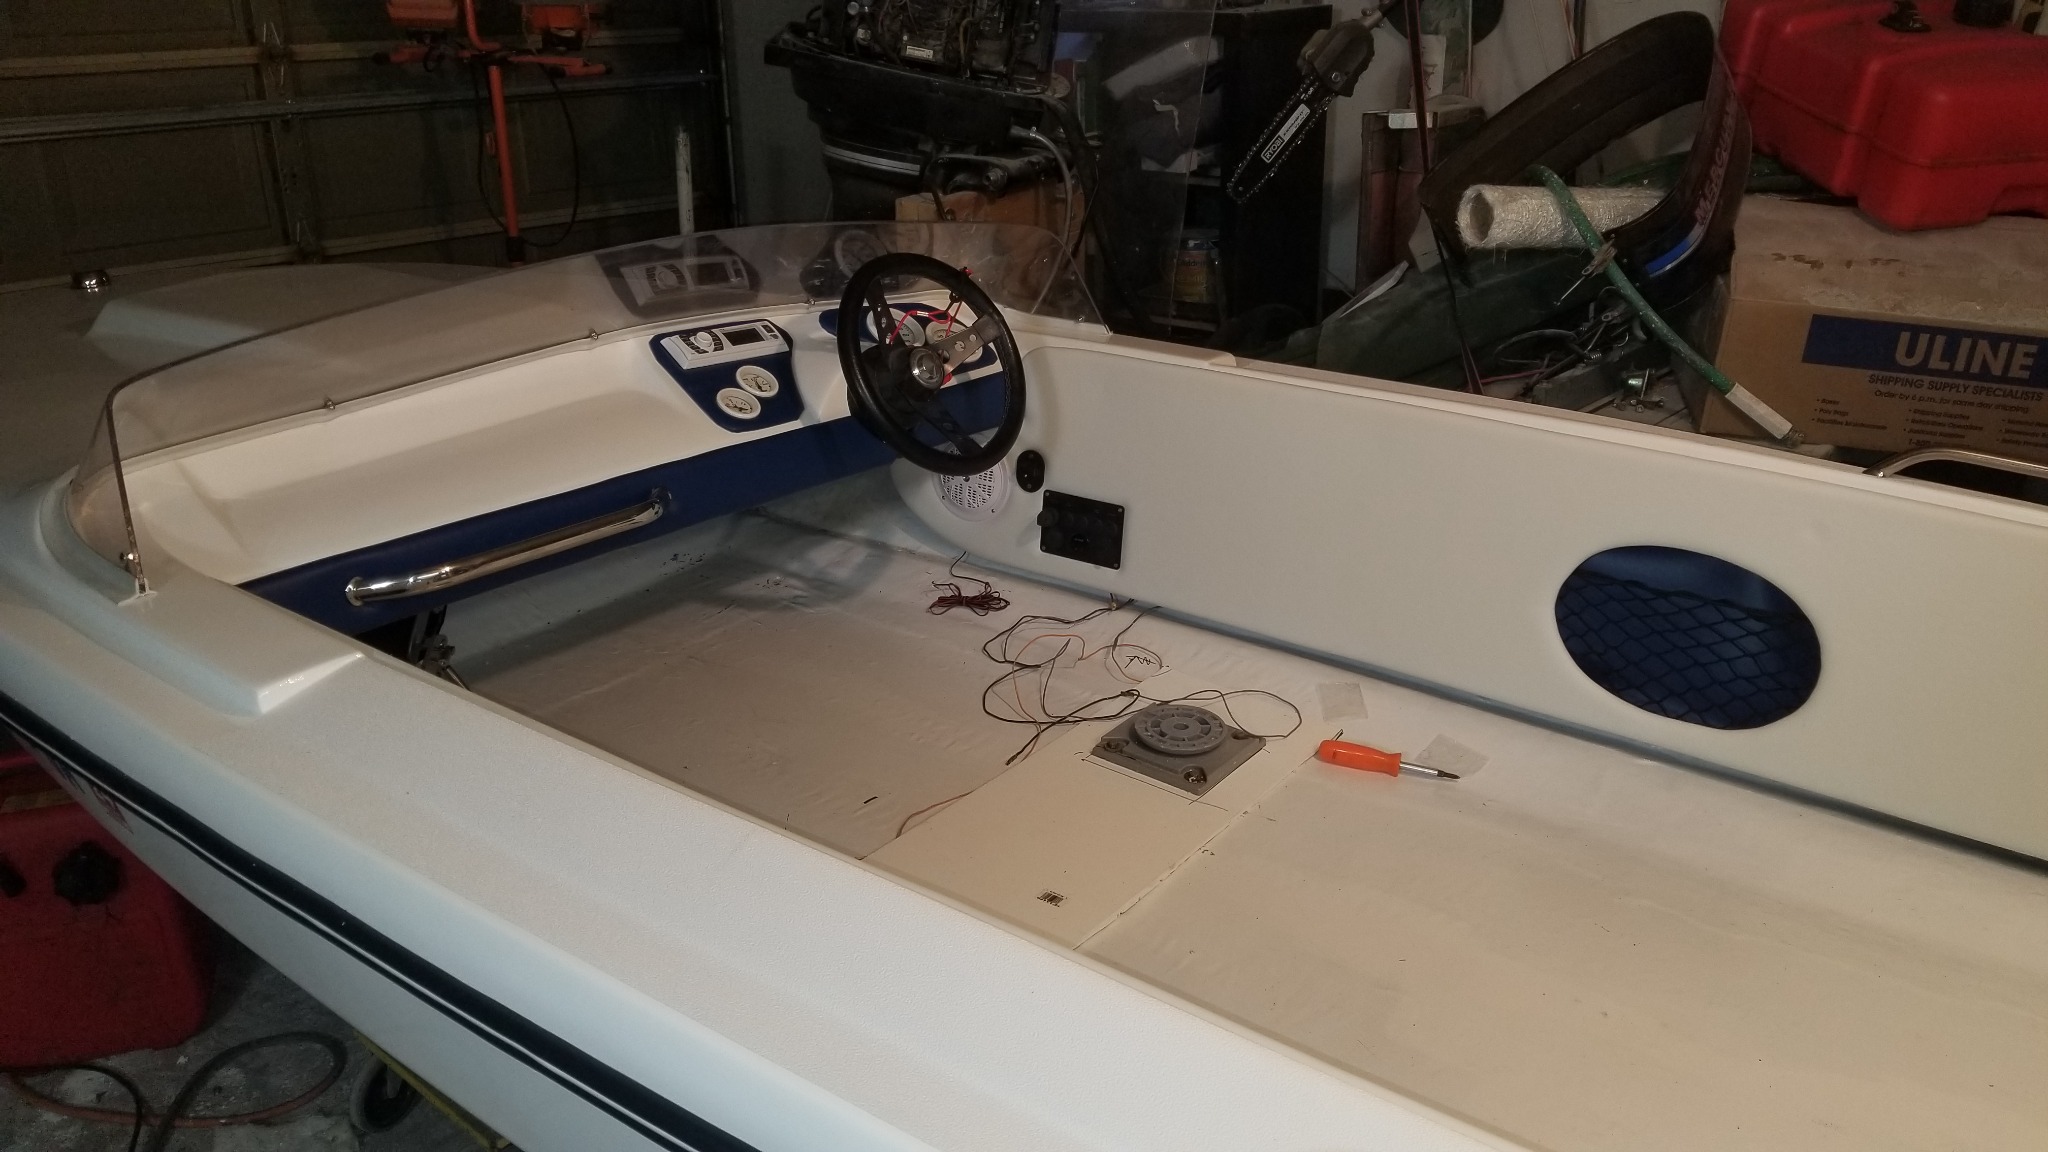
As I was scrolling though Facebook Market place I came across another sale I couldn't pass up. Someone selling off new items he bought for a project he scrapped. included was a set of white gauges, Taco rub rail kit with the white insert I needed, 2 new boat seats red and grey (dont need these but wife may want them in the bass boat, they look comfortable) white Marine blue tooth stereo with speakers, a automatic bilge pump, fuse block, switch panel, and trailer lights. I offered him $200 and he took it. So I am returning the 2 gauges I bought along with the bilge pump I just bought as well. Getting about $195 back.

So the way I look at it is I paid $5 for the white rub rail insert I needed (Have it half way installed. Had to take a break) and got the rest for FREE!

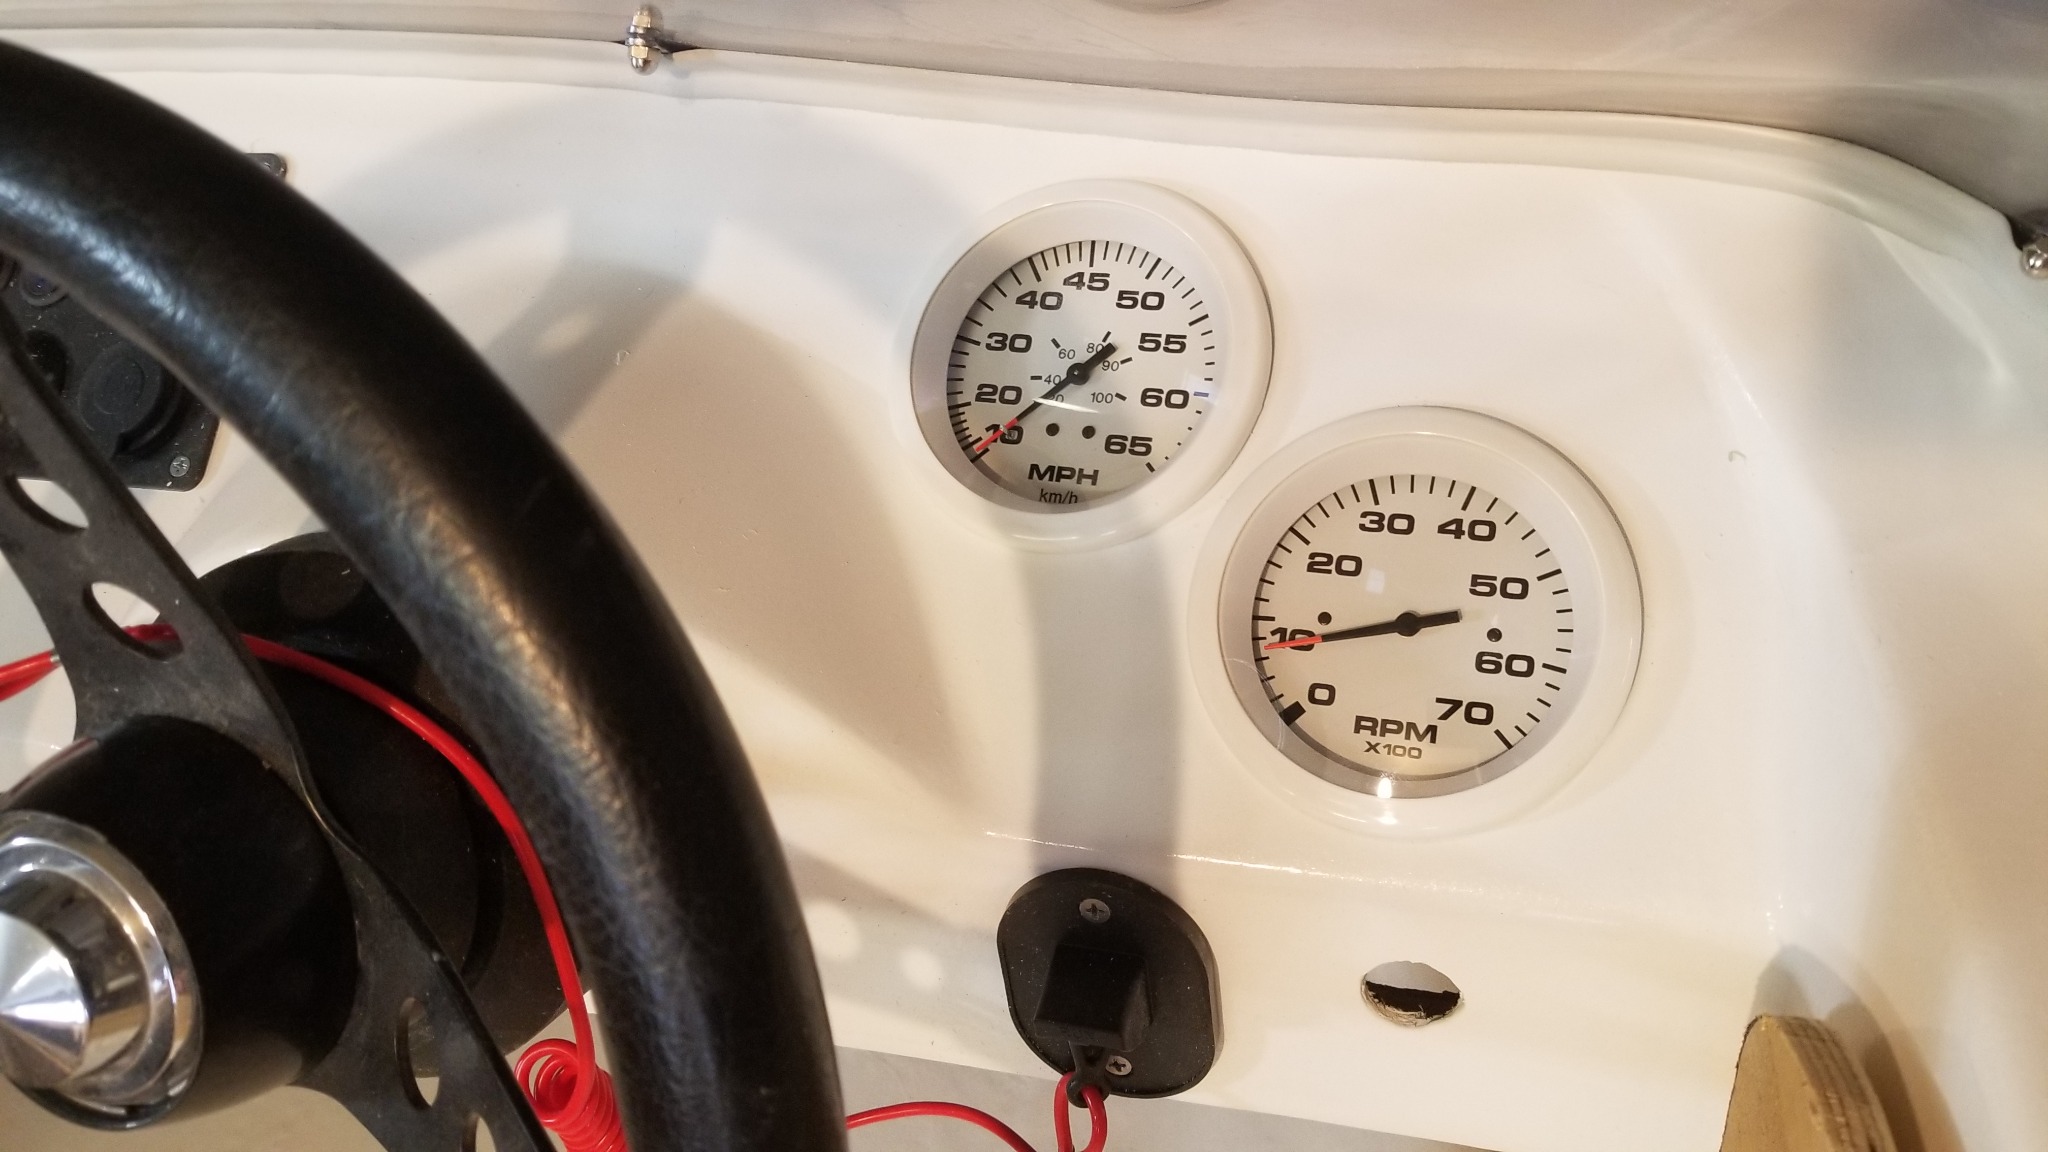
Also notice the old/new black gauges only went to 50 MPH (previous photo), the new white gauge pegs at 65 MPH. So by my calculations, just changing to the white speedo, I will gain 15 MPH!


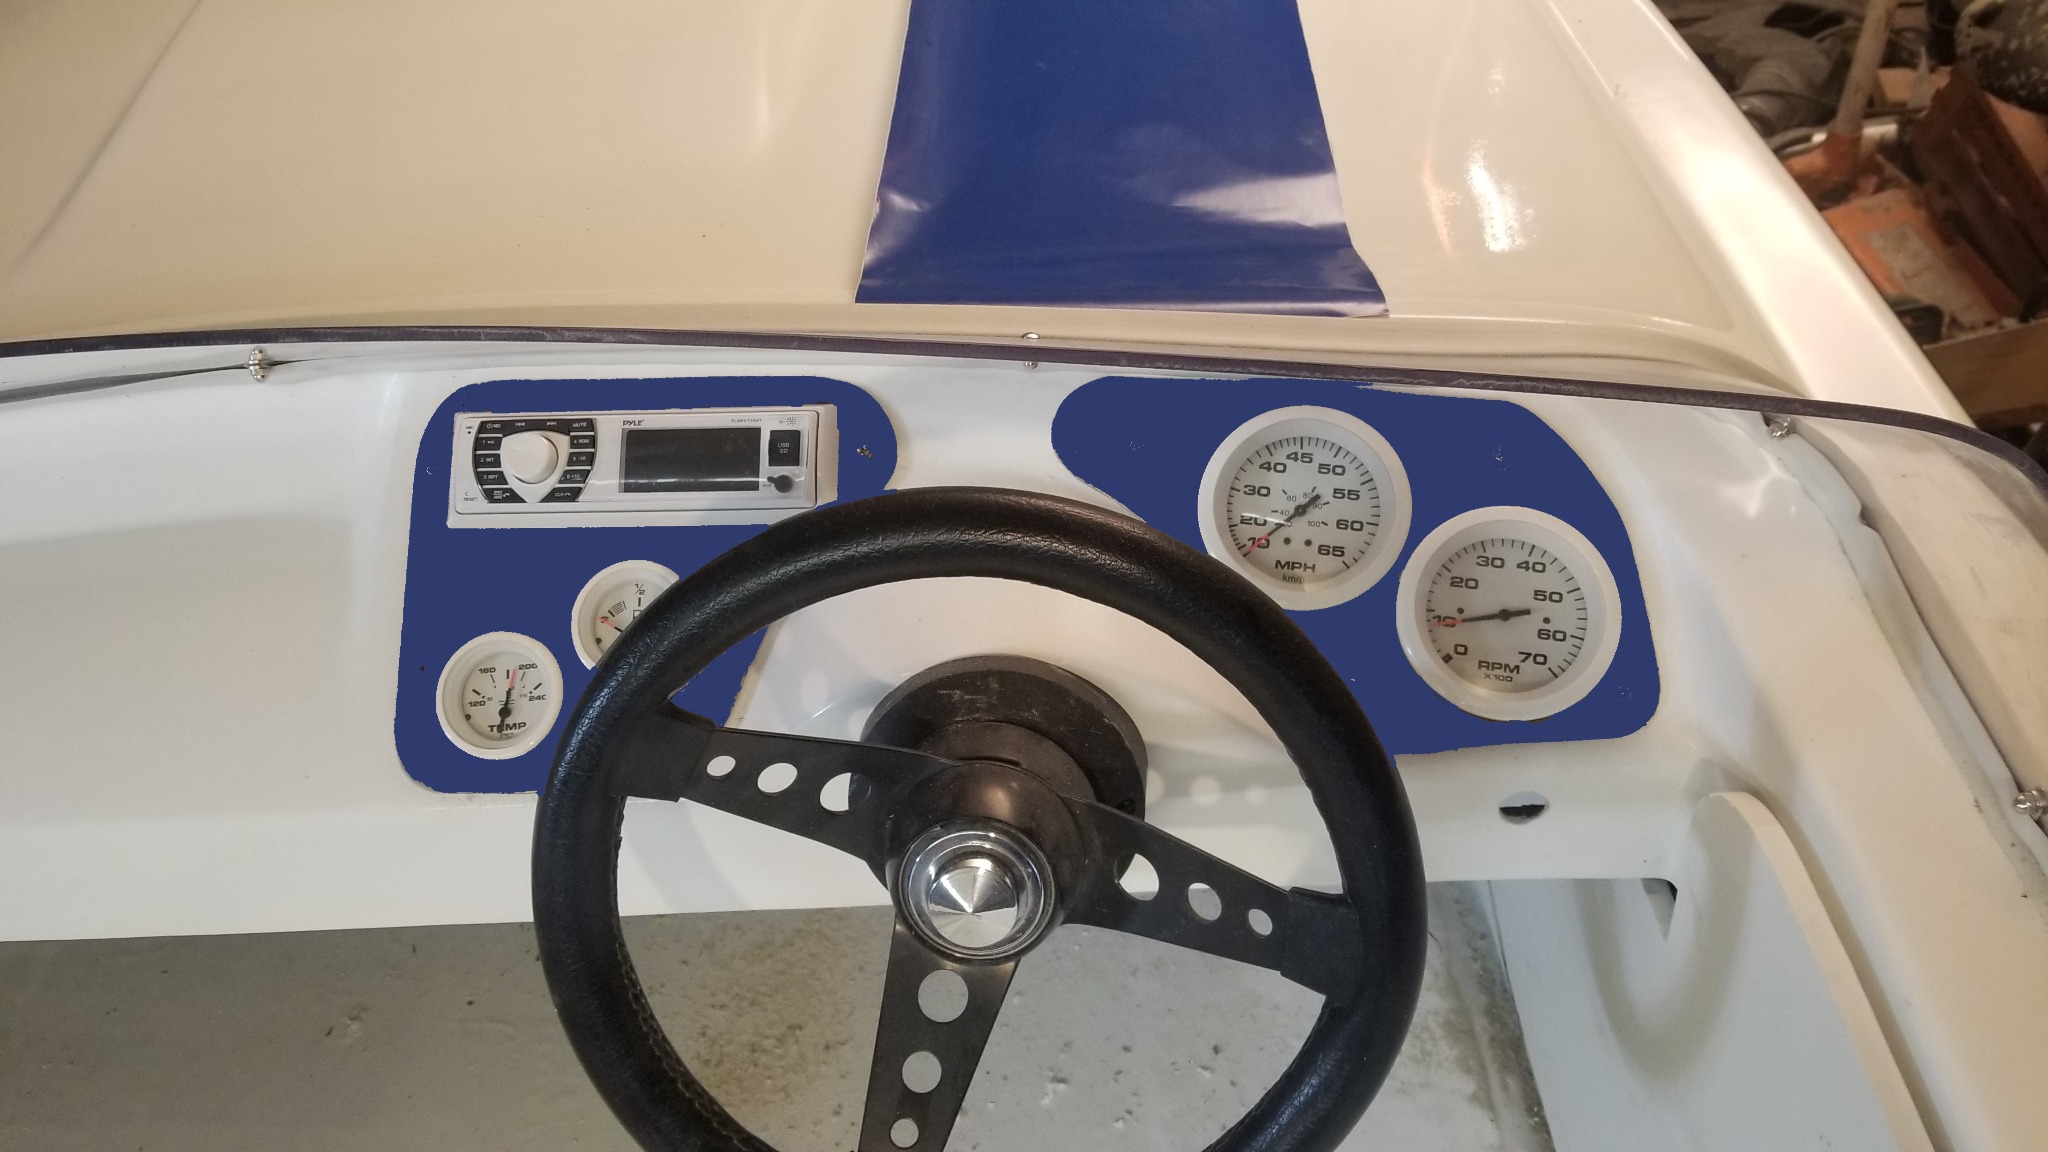
Now I have to do a few more things. I have a few pieces of stainless I am going to cut out to add 2 panels to the dash, moving the black switches over to the side panel just in front of where the controls will go. Reorganize where the gauges and radio will go. Then find a white steering wheel. I figure I will most like not like the stainless panels with no other stainless in sight, If this is the case I will cover it with the left over vinyl when I am done with the side panels. Maybe I can get creative and cover the spokes with the blue vinyl I will have left over after decaling the boat and use some more of the interior white vinyl to cover the steering wheel.
Attachments:

Please Log in or Create an account to join the conversation.

restoration project make/mode/year unknown 1 year 9 months ago #147762

Appears to be a great score! Fortune is in your favor to complete this project. I love how fate intervenes and steers the fit and finish of your boat. Kind of nice to have a blank canvas as opposed to chasing a true restoration.
The following user(s) said Thank You: Fatlenny

Please Log in or Create an account to join the conversation.

restoration project make/mode/year unknown 1 year 9 months ago #147768

  • 63 Sabre
  • 63 Sabre's Avatar
  • Offline
  • Contributing Member
  • Contributing Member
  • Posts: 4676
  • Karma: 147
  • Thank you received: 167

Please Log in or Create an account to join the conversation.

restoration project make/mode/year unknown 1 year 9 months ago #147773

  • Fatlenny
  • Fatlenny's Avatar Topic Author
  • Offline
  • Senior Boarder
  • Senior Boarder
  • Posts: 241
  • Karma: 3
  • Thank you received: 17
Had to take today off from work to take the wife to an oral surgeon , so why not take Friday off too and make a 4 day weekend out of it. Got the wife home and settled in then out to the garage I went. I ran the steering cable to the back making sure that the length I have was going to work. seems like it will with the Jack Plate but It may be too long if I don't use it.

Then I got out the registration numbers and placed them on the side of the boat along with the state tag.

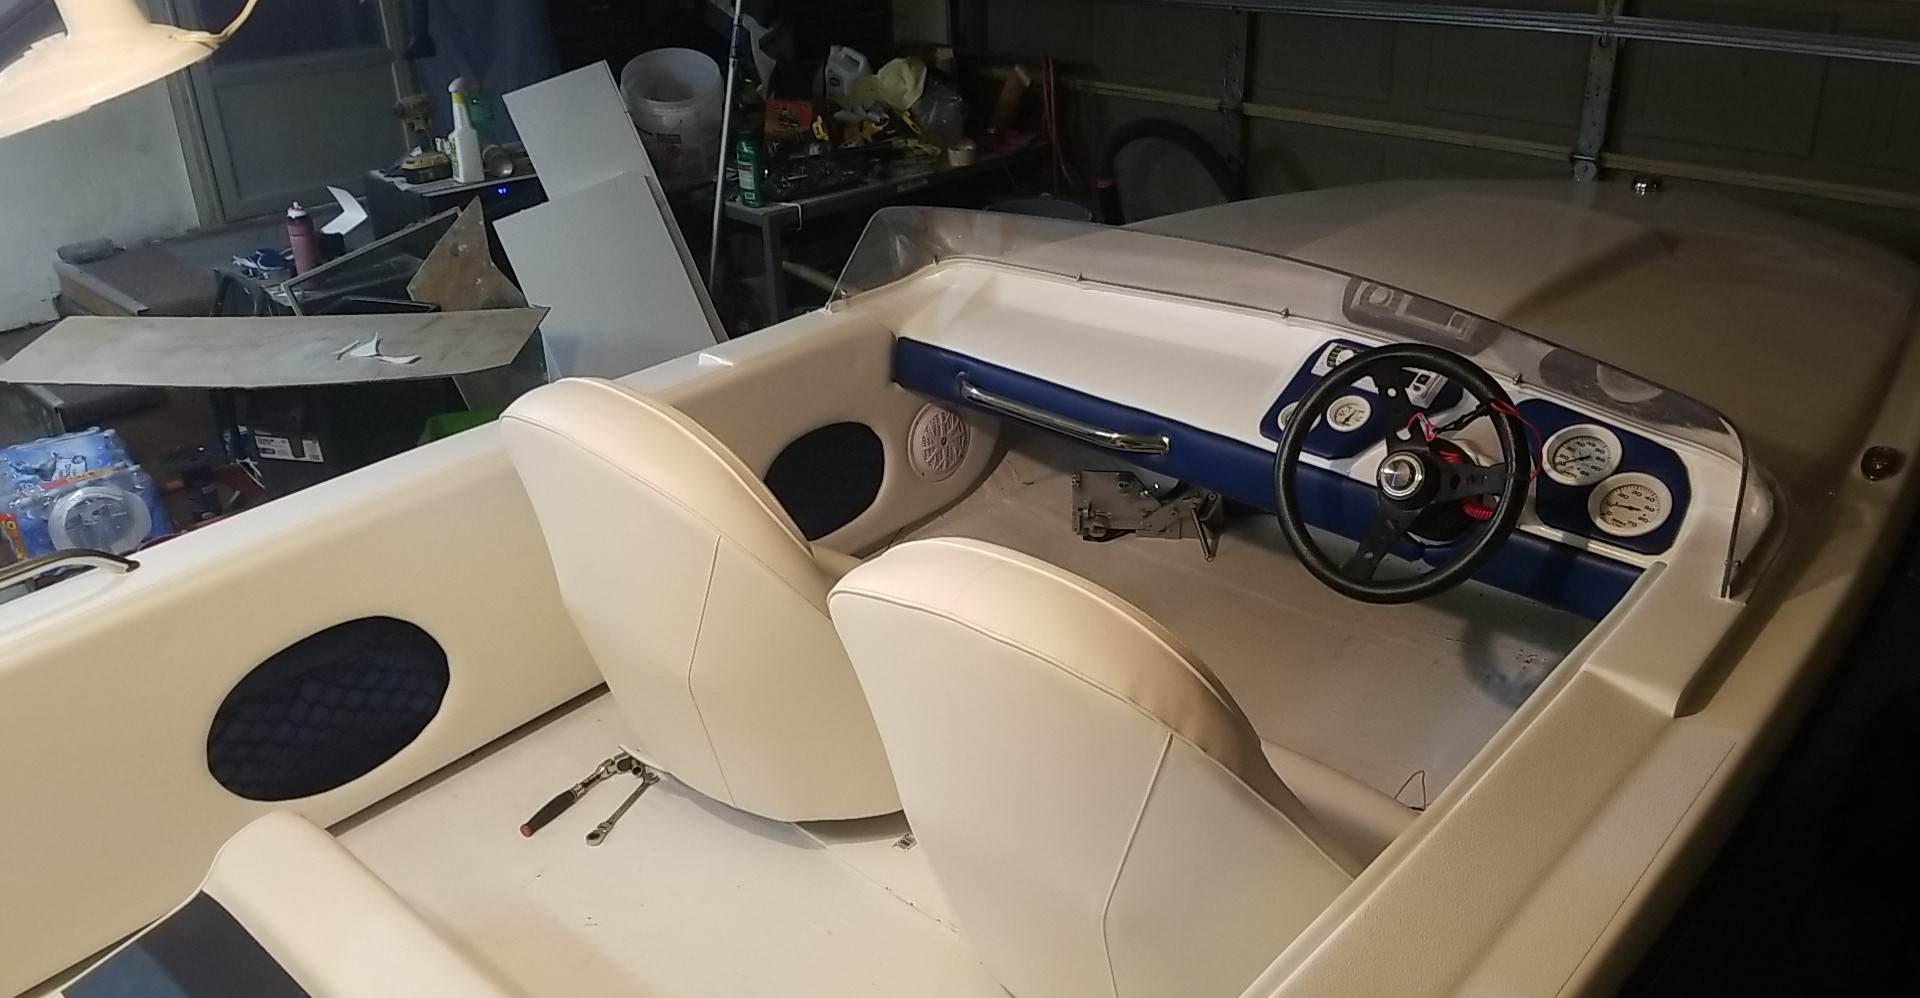
I wasn't happy with the 3/8 plywood I had cut to use for the backers of the side panels as they started warping really bad. So off to the HomeDepot I went and picked up a 4'x8'x1/2" piece of PVC board. These shouldn't warp, rot, or need to be sealed. This will out last the boat. I have to get these bolted in and set the seats back in and see where I want to make a couple cut outs for a little bit of storage space. Then attach the controls to see where I want to put the switch panel and safety lanyard and cut holes accordingly for control cables, wiring and such and put a quarter round on all the edges prior to attaching the 3 yards of vinyl I ordered that should be here Wednesday.


Looking for opinions here. I got the stainless pieces cut out for the dash and everything where I want it. The plan was to cover these with the vinyl I have coming. But now that its on there I am wondering if I should clean up this stainless and swap steering wheels with the bass boat as it is the same style but brushed stainless spokes.

What do you all think?
1. Cover them with the white vinyl to match the side panels.


2. Do a brushed finish on them and swap the steering wheel out to the stainless steel spoked wheel.


3. Cover them with the same blue vinyl wrap to match the blue in the seats and the stripes on the side.
Attachments:

Please Log in or Create an account to join the conversation.

restoration project make/mode/year unknown 1 year 9 months ago #147774

Excellent! I like the blue myself, goes with the rest of the boats highlights.

Bob
The following user(s) said Thank You: Fatlenny

Please Log in or Create an account to join the conversation.

restoration project make/mode/year unknown 1 year 9 months ago #147775

I like the blue also.
The following user(s) said Thank You: Fatlenny

Please Log in or Create an account to join the conversation.

restoration project make/mode/year unknown 1 year 9 months ago #147779

  • Fatlenny
  • Fatlenny's Avatar Topic Author
  • Offline
  • Senior Boarder
  • Senior Boarder
  • Posts: 241
  • Karma: 3
  • Thank you received: 17
Thanks for the input, I think I liked that going with the trim colors as well. I ordered another yard of vinyl in the dark blue to add in the back of the pocket holes I had made in the side panels. I also got off my wallet and ordered a Hot Foot throttle. I hated the controls where they was going on the side where they normally go as it is getting tight with these larger bucket seats so I plan on mounting the now shifter only control on the floor in the middle to give it a hot rod feel with the hot foot throttle. May have to move the seats back a few more inches adding this throttle as I may not be comfortable or I may have to modify the foot rest board that is currently existing. Probably going to have to rethink the trim controls to maybe up on the dash as I had purchased the ones that replace the mercontrol handle grip to operate with your thumb.

Getting to the end of my planned budget on this journey. (tax refund almost all spent) But that is okay, we are getting to a short list of things to do before splashing her and I only need to purchase a few small items to complete this project. I figure I have 4 to 6 weeks left before it is nice enough to even try to go out on the water, so I think I will have more than enough time to get it done. I hate to say it but I will most likely redo the trailer in the summer when it is warmer and roll her out on her first trip on that ugly black trailer.

Please Log in or Create an account to join the conversation.

restoration project make/mode/year unknown 1 year 9 months ago #147788

  • Fatlenny
  • Fatlenny's Avatar Topic Author
  • Offline
  • Senior Boarder
  • Senior Boarder
  • Posts: 241
  • Karma: 3
  • Thank you received: 17
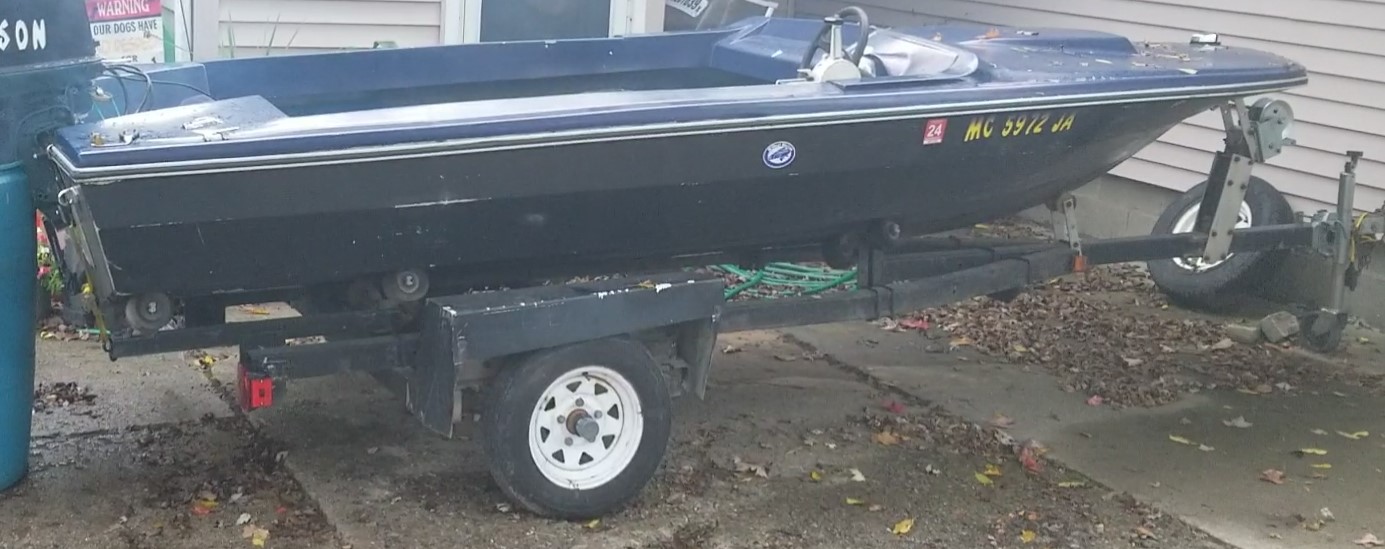
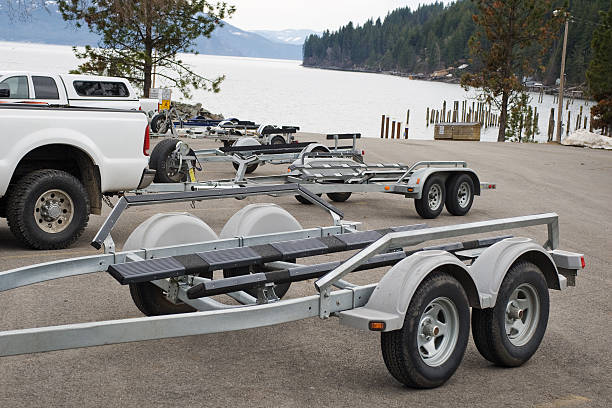
I dug the trailer out of the back yard and got looking at it. I remembered that it was very poorly balanced with the little Johnson 50 and no jack plate. It would hardly stay down on the screw jack up on the tongue, so I know it will have issues with the 80 on it with the jack plate. So after looking at it for about 15 minutes and discovering the options this trailer has built in, I see I can move the rear rollers up 16 inches and move the tongue up the same without drilling new holes. If need be I can move the axel as well if it ends up being too much tongue weight but I think it will be ok. I will have to look for the rules on boat trailer tongue weight and how to set it right. I am hoping for some nicer weather here shortly as I see it really wont take much to sand down a few rusty spots, scuff up the entire thing and put a fresh coat of white paint on it along with some new fenders. I just might have to wait until we get a warm enough day to paint it outside. I really dont like the idea of doing all this work to make the boat this nice and put it on a cruddy looking trailer.

Please Log in or Create an account to join the conversation.

restoration project make/mode/year unknown 1 year 9 months ago #147791

  • 63 Sabre
  • 63 Sabre's Avatar
  • Offline
  • Contributing Member
  • Contributing Member
  • Posts: 4676
  • Karma: 147
  • Thank you received: 167
I would start by just moving the axle back. there are probably holes already on the frame for doing that. Most trailers were "generic" by manufacturers to be sold to dealers. One issue you want to avoid is not enough weight on the hitch which you already have. Moving the axle back would balance your load and prevent the trailer sway problem while you're going 80+ mph. Search "trailer sway" and you'll find a gazillion remedies. Sneak the bathroom scale to your work area and you can get a starting point on weight distribution.

Please Log in or Create an account to join the conversation.

restoration project make/mode/year unknown 1 year 9 months ago #147798

  • Fatlenny
  • Fatlenny's Avatar Topic Author
  • Offline
  • Senior Boarder
  • Senior Boarder
  • Posts: 241
  • Karma: 3
  • Thank you received: 17
To accomplish adding a transom saver to the trailer, I need to also add a cross member to the rear of the frame. As the wobble rollers are mounted at the farthest point of the rear of the frame, a transom saver would not work with this current set up of the trailer. I will have to move the tongue to its furthest point forward and the wobble rollers forward to add the cross member to the frame then attach the transom saver. I wish it was just as easy as moving the axel forward.
Attachments:

Please Log in or Create an account to join the conversation.

restoration project make/mode/year unknown 1 year 8 months ago #147799

  • 63 Sabre
  • 63 Sabre's Avatar
  • Offline
  • Contributing Member
  • Contributing Member
  • Posts: 4676
  • Karma: 147
  • Thank you received: 167
OK looking at the picture I see your point. Might just move everything forward as far as possible and see if that works. I would caution though to keep the furthest aft roller directly under the transom when it's finished. I've seen older boats that had developed a cup in the stern because the motor weight et al pushed the rollers into the fiberglass bottom. Put a bouncing effect on this during road trips. Another option if you can't get then adjusted right is to remove the pivoting rollers and put bunks in their place and keep the keel rollers which is not difficult. Just a suggestion.

Please Log in or Create an account to join the conversation.

restoration project make/mode/year unknown 1 year 8 months ago #147800

  • Fatlenny
  • Fatlenny's Avatar Topic Author
  • Offline
  • Senior Boarder
  • Senior Boarder
  • Posts: 241
  • Karma: 3
  • Thank you received: 17
I worried about adding more of a hook in the hull that it already has, or how this old fiberglass would like the extra weight I am adding to the transom while traveling on the road.

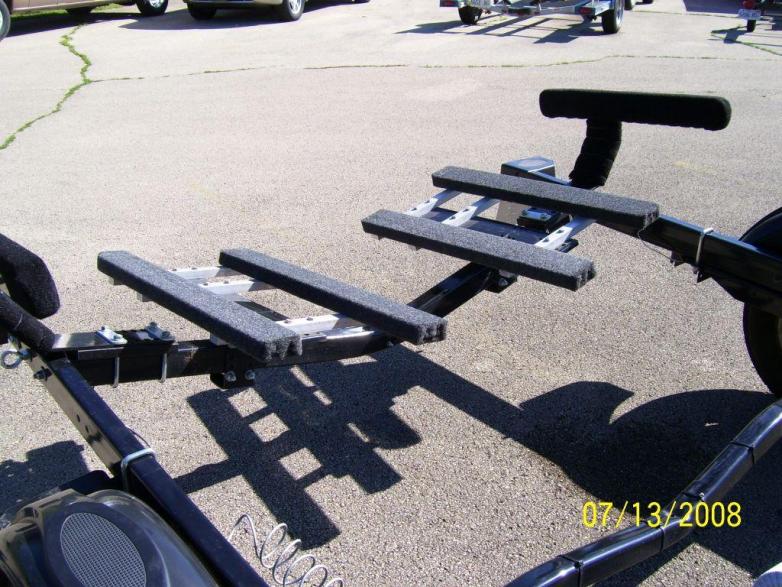
I wonder if I can, or if it is a good idea to remove the 8 rear wobble rollers leaving the pivot hardware in place, and add 4 short bunks in its place to better support the boat. Im sure this little boat really dont need a roller trailer and I figure doing this in this unconventional way would be easier than getting the bunk hardware. Sure they would flop around without the boat on it but I dont see any issue with this. Does any one else see why I couldnt do this?

Attachments:

Please Log in or Create an account to join the conversation.

restoration project make/mode/year unknown 1 year 8 months ago #147801

  • 63 Sabre
  • 63 Sabre's Avatar
  • Offline
  • Contributing Member
  • Contributing Member
  • Posts: 4676
  • Karma: 147
  • Thank you received: 167
Couple of ways to approach this. You're a handy guy so if you can make some "U" shaped metal brackets that would fit around a 2x4 and bolt the bottom of the bracket to the trailer rails, insert the 2x4s edgewise .

Use the swivel brackets, take off the wheels and just lay 2x6 flat on the brackets. that way they will still conform to the hull.
Make sure they extend far enough back so you don't scrape the bow on the trailer cross frame unless you can leave the center rollers on the keel.
Search pictures of boat trailers and you can get some better ideas.
Attachments:
The following user(s) said Thank You: Fatlenny

Please Log in or Create an account to join the conversation.

restoration project make/mode/year unknown 1 year 8 months ago #147804

Sorry stupid busy so late again. Yeah what Cal said. I only use bunks for any trailers any more. Roller trailers are fine if it's just for tranporting but if the boat is going to live on the trailer most of the time, bunks.


Bob
The following user(s) said Thank You: Fatlenny

Please Log in or Create an account to join the conversation.

restoration project make/mode/year unknown 1 year 8 months ago #147816

  • Fatlenny
  • Fatlenny's Avatar Topic Author
  • Offline
  • Senior Boarder
  • Senior Boarder
  • Posts: 241
  • Karma: 3
  • Thank you received: 17
I think I agree. This boat will get as much use as I can this summer but never going to be in the water overnight, so she will spend most of her time on a trailer. I am going to just pull off the wobble roller wheels and attach 4 bunks like the image I had found online of someone else that did this. Just waiting on better weather to get outside to work on the trailer. After looking at this one, I may have to rethink my plans on the cross member in the back. I assumed I could just run one straight across but moving the bunks forward I may have to have a bent cross member. I will have to see how the boat is going to ride up the trailer without a cross member to see if I will have clearance.


In the meantime, I did receive the vinyl I had ordered. started on the dash and got that done tonight.

Attachments:

Please Log in or Create an account to join the conversation.

restoration project make/mode/year unknown 1 year 8 months ago #147817

Depends on if your going to pull it with the motor down or tilted. I leave mine down but have plenty of room between the motor skeg and the ground.

Tha dash looks awesome!!!!

Bob
The following user(s) said Thank You: Fatlenny

Please Log in or Create an account to join the conversation.

restoration project make/mode/year unknown 1 year 8 months ago #147818

  • Fatlenny
  • Fatlenny's Avatar Topic Author
  • Offline
  • Senior Boarder
  • Senior Boarder
  • Posts: 241
  • Karma: 3
  • Thank you received: 17
I think I wasnt clear, I am not talking about the skeg making contact. I am talking about putting a cross member straight across the back of the trailer so I can add a transom saver to the trailer. The concern is if the keel will come in contact with it loading and unloading the boat on the trailer if it is straight vs bent down to give more clearance.

Please Log in or Create an account to join the conversation.

restoration project make/mode/year unknown 1 year 8 months ago #147819

  • Fatlenny
  • Fatlenny's Avatar Topic Author
  • Offline
  • Senior Boarder
  • Senior Boarder
  • Posts: 241
  • Karma: 3
  • Thank you received: 17
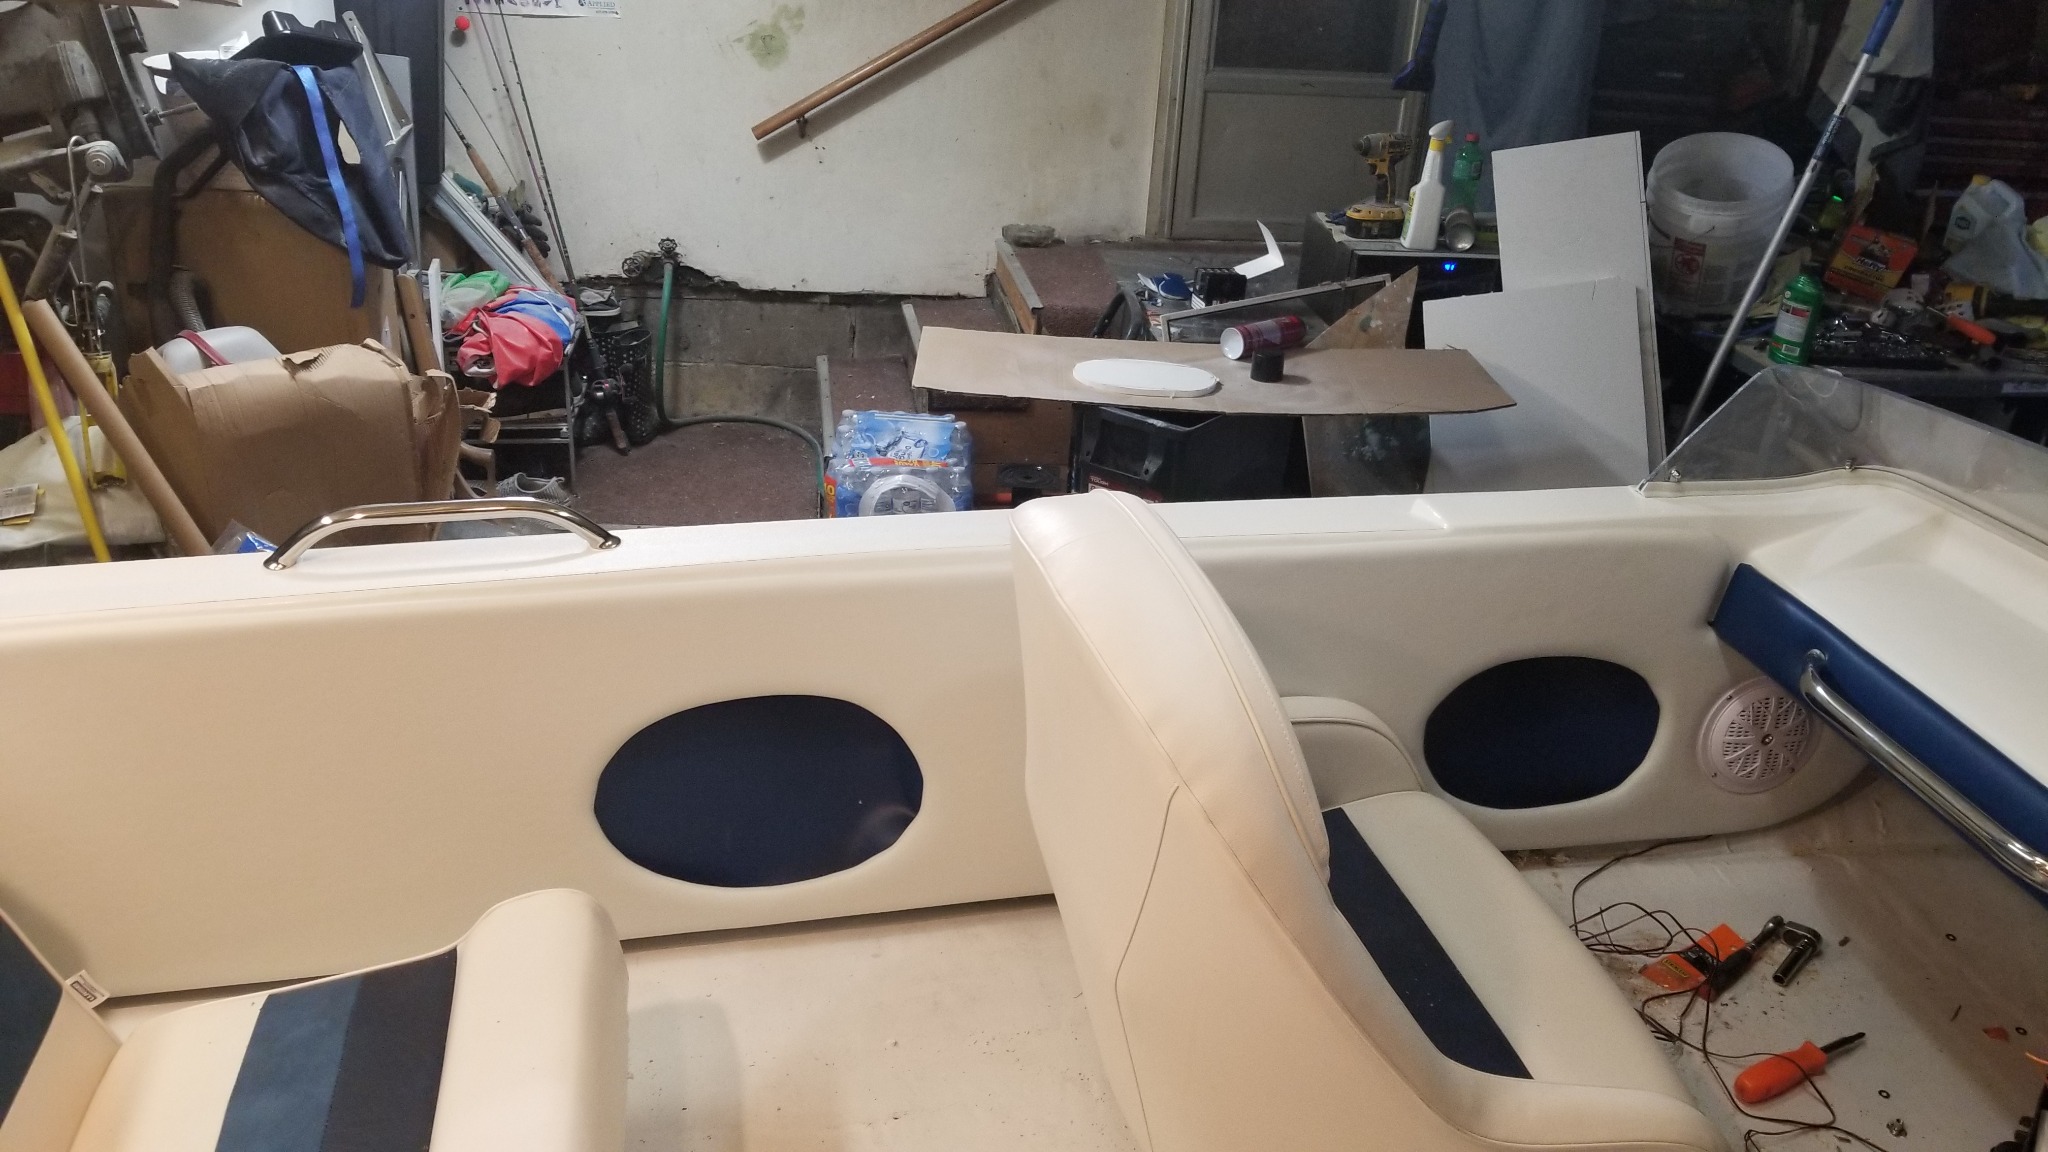
Another day, another panel. I have to lay this out in the dining room floor and staple away. I am remembering that im not as young as I once was. Its getting hard to get up off the floor nowadays. So I think one panel a day is good enough for me LOL.

Attachments:

Please Log in or Create an account to join the conversation.

restoration project make/mode/year unknown 1 year 8 months ago #147821

Looks professionally done. Very nice work!!

Where did you source your vinyl?

Please Log in or Create an account to join the conversation.

restoration project make/mode/year unknown 1 year 8 months ago #147822

  • Fatlenny
  • Fatlenny's Avatar Topic Author
  • Offline
  • Senior Boarder
  • Senior Boarder
  • Posts: 241
  • Karma: 3
  • Thank you received: 17
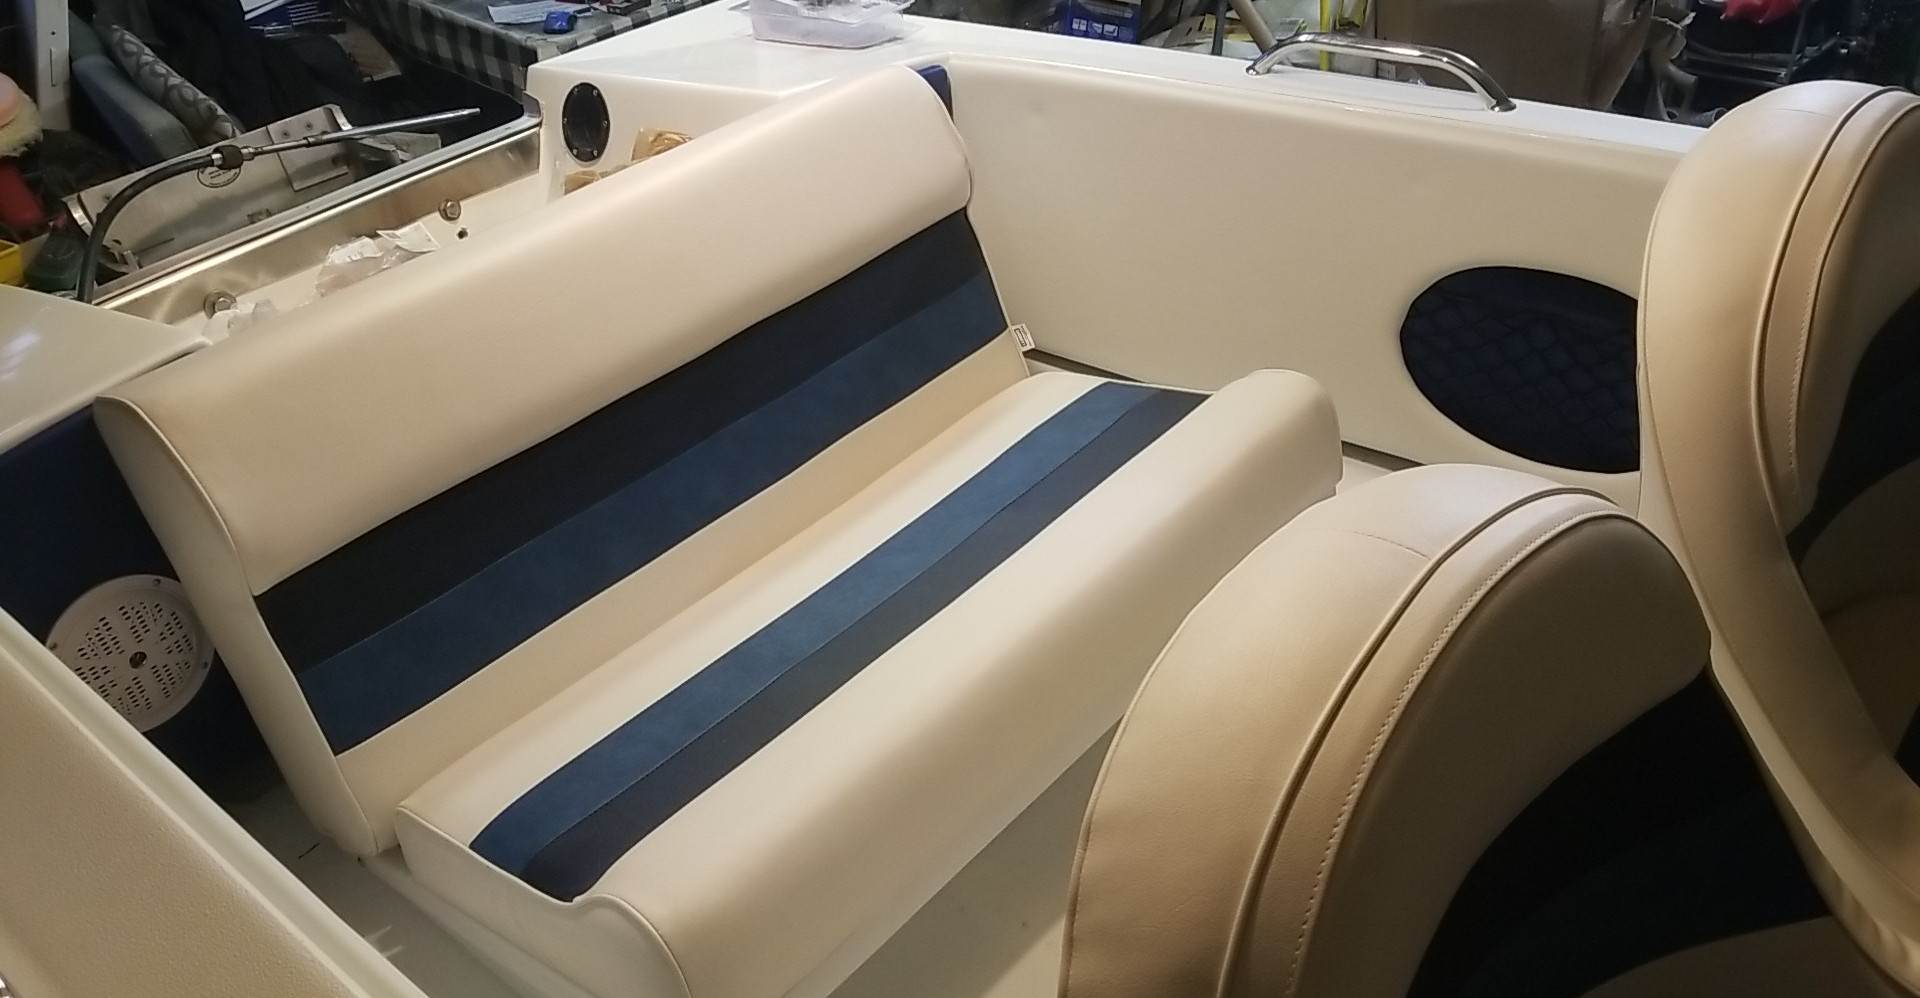
Thanks, ordered most of my needed parts from the great Amazon. looks like almost 30 colors to choose from. https://www.amazon.com/dp/B07MC9G457?psc=1&ref=ppx_yo2ov_dt_b_product_details This vinyl came with attached 1/4 foam backing. A little spray adhesive, a bit of stretching/trimming, a bunch of staples, and a stiff back this morning and it don't look too bad.

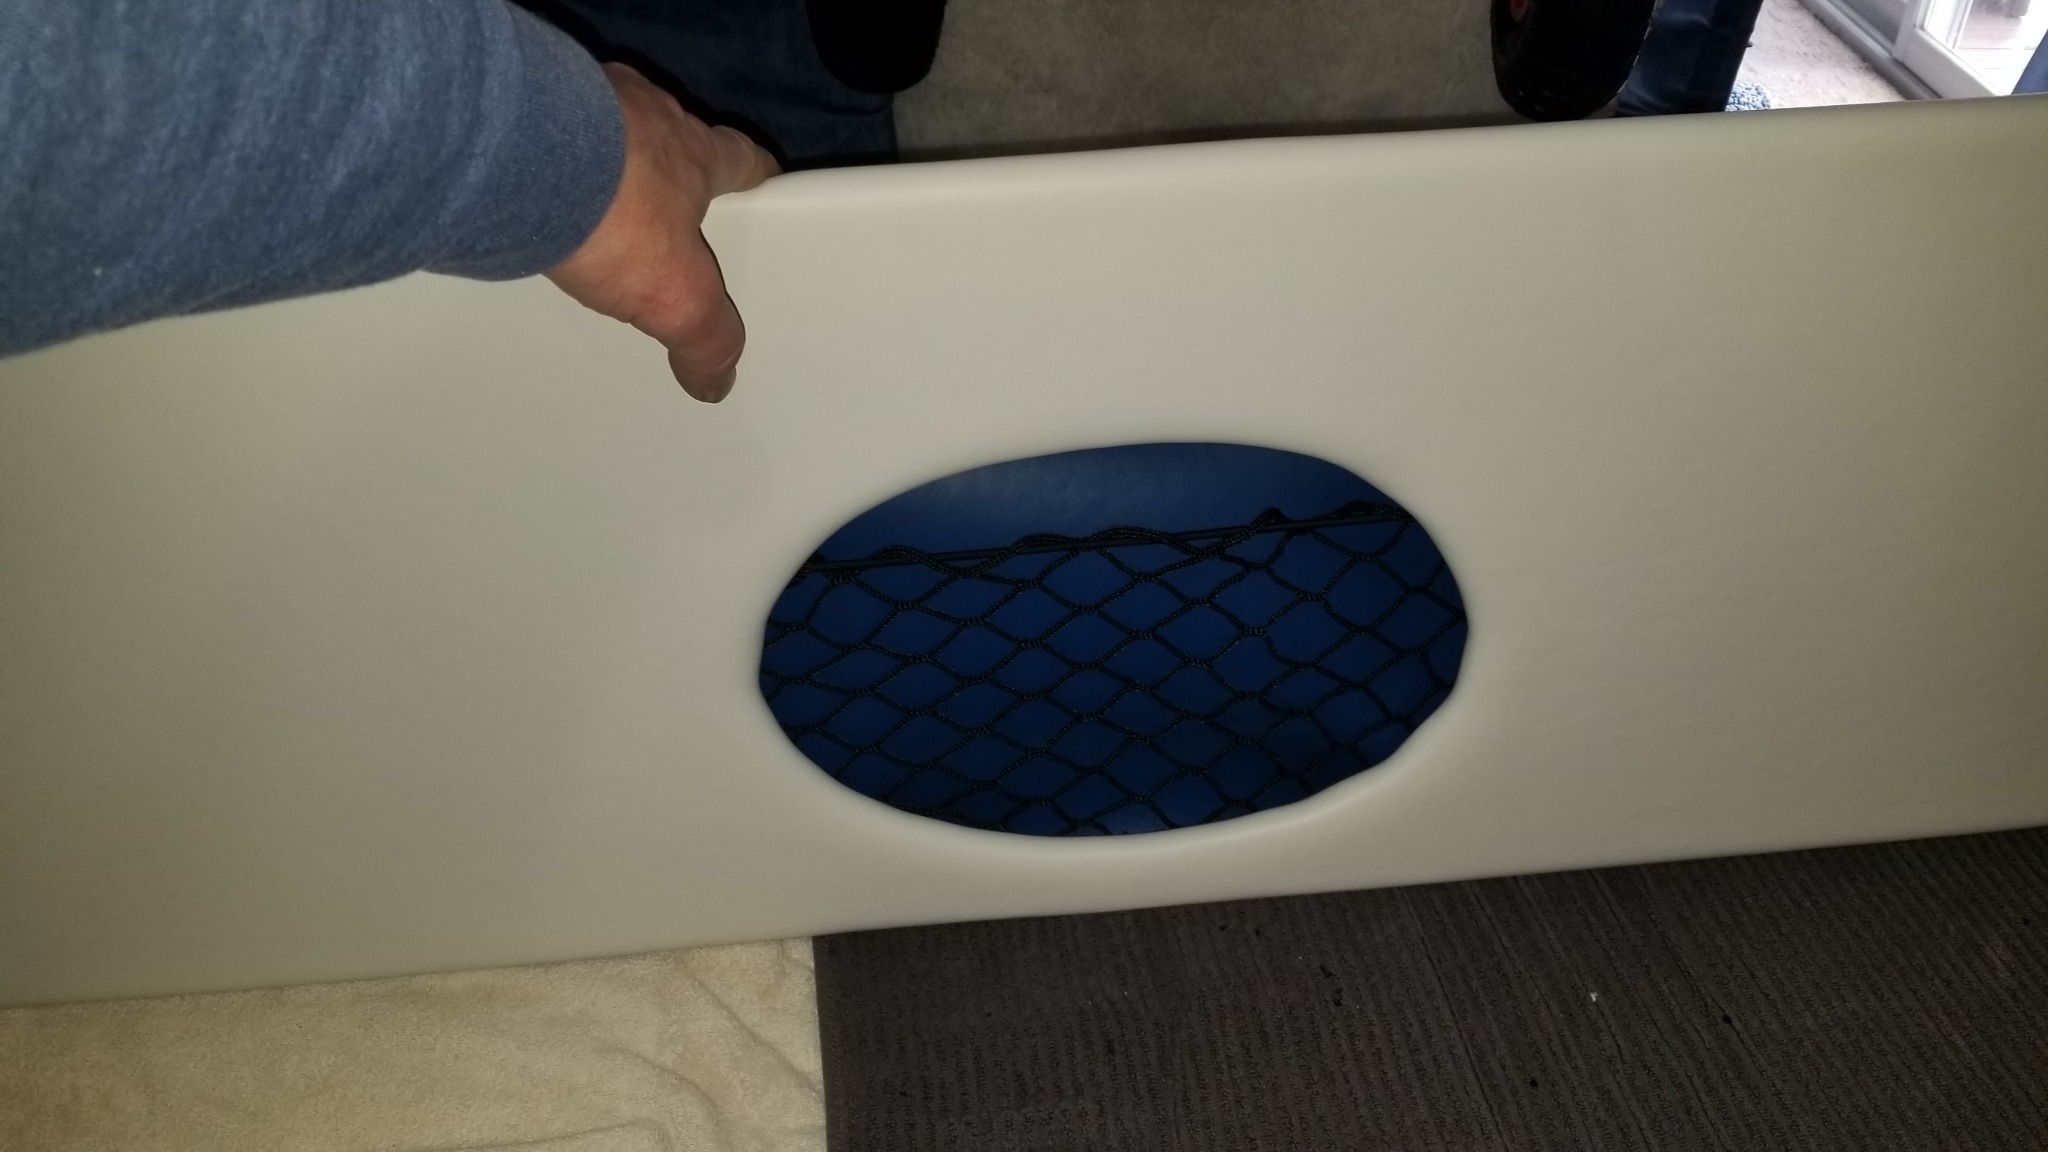
I am pretty happy with the colors being pretty close to the colors of the seat. I am not happy with the pockets/pouches. I had less than I hoped for left of the blue vinyl as a last minute decision to cover the panel that goes behind the back seat in the dark blue to break up all the white. I couldn't get the pouches to be as deep as I wanted with the lack of blue left over. I have thought about a solution for this and I am going to do a little local searching for some elastic cargo net material, staple it in front of the blue to allow these pockets to be more usable.

Quick update: Quick online search at AutoZone and found this clearance item I am sure I can make work for the 3 pockets I have. Think I need to get dressed and head down the street. https://www.autozone.com/tie-down-and-cargo-management/cargo-net/p/bell-automotive-45in-x-60in-cargo-net/835188_0?rrec=true

Please Log in or Create an account to join the conversation.

restoration project make/mode/year unknown 1 year 8 months ago #147823

  • Fatlenny
  • Fatlenny's Avatar Topic Author
  • Offline
  • Senior Boarder
  • Senior Boarder
  • Posts: 241
  • Karma: 3
  • Thank you received: 17
For the $3 I spent on this, I feel like I got gold. Too bad it wasn't white netting.

Something to think about, if you use the shortened version of "do not" in the sentence "Don't you dare!" It sounds like correct grammar, but try saying it without shortening "do not" into "don't" and you sound really silly.


Please Log in or Create an account to join the conversation.

restoration project make/mode/year unknown 1 year 8 months ago #147824

Awesome Lenny. Sory for the misunderstanding on the trailer. You could either use a straight one with a roller that would keep the keel off of it or use the bent.

Bob
The following user(s) said Thank You: Fatlenny

Please Log in or Create an account to join the conversation.

restoration project make/mode/year unknown 1 year 8 months ago #147825

  • Fatlenny
  • Fatlenny's Avatar Topic Author
  • Offline
  • Senior Boarder
  • Senior Boarder
  • Posts: 241
  • Karma: 3
  • Thank you received: 17
I got the trailer up to the garage and made the planned adjustments moving everything forward, replaced the home made winch post with one I picked up on market place and got that adjusted as well. (photo shows old winch post)

Depending on the weather this week I will either work on the boats wiring while it is sitting on the the trailer in the garage or if it gets a bit nicer, pull the boat back off the trailer, disassemble the trailer, sand and paint it all the parts, reassemble, remove the rear wobble wheels and replace with 4 - 2x4 bunks.

Attachments:

Please Log in or Create an account to join the conversation.

restoration project make/mode/year unknown 1 year 8 months ago #147828

It really looks great!
The following user(s) said Thank You: Fatlenny

Please Log in or Create an account to join the conversation.

restoration project make/mode/year unknown 1 year 8 months ago #147831

  • Fatlenny
  • Fatlenny's Avatar Topic Author
  • Offline
  • Senior Boarder
  • Senior Boarder
  • Posts: 241
  • Karma: 3
  • Thank you received: 17
The fenders for the trailer I ordered came today, I went to the box store and picked up some stainless screws and other small items I had on my list to finish up mounting the rear seat and to mount the shifter controls and the Hot Foot. I also picked up some items to get working on the wiring. So that's what I did. I thought the wiring was going to be a simple task, I now know I underestimated this process. Wiring a house or a stereo is so much simpler. To plan out what I want on with the ignition switch, what should have power all the time, how to get it all the way I want it. Im sure I am over complicating things, but it will be the way I want my switches to work.

Question about the gauge lights. What is ideal? Either have them only light up when the nav lights are on, or just simplifying it by having them light up when ever the engine in the run position?

Please Log in or Create an account to join the conversation.

restoration project make/mode/year unknown 1 year 8 months ago #147832

On the gauge lights I can tell you that a lot of boat manufacturers wire them to come on with the engine key switch. Unobtrusive during the day and they are on at night.
On your seats. What I did with the seats on my G3 was install them with nylon wing nuts so they can be removed easily and taken inside to keep moisture out of the wood backing. Just a thought.
The following user(s) said Thank You: Fatlenny

Please Log in or Create an account to join the conversation.

restoration project make/mode/year unknown 1 year 8 months ago #147845

  • Fatlenny
  • Fatlenny's Avatar Topic Author
  • Offline
  • Senior Boarder
  • Senior Boarder
  • Posts: 241
  • Karma: 3
  • Thank you received: 17
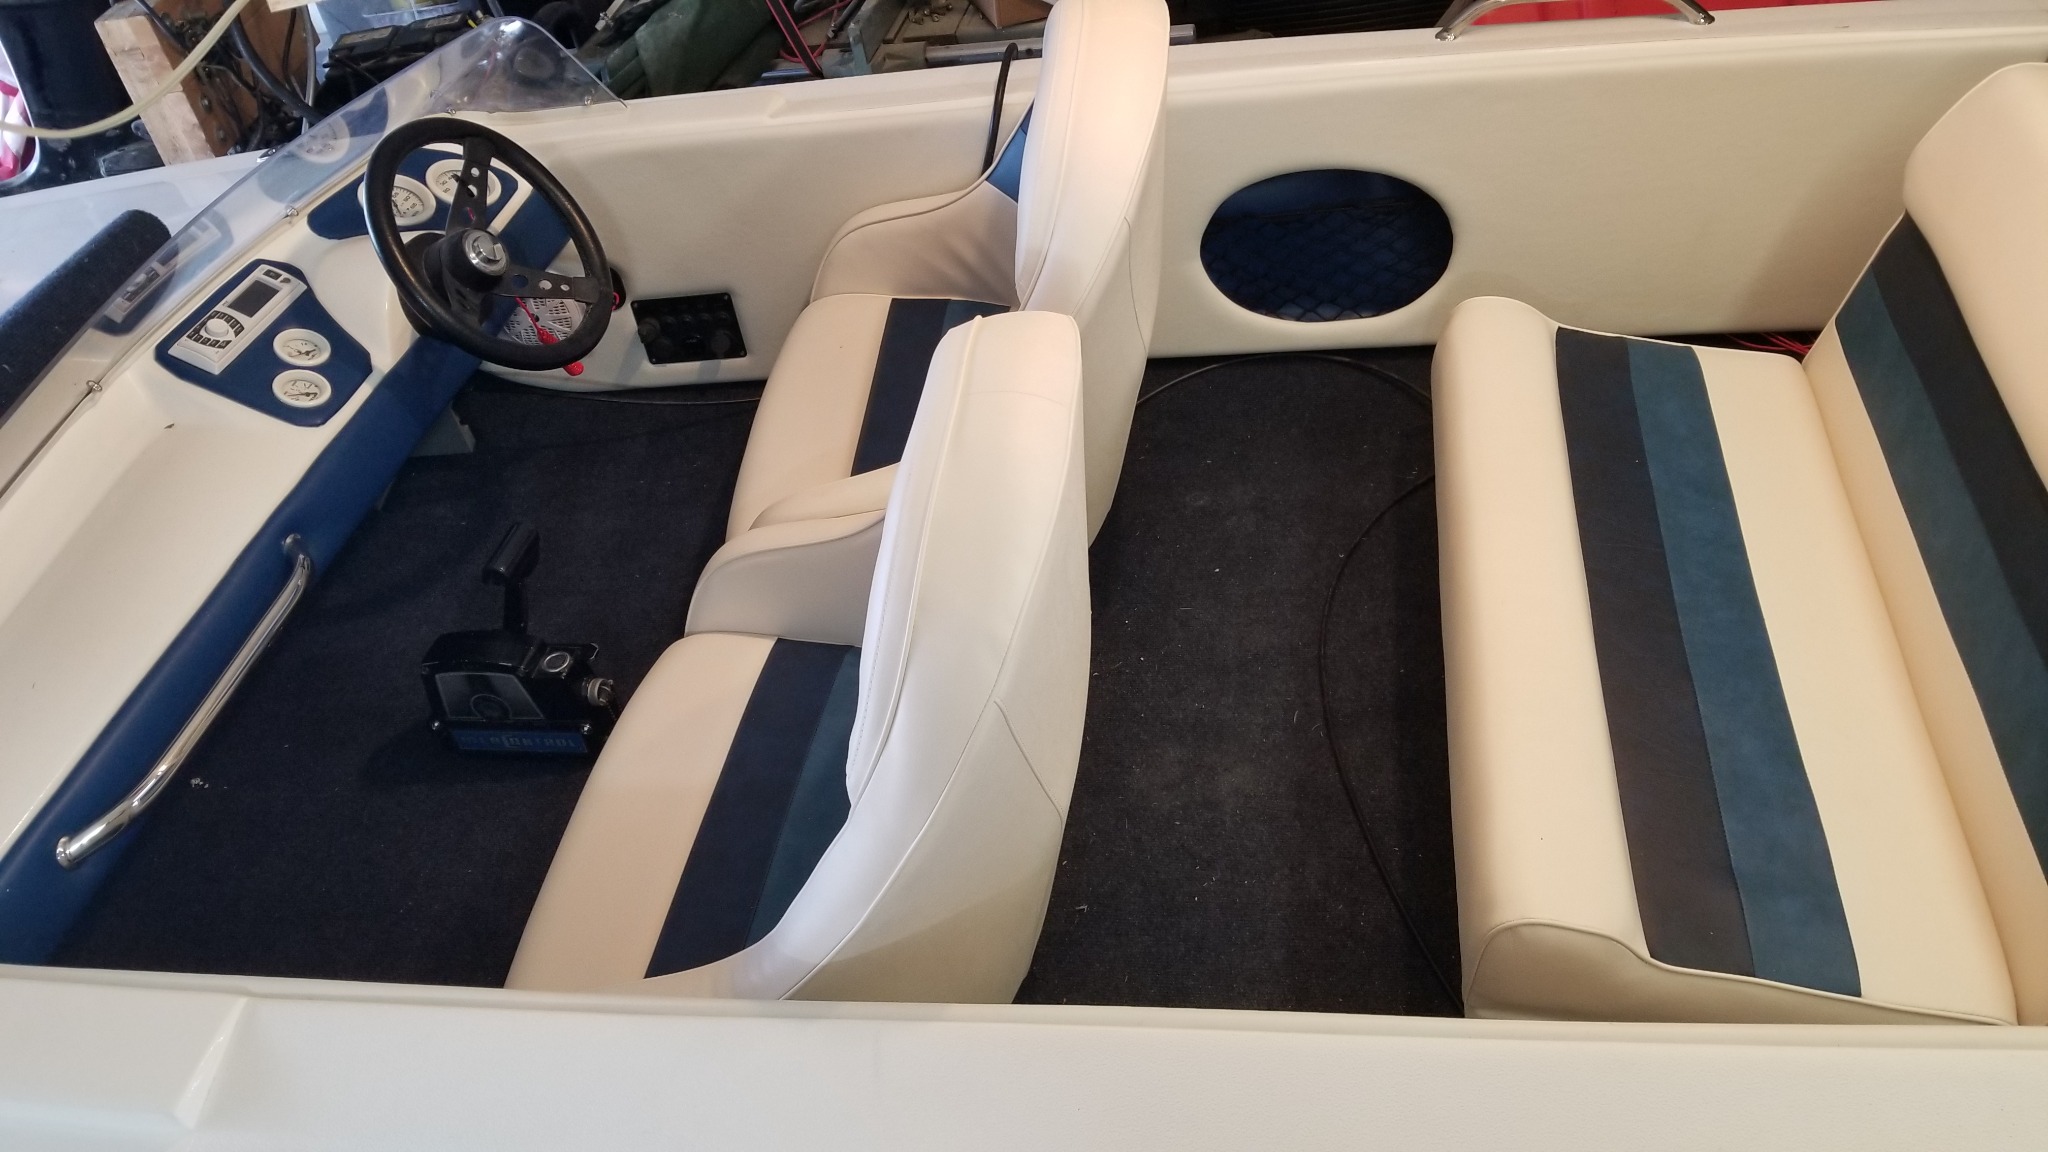
The rear seat will be removable in 2 stages. First I would be able to remove the seat back with 4 stainless latches. The seat base, I am still playing with the idea of using a couple of bimini hardware pieces to keep it in place and be able to remove with the pull pins. Still playing with the wiring. I would say it is about 90% done. Only a few more connections to make and ziptie them all out of the way. Sometime this next week I plan on hooking up the outboard, plugging in the harness while still on the stand, to double check all the wiring is correct including trying to figure out if the neutral safety switch and the safety cut off lanyard is hooked up and operating properly.

With that said, last few items to wrap up will be moving the front seats back a few inches, (Still considering ordering some adjustable seat mounts to be able to slide them into a comfortable position.) installing the carpet sealing the outboard mounting holes in the transom and mounting the outboard. Well I guess I am forgetting about the trailer refinishing project. This will most likely come prior to mounting the motor.

I have to work a few days on 3rd shift to do some training with a new employee so this is going to be a rough week. I will post some more pictures as I have something new to share.

Please Log in or Create an account to join the conversation.

restoration project make/mode/year unknown 1 year 8 months ago #147854

  • Fatlenny
  • Fatlenny's Avatar Topic Author
  • Offline
  • Senior Boarder
  • Senior Boarder
  • Posts: 241
  • Karma: 3
  • Thank you received: 17
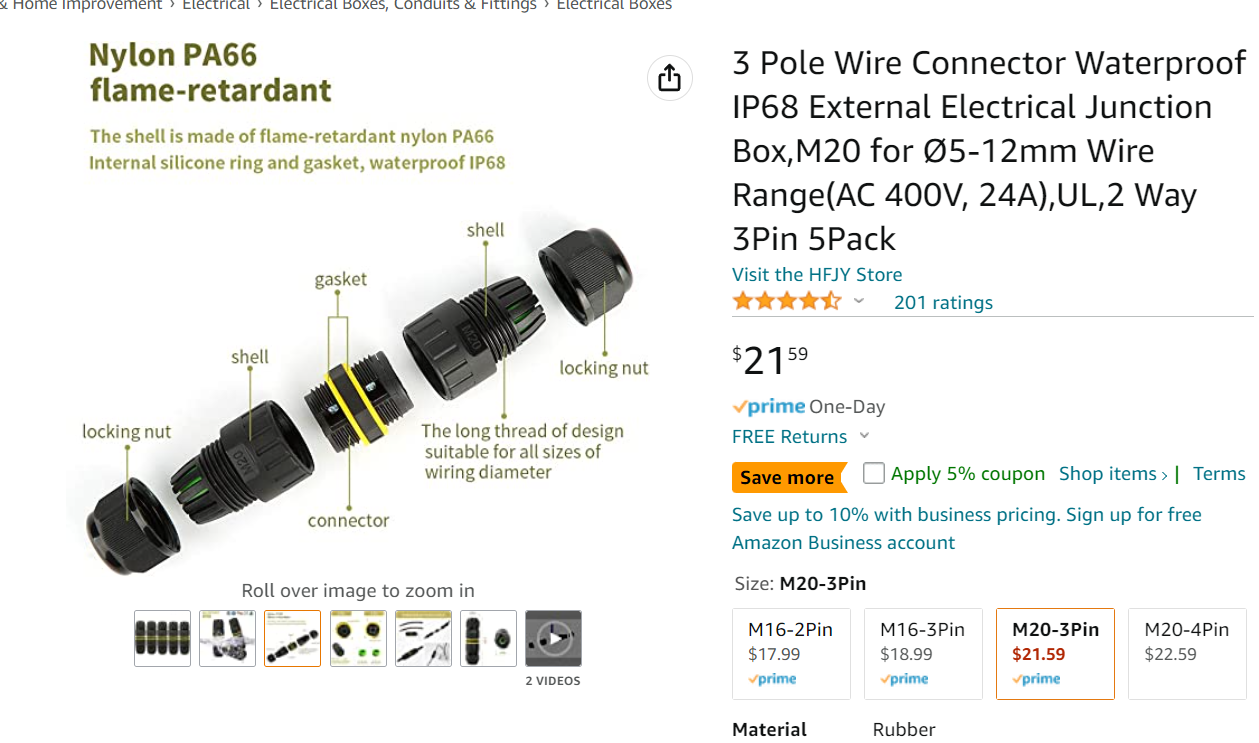
I finished up most of the wiring that was needed today. All I have left is to connect the neutral safety switch to the control, wire in the tilt trim switch, and do a wire repair on the harness that is attached to the trim motor. I am looking for a little bit of help here. The marina that the PO of this outboard just cut wires when removing the outboard to replace it. The trim motor wire harness is cut right at the transom. I was able to check everything by connecting all the wires to a junction block on my motor stand but this junction block will not work on the boat as where the cut is, it is not long enough to reach up under the cap of the boat at the transom. These 3 wires look like they are 12 gauge maybe better. I assume these could draw almost 30 amps. I am looking at something like this and wonder if it would work for an inline splice and if it would handle the amps this trim motor would be drawing. Any advise here would be greatly appreciated.

Attachments:

Please Log in or Create an account to join the conversation.

restoration project make/mode/year unknown 1 year 8 months ago #147868

  • Fatlenny
  • Fatlenny's Avatar Topic Author
  • Offline
  • Senior Boarder
  • Senior Boarder
  • Posts: 241
  • Karma: 3
  • Thank you received: 17
HAPPY EASTER EVERYONE!

As for the previous post, I am just going to solder the 3 wires and heat shrink. I was really hoping to find some kind of plug I could just wire in and call it a day.

Got the carpet cut out and laid out today, I planned on making it just snap into place making it easy to remove to clean and dry as needed, but I dont care for how much it moves around and slips out of place. I guess I will just glue it down like I originally had planned.

I got the Hot Foot mounted today along with the shift control. I will finish the wiring for the neutral safety switch and the tilt trim switches over the next couple days. Then pull all the hardware out that I have screwed into the floor of the boat for the seats, hot foot and controls to apply sealant and then remount them all permanently. Then on to gluing the carpet down. May even see about tackling buffing the paint and applying the decals before I pull it back off the trailer. The weather is getting too nice to not have the outboard on it and ready for a shake down run. Got to keep going.

Attachments:

Please Log in or Create an account to join the conversation.

restoration project make/mode/year unknown 1 year 8 months ago #147872

  • Fatlenny
  • Fatlenny's Avatar Topic Author
  • Offline
  • Senior Boarder
  • Senior Boarder
  • Posts: 241
  • Karma: 3
  • Thank you received: 17
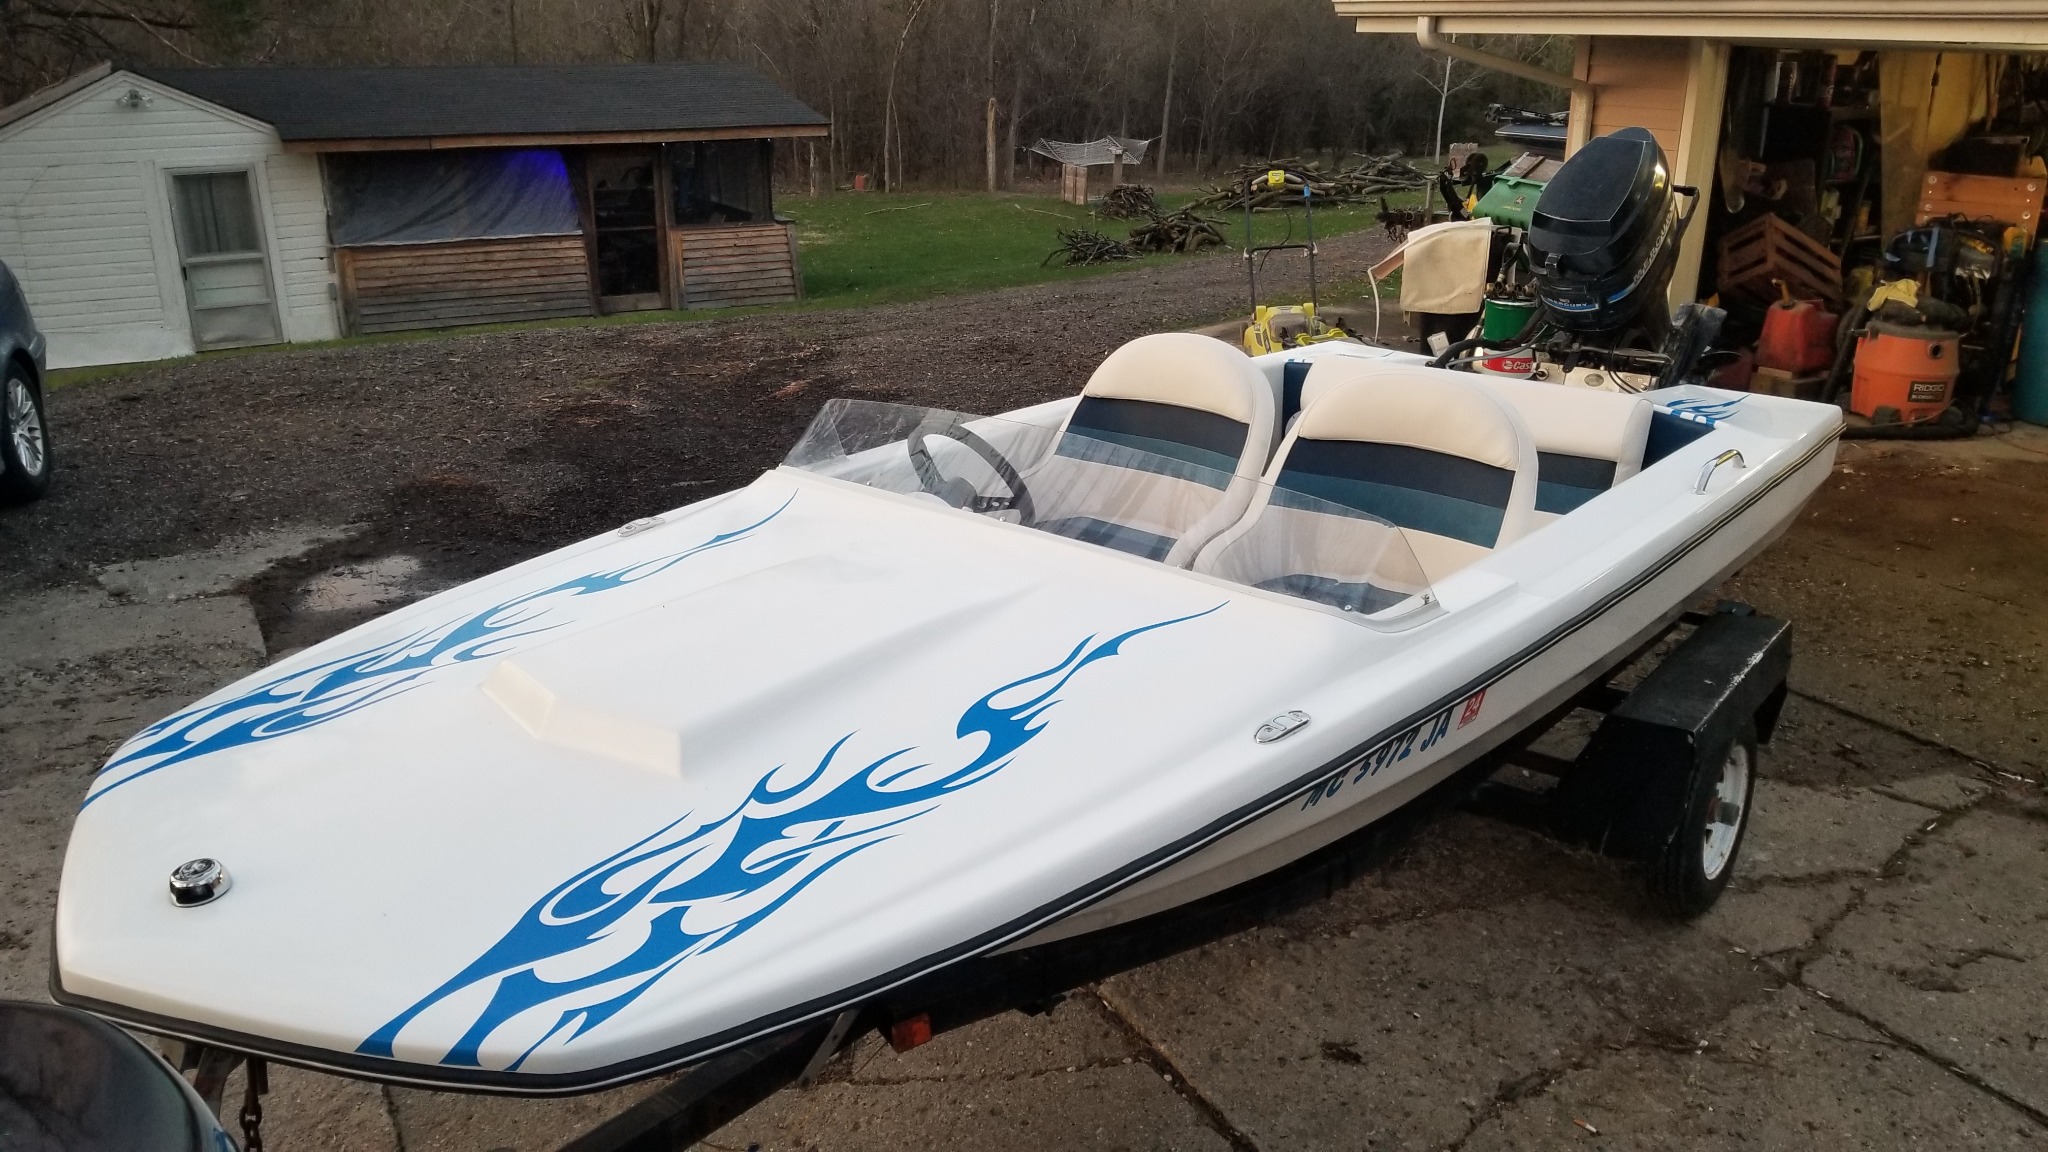
Well Things never go as planned. The weather has been TOO NICE. I just couldnt take it any longer. The trailer can wait! I had my son in law stop by yesterday and help mount the outboard. I fought with 3 of the 4 stainless steel bolts galling up on me installing them. I gave up for the night and moved the boat back into the garage and then scratched the hull against a patio umbrella that was laying on a table. I yelled, I cried, I almost started throwing things, but calmed down and ordered a bit of paint I guess I will have to keep around for touch ups.

Today I replaced the messed up bolts mounting the motor and I finished up the wiring on the neutral safety switch and the tilt and trim. Then continued to hook up everything to get a test fire in. Texted my son in law again to see if he wanted to go out on a shake down run with me today and he was down. I continued to get her ready to fire her up for the first time this year. She ran great last year. I had some junk I had to clean out of the carburetors last year but after that she ran great on muffs. It was such a different story in the barrel of water. It was idling rough and wouldn't stay running while in gear. Drained the carb bowls and some junk came out again. Now the floats were sticking. overflowing the bowls. I pulled the bowls off and everything looked good, reassembled and everything was fine. Adjusted the timing a bit up at Idle. Now she goes into gear just fine. Everything works as it should, even tested the lanyard safety switch and the neutral safety switch.

The outboard needs a good hard cleaning. There is a lot of mineral build up on it, but at this point I just want on the water. I can clean that up later.

Well at this point in the night we had only about a hour and a half left of daylight. So disappointed. The lake is a good 30 minutes away. Not going to get her wet today. But will try a cold start tomorrow, and If everything goes well I plan on leaving early morning to run her.

Attachments:

Please Log in or Create an account to join the conversation.

restoration project make/mode/year unknown 1 year 8 months ago #147873

  • Fatlenny
  • Fatlenny's Avatar Topic Author
  • Offline
  • Senior Boarder
  • Senior Boarder
  • Posts: 241
  • Karma: 3
  • Thank you received: 17
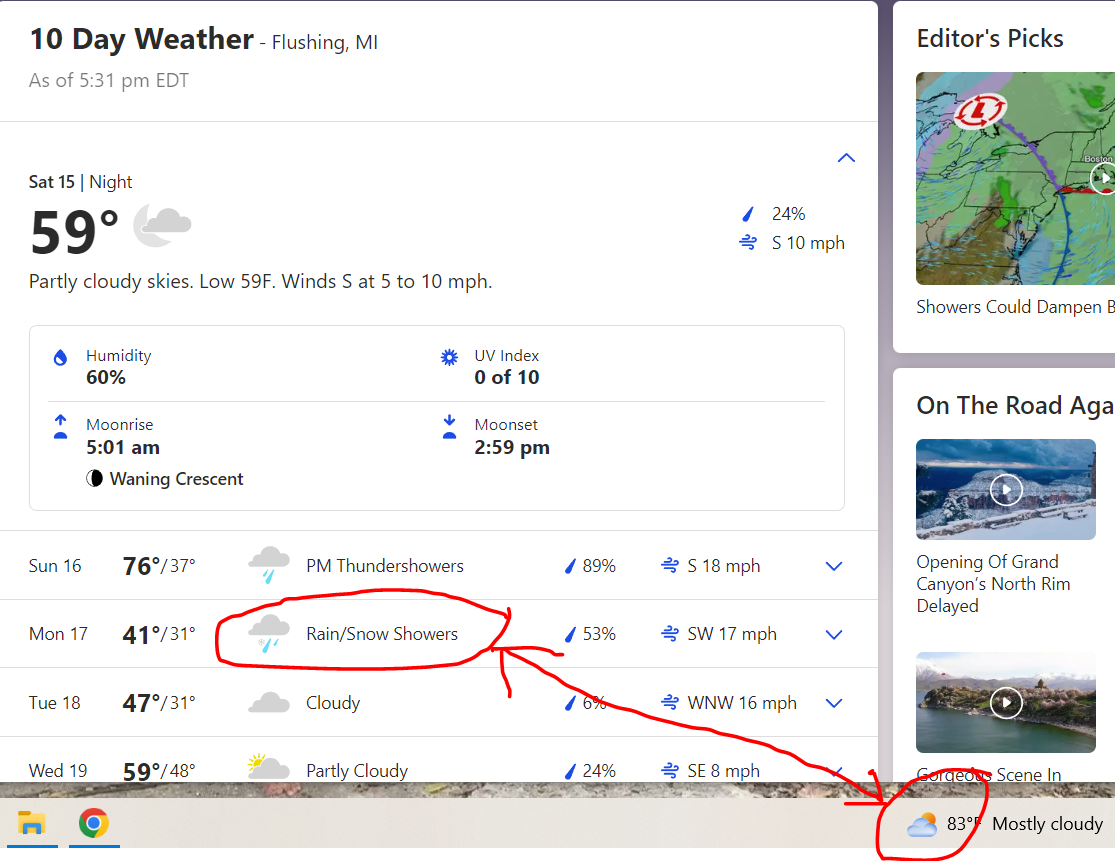
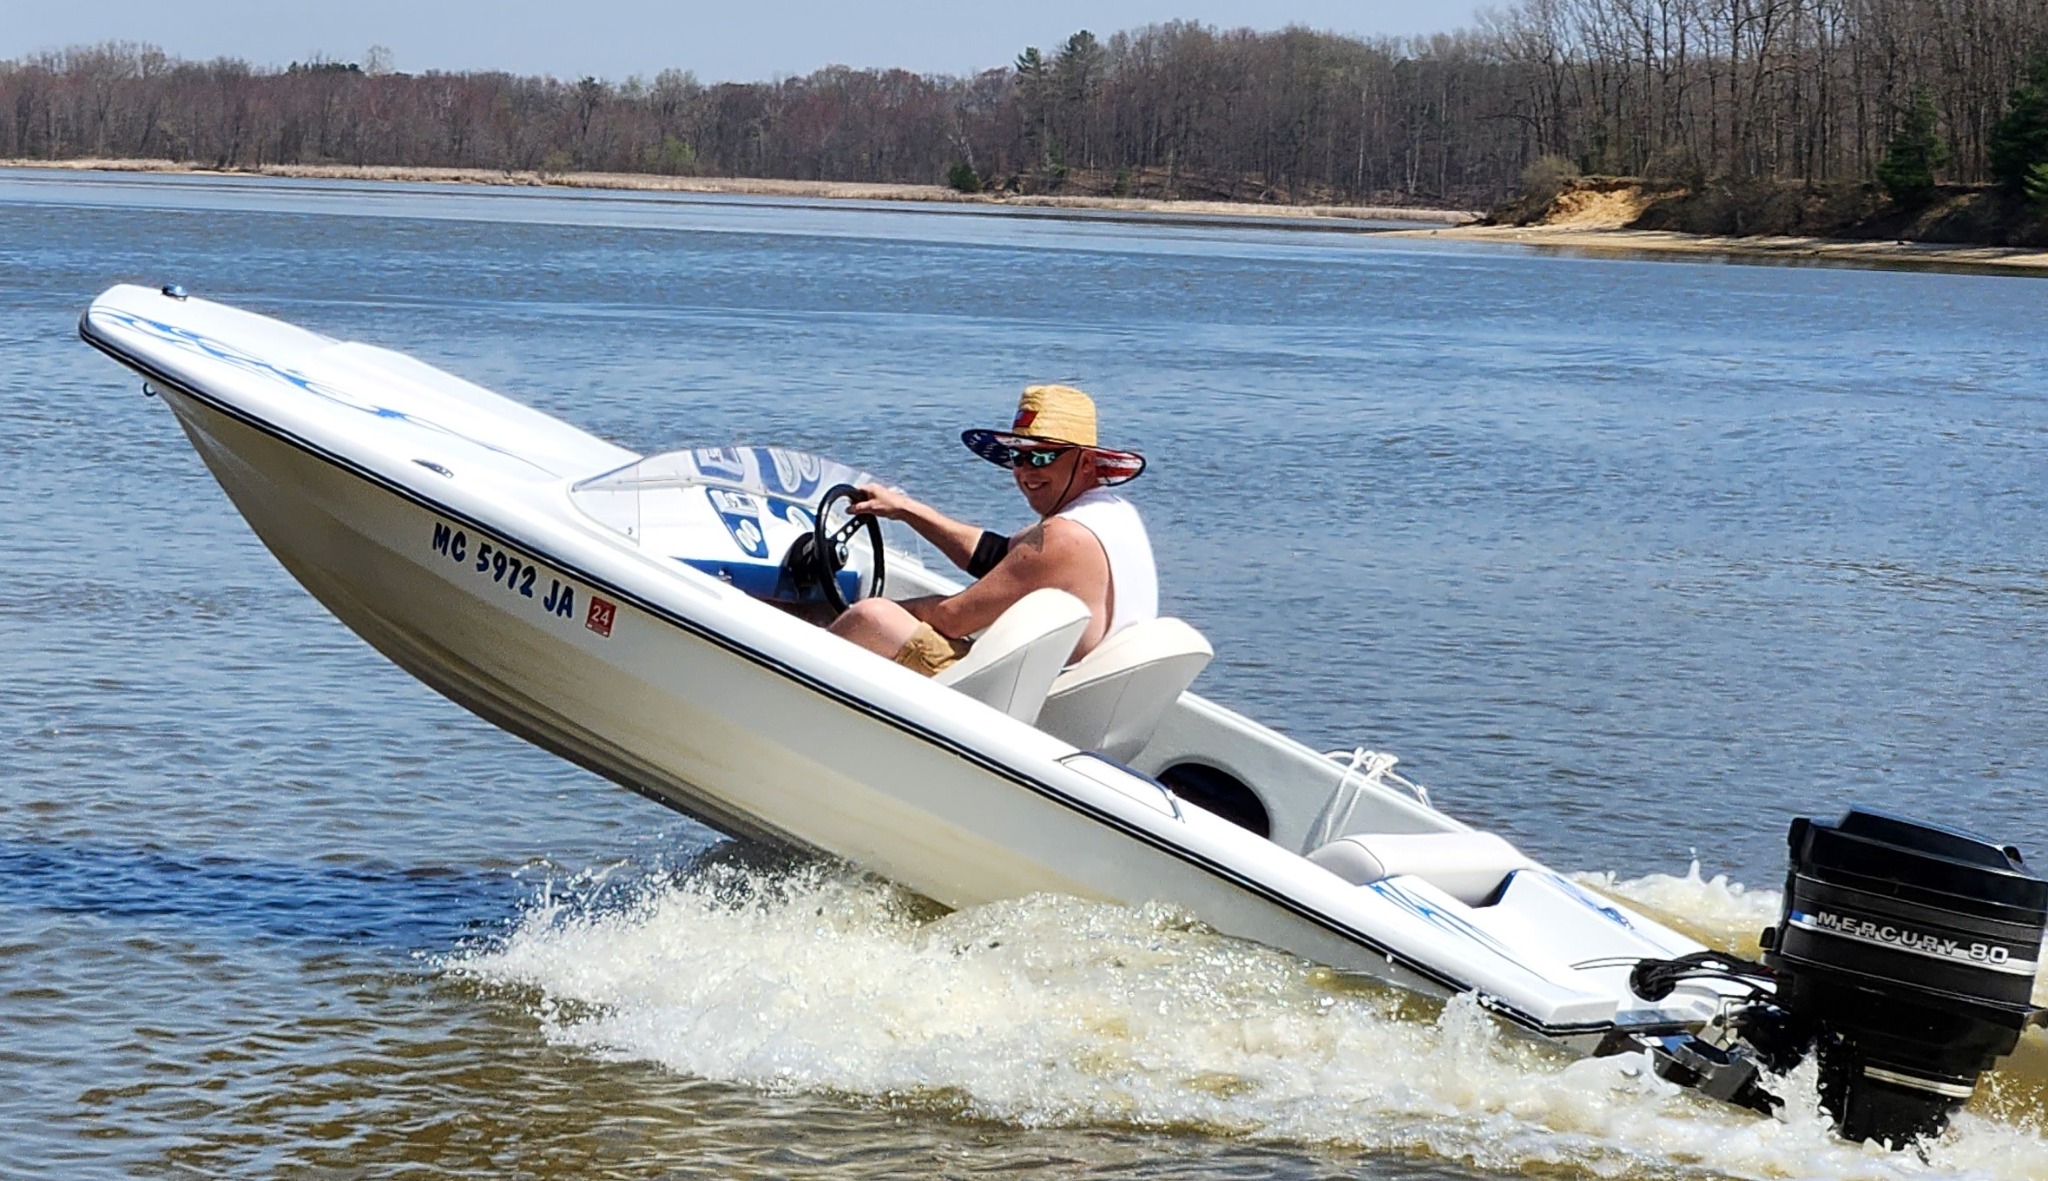
Had a blast out there today on the water. Hit top end of 42MPH according to the boats speedo. Forgot to start the GPS on my phone to get a more accurate top speed. There was virtually no wind so the reservoir was very smooth today, and its so early in the year that there was only a single other boat. The reservoir is still at the winter level, about 3 to 4 foot lower. They will be raising the water level over the next few weeks. Will have to get a tube to tow behind and start having some fun, but that wont be for a few more weeks. Well our early summer is almost over, it was fun while it lasted. 83°F now and will be snowing Monday.


Attachments:

Please Log in or Create an account to join the conversation.

restoration project make/mode/year unknown 1 year 8 months ago #147874

Awesome, congrats!

Bob
The following user(s) said Thank You: Fatlenny

Please Log in or Create an account to join the conversation.

restoration project make/mode/year unknown 1 year 8 months ago #147875

Cool holeshot pic! I was sorry to read your post from yesterday! We've all been there where you work real hard and are very careful with something and one bad day creates a blemish. Glad you were able to get out on the water today and enjoy!
The following user(s) said Thank You: Fatlenny

Please Log in or Create an account to join the conversation.

restoration project make/mode/year unknown 1 year 8 months ago #147876

The boat looks beautiful! Glad ya got out on the water and had fun.
The following user(s) said Thank You: Fatlenny

Please Log in or Create an account to join the conversation.

restoration project make/mode/year unknown 1 year 8 months ago #147877

  • 63 Sabre
  • 63 Sabre's Avatar
  • Offline
  • Contributing Member
  • Contributing Member
  • Posts: 4676
  • Karma: 147
  • Thank you received: 167
Looks like all the effort paid off in spades.
Lucky you were almost alone on the ramp otherwise you would have not gotten in the water. too many people holding you up asking questions.
Great job!
The following user(s) said Thank You: Fatlenny

Please Log in or Create an account to join the conversation.

restoration project make/mode/year unknown 1 year 7 months ago #147885

  • Fatlenny
  • Fatlenny's Avatar Topic Author
  • Offline
  • Senior Boarder
  • Senior Boarder
  • Posts: 241
  • Karma: 3
  • Thank you received: 17
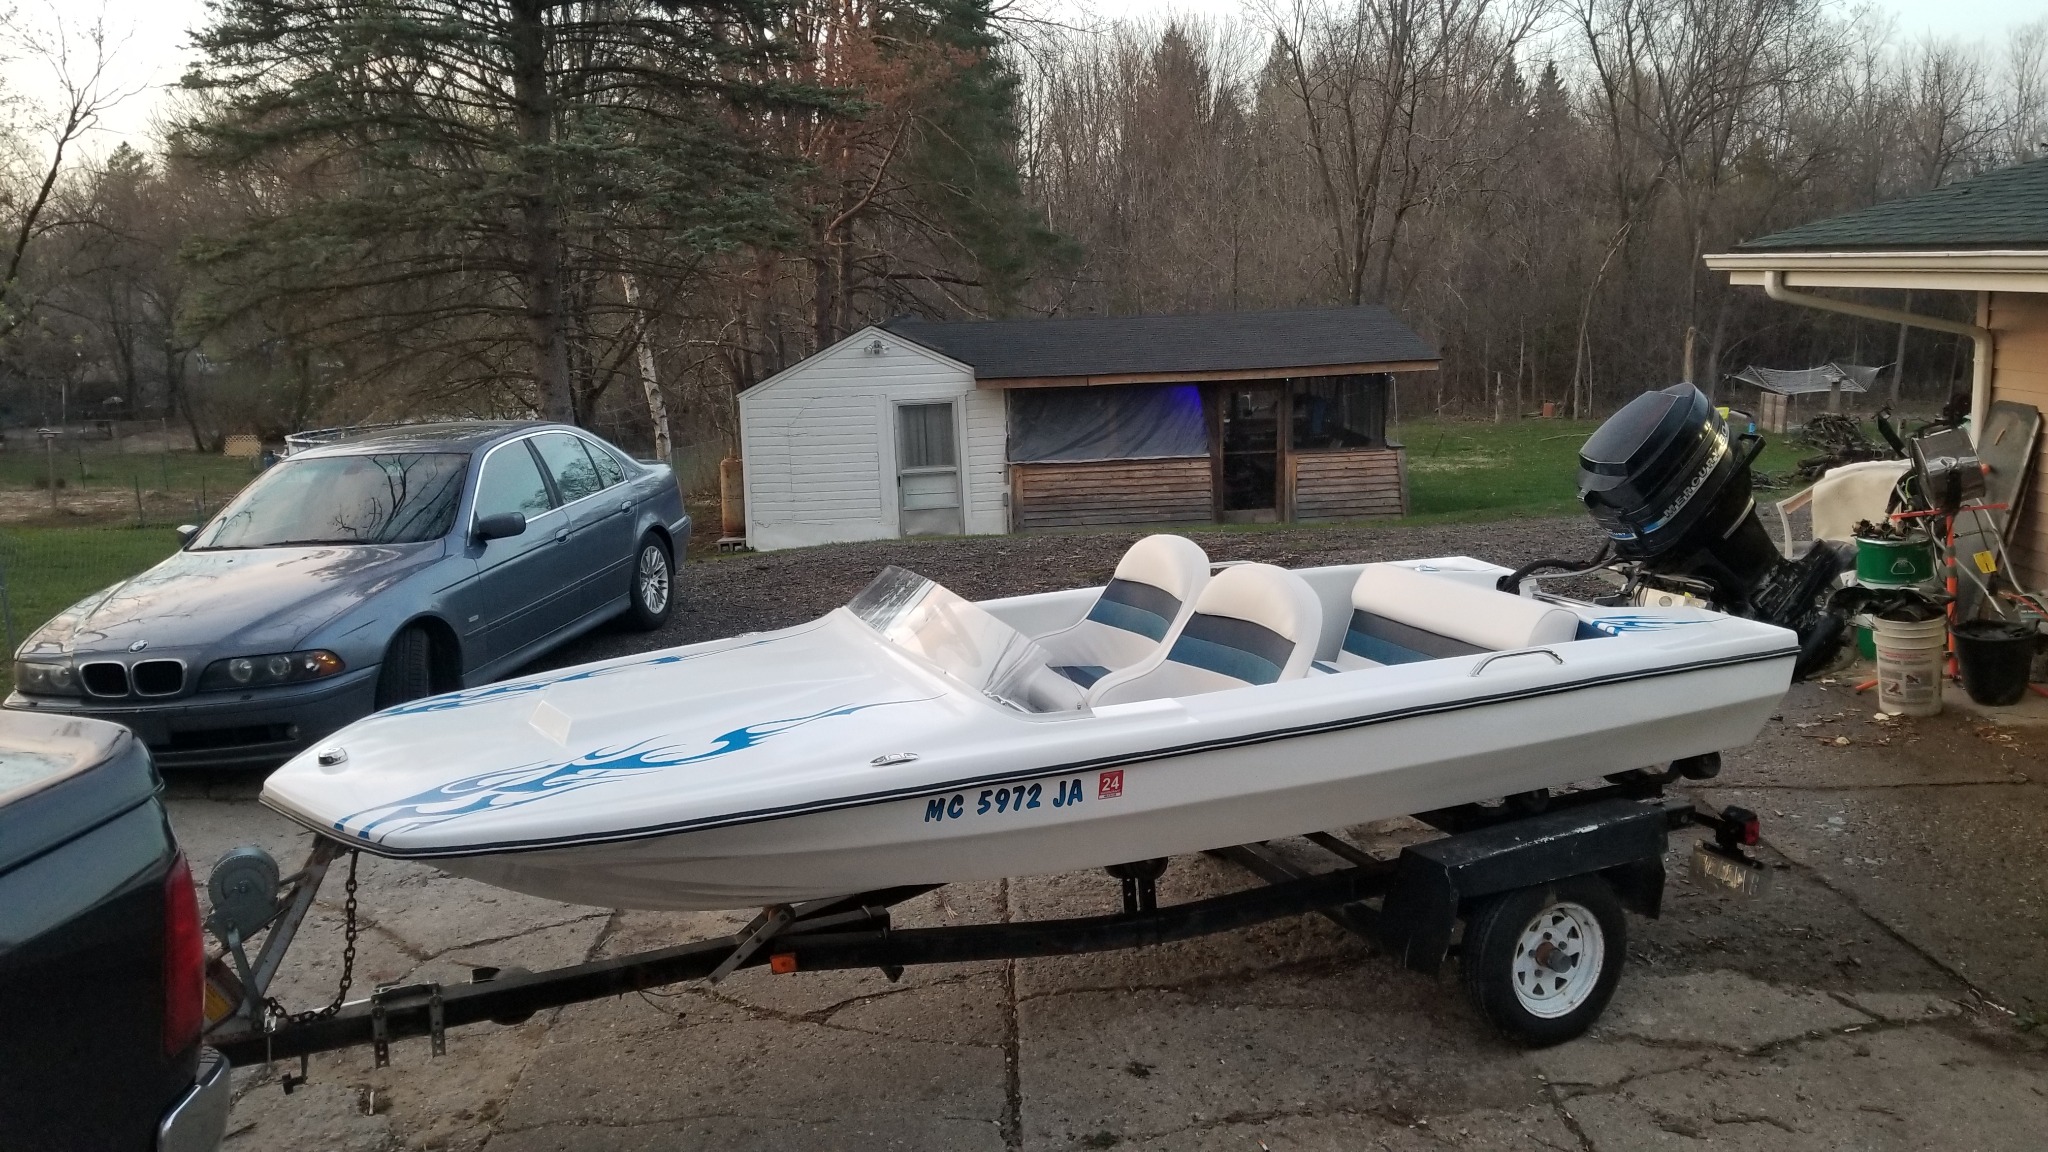
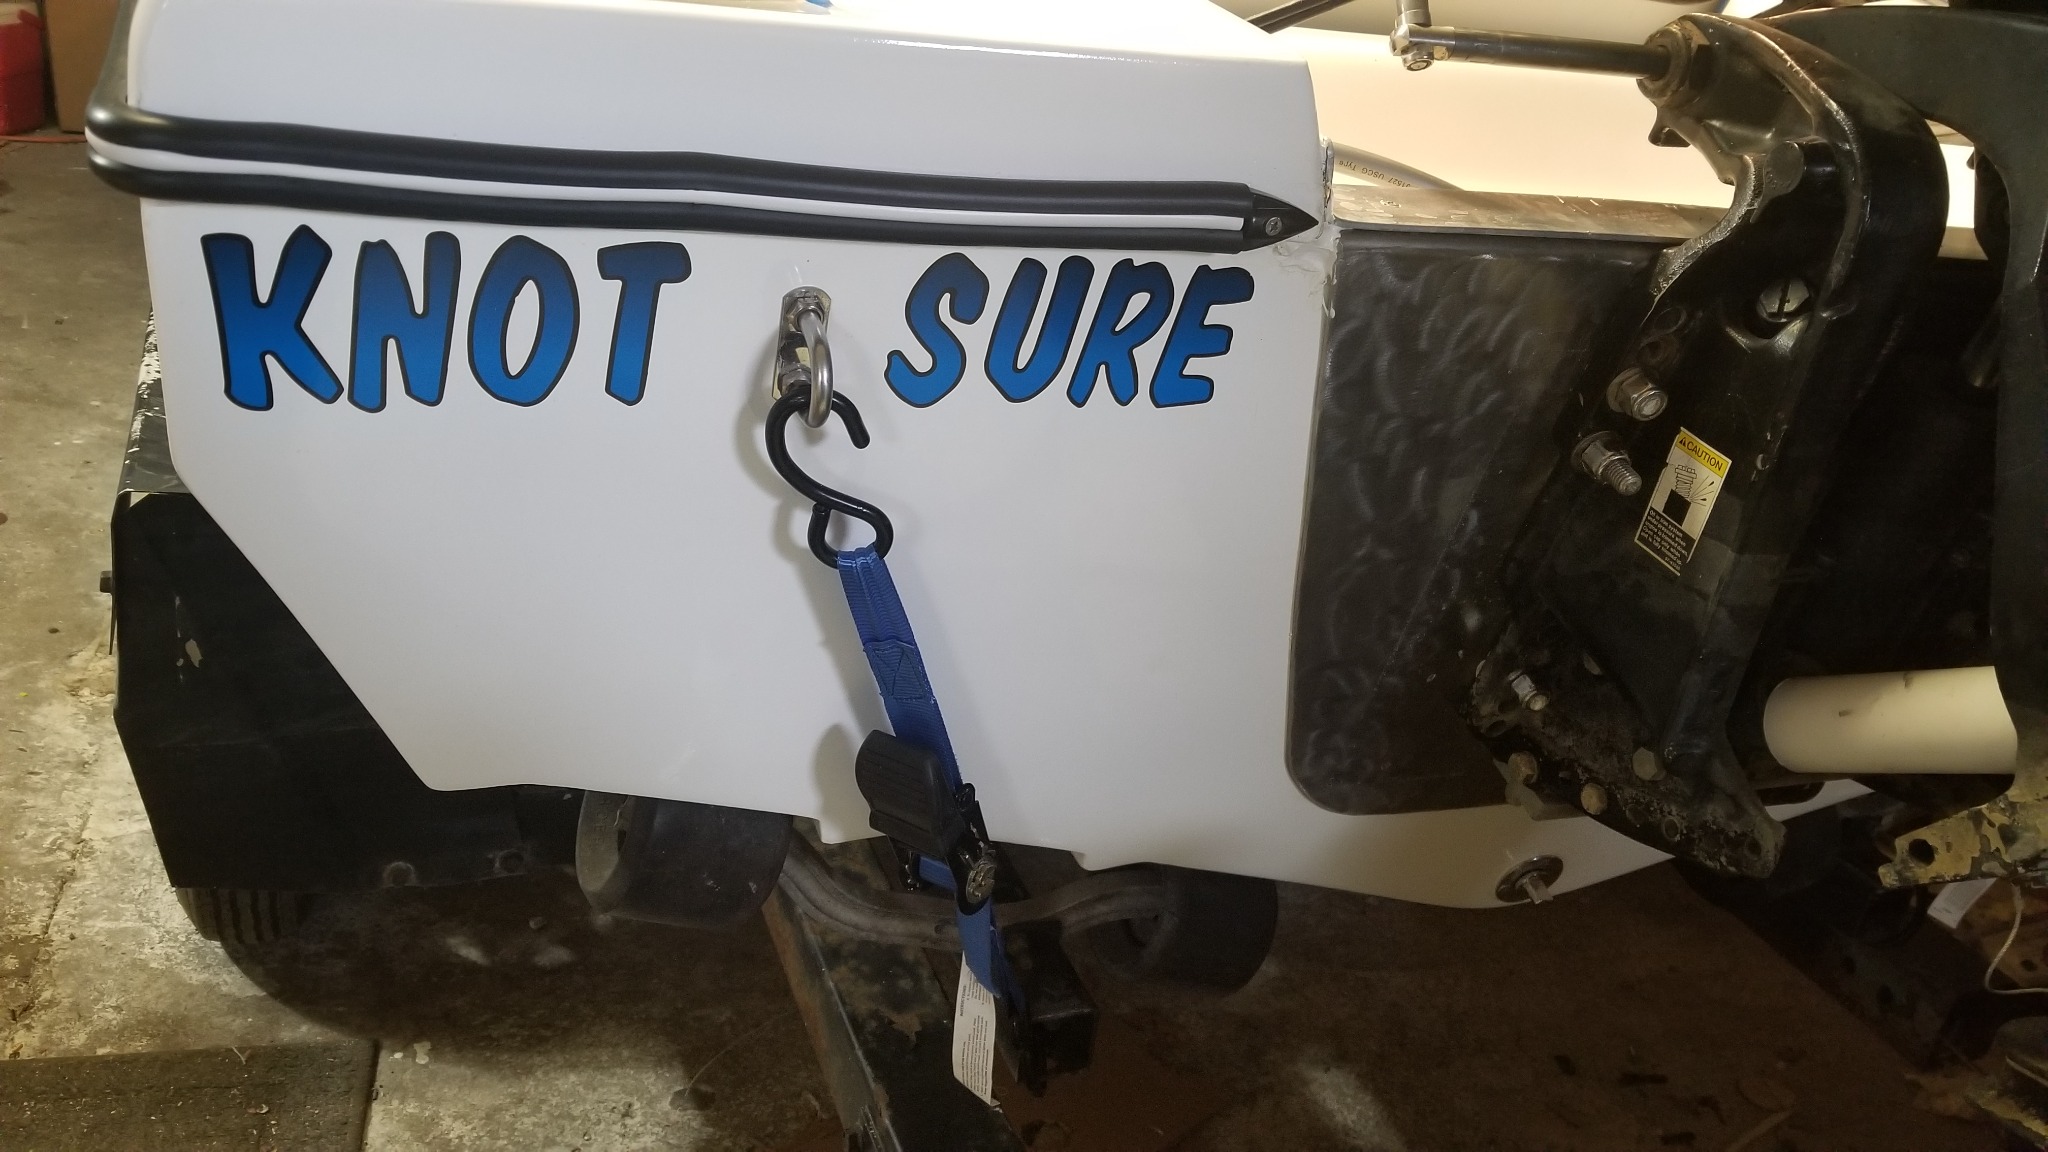
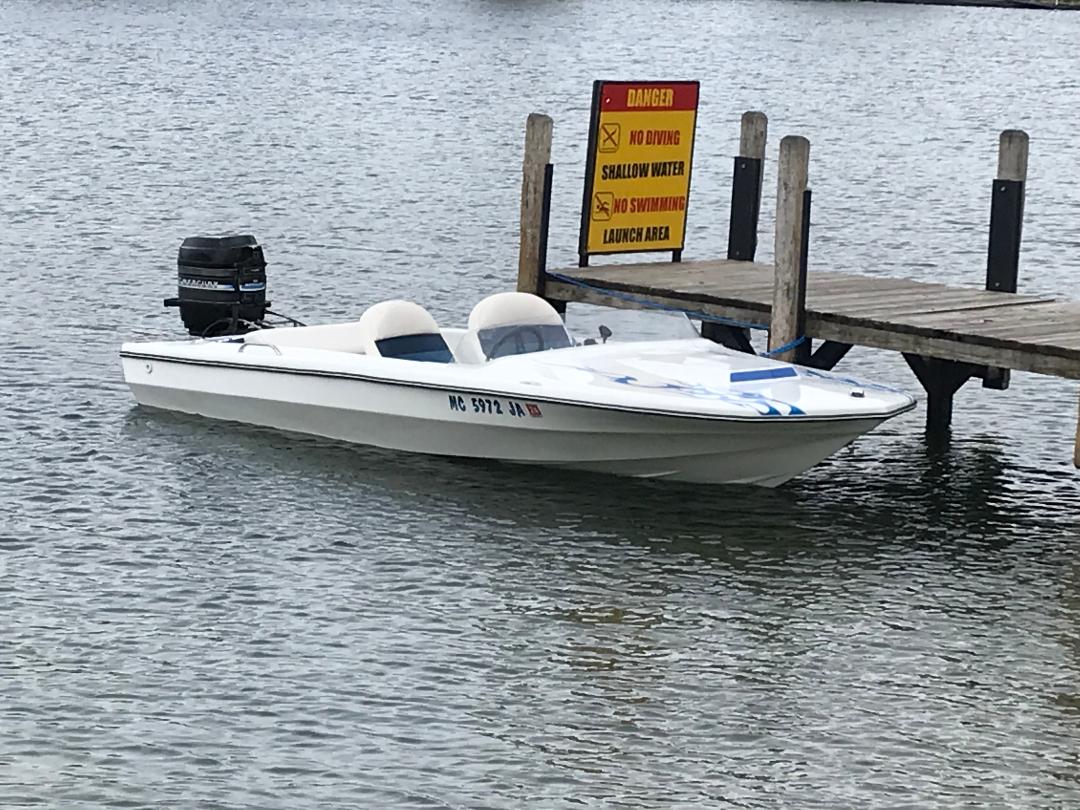
We went to lake Fenton today even though it was quite cool out today. only about 47. One other person at the ramp, loading their competition bass boat. They was doing some shake down runs themselves. One guy came over to the prep area and said hello. I giggled inside as I knew that he was going to ask a question that I could only answer by pointing at the name of the boat on the transom. He complimented my boat and then asked "What year is it?" I pointed at the transom and we both laughed. He then commented that I must get that question all the time. I said I hadn't yet. That this was the second time out, but I'm sure I will get plenty of opportunities to point out her name in the near future. (The crooked "K" really is bugging me. Going to pull that off and put a new one on hopefully straighter)


I had removed the 10" jack plate because I didn't like how low she sat in the water at the stern, and moved the fuel tank up to the front. I am happy with how she sits now in the water. I wouldn't worry about a tuber getting back in the boat out on the water and swamping the boat. I keep messing up figuring out the speed on this boat. I did use the GPS (Top speed 38mph GPS) but don't know if I lost speed with this set up or not as I only looked at the GPS speed on my phone and didn't compare it to the dash mounted speedo. I am looking at options of a 4" jack plate so I can still have the adjustability to tune her a bit more without having to hang the motor and move it a bolt hole at a time. I cant imagine that a 4" set back will get me anywhere near how low she sat before.

Attachments:

Please Log in or Create an account to join the conversation.

restoration project make/mode/year unknown 1 year 7 months ago #147886

Congrats!
Looks purty for sure Fatlenny.
The Merc was the finishing touch.
The following user(s) said Thank You: Fatlenny

Please Log in or Create an account to join the conversation.

Time to create page: 0.344 seconds

Donate

Please consider supporting our efforts.

Glassified Ads

Mercury outboard
( / Engines)

noimage
11-03-2024

Classic Mercury Outboard Motors
( / Engines)

Classic Mercury Outboard Motors
10-18-2024

1958 Skagit Sportster
( / Boats)

1958 Skagit Sportster
09-25-2024

FG Login

FiberGoogle

Who's Online

We have 6638 guests and one member online