|
Welcome,
Guest
|
TOPIC: 1971 Glasspar Newport Cruiser - Rejuvenation
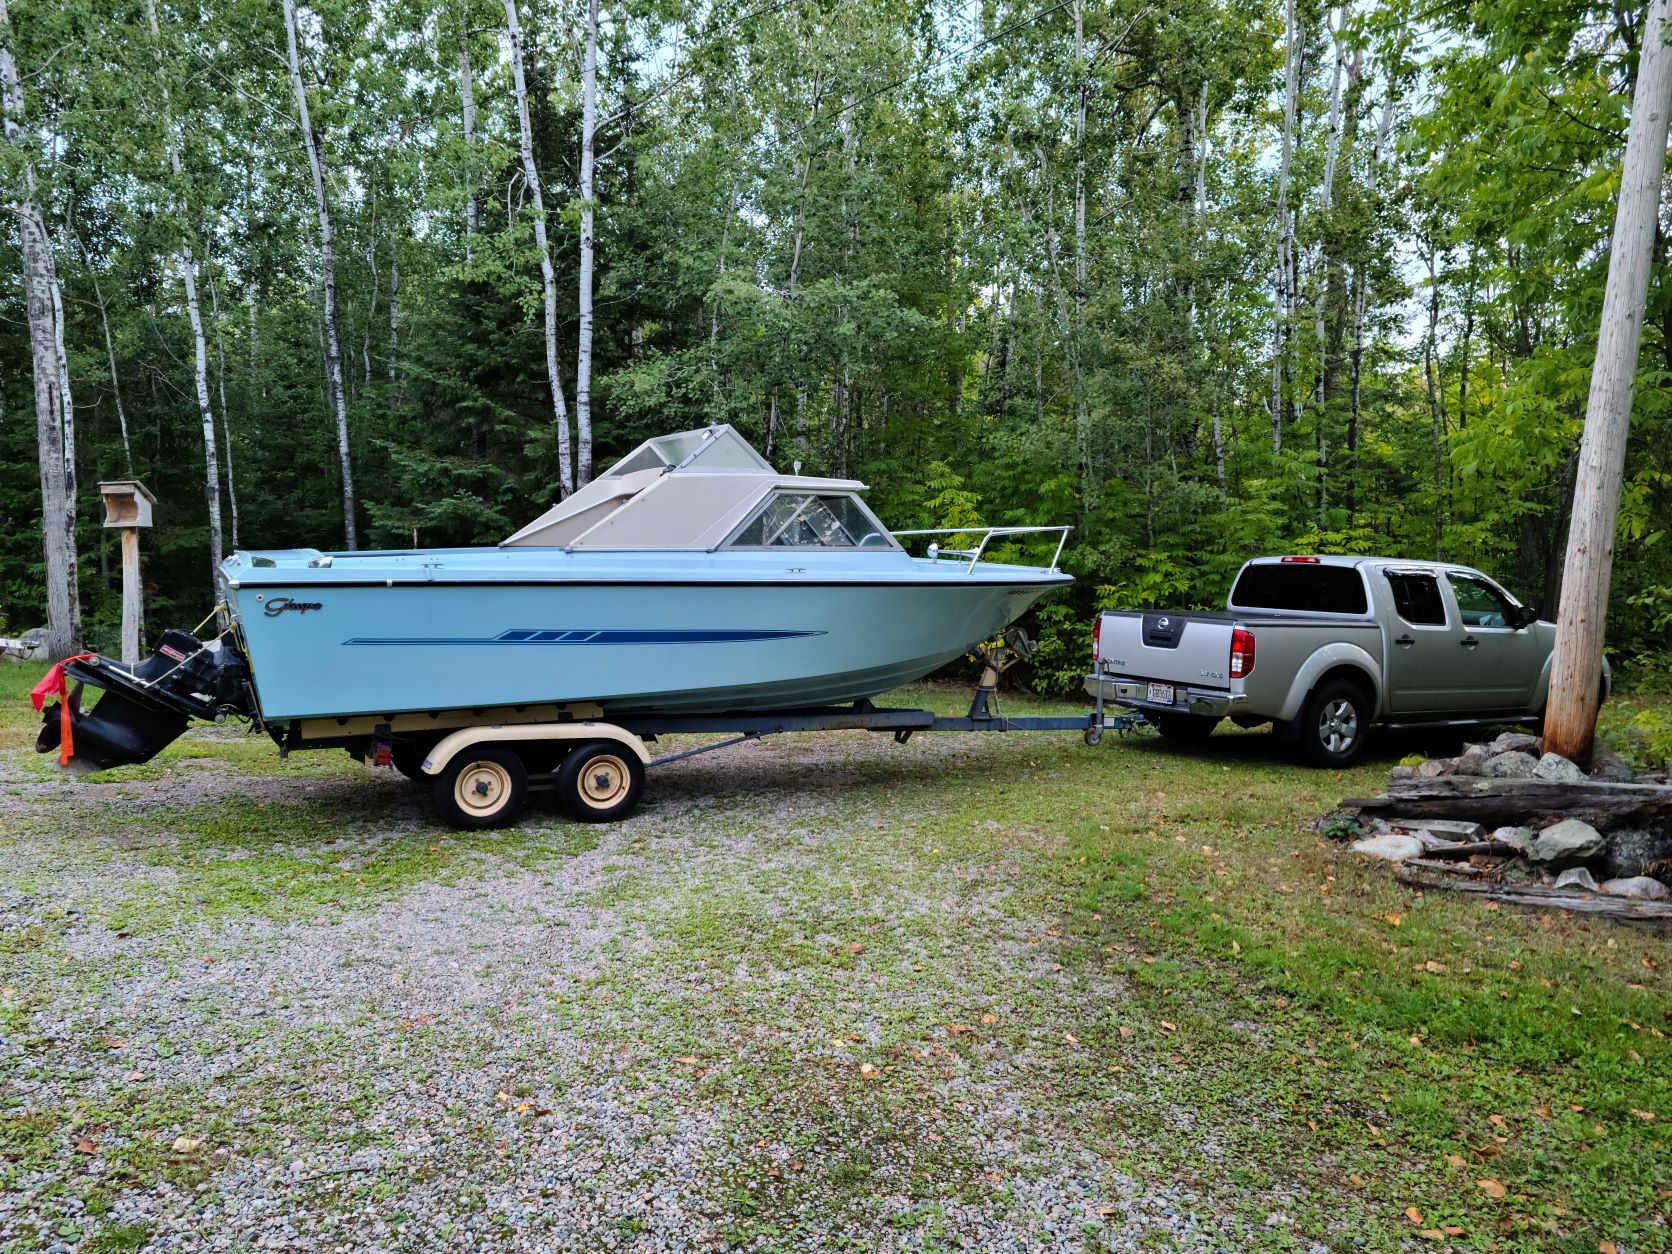
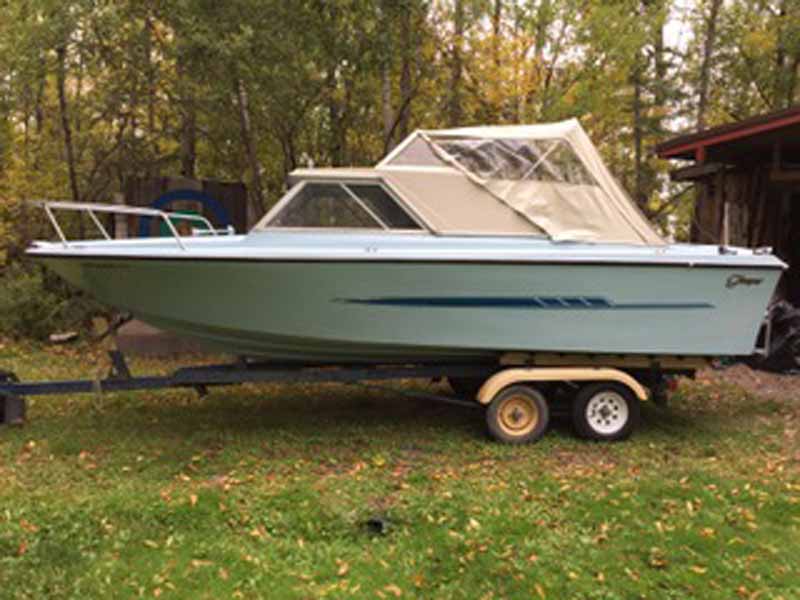
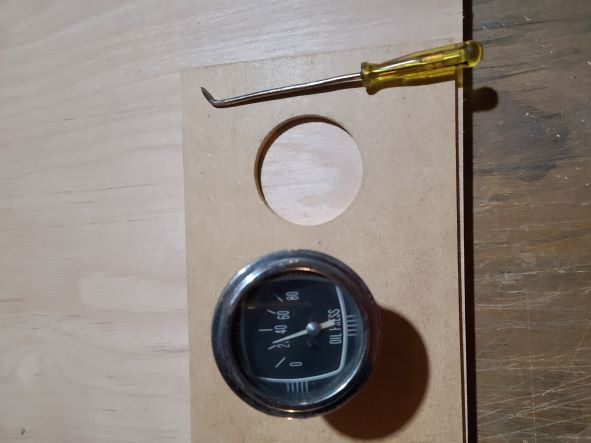
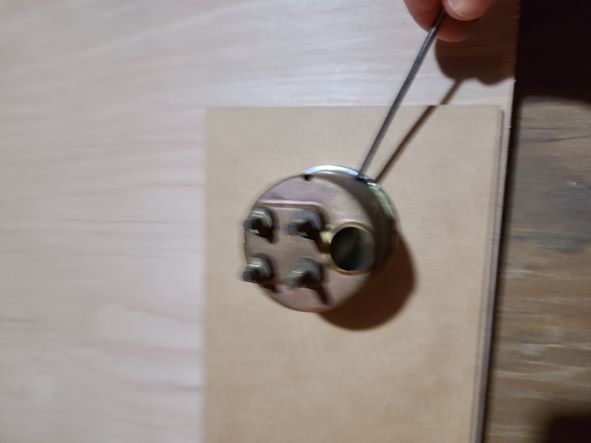
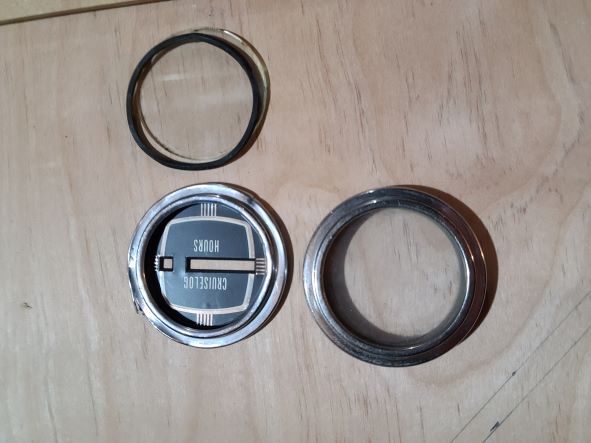
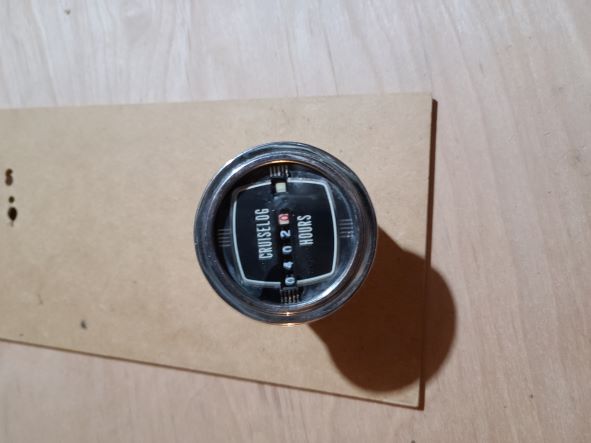
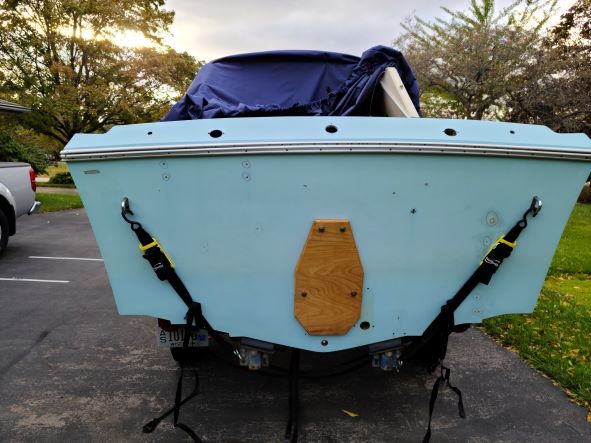
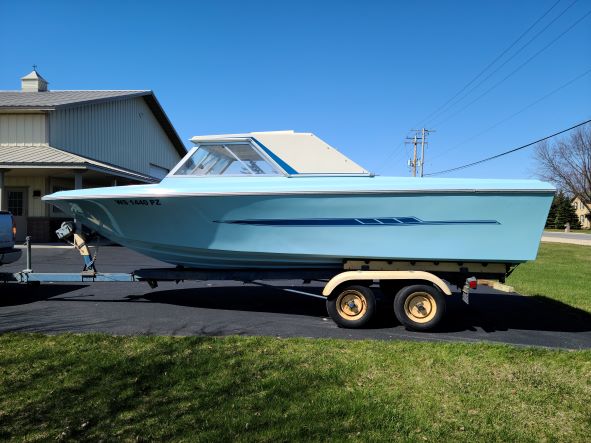
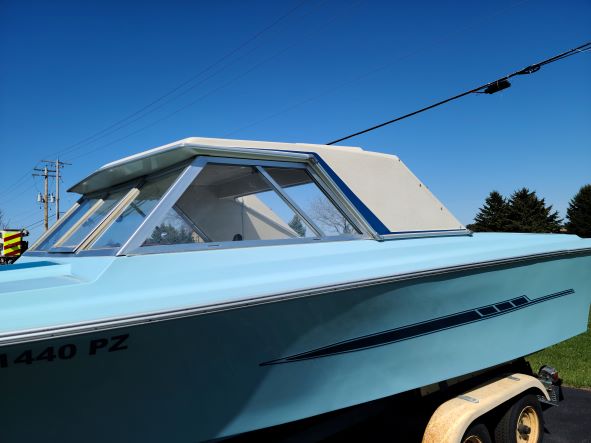
1971 Glasspar Newport Cruiser - Rejuvenation 4 years 3 months ago #145852
|
Please Log in or Create an account to join the conversation. |


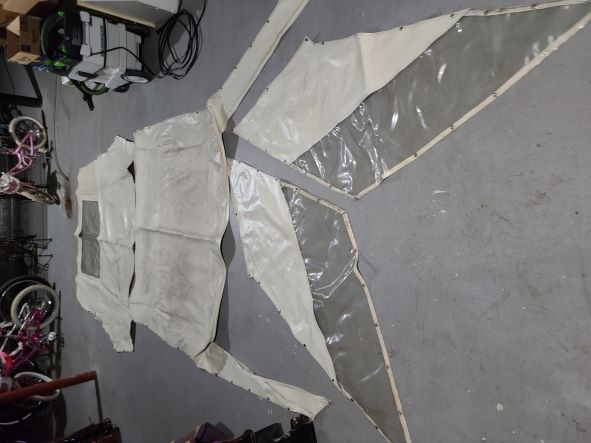
1971 Glasspar Newport Cruiser - Rejuvenation 4 years 3 months ago #145853
|
Please Log in or Create an account to join the conversation. |


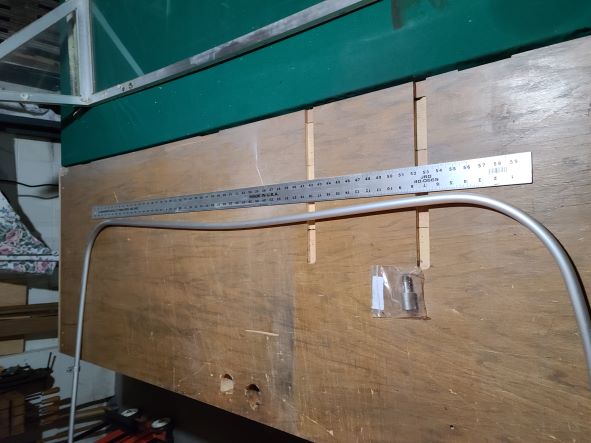
1971 Glasspar Newport Cruiser - Rejuvenation 4 years 3 months ago #145854
|
Please Log in or Create an account to join the conversation. |

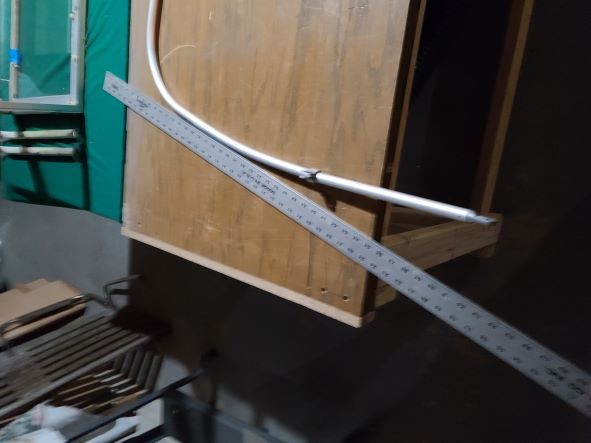
1971 Glasspar Newport Cruiser - Rejuvenation 4 years 3 months ago #145858
|
Please Log in or Create an account to join the conversation.
Website: NautilusRestorations.com
Mentor to the unenlightened! "Never allow logic to interfere with a boat purchase." - J. S. Hadley "Vintage quality beats new junk every time." - J. S. Hadley "Anything supposed to do two things does both of them half-assed." - J. S. Hadley "Success makes... |

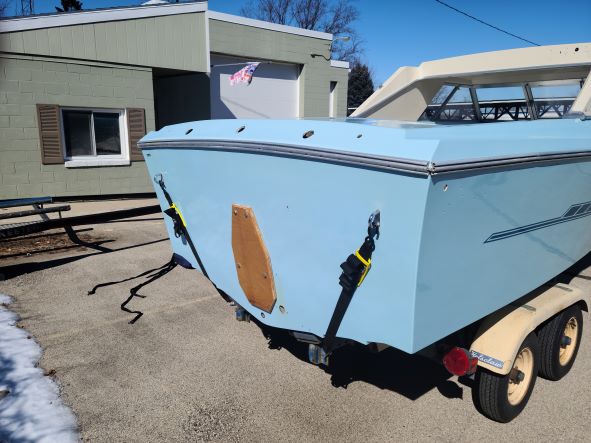
1971 Glasspar Newport Cruiser - Rejuvenation 4 years 3 months ago #145860
|
Please Log in or Create an account to join the conversation. |
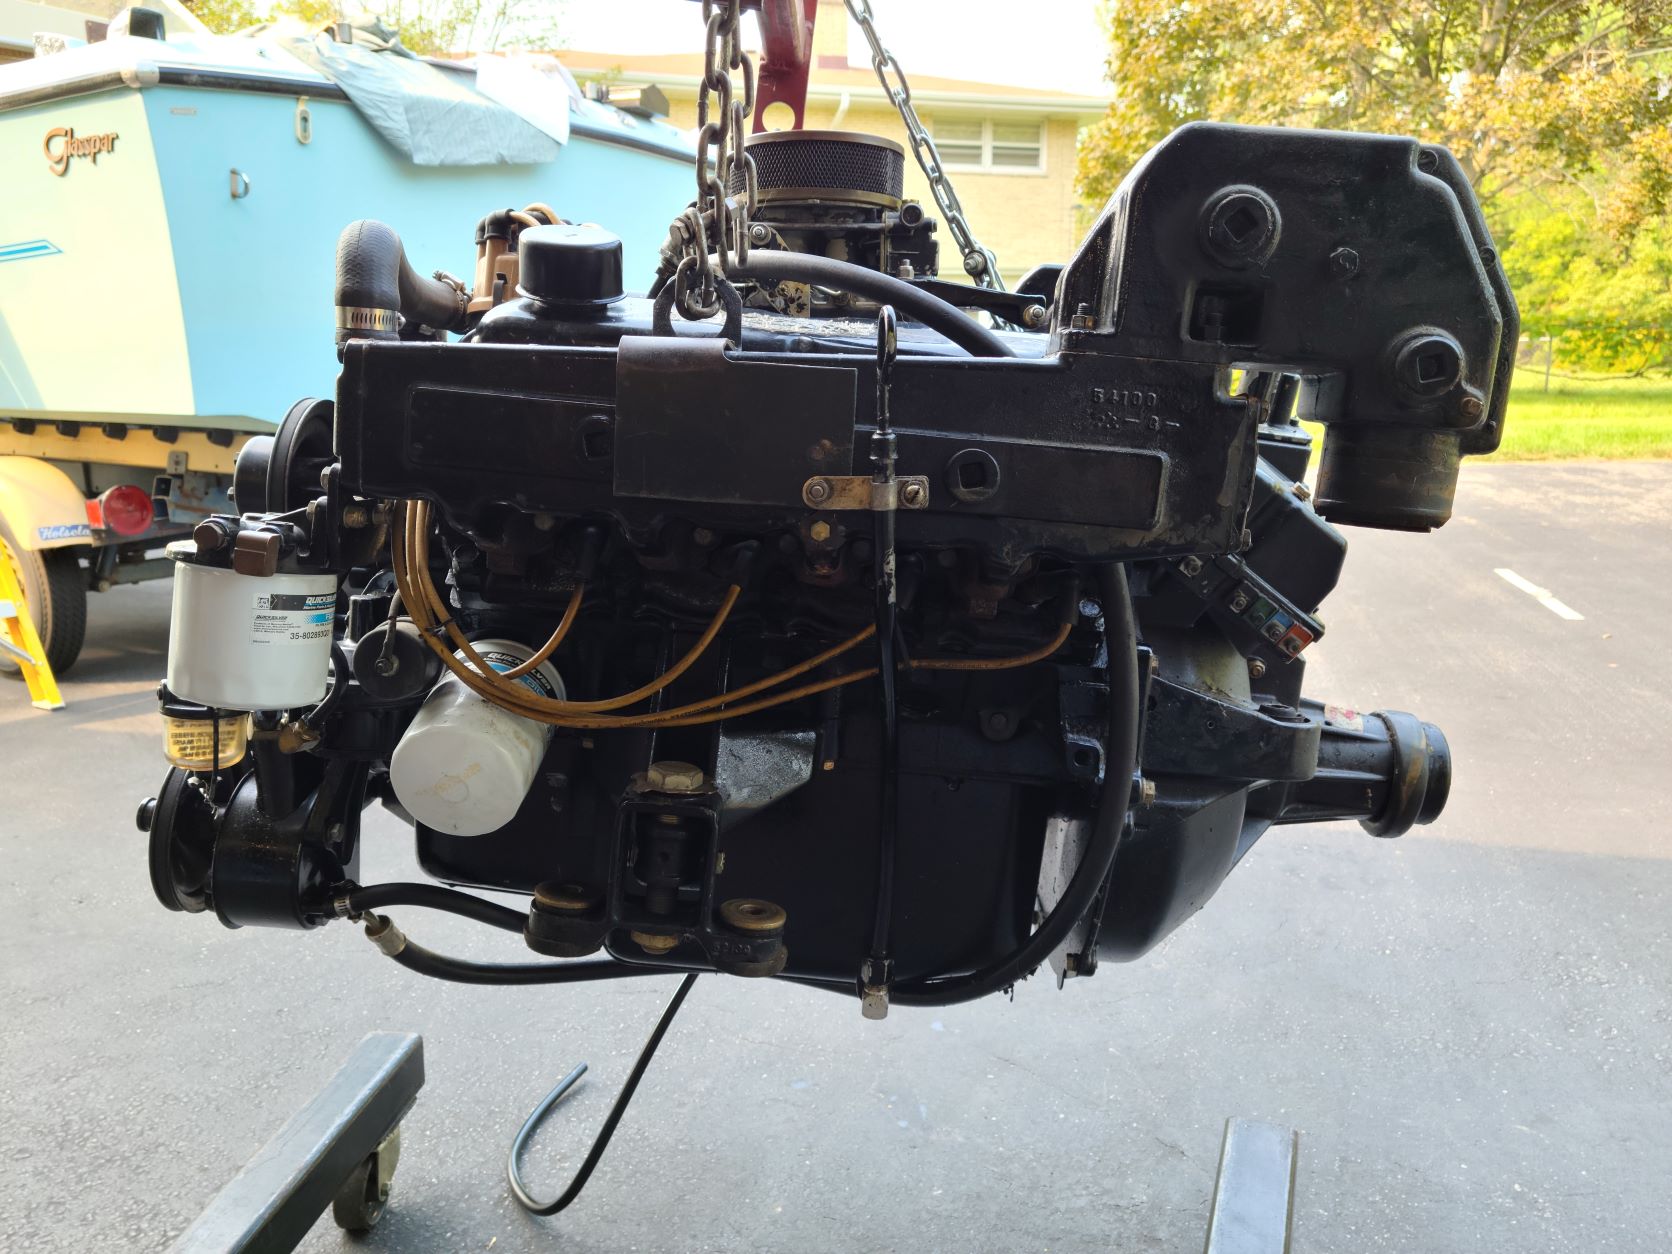
1971 Glasspar Newport Cruiser - Rejuvenation 4 years 2 months ago #146027
|
Please Log in or Create an account to join the conversation. |


1971 Glasspar Newport Cruiser - Rejuvenation 4 years 2 months ago #146029
|
Please Log in or Create an account to join the conversation.
Dr.Go!
|

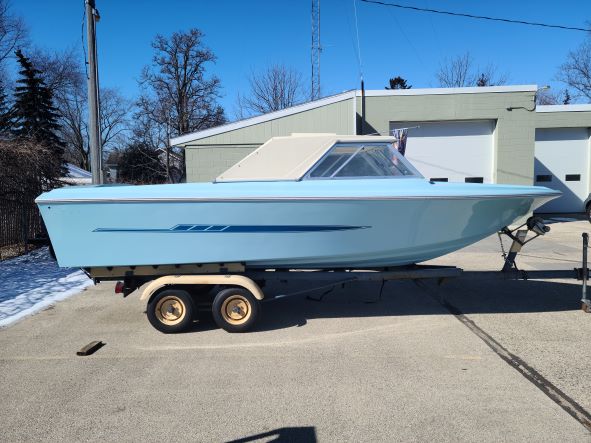
1971 Glasspar Newport Cruiser - Rejuvenation 4 years 2 months ago #146041
|
Please Log in or Create an account to join the conversation. |

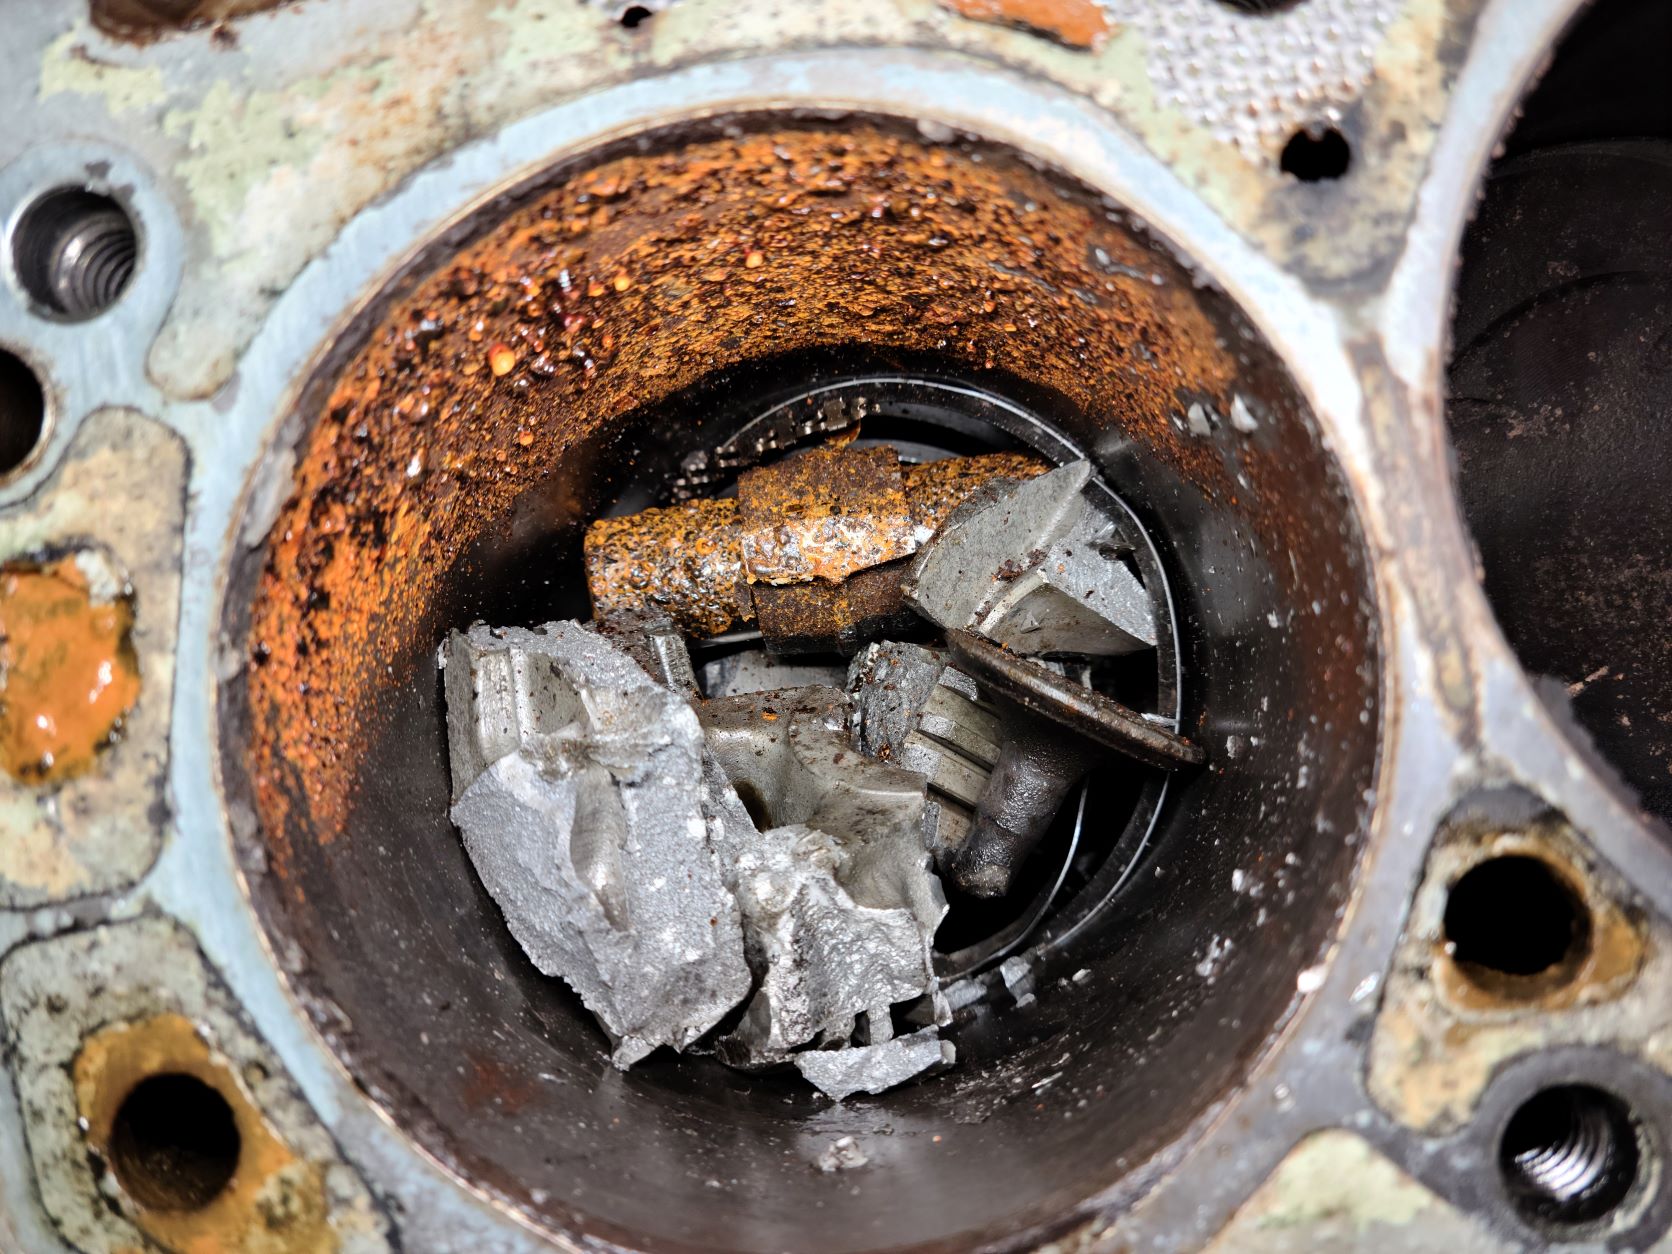
1971 Glasspar Newport Cruiser - Rejuvenation 4 years 2 months ago #146043
|
Please Log in or Create an account to join the conversation. |
1971 Glasspar Newport Cruiser - Rejuvenation 4 years 2 months ago #146044
|
Please Log in or Create an account to join the conversation. |
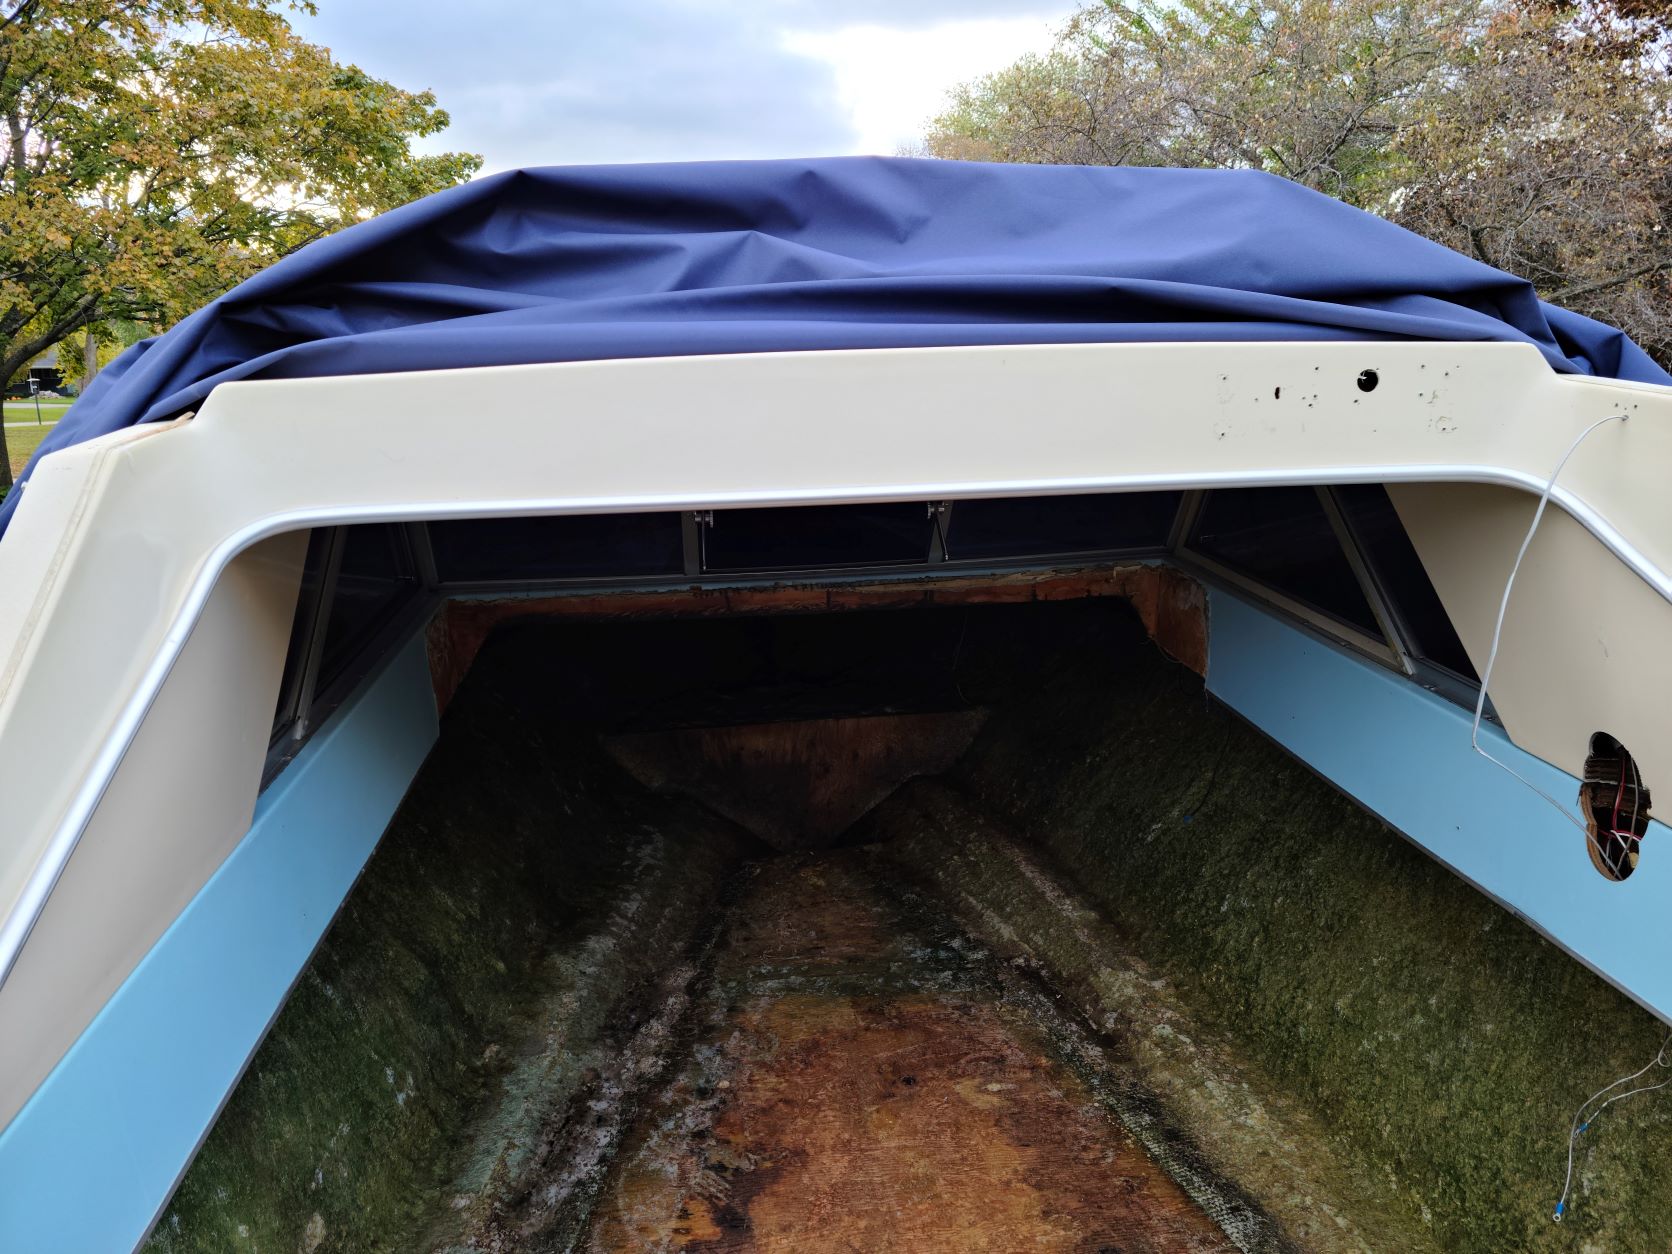
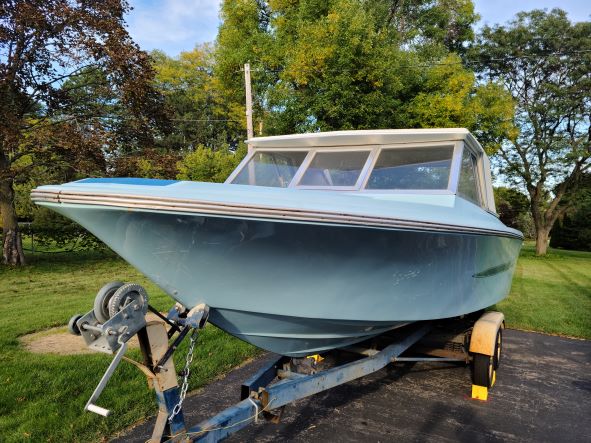
1971 Glasspar Newport Cruiser - Rejuvenation 4 years 2 months ago #146080
|
Please Log in or Create an account to join the conversation. |


1971 Glasspar Newport Cruiser - Rejuvenation 4 years 2 months ago #146087
|
Please Log in or Create an account to join the conversation. |

1971 Glasspar Newport Cruiser - Rejuvenation 4 years 2 months ago #146088
|
Please Log in or Create an account to join the conversation. |
1971 Glasspar Newport Cruiser - Rejuvenation 4 years 2 months ago #146107
|
Please Log in or Create an account to join the conversation.
Dr.Go!
|
1971 Glasspar Newport Cruiser - Rejuvenation 4 years 2 months ago #146114
|
Please Log in or Create an account to join the conversation. |
1971 Glasspar Newport Cruiser - Rejuvenation 4 years 2 months ago #146125
|
Please Log in or Create an account to join the conversation. |


1971 Glasspar Newport Cruiser - Rejuvenation 4 years 2 months ago #146133
|
Please Log in or Create an account to join the conversation. |
1971 Glasspar Newport Cruiser - Rejuvenation 4 years 2 months ago #146135
|
Please Log in or Create an account to join the conversation. |
1971 Glasspar Newport Cruiser - Rejuvenation 4 years 2 months ago #146150
|
Please Log in or Create an account to join the conversation. |


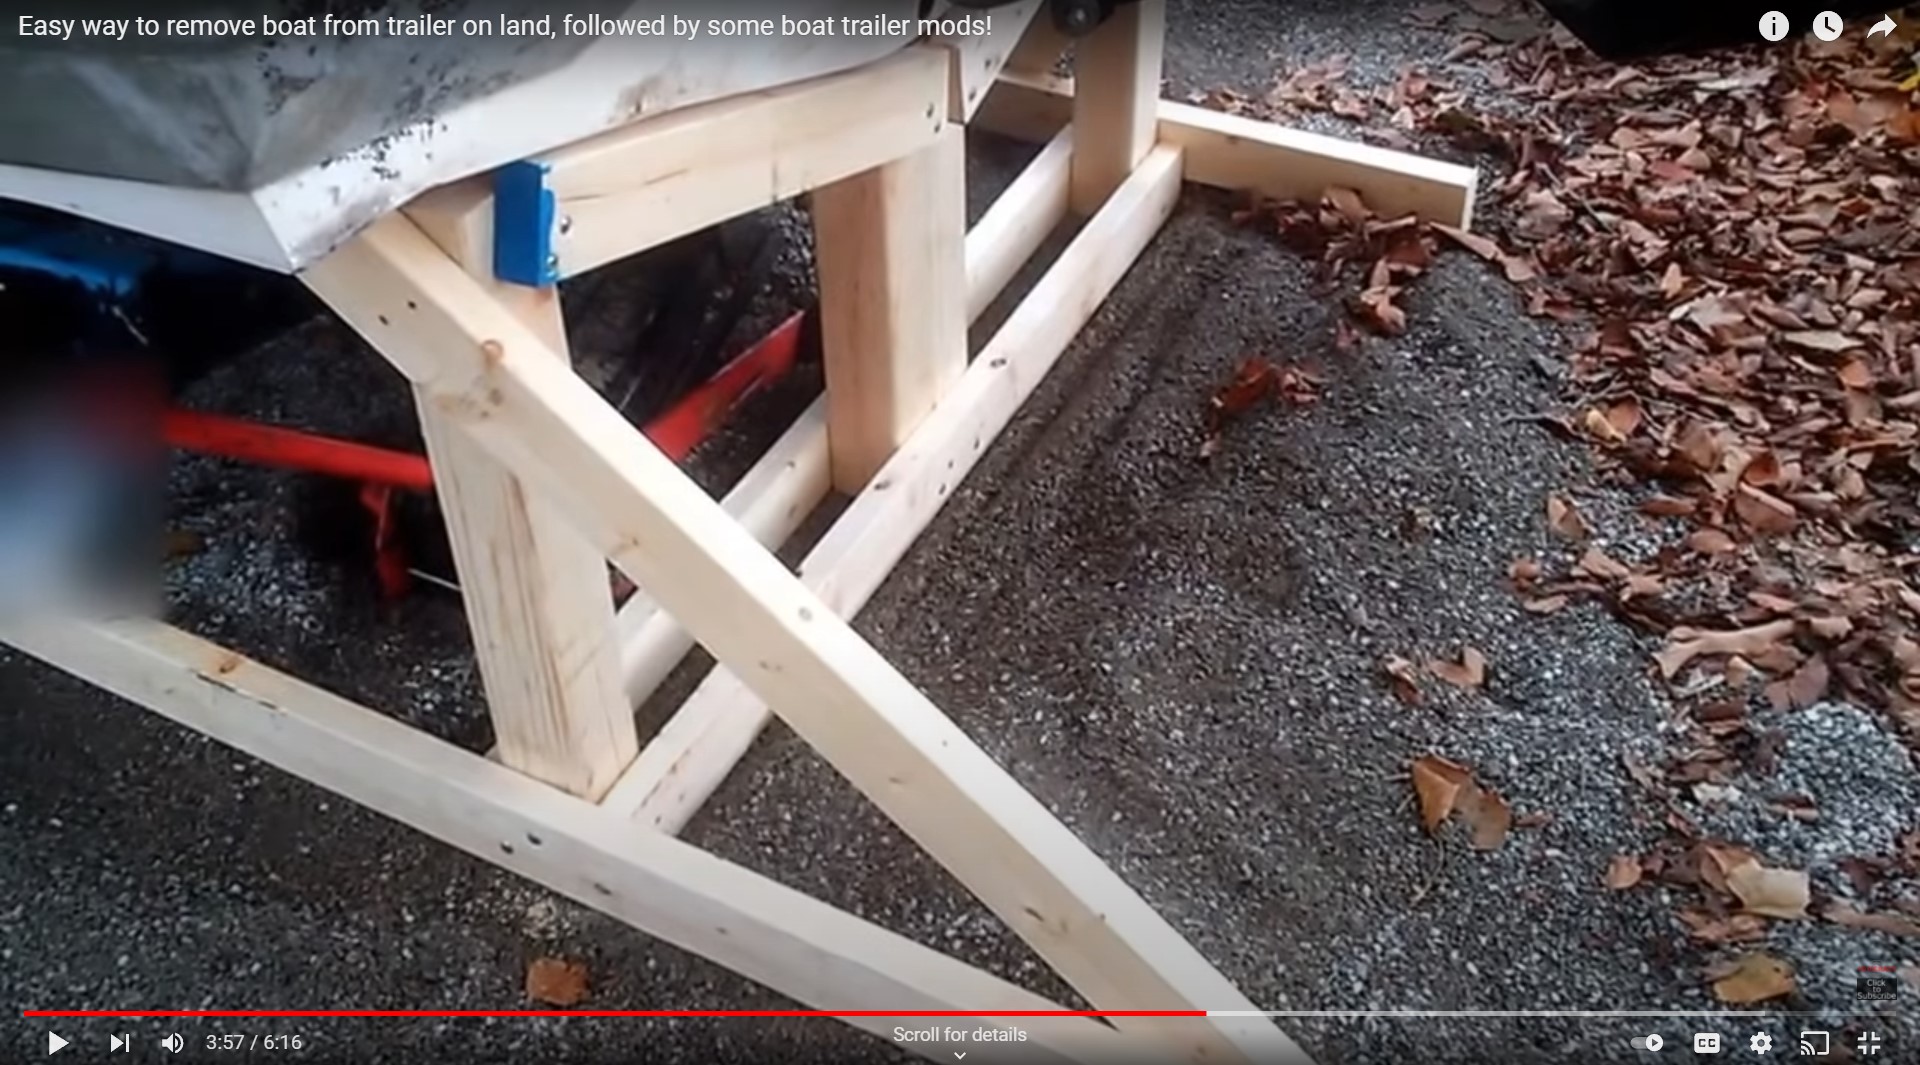
1971 Glasspar Newport Cruiser - Rejuvenation 4 years 1 month ago #146194
|
Please Log in or Create an account to join the conversation. |
1971 Glasspar Newport Cruiser - Rejuvenation 4 years 1 month ago #146228
|
Please Log in or Create an account to join the conversation. |


1971 Glasspar Newport Cruiser - Rejuvenation 4 years 1 month ago #146232
|
Please Log in or Create an account to join the conversation. |
1971 Glasspar Newport Cruiser - Rejuvenation 4 years 1 month ago #146234
|
Please Log in or Create an account to join the conversation. |
1971 Glasspar Newport Cruiser - Rejuvenation 4 years 1 month ago #146236
|
Please Log in or Create an account to join the conversation. |
1971 Glasspar Newport Cruiser - Rejuvenation 4 years 1 month ago #146238
|
Please Log in or Create an account to join the conversation. |

1971 Glasspar Newport Cruiser - Rejuvenation 4 years 1 month ago #146239
|
Please Log in or Create an account to join the conversation. |
1971 Glasspar Newport Cruiser - Rejuvenation 4 years 2 weeks ago #146357
|
Please Log in or Create an account to join the conversation. |


1971 Glasspar Newport Cruiser - Rejuvenation 4 years 2 weeks ago #146358
|
Please Log in or Create an account to join the conversation. |


1971 Glasspar Newport Cruiser - Rejuvenation 4 years 1 week ago #146371
|
Please Log in or Create an account to join the conversation.
Dr.Go!
|
1971 Glasspar Newport Cruiser - Rejuvenation 4 years 1 week ago #146376
|
Please Log in or Create an account to join the conversation. |
1971 Glasspar Newport Cruiser - Rejuvenation 4 years 1 week ago #146380
|
Please Log in or Create an account to join the conversation.
Dr.Go!
|
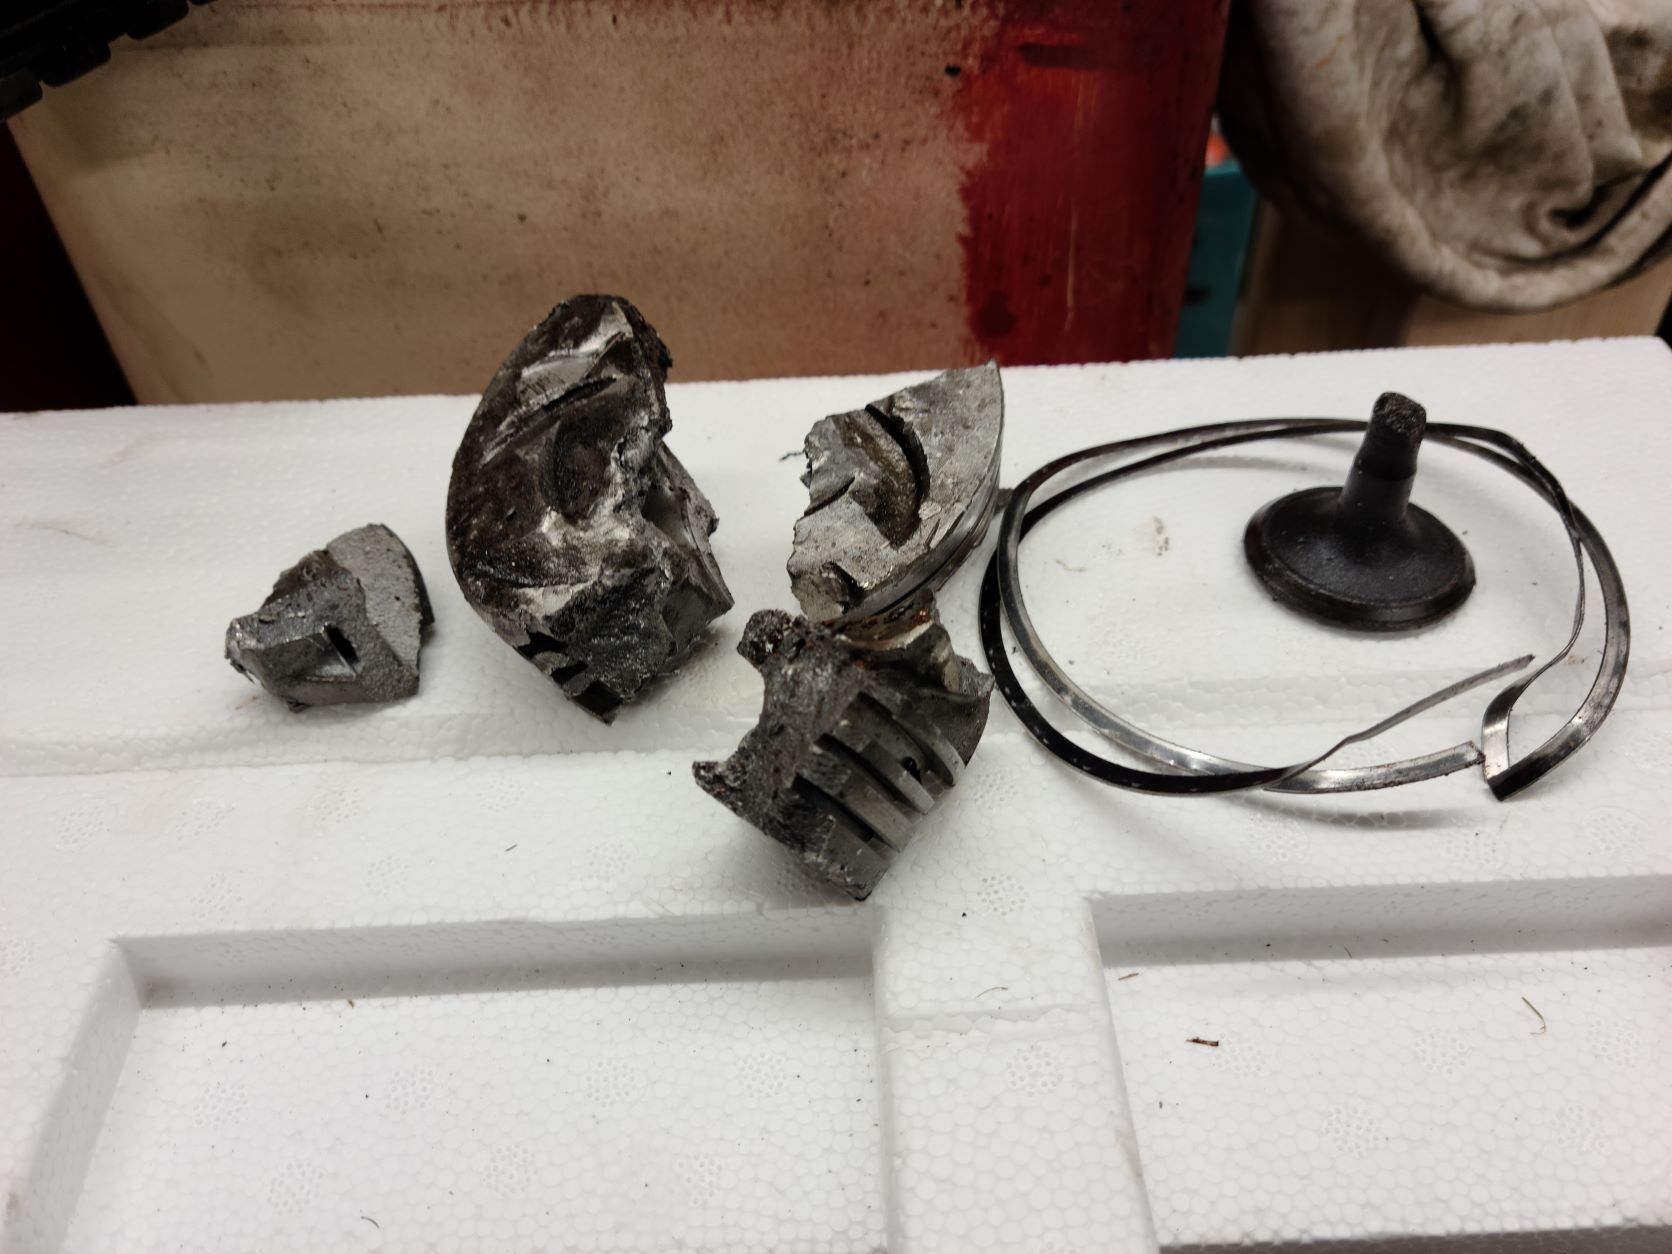
1971 Glasspar Newport Cruiser - Rejuvenation 3 years 11 months ago #146435
|
Please Log in or Create an account to join the conversation. |


1971 Glasspar Newport Cruiser - Rejuvenation 3 years 11 months ago #146532
|
Please Log in or Create an account to join the conversation. |

1971 Glasspar Newport Cruiser - Rejuvenation 3 years 11 months ago #146535
|
Please Log in or Create an account to join the conversation. |
1971 Glasspar Newport Cruiser - Rejuvenation 3 years 11 months ago #146538
|
Please Log in or Create an account to join the conversation. |


1971 Glasspar Newport Cruiser - Rejuvenation 3 years 11 months ago #146539
|
Please Log in or Create an account to join the conversation.
Dr.Go!
|
1971 Glasspar Newport Cruiser - Rejuvenation 3 years 11 months ago #146541
|
Please Log in or Create an account to join the conversation. |
1971 Glasspar Newport Cruiser - Rejuvenation 3 years 11 months ago #146542
|
Please Log in or Create an account to join the conversation. |
1971 Glasspar Newport Cruiser - Rejuvenation 3 years 10 months ago #146695
|
Please Log in or Create an account to join the conversation. |


1971 Glasspar Newport Cruiser - Rejuvenation 3 years 10 months ago #146696
|
Please Log in or Create an account to join the conversation.
Dr.Go!
|
Donate
Please consider supporting our efforts.
Glassified Ads
Looking for Vollrath Stern Handles |

Vintage 1940 set of 2 Dinbec double jointed boat seat hinges( / Parts / Miscellaneous)


1962 Scott Boat( / Boats)


FG Login

FiberGoogle
Who's Online
We have 8830 guests and no members online