Welcome, Guest
Username: Password: Remember me

TOPIC: 1959 Cutter Jet Deville

1959 Cutter Jet Deville 5 years 5 months ago #139900

  • Dr.Go!
  • Dr.Go!'s Avatar
  • Offline
  • Contributing Member
  • Contributing Member
  • Posts: 1719
  • Karma: 19
  • Thank you received: 125
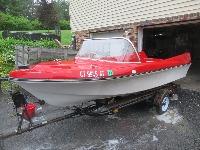
Nice boat! It will be great when finished. I am wanting to follow a similar restoration path and when reading your post, a crazy thought came to mind. To help get a boat on the water sooner, I might consider using or buying another more modern simple small trailer locally from one of the many listing sources and put the boat on that... then rig it and use it in the summer while then turning to restoring the original trailer during non-boating weather days or fall/ winter. Then when the trailer is done, swap the boat back and then re-sell the simple more modern trailer. Your boat looks in great shape.
The following user(s) said Thank You: JetDeville700

Please Log in or Create an account to join the conversation.

Dr.Go!

1959 Cutter Jet Deville 5 years 5 months ago #139902

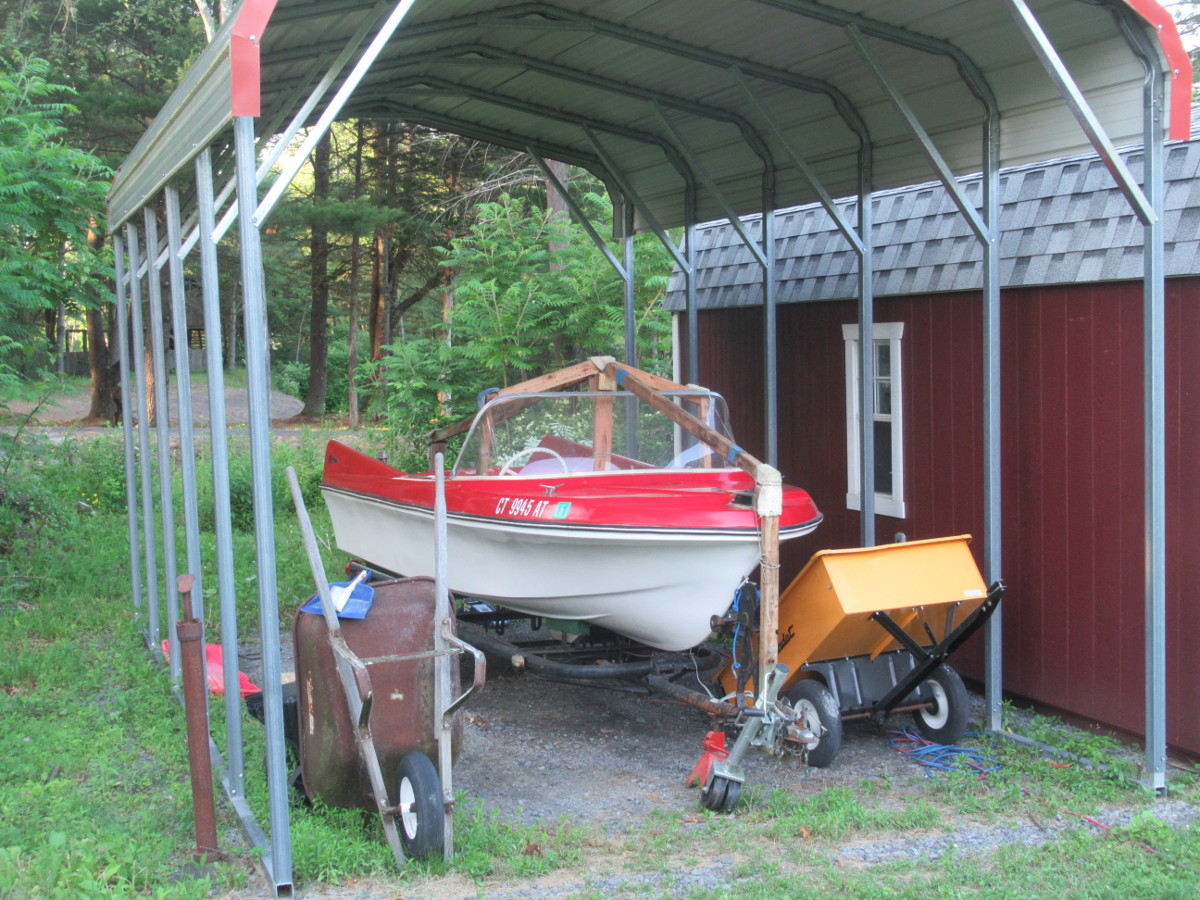
Once I get back in shape, I will probably lift the boat off the trailer in the carport I moved it to today. Been having serious back problems and will get some x-rays tomorrow and see what's up. Don't have a new outboard for it anyways.
Attachments:

Please Log in or Create an account to join the conversation.

1959 Cutter Jet Deville 5 years 5 months ago #139903

Great find Frank, she'll be great when your done!

Bob
The following user(s) said Thank You: JetDeville700

Please Log in or Create an account to join the conversation.

1959 Cutter Jet Deville 5 years 5 months ago #139904

It will be a while Bob. Too many projects and problems with my health. It will be more than worth it when it's done though. Thanks.

Please Log in or Create an account to join the conversation.

1959 Cutter Jet Deville 5 years 5 months ago #139909

  • Dr.Go!
  • Dr.Go!'s Avatar
  • Offline
  • Contributing Member
  • Contributing Member
  • Posts: 1719
  • Karma: 19
  • Thank you received: 125
Best wishes recovering from those back issues!
The following user(s) said Thank You: JetDeville700

Please Log in or Create an account to join the conversation.

Dr.Go!

1959 Cutter Jet Deville 5 years 5 months ago #139911

It's NOT a Herters. It's a Cutter: www.fiberglassics.com/library/index.php?title=Cutter

Will try and register both boat and trailer today. Wish me luck!

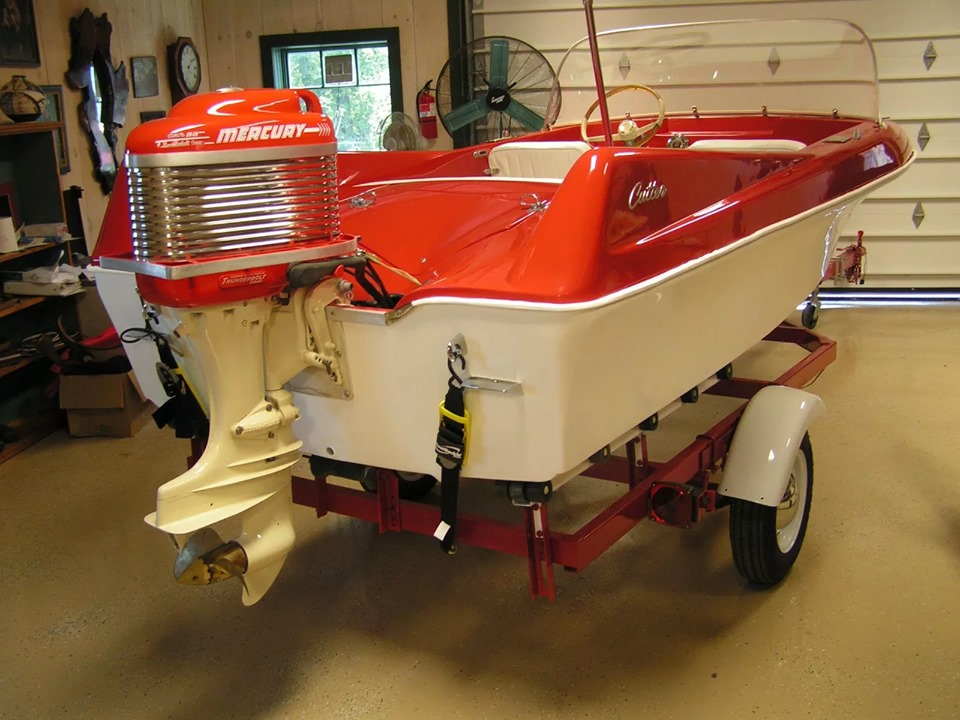
I want it to look like this when it's done...
Attachments:

Please Log in or Create an account to join the conversation.

1959 Cutter Jet Deville 5 years 5 months ago #139916

So, good news on a couple of fronts. First of all, the CT transferable registration on the boat listed it as a '62, which I knew from the library here was not true. It is a 1959. As it turned out, I lucked out at DMV. The woman who processed my stuff is the daughter of a classic boating buddy of mine who I used to work with. I told her the boat was really a '59, but I just wanted to get it registered. Then she hands me my stuff (and a bill for nearly 100 bucks!), and it's registered now as a '59!

Next good news is my back problem X-rays just showed I'm old and need to slow down. Arthritis, which did not surprise me, as I have had similar but different problems in the past. Those included included the 4 years it took me to put the Power Cat back on the water with a great matching trailer. I think I was flat on my back for 4 weeks of those two years.

I hope to test the transom tomorrow with my 40 hp. Just got off the phone with Tim Calmes (Paradise Boat Works) and he told me the best way to do it. If my back is good enough, I can bring the 40hp out next week and see what he has for a vintage short shaft 70hp Merc (NOT a dockbuster!).

Life is good.

Please Log in or Create an account to join the conversation.

1959 Cutter Jet Deville 5 years 5 months ago #139917

The following user(s) said Thank You: JetDeville700

Please Log in or Create an account to join the conversation.

1959 Cutter Jet Deville 5 years 5 months ago #139920

Great news then Frank!!! Some Blue Emu and more time and you'll be good as new. ;)

Bob

Please Log in or Create an account to join the conversation.

1959 Cutter Jet Deville 5 years 5 months ago #139927

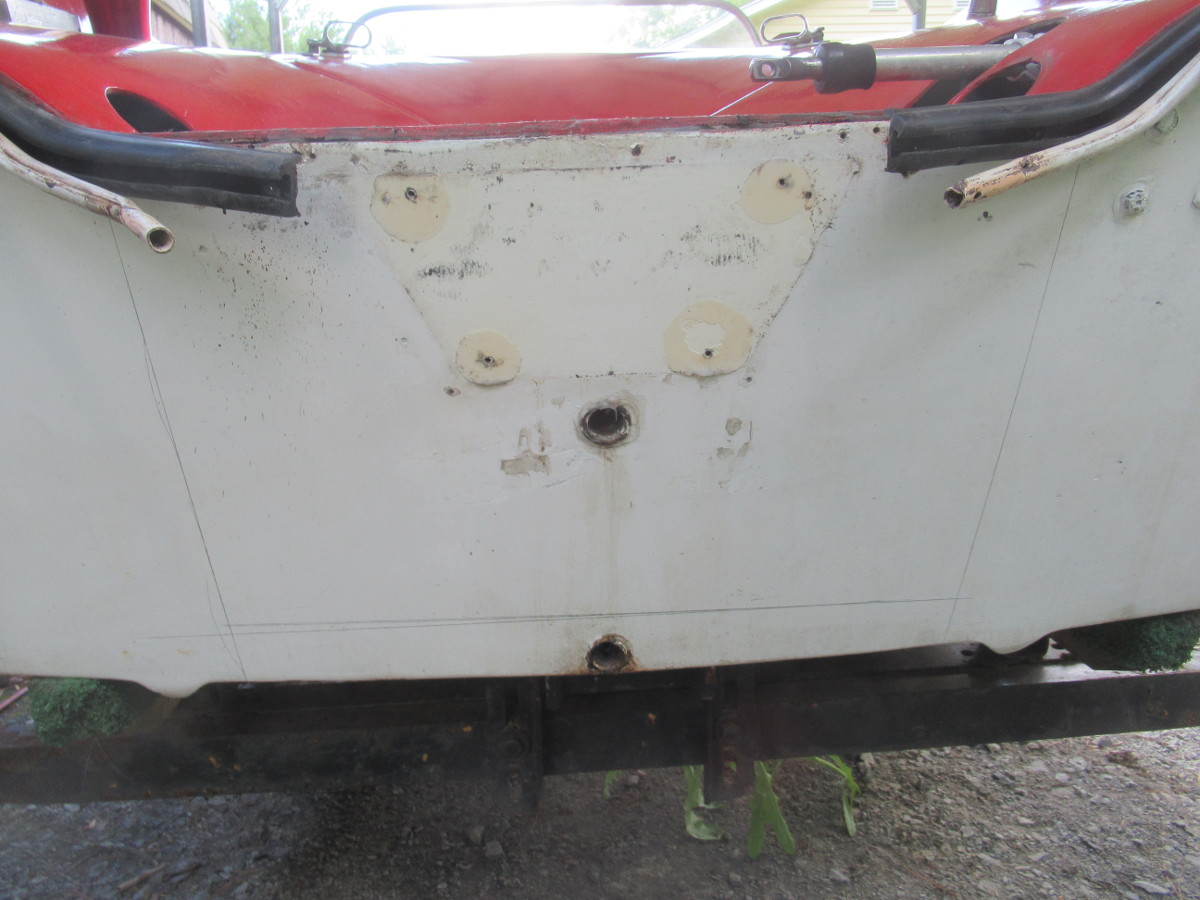
Put an old Merc on it this morning and the clamps crushed the transom some. Upon further investigation, guess what? It needs a new transom. What's there is like wet burnt toast...

I'll get it done, it's just a drag after the P.O.. told me it was good.

Please Log in or Create an account to join the conversation.

1959 Cutter Jet Deville 5 years 5 months ago #139928

I'll be following www.boatworkstoday.com/ videos on replacing a transom from the outside.

Please Log in or Create an account to join the conversation.

1959 Cutter Jet Deville 5 years 5 months ago #139940

Rotten transom hiding between aluminum diamond plate and aluminum angle on top.
Attachments:

Please Log in or Create an account to join the conversation.

1959 Cutter Jet Deville 5 years 5 months ago #139946

Oh Booooooo!

Bob
The following user(s) said Thank You: JetDeville700

Please Log in or Create an account to join the conversation.

Started on the transom 5 years 5 months ago #139982

Started on the transom today after a bunch of other errands I had to do. Got as much done as an old guy with a bad back can do while the wife is at work. Only way I can do it is seated, as you will see.

Having done a lot of glass work over the years, it is critical to protect yourself, as my selfie shows. You can see I have a long sleeved work shirt on, what you can't see are my jeans. Fiberglass dust is NOT good for you.

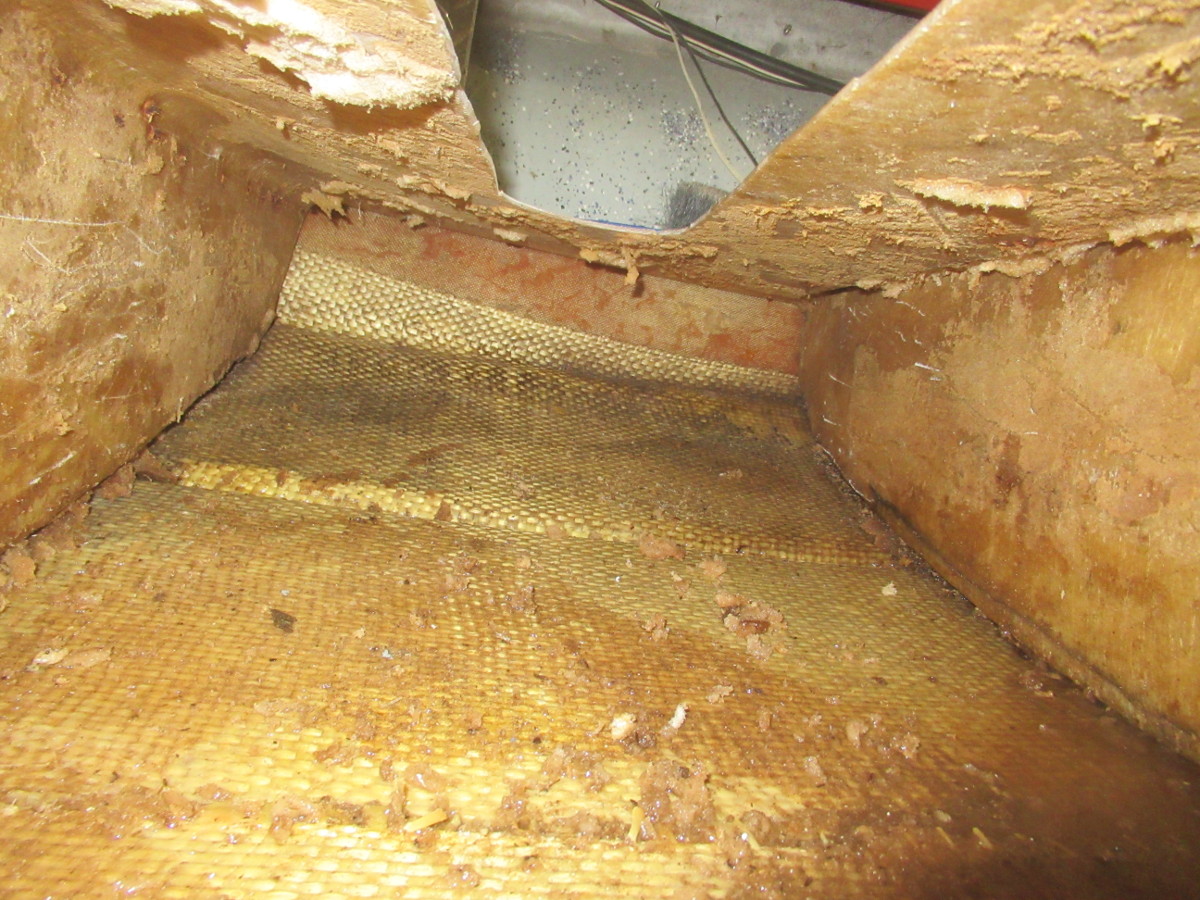
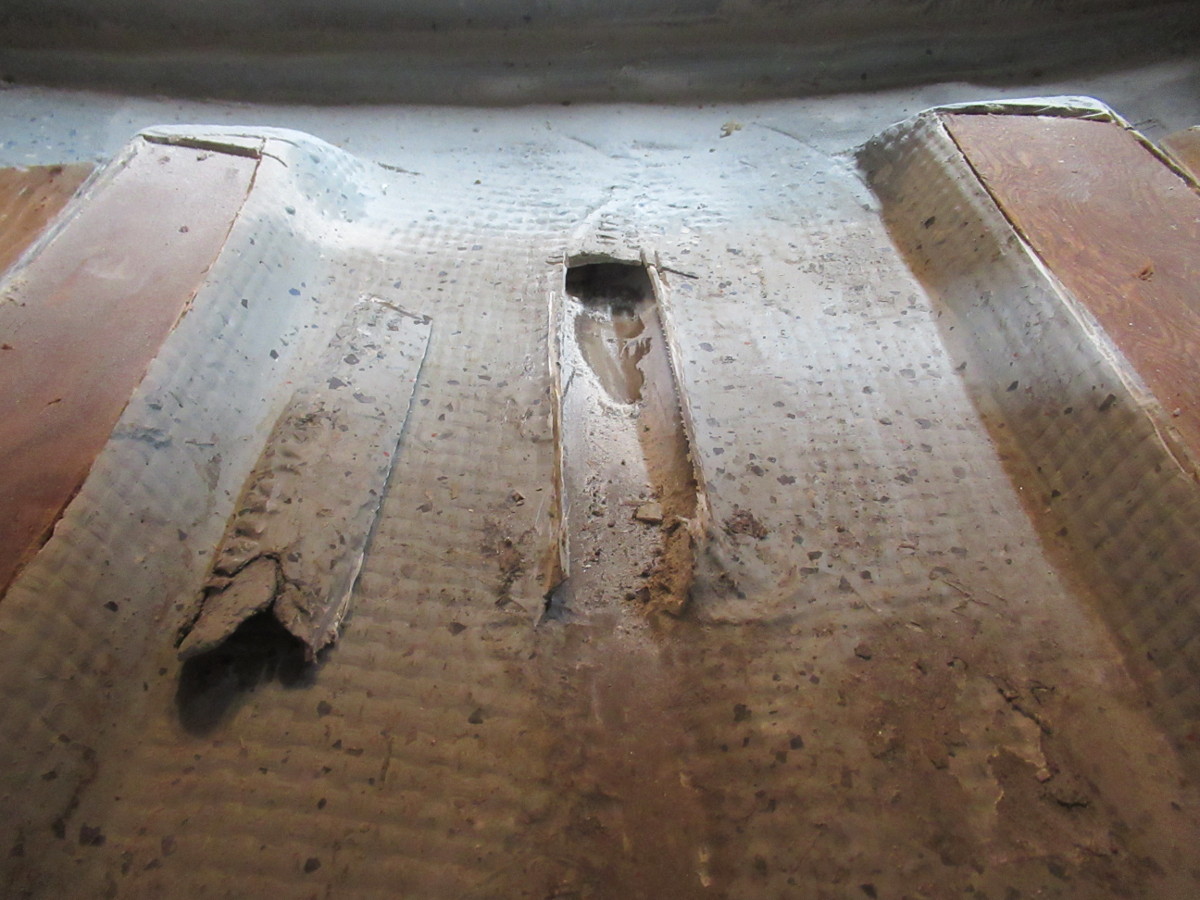
Started by what I optimistically hoped would be all I needed to do. Nope, needs more work, maybe the entire transom. The 2 inches I left on the bottom are to fair the eventual cloth over, instead of wrapping it over the bottom of the hull. That bottom 2 inches of wood that I did not remove today is soaked with water like a kitchen sponge in the dishpan. Port side of the cut is almost dry though, so I may just go a few inches to each side. Starboard side is good and wet.

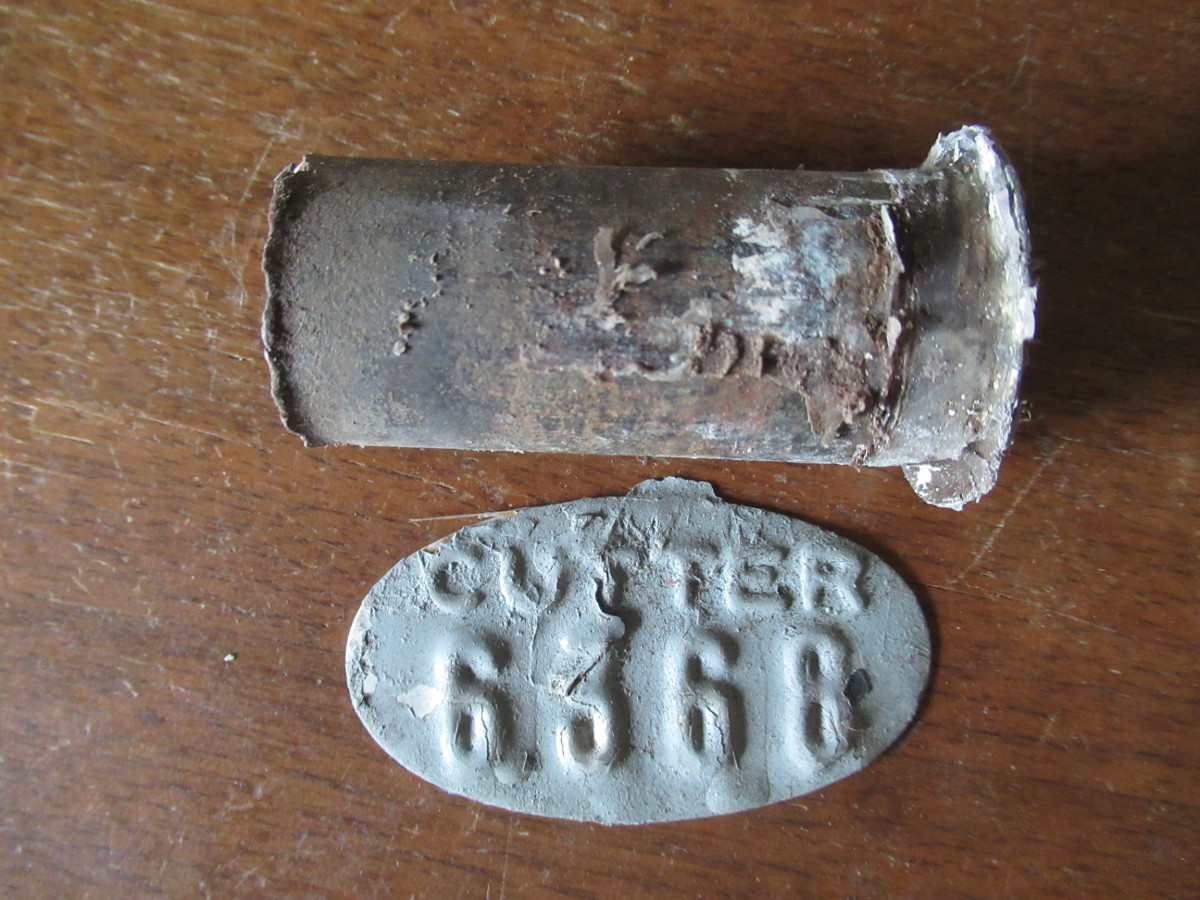
Found this old Cutter tag today. I might have knocked it off, no clue. Engine pit drain tube was apparently siliconed in. Jeez.

Gotta go lay down for when the wife gets home, and sees I'm taking care of myself...


Attachments:

Please Log in or Create an account to join the conversation.

1959 Cutter Jet Deville 5 years 4 months ago #140023

Boy, it's not easy getting a Subject heading changed here. This one should read "1969 Cutter Jet Deville". Can anyone help me out here?

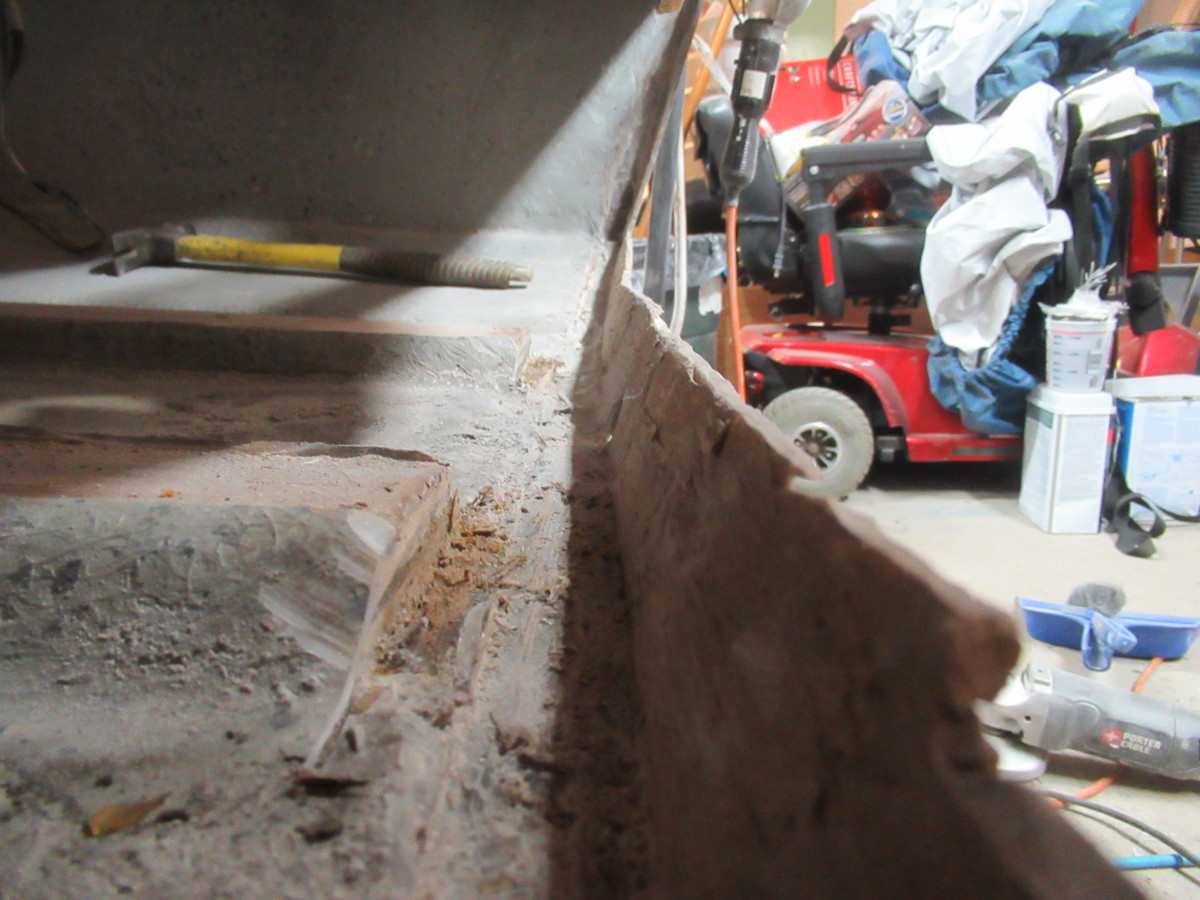
Over the last two days I removed all the mostly waterlogged foam under the two seat bases. Tools used were a 4 inch hole saw, 4-1/2 inch angle grinder with cut-off wheel, yardstick, pencil and the hammer and pry bar you see in the picture. Took four 33 gallon HD trash bags heavier than I could lift! We'll see if it's dry tomorrow morning. If not, my son will set up a dehumidifier in the garage while I'm out for the weekend. I'm not going to start on a new transom until the boat is bone dry.


Attachments:

Please Log in or Create an account to join the conversation.

1959 Cutter Jet Deville 5 years 4 months ago #140024

Well I just changed them all to '59 thought that's what your support request was. Now you say '69 in the text....make up my mind! lol

Bob

Please Log in or Create an account to join the conversation.

1959 Cutter Jet Deville 5 years 4 months ago #140030

Thanks Bob, but it still needs a couple of changes. It is NOT a Herters, it IS a 1959 Cutter Jet Deville.

How's that?

I'm getting too old for this stuff I guess...

Deck paint will be: KBS Coatings MAXX Two Part Polyurethane UV Stable Topcoat Paint Red

Hull paint will be: Interlux VC Performance Epoxy Bottom Paint Quart Kit White

Deck paint will be roll 'n tip. Hull paint is really great stuff I have used before. Takes lots of coats to get coverage, but very slick stuff and great for any boat that is trailered.

No work over the weekend - will be in Niagara Falls Ontario celebrating our 45th anniversary. How's that?

Frank

Please Log in or Create an account to join the conversation.

1959 Cutter Jet Deville 5 years 4 months ago #140039

LOL Senior moment, guess I should have read it more thoroughly! Whew, done now. Had to go back to every post and change it. :)

Congrats on the Anniversary, have a great time.

Bob
The following user(s) said Thank You: JetDeville700

Please Log in or Create an account to join the conversation.

1959 Cutter Jet Deville 5 years 4 months ago #140061

Thanks Bob, you da man!

Been gone all weekend, lots to do around here before I get to the boat. Have a problem stringer, i.e., it's damp even after sitting all weekend. I can do a couple things, but may just enclose it it with mat and resin. Gotta figure it out so I can get a transom in and move ahead.

Please Log in or Create an account to join the conversation.

1959 Cutter Jet Deville 5 years 4 months ago #140083

I cut off the top glass on the stringers to help them dry yesterday morning. As of this morning, everything is dry and ready to go. I concentrated this morning on getting the hull ready for my new transom. It will be 1-1/2 inch thick, probably 3/8 to 1/2 inch thicker than original. To do that will require some careful surgery on the engine well, but I'm up for it, and would have it no other way.


Attachments:

Please Log in or Create an account to join the conversation.

1959 Cutter Jet Deville 5 years 4 months ago #140084

  • Dr.Go!
  • Dr.Go!'s Avatar
  • Offline
  • Contributing Member
  • Contributing Member
  • Posts: 1719
  • Karma: 19
  • Thank you received: 125
I need to do a transom, so I am interested in each and every step. Thanks for posting this project! I have tried to read and watch as much as possible, but seems each one was done differently, or left out steps I cannot figure out. Some use glass between wood layers and other products say no glass between layers, just epoxy wetted and clamped. I do usually see some sort of glass on both of the outsides (and when they leave the outer shell in tact, they wet epoxy, then peanut, and then 1708 rough side against outer old shell with first wetted wood and wetted shell...that is the part I get a little lost on). I have watched your method from Boatworkstoday (Andy) and I understand that part. Mine is just a little different because I have the outer shell and no top deck/no splashwell, but I want to see how you laminate and then tab in and finish inside.

Please Log in or Create an account to join the conversation.

Dr.Go!

1959 Cutter Jet Deville 5 years 4 months ago #140086

This is the 4th transom I've done. I get these old boats and nobody seems to care about the transom. It must be sealed so absolutely NO water gets in. Keep that as a Golden Rule.

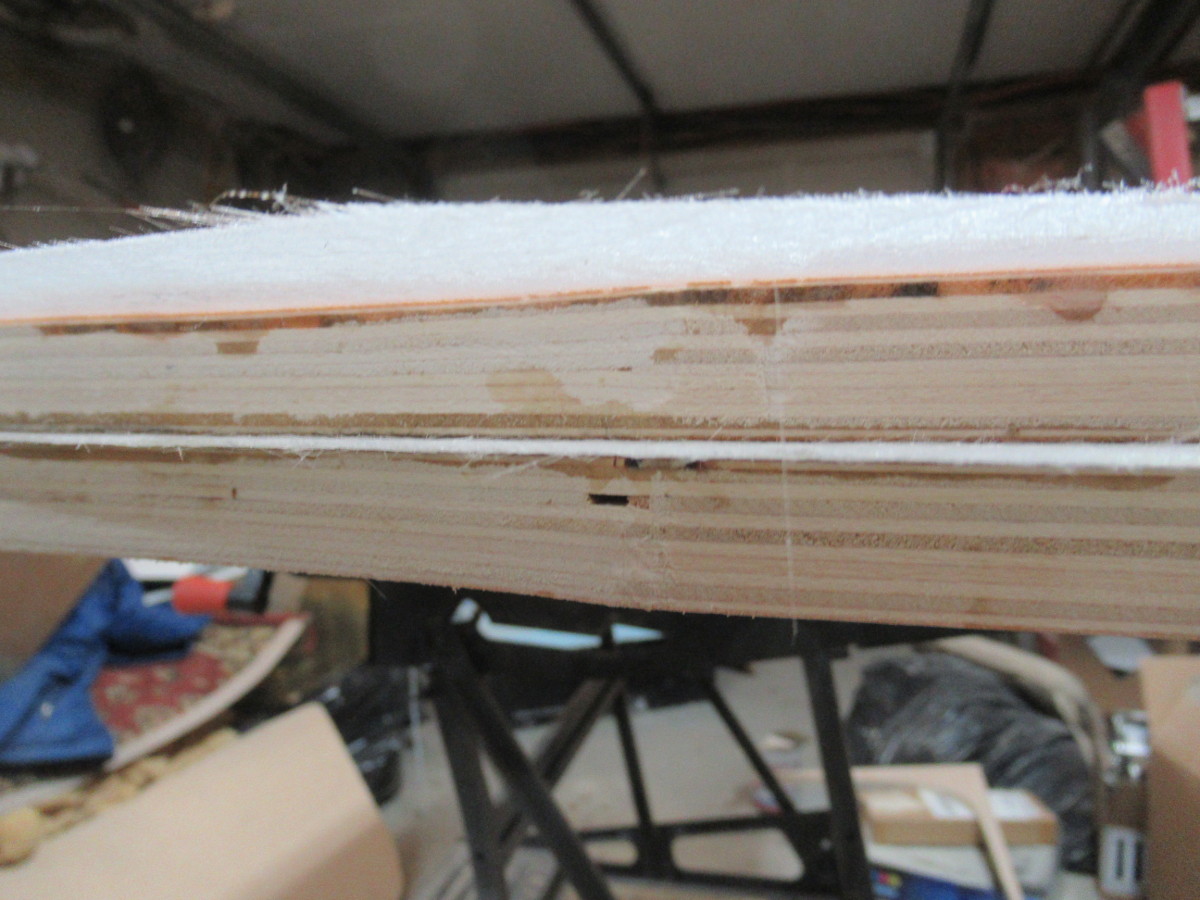
I always build my transoms before installation, and always glass the transom pieces together with mat, and finish the inner and outer edges with cloth, often a number of layers. Any drain holes I over drill, apply mat and filler, then fill any gaps with 3M 5200, which I also use on any bolt or screw holes anywhere on the boat.

Not everyone likes working with resin, mat, and cloth, but I enjoy making things and always have. On the other hand, I'm 66 now and this is my last boat project!

Please Log in or Create an account to join the conversation.

1959 Cutter Jet Deville 5 years 4 months ago #140089

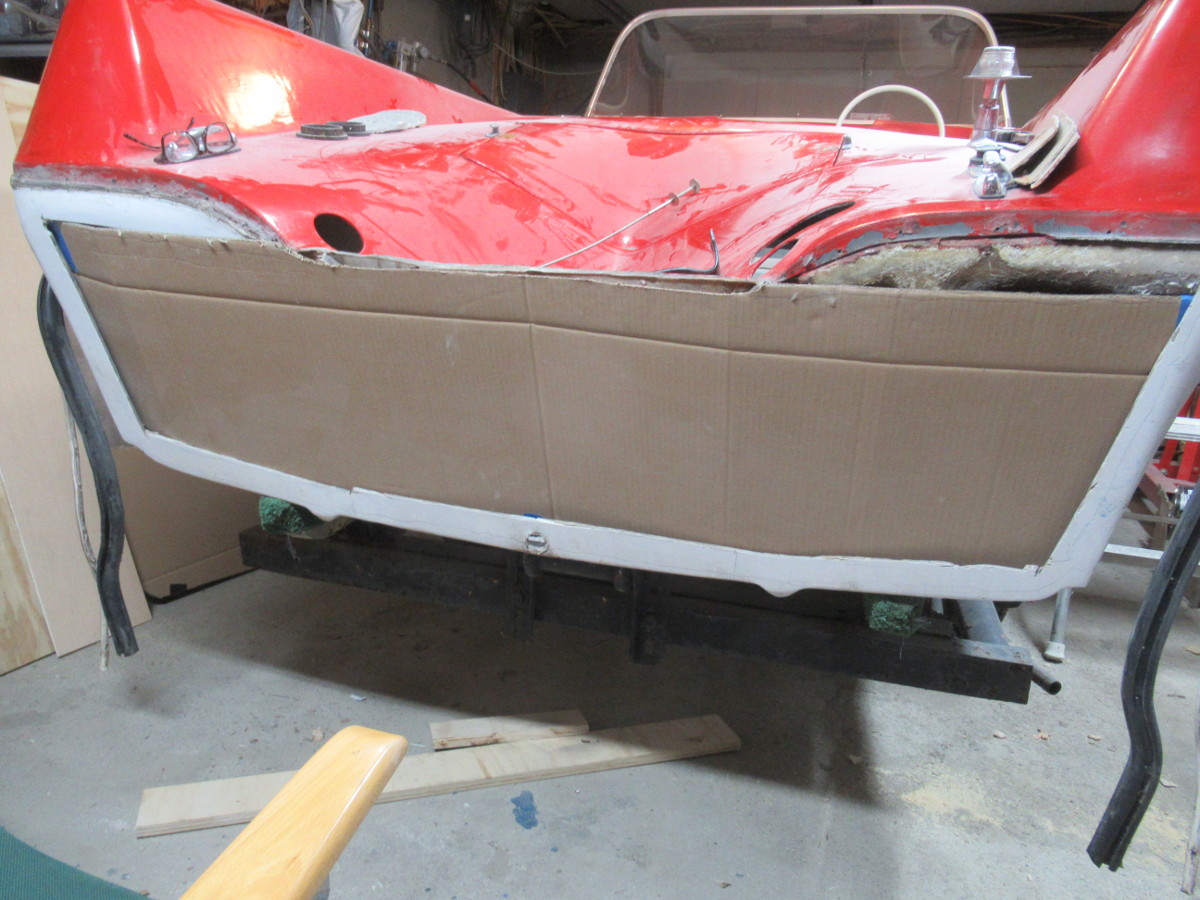
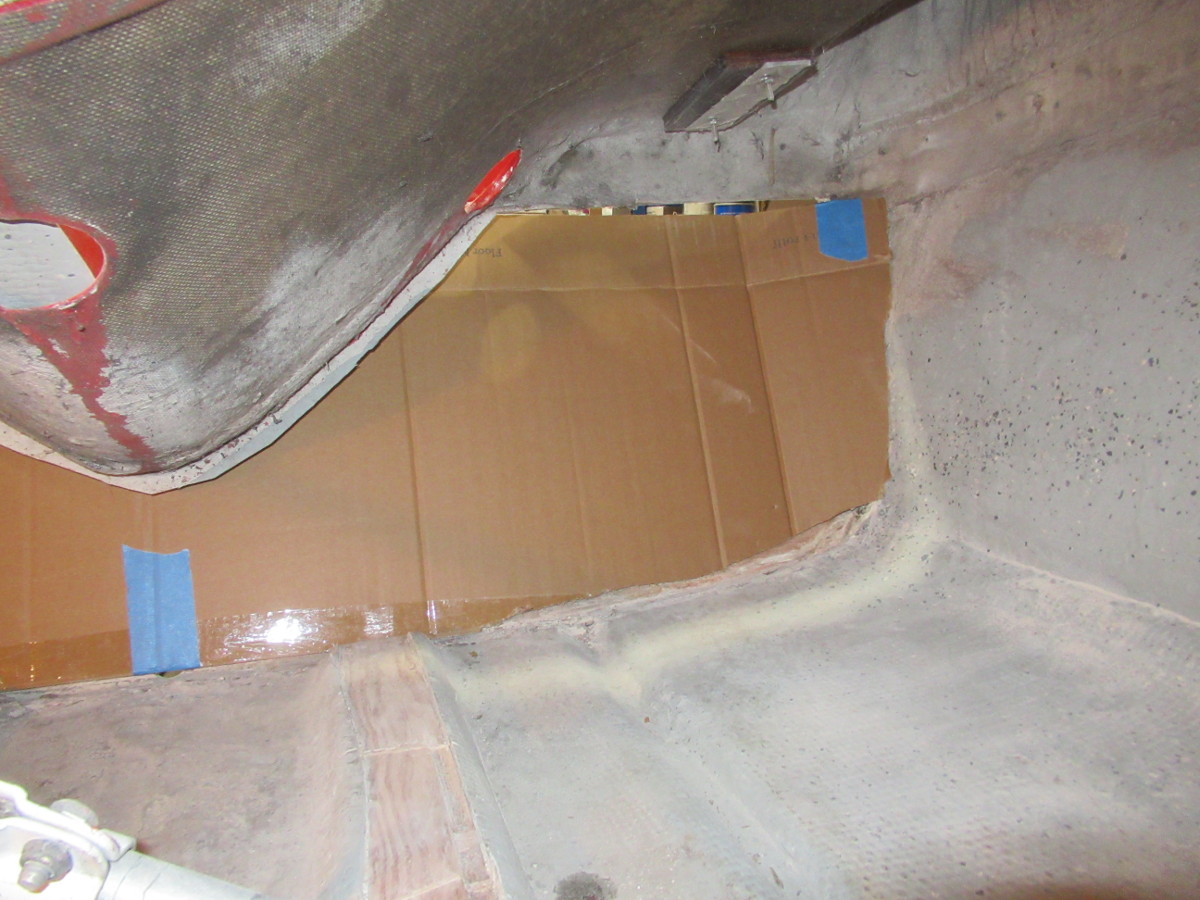
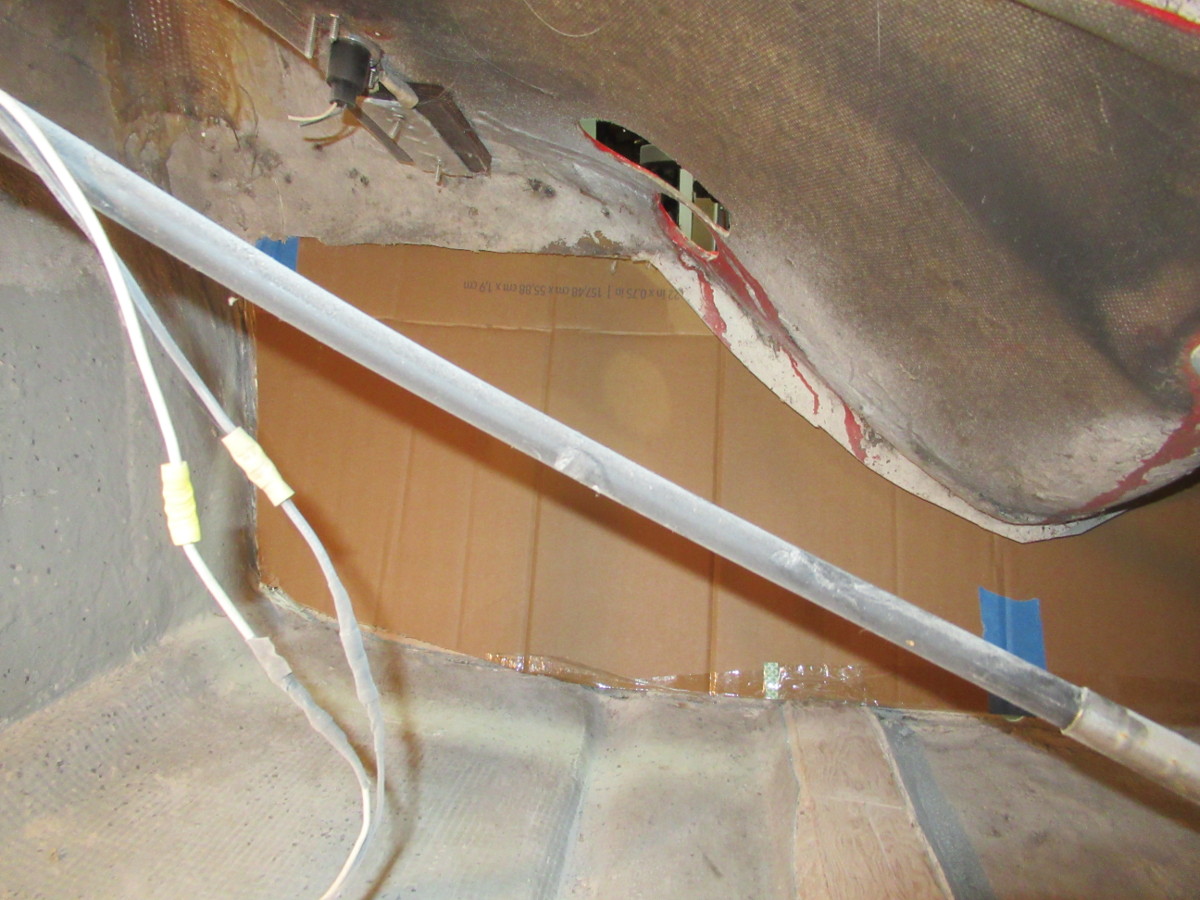
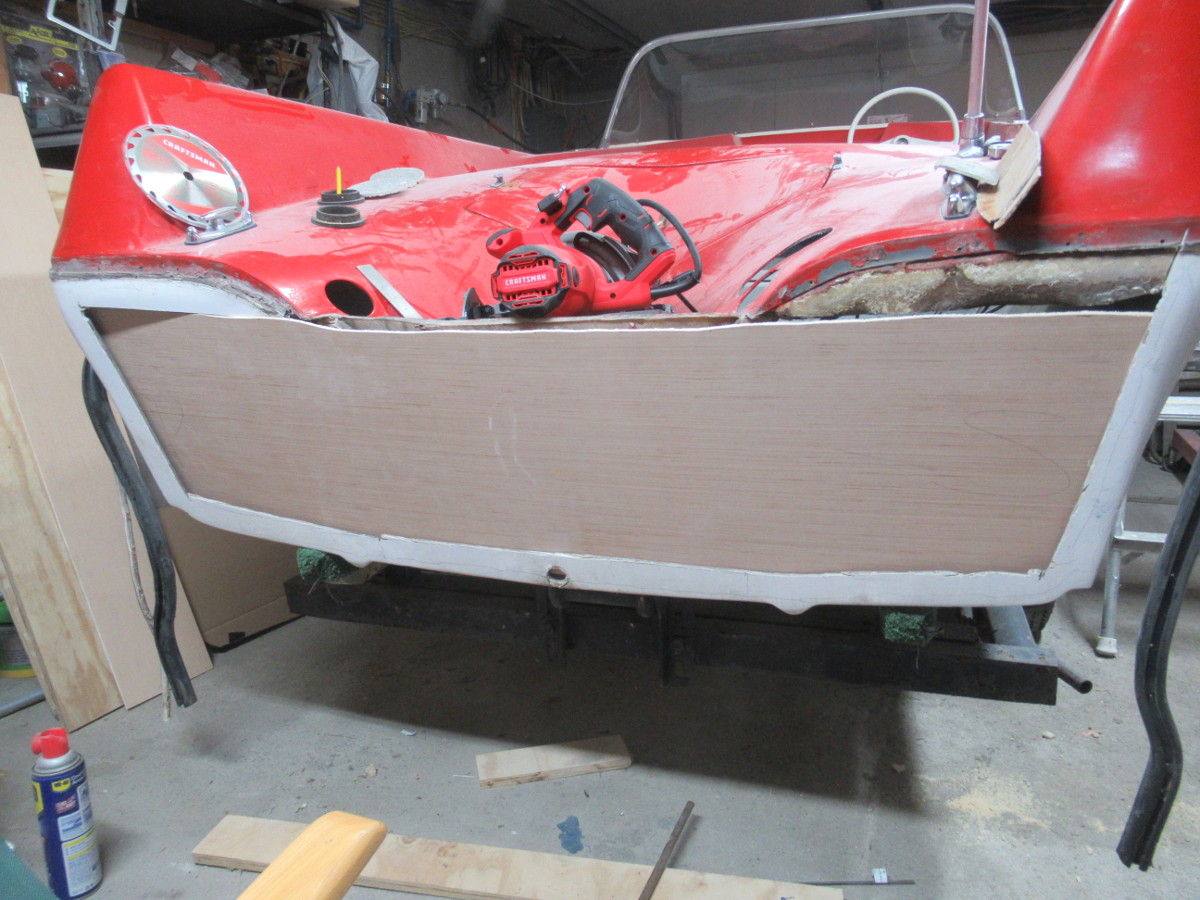
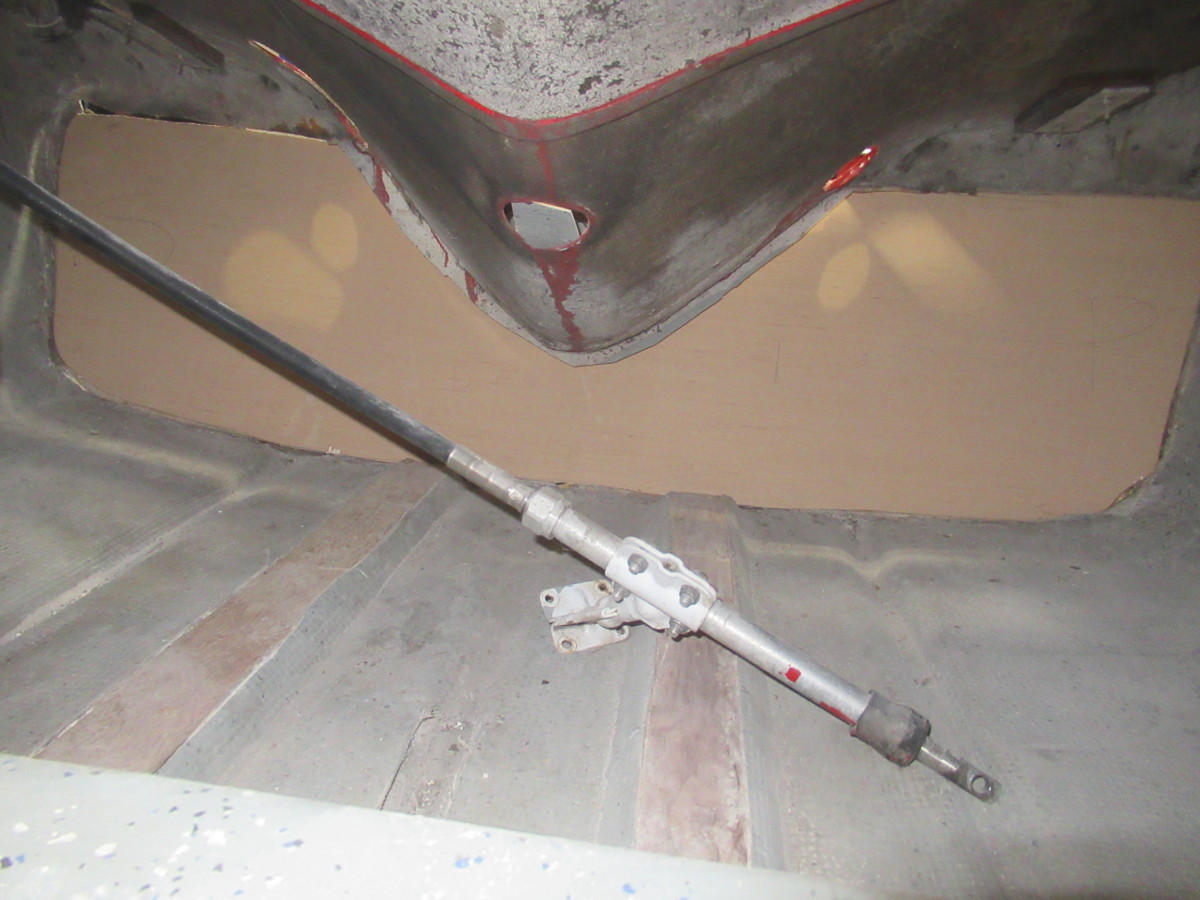
Got a few things to clear up on my cardboard transom, but getting closer. Port side needs more cardboard at the bottom corner, and cardboard needs to be cut a bit at top, but it's a first attempt. Will try and get closer tomorrow with luan.


Attachments:

Please Log in or Create an account to join the conversation.

1959 Cutter Jet Deville 5 years 4 months ago #140090

  • Dr.Go!
  • Dr.Go!'s Avatar
  • Offline
  • Contributing Member
  • Contributing Member
  • Posts: 1719
  • Karma: 19
  • Thank you received: 125
Great information and great pictures! So when you use Mat between layers, do you just wet out both faces with resin and then wet out your mat on one layer before clamping together? Do I understand your instructions that when you oversized the drain hole, do you line the hole with mat and resin and then use 5200 around the inserted drain tube? Or do you fill the entire hole with mat and resin completely shut and then re drill the hole so that no wood is exposed and then use 5200 around drain tube insert and crimp roll the flange of the drain tube before it all sets up? Sorry for all of the questions, but I want this to be done once and survive through the next generation.

Please Log in or Create an account to join the conversation.

Dr.Go!

1959 Cutter Jet Deville 5 years 4 months ago #140092

Yes to your first question. Plywood wetted, mat placed and wetted out again, then clamped together. I use 1-1/4 inch sheetrock screws as my clamps. When removed, they're glassed over at least once. I then use more mat with a cloth finish for the inside before installation as it is generally not easy to get to once the transom is installed. It will be tough enough in my case just to get to the inside. Also, I knee brace the transom with triangular pieces of plywood center port and starboard. Just simple insurance.

If you drill a 1 inch hole through the resin-and mat, the fit should be tight. Keep a steady hand, as it's not necessarily easy to do. I would still coat the drain tube with 5200. Also, if you get the brass tube installed correctly, the ends should be tight to the transom and assist in sealing.

Best of luck to you!
The following user(s) said Thank You: Dr.Go!

Please Log in or Create an account to join the conversation.

1959 Cutter Jet Deville 5 years 4 months ago #140093

  • Dr.Go!
  • Dr.Go!'s Avatar
  • Offline
  • Contributing Member
  • Contributing Member
  • Posts: 1719
  • Karma: 19
  • Thank you received: 125
Awesome. Those were exactly what I was hoping for. Thanks for the comments about the added knees. I have been pondering that very thing. In addition to that, I am thinking about a thin wrap of metal as an outer transom protector. I just saw a stainless Steel one that was mirror polished. I also noticed that the metal Break it was bent on could only make the one bend on the back of transom since the back to back bend dimension is too small to bend a second bend. I noticed it was welded. It appeared about 3 sixteenth thick. I used eight inch on a fishing boat transom. They made the first ninety degree bend but they could only get about 70 degrees on the second bend before hitting its max point. I had to get super creative to finish that bend by jigging, clamping and running over it with my old garden tractor from the 70s because it was the only heavy thing I could think of. I want the transom strong enough that I can climb my 235 pounds up the back of the motor to climb in without worrying about cracking anything.

Please Log in or Create an account to join the conversation.

Dr.Go!

1959 Cutter Jet Deville 5 years 4 months ago #140096

You don't really need to bend metal transom protectors. One on each side reaching to the top is fine. The problem is not the top, if the transom is built well. Rather, it is the sides that take the clamping pressure. Another alternative for the top would be aluminum channel, that met aluminum plate both sides.

What part of the country do you live? I'm near the Hudson River south of Albany NY.

Please Log in or Create an account to join the conversation.

1959 Cutter Jet Deville 5 years 4 months ago #140101

I would really like to get this transom done today. My wife is off for the next four days and it sounds as if I might be busy with other stuff.

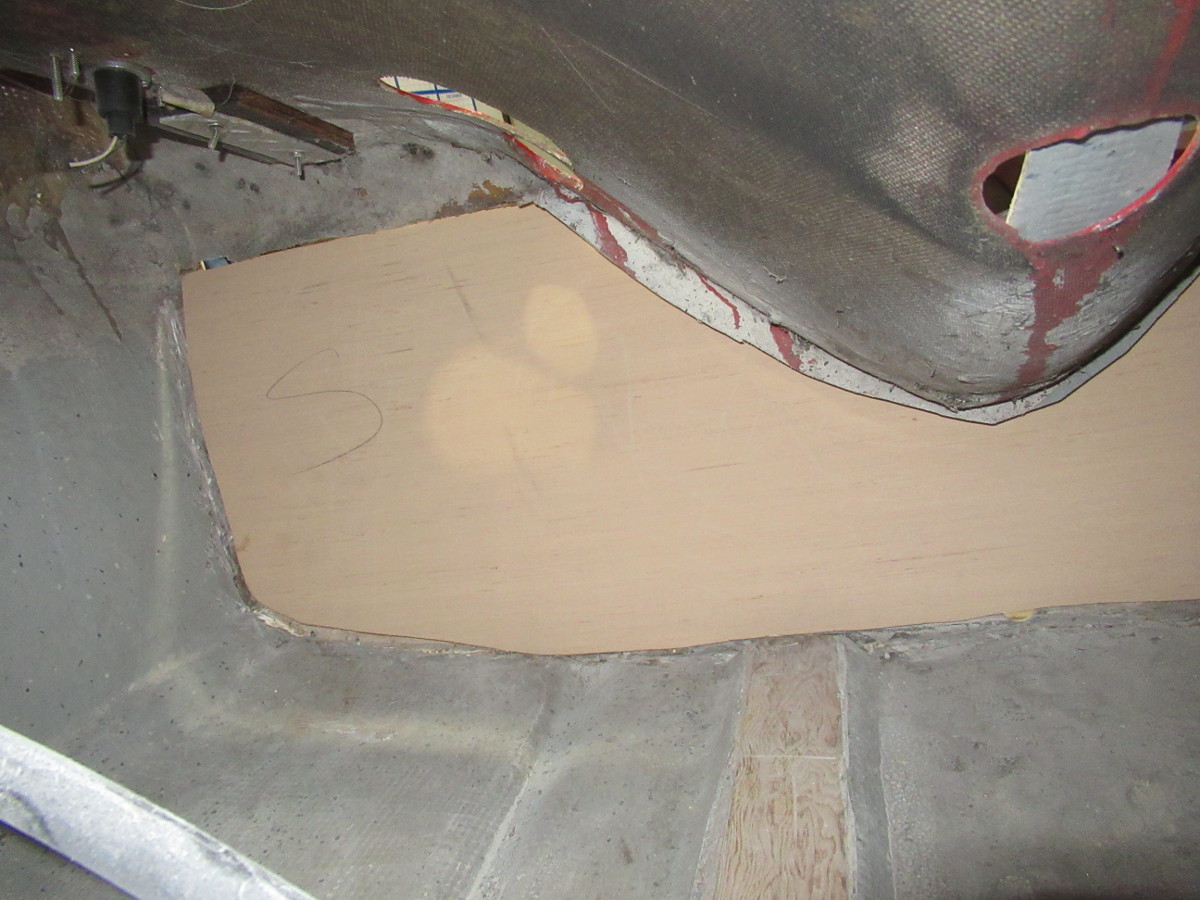
Got the luan cut out this morning (may do another one to get a bit closer). As you can see, I mark both sides of the luan for port and starboard so I can keep things straight. Port side has a long triangle on top that should be filled. while starboard side has too big a gap on the bottom corner. The closer I can get this, the better. I do not like wasting 3/4 plywood!


Attachments:

Please Log in or Create an account to join the conversation.

1959 Cutter Jet Deville - luan #2 5 years 4 months ago #140102

Got a bit more detail in my template for the 3/4 stuff. Feel pretty good about this, but been at it since 5 a.m , one cardboard template and two luan, need food!


Attachments:

Please Log in or Create an account to join the conversation.

1959 Cutter Jet Deville 5 years 4 months ago #140105

  • Dr.Go!
  • Dr.Go!'s Avatar
  • Offline
  • Contributing Member
  • Contributing Member
  • Posts: 1719
  • Karma: 19
  • Thank you received: 125
From north central Wisconsin. Looking good. My assembly will differ slightly because I have the full outer skin in tact and also have wide open inside access since mine would look similar to an open fishing boat. I will still use your same pattern making method.

Please Log in or Create an account to join the conversation.

Dr.Go!

1959 Cutter Jet Deville 5 years 4 months ago #140108

We lived in Beaver Dam many, many moons ago!

My transom is going to be a bear to install because it is not an open boat. It may get opened up a bit more!

Please Log in or Create an account to join the conversation.

1959 Cutter Jet Deville 5 years 4 months ago #140113

WOW!!!

Just read through your thread. Really nice attention to detail and explaination of the progress. Also a very nice boat! I have some Owens step-pads (re-made them from the original ones) and the logo. I could make pictures for reference if you'd like.

My Owens doesn't have a windshield yet, do you have a template in autoCAD or on paper for yours? Would love to have it!

Mats
The following user(s) said Thank You: JetDeville700

Please Log in or Create an account to join the conversation.

1959 Cutter Jet Deville 5 years 4 months ago #140114

Thanks Mats. A lot of work going into this boat for what I paid for it. Let's just consider I was told the transom was fine... Still, it's okay, as I never had a boat with fins!

My step pads and logos are fine, but thanks.

I'm not much of a computer guy. Autocad? Or paper for the windshield? I would be glad to help. The Owens brother were the originator of Cutter boats, so I assume your windshield would be like mine? I can see if I can get some help, but I do not believe I have AutoCad.

Frank

Please Log in or Create an account to join the conversation.

1959 Cutter Jet Deville 5 years 4 months ago #140119

It always costs more than you think! In my area these kind of boats are rare, mine might even be the ONLY ONE in the country. I'm from the Netherlands.

The Owens boat had a few different windshields throughout the years but the one you have is the nicest in my opinion. However it probably wouldn't fit on my boat because of the width.

Mats

Please Log in or Create an account to join the conversation.

1959 Cutter Jet Deville 5 years 4 months ago #140120

Mats, I'll take my wife's sewing tape today sometime and do some measurements of the windshield. I'll let you know what it is.

I think it is very cool to have a unique boat, which is why we bought this one.

It's 5:50 a.m. here in the eastern states, and I just came up from fiberglassing some mat on my new transom. I glassed the two pieces together yesterday, and now want to get it ready for installation sometime soon. I'll have some pics soon.

Frank

Please Log in or Create an account to join the conversation.

1959 Cutter Jet Deville 5 years 4 months ago #140123

Would appreciate that!!

It is cool to have an unique boat out there, Mine hasnt hit the water yet but ive already had many compliments from people passing by my place!

Good luck with the transom

Mats

Please Log in or Create an account to join the conversation.

1959 Cutter Jet Deville 5 years 4 months ago #140126

Busy all morning spring cleaning on a 92F (33C) summer day. Man!

Mats, will get you those windshield measurements sometime today.

I did get the other side of the transom in mat...

Attachments:

Please Log in or Create an account to join the conversation.

1959 Cutter Jet Deville 5 years 4 months ago #140140

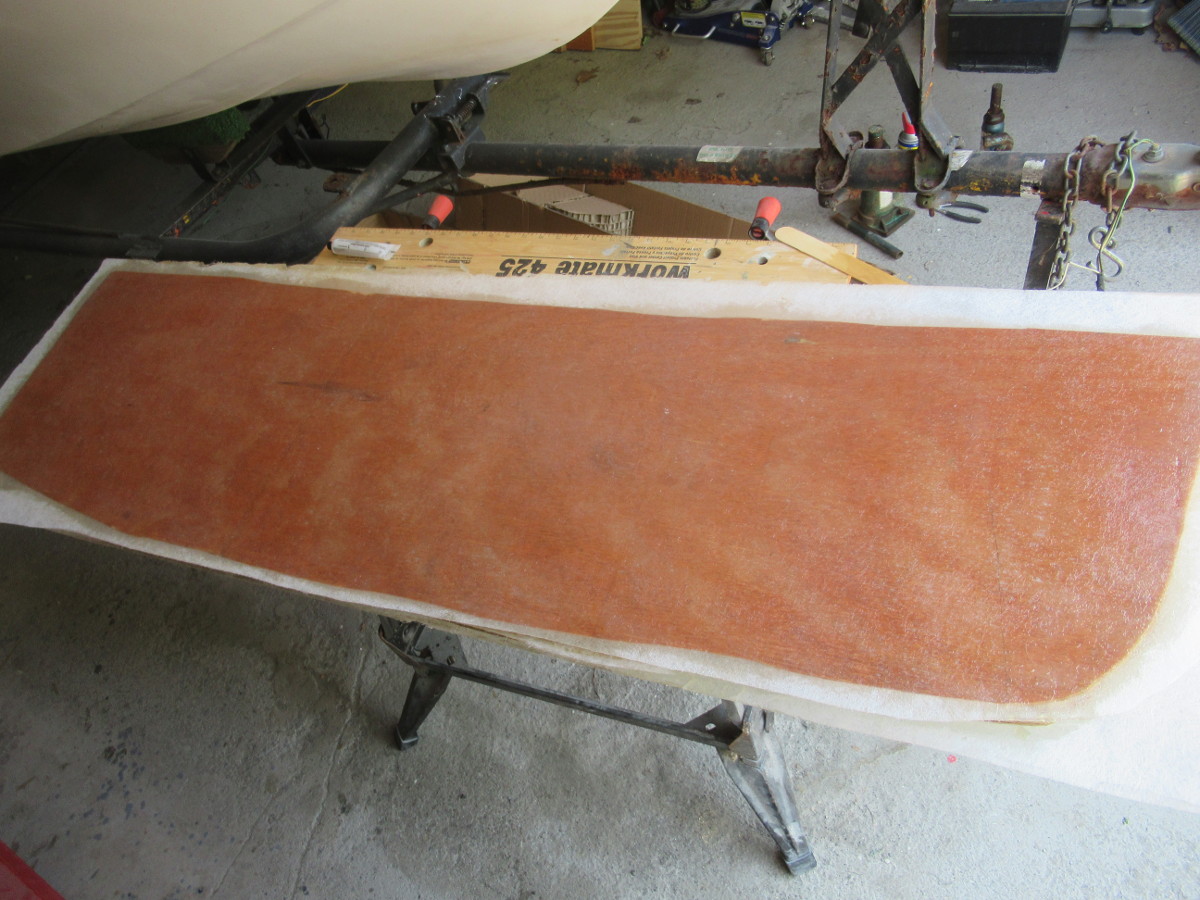
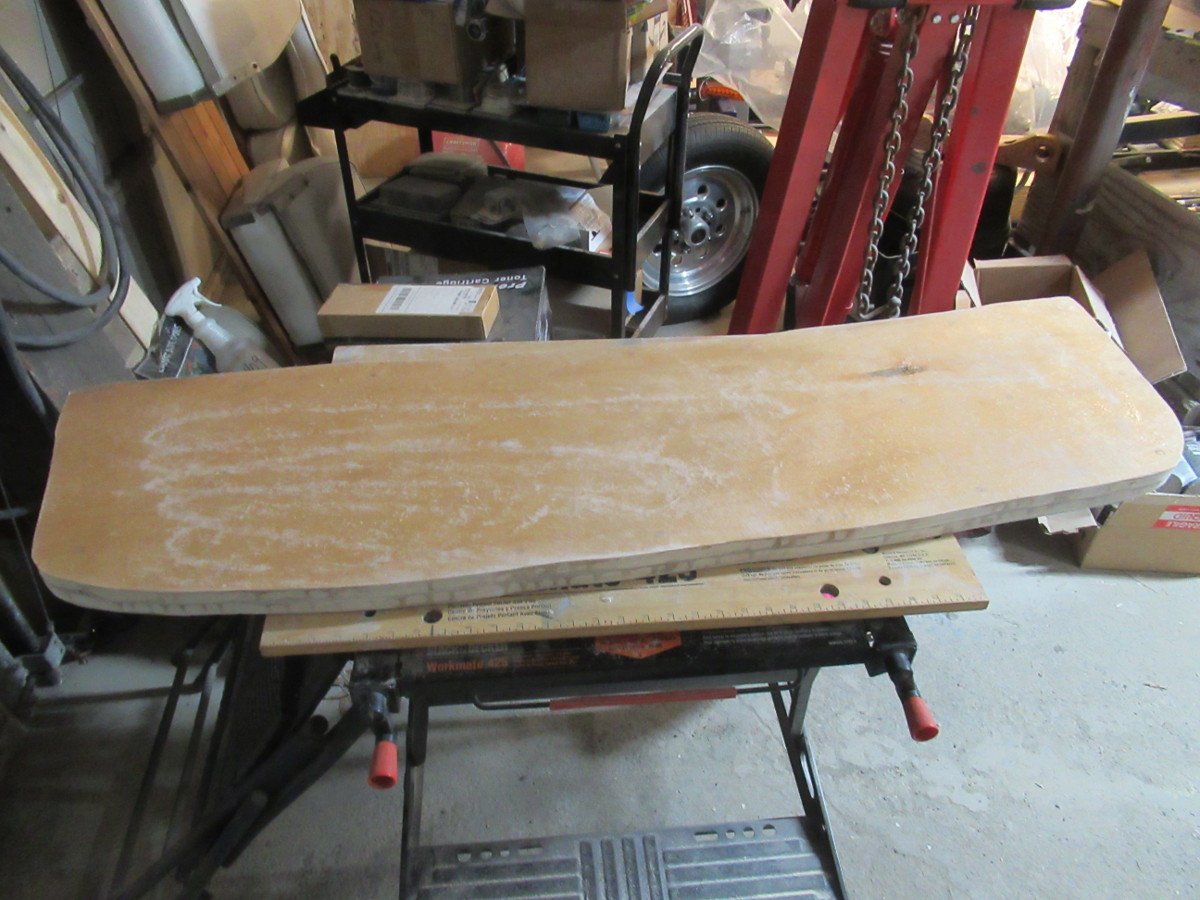
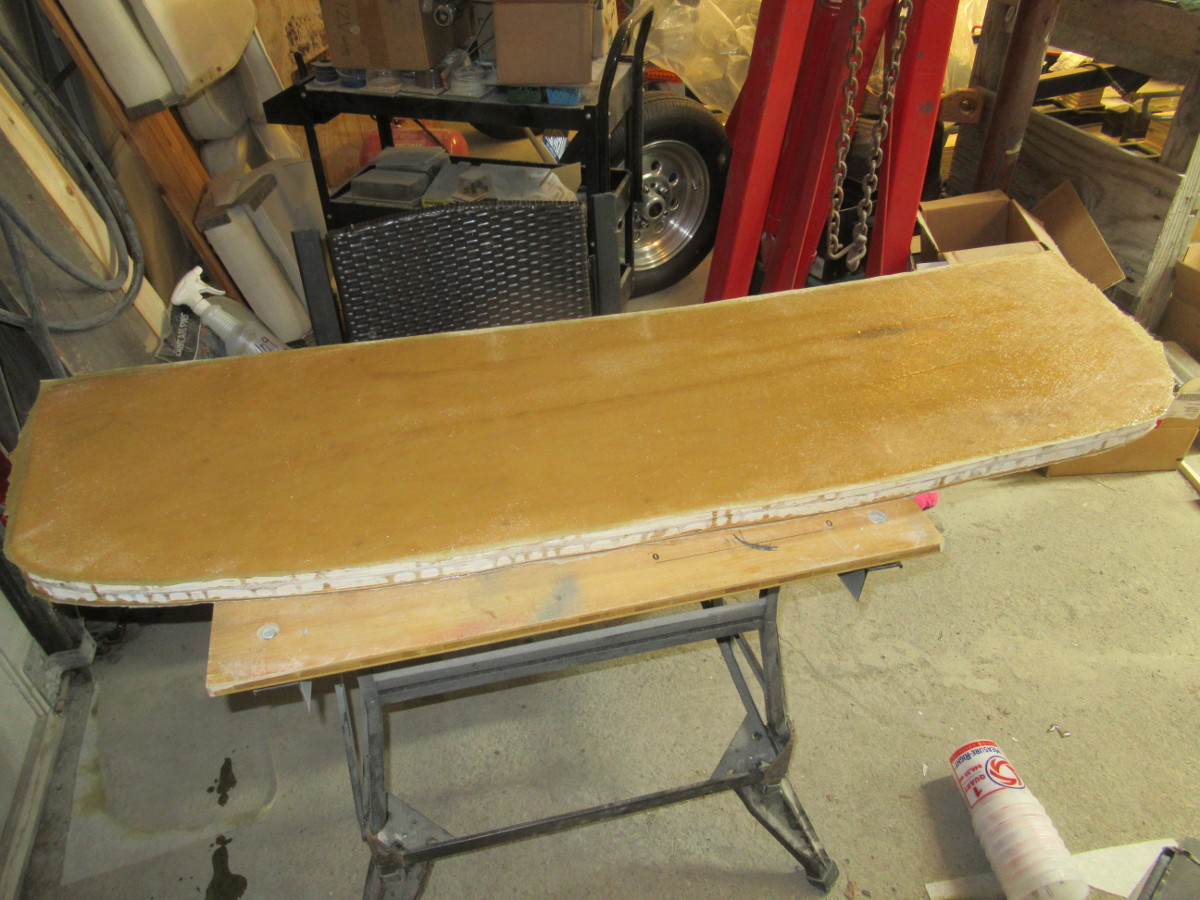
Finished a new transom today. 11 ply 3/4 inch stuff, no voids, etc. Made a much nicer, very solid transom.

Brutal heat today for upstate NY. 92 with oppressive humidity. Great day to be out on a boat!


Attachments:

Please Log in or Create an account to join the conversation.

1959 Cutter Jet Deville 5 years 4 months ago #140143

Looks solid! When are you installing it?

Please Log in or Create an account to join the conversation.

1959 Cutter Jet Deville 5 years 4 months ago #140144

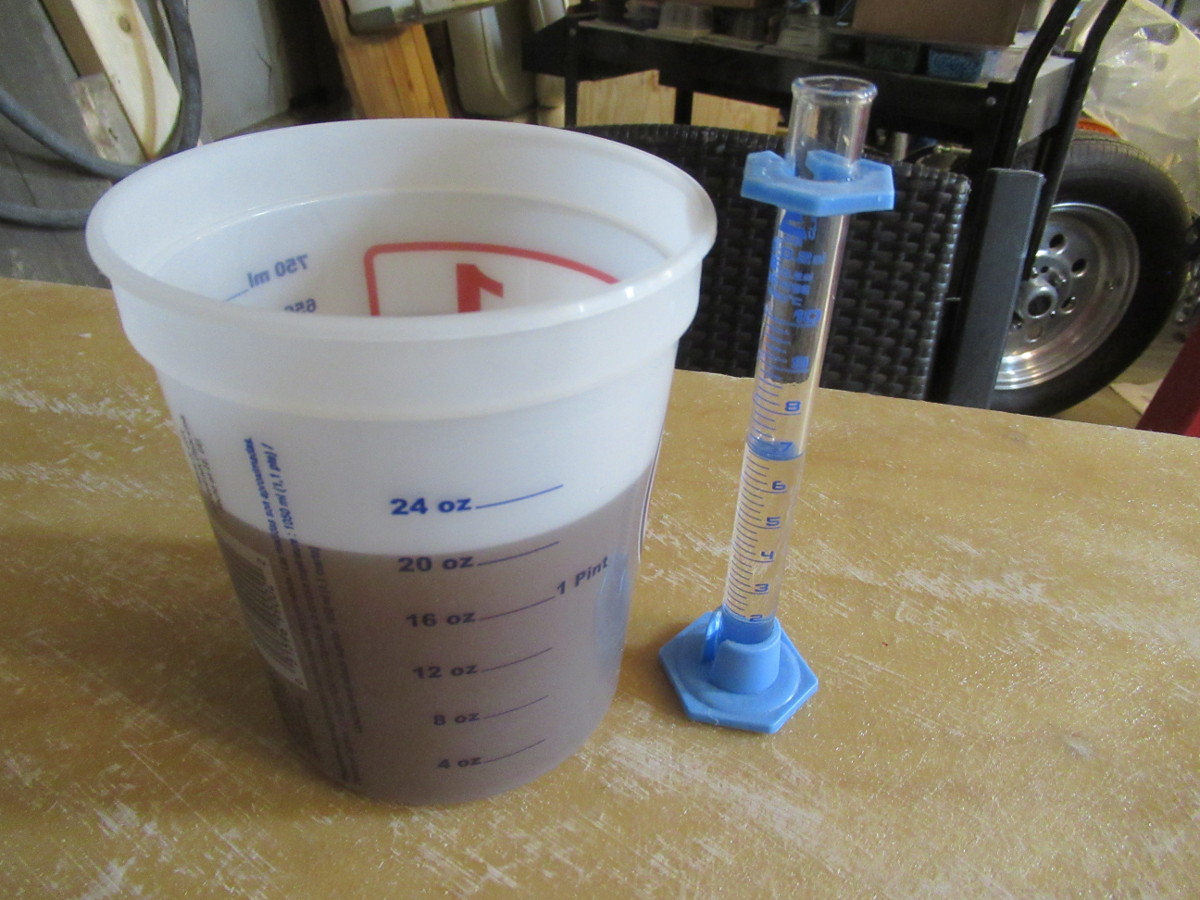
Just finished matting the other side, so both sides now have two layers of mat. Still need to protect edges, may do later today. May sand later today, but might hold off till tomorrow as we have brutal humidity here today. And I don't want resin dust in my garage! Humidity caught me by surprise (even in my garage!), resin started gelling just as I was finished, but rolled it out, looks good.

Got plenty of chores around the homestead tomorrow when it dries out and cools down some. So I will probably get at it Monday through the early part of next week. We're leaving Thursday for NH for a long weekend. Sure would be nice to get that transom in, but it is going to be a bear to do!


Attachments:

Please Log in or Create an account to join the conversation.

Time to create page: 0.330 seconds

Donate

Please consider supporting our efforts.

Glassified Ads

1967 23 ft powercat flybridge
( / Boats)

noimage
11-17-2024

Mercury outboard
( / Engines)

noimage
11-03-2024

Classic Mercury Outboard Motors
( / Engines)

Classic Mercury Outboard Motors
10-18-2024

FG Login

FiberGoogle

Who's Online

We have 11325 guests and one member online