Welcome, Guest
Username: Password: Remember me

TOPIC: Chrysler Rebuild

Chrysler Rebuild 1 month 3 weeks ago #149280

  • 63 Sabre
  • 63 Sabre's Avatar Topic Author
  • Offline
  • Contributing Member
  • Contributing Member
  • Posts: 4761
  • Karma: 147
  • Thank you received: 170
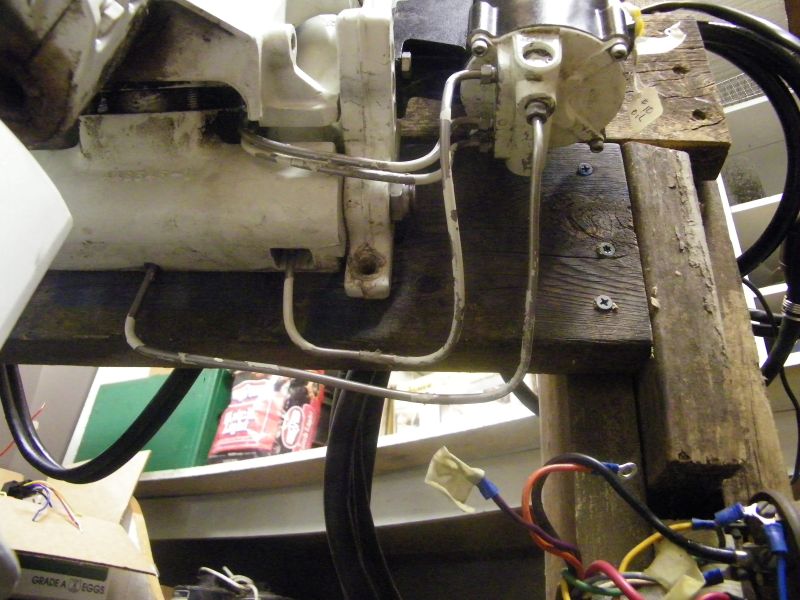
Jim, Oh no. Looking around late spring early summer next year. While "perusing" some original pics on my phone I found one that shows the routing for the hydraulic trim/tilt lines, was an accidental pic but now I can wrap up that issue also.
Got a text from the PO and he would like to see the progress, only lives 10 minutes away. Hoping the impeller arrives today.
I did go to the local DNR office two days ago and got the official title and registration completed. Didn't want to do that until I was sure the motor was good and the transom could be fixed. Otherwise I would be selling a trailer with boat attached.

Please Log in or Create an account to join the conversation.

Chrysler Rebuild 1 month 3 weeks ago #149281

  • Bilge
  • Offline
  • Fresh Boarder
  • Fresh Boarder
  • Posts: 12
  • Karma: 1
  • Thank you received: 1
Rebuild looks great so far! Happy to see that old Chrysler get some love, keeping it white on the topside or are you going to paint it another colour?

Please Log in or Create an account to join the conversation.

Chrysler Rebuild 1 month 3 weeks ago #149282

  • 63 Sabre
  • 63 Sabre's Avatar Topic Author
  • Offline
  • Contributing Member
  • Contributing Member
  • Posts: 4761
  • Karma: 147
  • Thank you received: 170
Keeping the lower portion original, topside will get some blue accent only. Planning on maybe white/blue interior seating so I want to draw them together. I have always done my own work on restorations/rebuilds including interior sewing etc. never farmed anything out except for graphics. Have some visualizations but not that far yet. This is a winter project. Thanks for the interest.

Please Log in or Create an account to join the conversation.

Chrysler Rebuild 1 month 3 weeks ago #149286

  • 63 Sabre
  • 63 Sabre's Avatar Topic Author
  • Offline
  • Contributing Member
  • Contributing Member
  • Posts: 4761
  • Karma: 147
  • Thank you received: 170
Managed to get the trim/tilt re-plumbed and tightened down, fill some holes in the bow area. Now I can soap and water the engine since the oily greasy stuff is done. Grease up all the zerks. A little wax job to make it look purty
Attachments:

Please Log in or Create an account to join the conversation.

Chrysler Rebuild 1 month 3 weeks ago #149298

  • 63 Sabre
  • 63 Sabre's Avatar Topic Author
  • Offline
  • Contributing Member
  • Contributing Member
  • Posts: 4761
  • Karma: 147
  • Thank you received: 170
Nope, not this year. Maybe late spring early summer 2026.
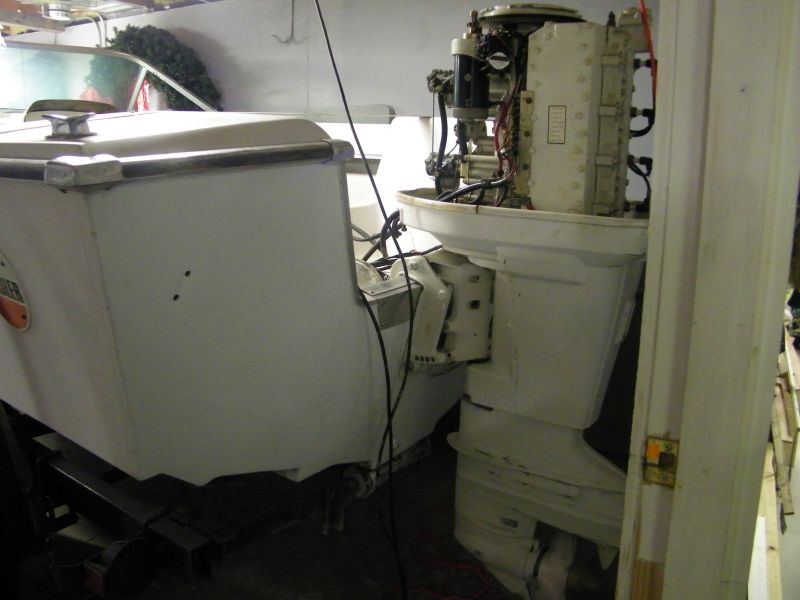
I just finished up the motor today!! Put in the new water impeller, greased all the zerks I could find, filled the LU. Only thing left is oil in the T/T pump but waiting until I get the motor re-mounted and the new wiring installed. Got new LED nav lights for the bow so I have to convert the cool looking bow light.

Please Log in or Create an account to join the conversation.

Chrysler Rebuild 1 month 3 weeks ago #149299

Yay, finally made it back in!!!! Looking good Cal, nice work so far. There was a guy who use to race in the APBA in MAryland when I libed there and he had a Chrysler 135, well he had 3 different HP badges on it but I think it really was a 135 with the racing exhaust horns, running on a 16' tunnel hull. That thing would haul a$$! It sounded like a pissed off hornets nest when running. LOL

Bob

Please Log in or Create an account to join the conversation.

Chrysler Rebuild 1 month 3 weeks ago #149300

I believe the Chrysler with the megaphones was a 150.

Please Log in or Create an account to join the conversation.

Chrysler Rebuild 1 month 3 weeks ago #149302

  • ed-mc
  • Offline
  • Platinum Boarder
  • Platinum Boarder
  • Posts: 1460
  • Karma: 235
  • Thank you received: 127
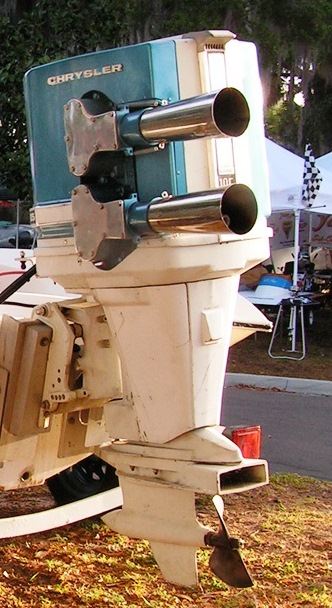
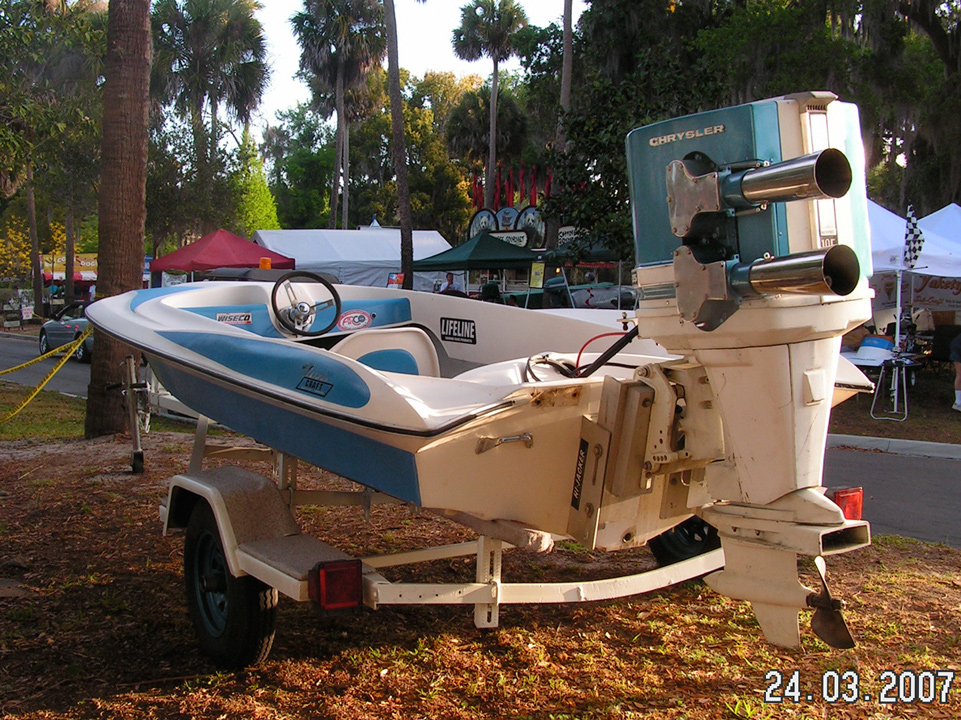
Looks like they had both 135 and 150hp versions. This pic I found is a 135 with the cool exhaust stacks and racing mid-section & lower unit. A rare bird, no doubt!
Attachments:

Please Log in or Create an account to join the conversation.

Chrysler Rebuild 1 month 3 weeks ago #149303

  • 63 Sabre
  • 63 Sabre's Avatar Topic Author
  • Offline
  • Contributing Member
  • Contributing Member
  • Posts: 4761
  • Karma: 147
  • Thank you received: 170
Yup guys, I think the difference is the lower unit design. I read somewhere that the drive shaft was smaller to cut down on vibration. More than likely bored out. I'm beginning to like this one, it's so "simple" and down to basics, easy to work on and everything is out front. Over the years I've read stories about hard-to-find parts etc. but I'm not find that at all.

Please Log in or Create an account to join the conversation.

Chrysler Rebuild 1 month 3 weeks ago #149305

  • ed-mc
  • Offline
  • Platinum Boarder
  • Platinum Boarder
  • Posts: 1460
  • Karma: 235
  • Thank you received: 127
They are quite Stone Age, but pretty easy to work on.

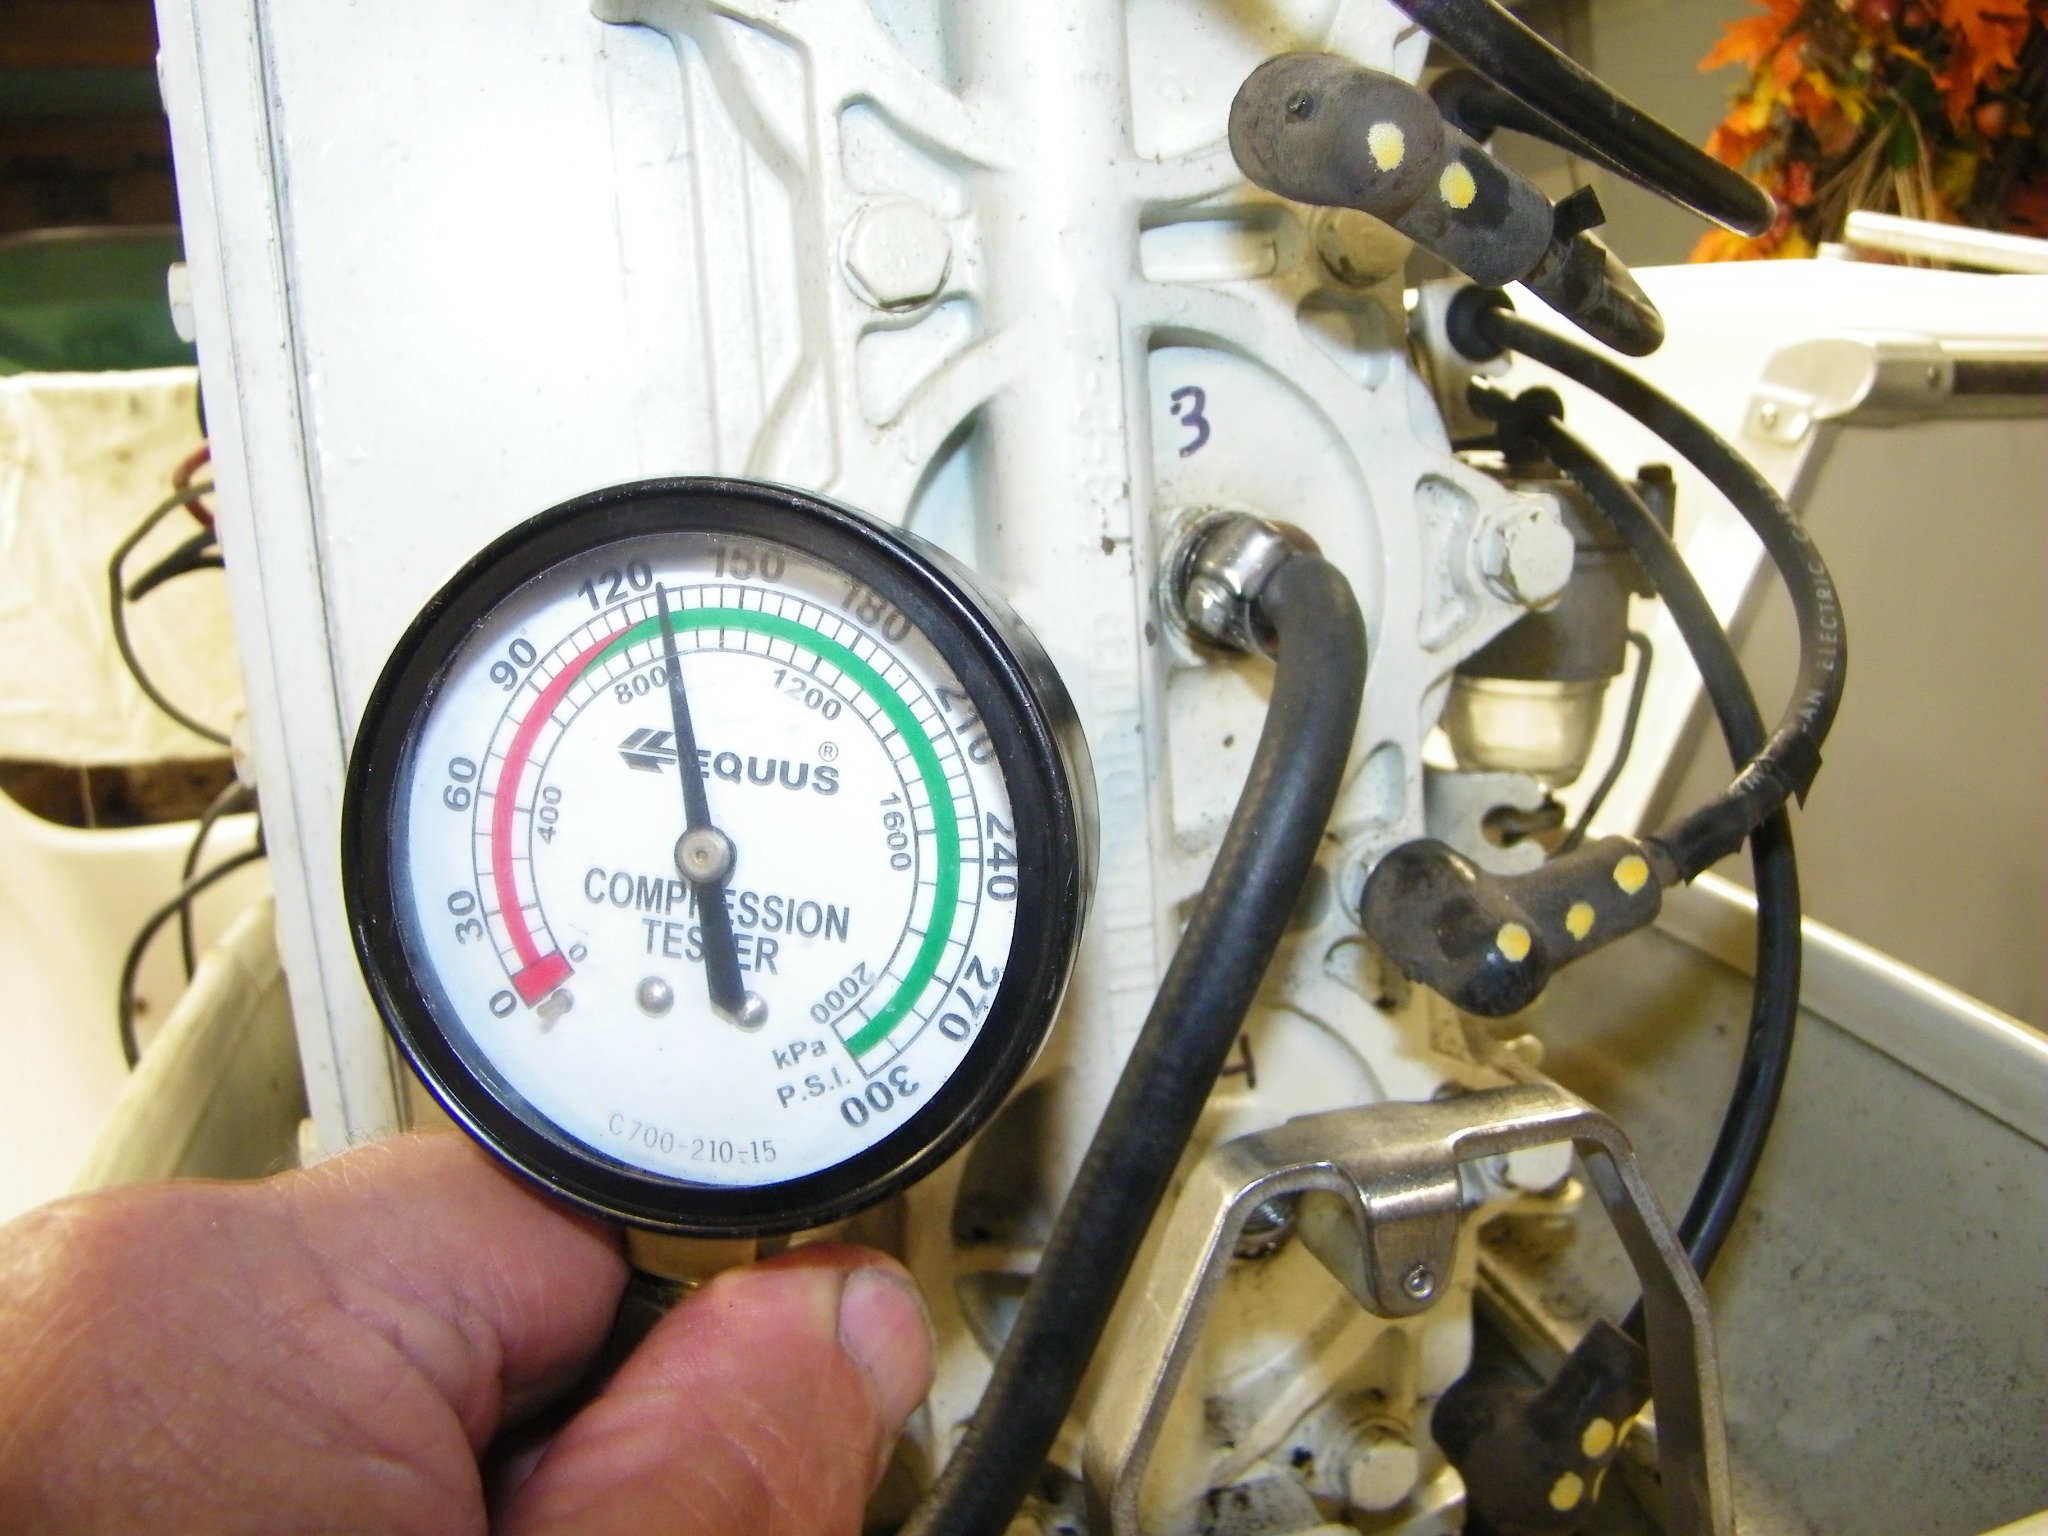
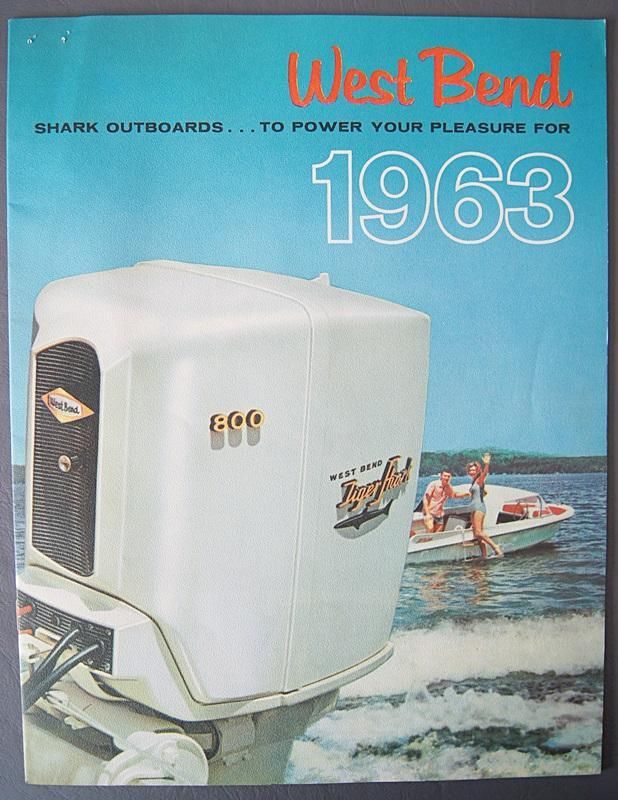
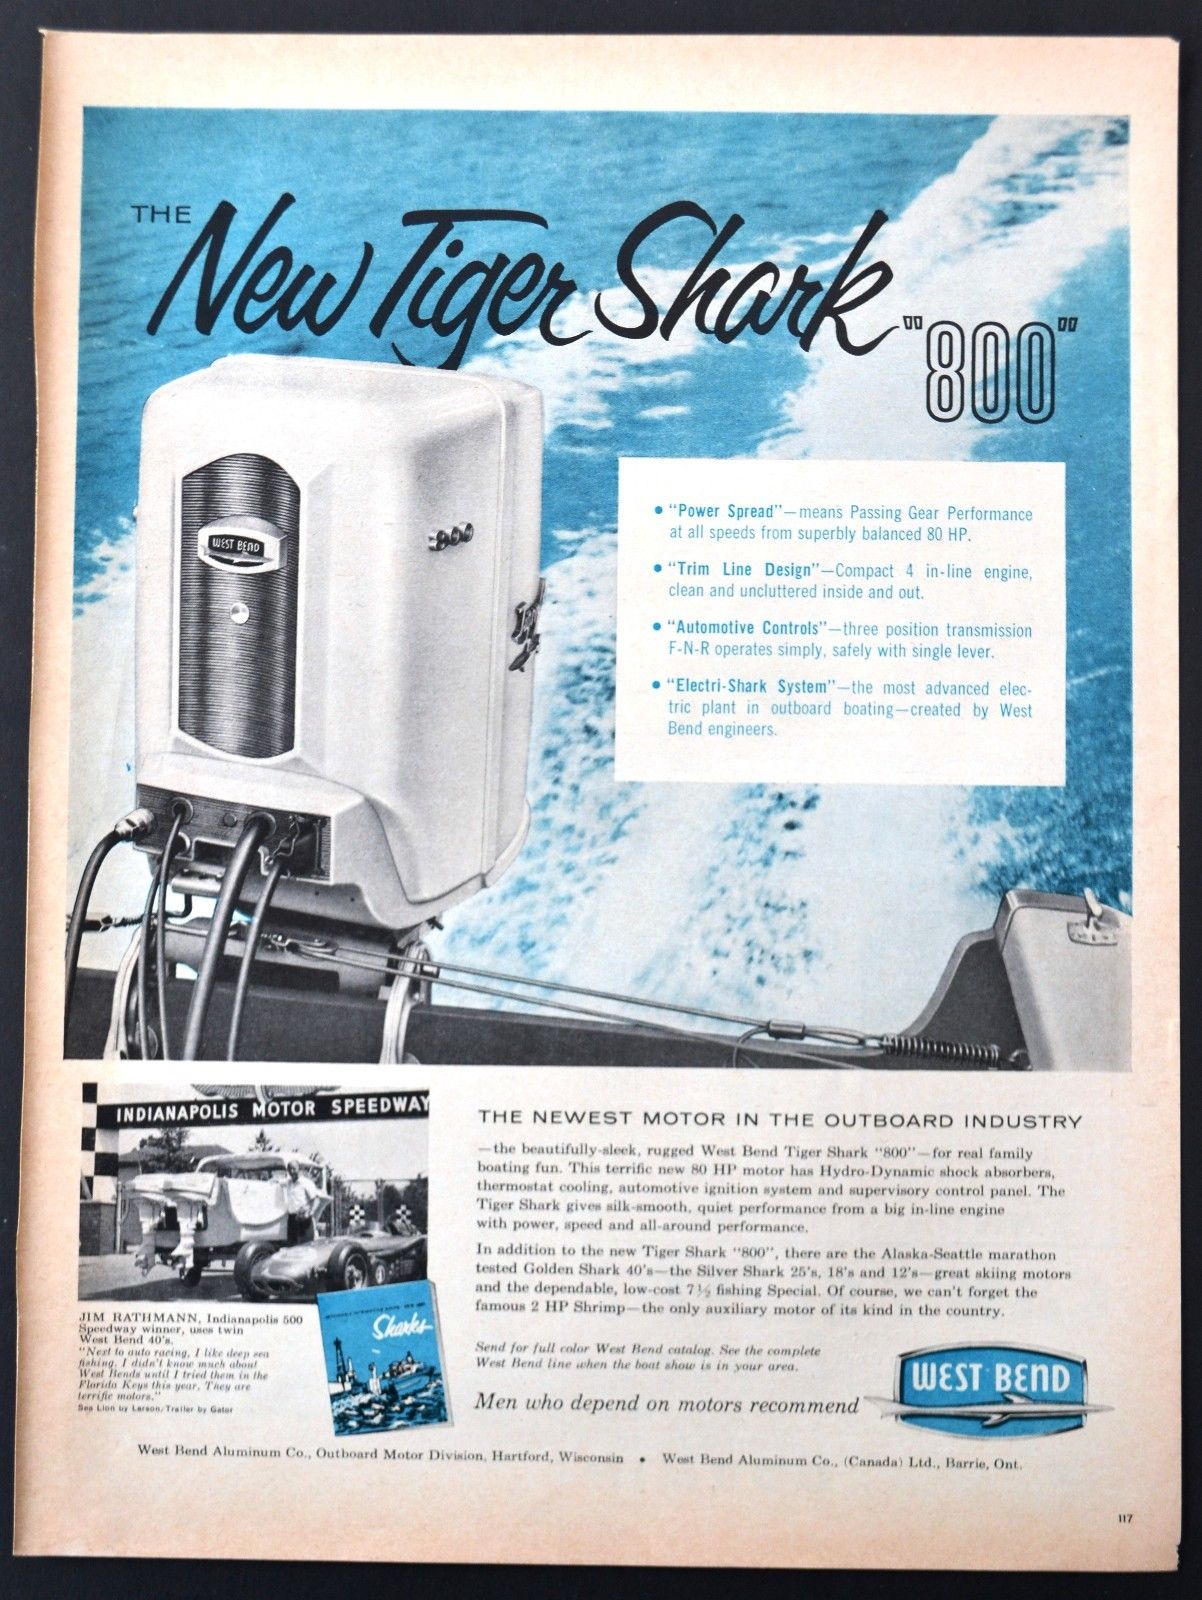
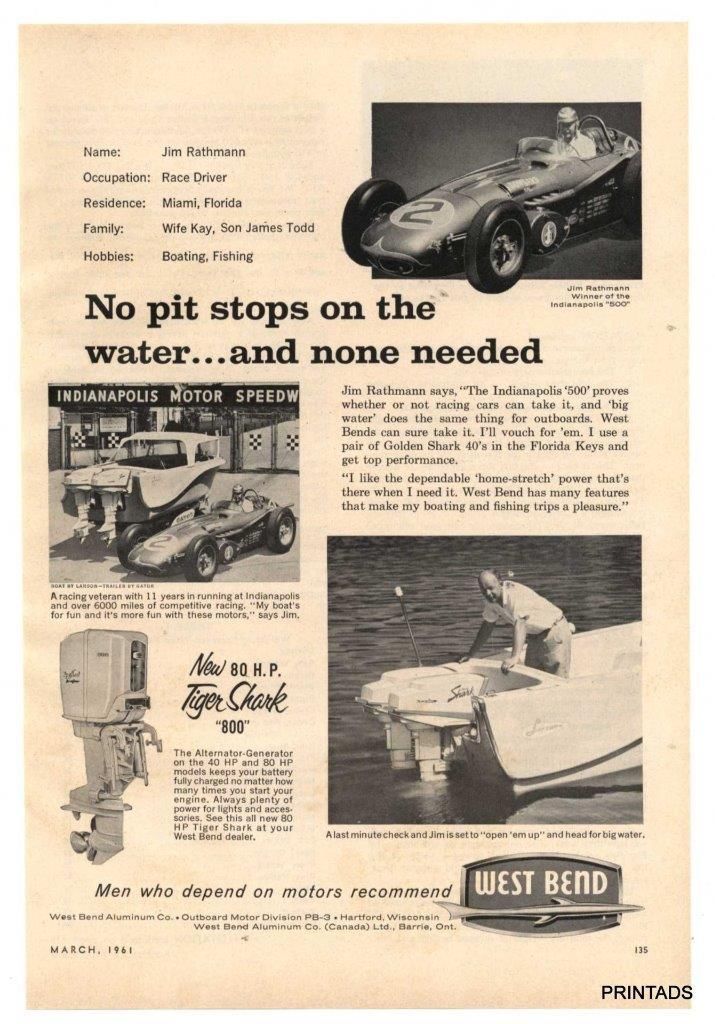
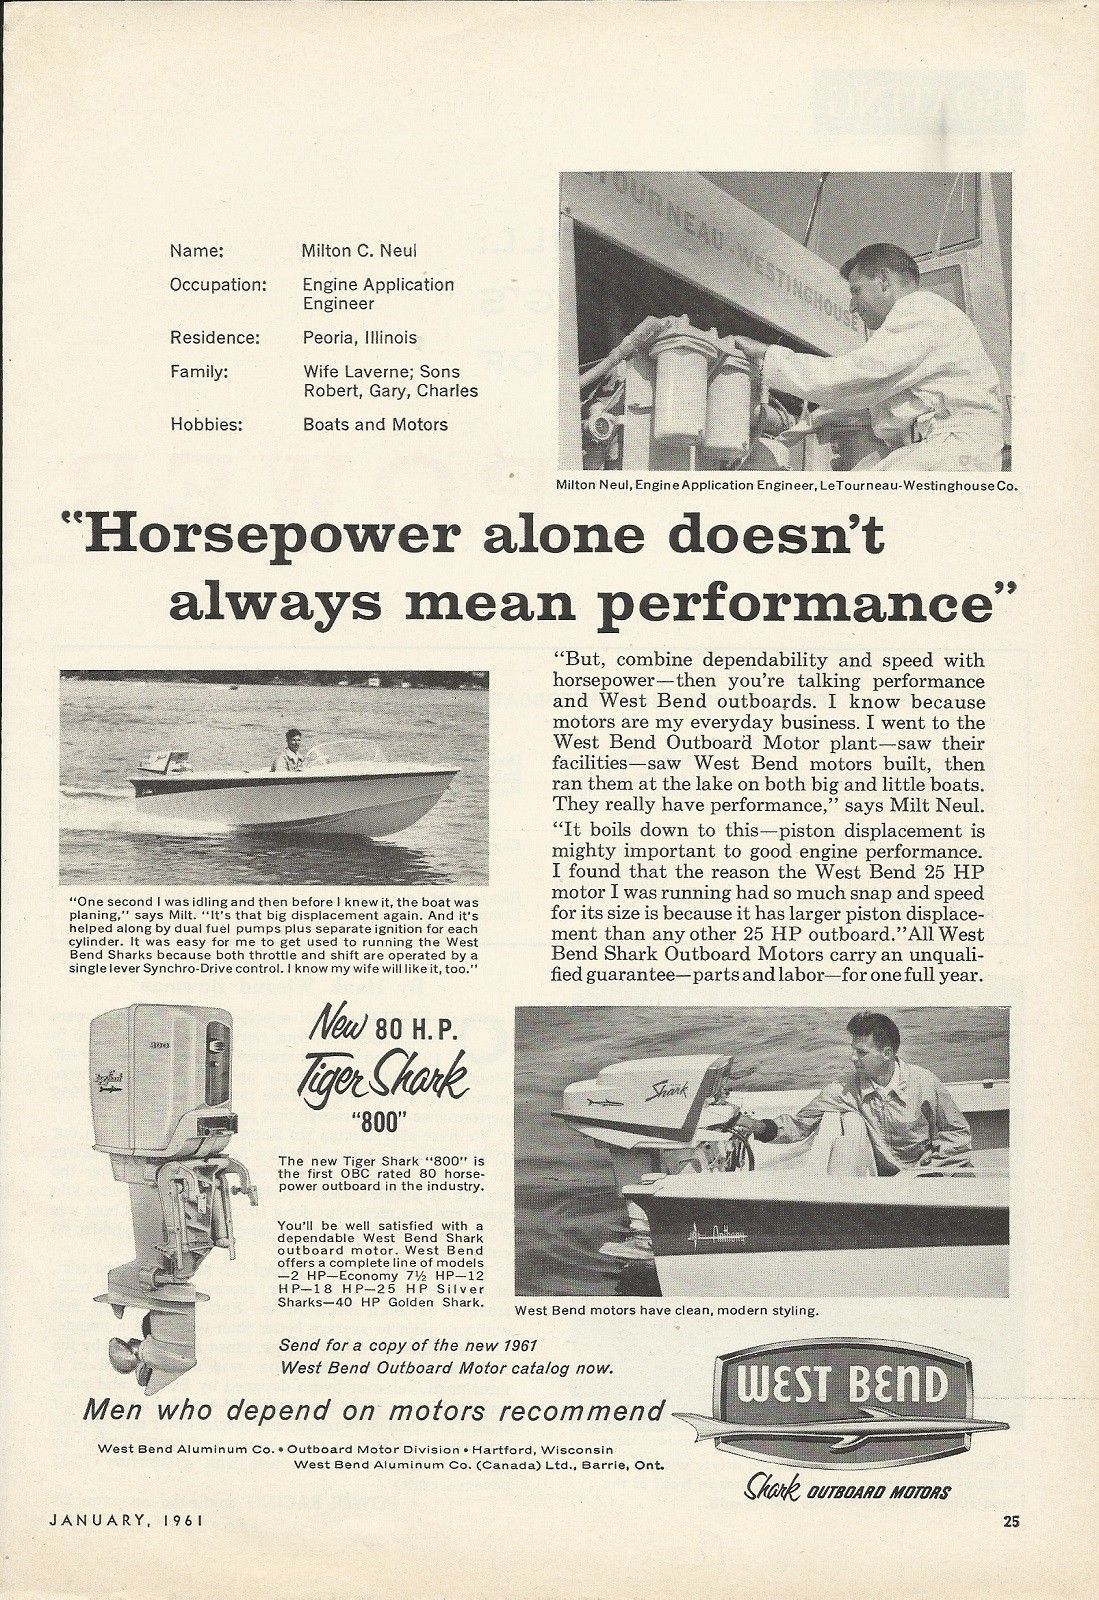
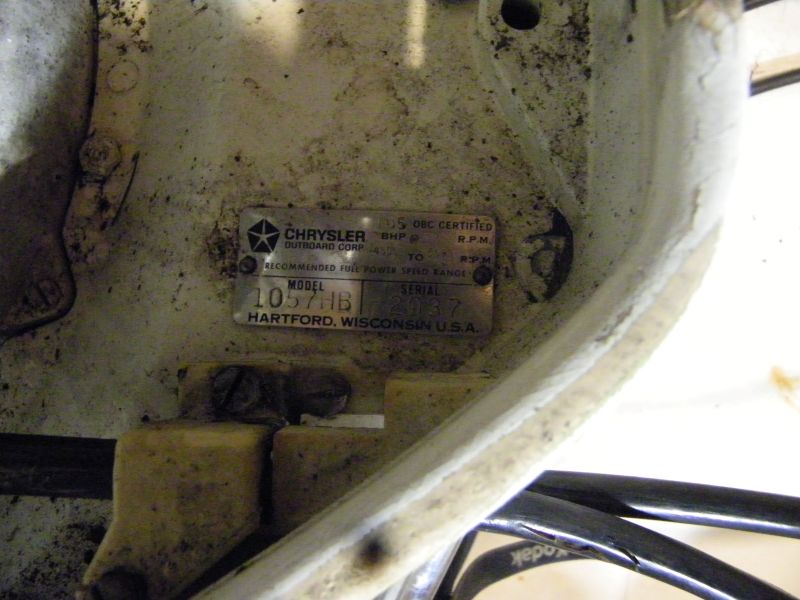
I was just reading that when Chrysler took over West Bend Outboards, one of their first big outboards was the 105hp, which was an upgraded version of the 80hp West Bend Tiger Shark.

Well, I ended up with a Tiger Shark many years ago, and put it on a boat I was selling. It was a Big Old Ugly Beast but it ran ok, and it was better than no motor at all on the boat! I basically just threw it in as part of the deal. Long time later the guy told me it had snapped a rod in the bottom cylinder. Well, it kept running all the way back to the ramp, while what was left of the rod on the crank was winging around, bashing the crankcase! Unreal.
Attachments:
The following user(s) said Thank You: 63 Sabre

Please Log in or Create an account to join the conversation.

Chrysler Rebuild 1 month 3 weeks ago #149306

  • 63 Sabre
  • 63 Sabre's Avatar Topic Author
  • Offline
  • Contributing Member
  • Contributing Member
  • Posts: 4761
  • Karma: 147
  • Thank you received: 170
Interesting info. That explains a lot about the schematics I have. wiring diagrams and part #s are compatible with the 80/85 hp. The PO stopped by my house today and had some stories about the motor, the CD unit has been replaced twice by a "qualified" tech who wouldn't stand by his work, The motor crapped out on him while fishing on Lake Michigan and he had to get towed in. That is where you do not want to have engine issues. Jim Andros' thought was to keep running the old CD unit and keep the new improved CDI ($395} on board. They are not that difficult to replace. A small crescent wrench and screwdriver.
Thinking of hanging it back on Thursday so I can run the wires and make up a new harness under the dash. Already have the fuse panel, relays terminals etc. Thinking of making a panel board to mount under the dash so everything is neat and tidy. Old corroded wired were held on with masking tape.
Yesterday installed new LED nav lights on the bow, those things are BRIGHT.

Please Log in or Create an account to join the conversation.

Chrysler Rebuild 1 month 2 weeks ago #149322

  • 63 Sabre
  • 63 Sabre's Avatar Topic Author
  • Offline
  • Contributing Member
  • Contributing Member
  • Posts: 4761
  • Karma: 147
  • Thank you received: 170
Finished re-mounting the motor and bolted down. Pulled the wires through the well hole and that's where they sit for now.
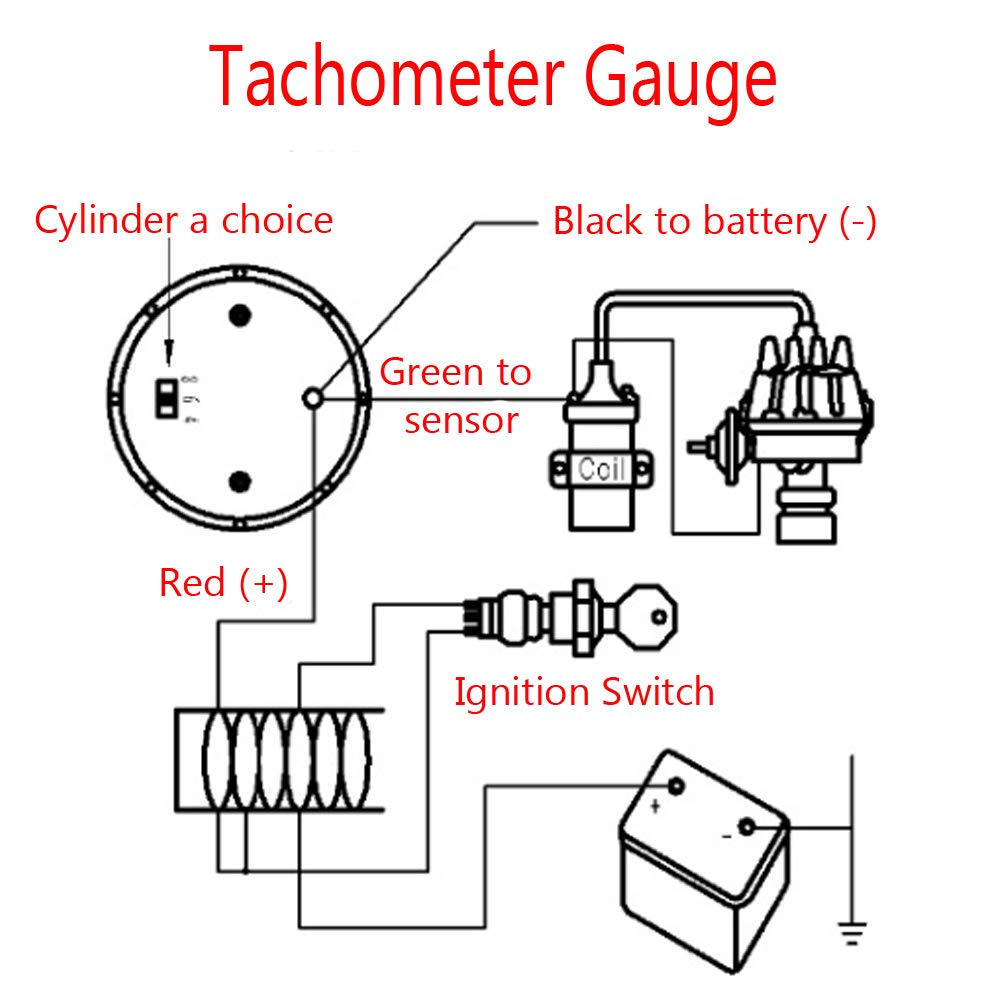
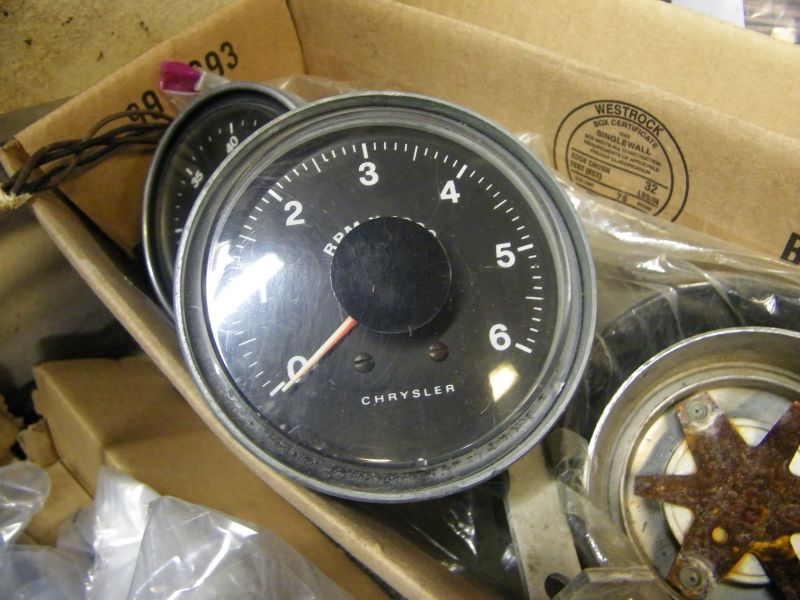
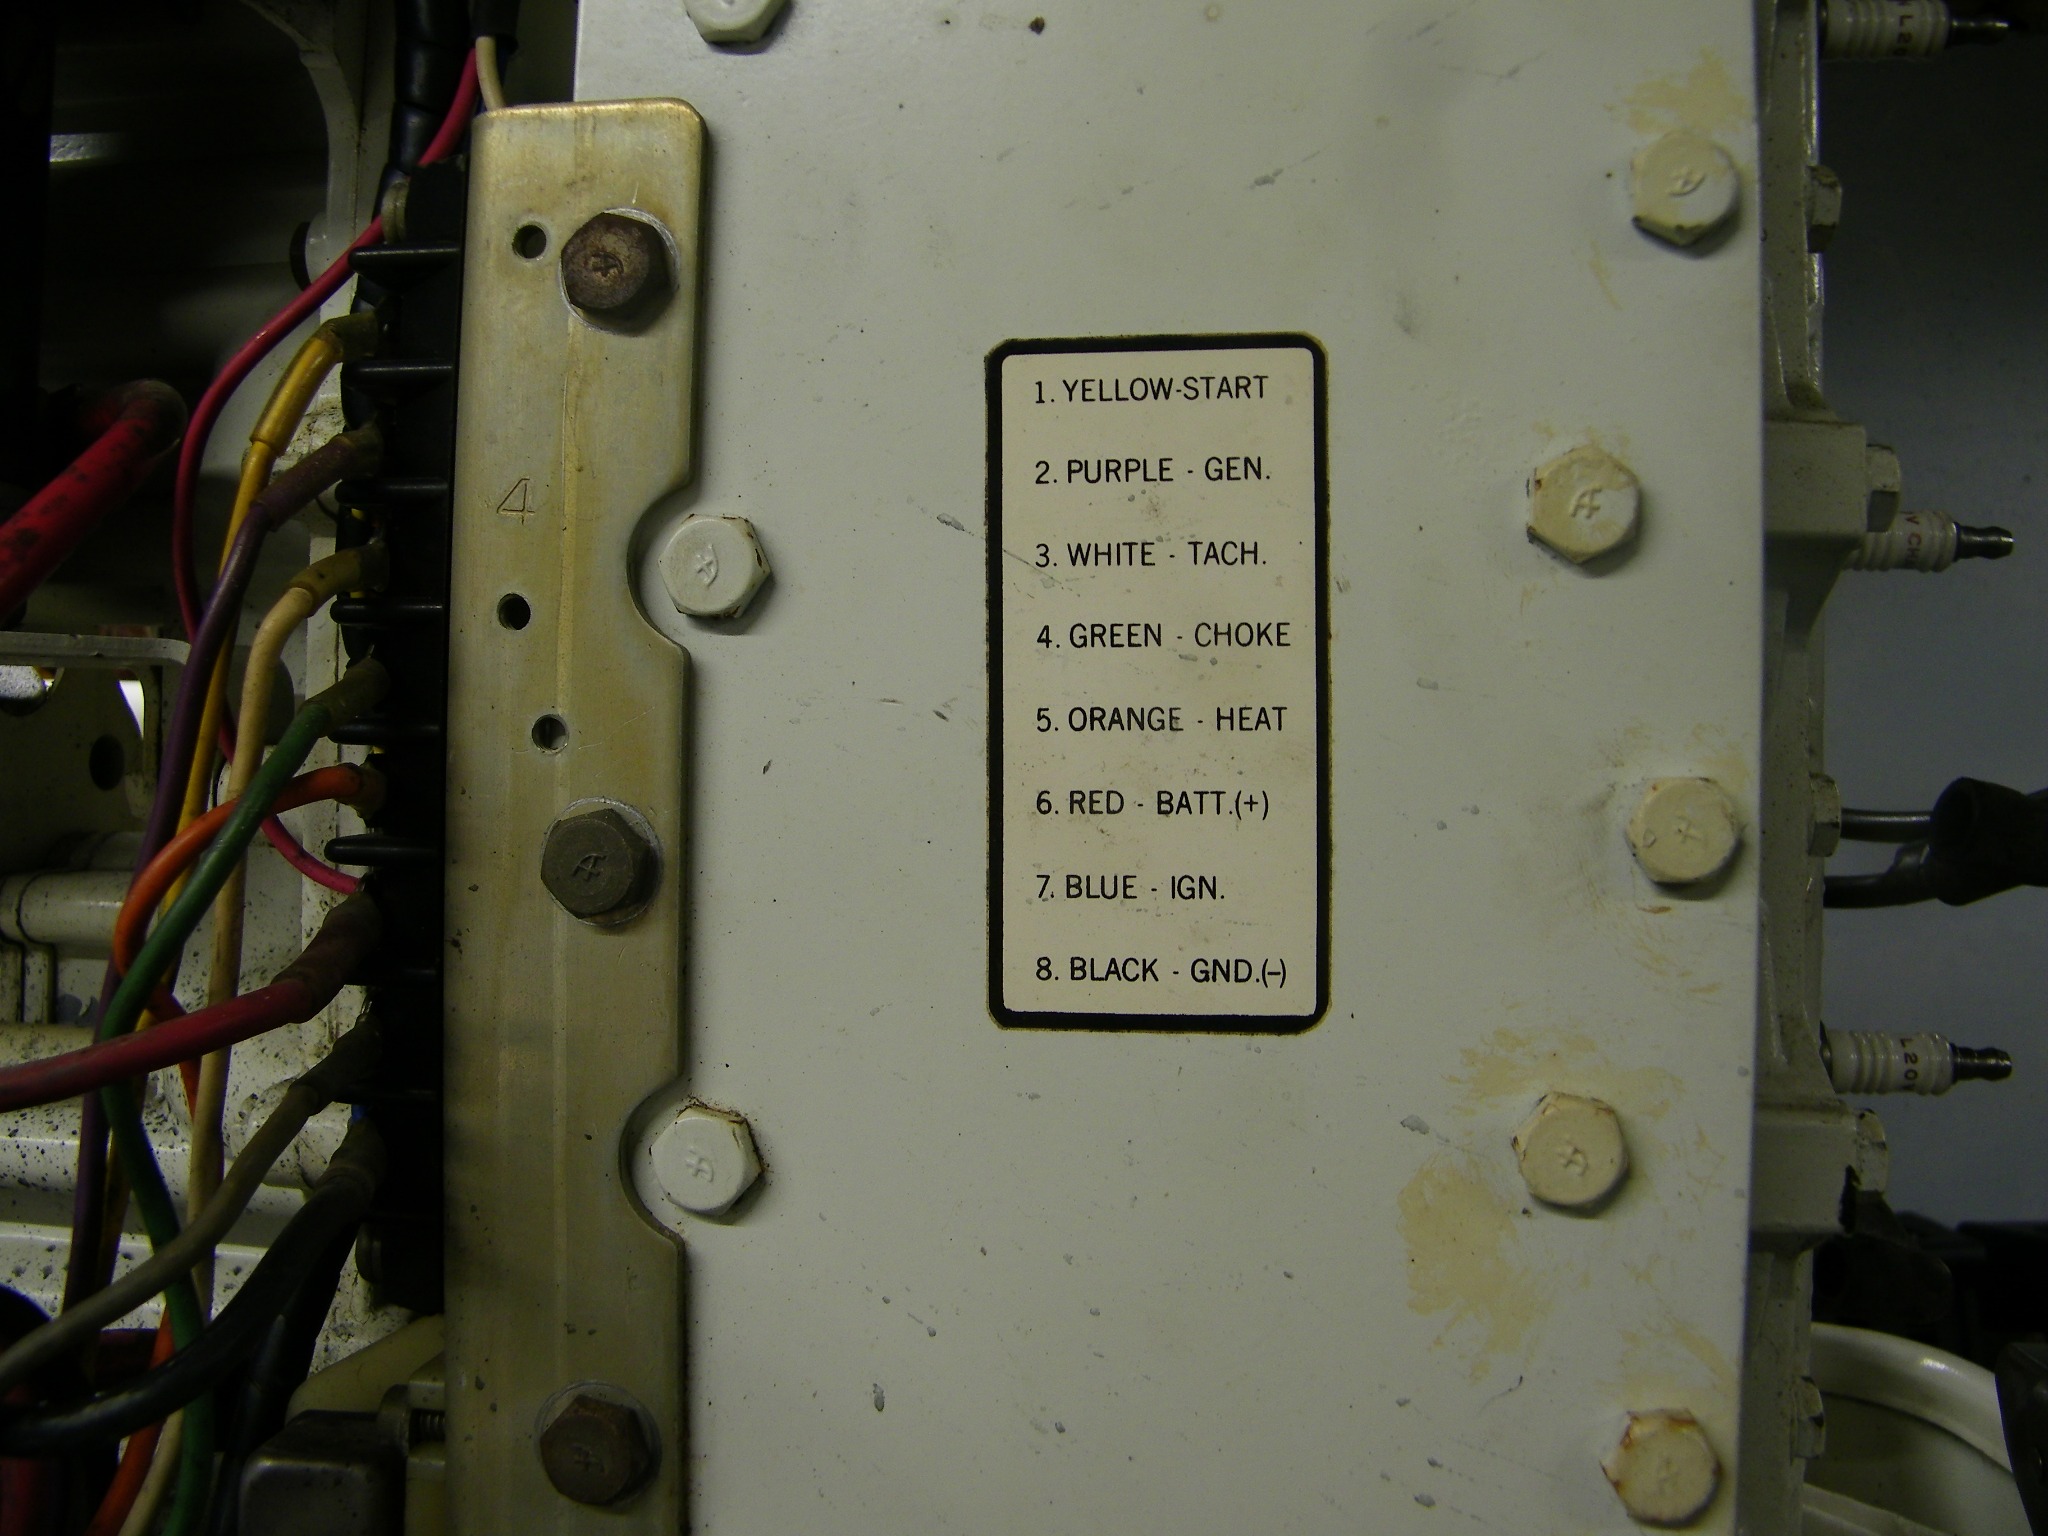
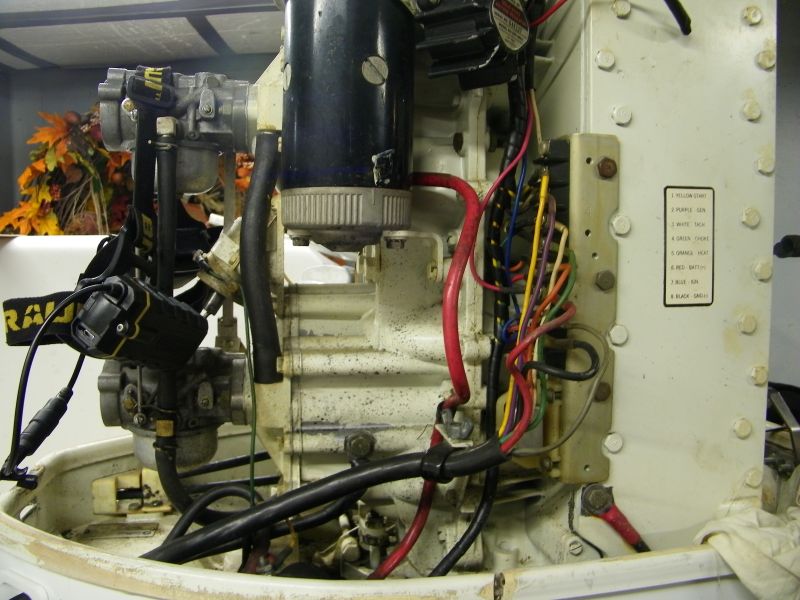
I need some advice on the tachometer. It was never wired in before, the gauge was just on the dash not connected. Wondering what wires feed into it. There is one gray wire in the loom with no connection and at the motor end the gray wire is connected to the blue ignition wire. Looking at some online diagrams would that gray wire be the feed for the tach? There are only two connection nuts on the meter and they are not labeled. I thought the tach took impulses from the stator ??? I need to know what wires go whre, Help please.
Attachments:

Please Log in or Create an account to join the conversation.

Chrysler Rebuild 1 month 2 weeks ago #149323

  • 63 Sabre
  • 63 Sabre's Avatar Topic Author
  • Offline
  • Contributing Member
  • Contributing Member
  • Posts: 4761
  • Karma: 147
  • Thank you received: 170
Forgot this. I know it say's white tach but what other wire goes on those lugs? Ground (blacK)??
Attachments:

Please Log in or Create an account to join the conversation.

Chrysler Rebuild 1 month 2 weeks ago #149324

I don't have Chrysler engine experience. I do have a fair amount of electronic tachonmeter experience.
Generally there are 3 electrical connections to an electronic (solid state) tach.

1) ground
2) postive 12V
3) Discharge side of coil going to distributor

The tach on my boat only has two posts also, with the ground wire attached to one of the mounting posts.

You can make a simple bench test platform for the gauge (if you want to take the time) -> fiberglassics.com/forum/the-70s-disco-fiber/133579-1971-glasspar-newport-cruiser-rejuvenation.html
Post #146125
The following user(s) said Thank You: 63 Sabre

Please Log in or Create an account to join the conversation.

Chrysler Rebuild 1 month 1 week ago #149325

  • 63 Sabre
  • 63 Sabre's Avatar Topic Author
  • Offline
  • Contributing Member
  • Contributing Member
  • Posts: 4761
  • Karma: 147
  • Thank you received: 170
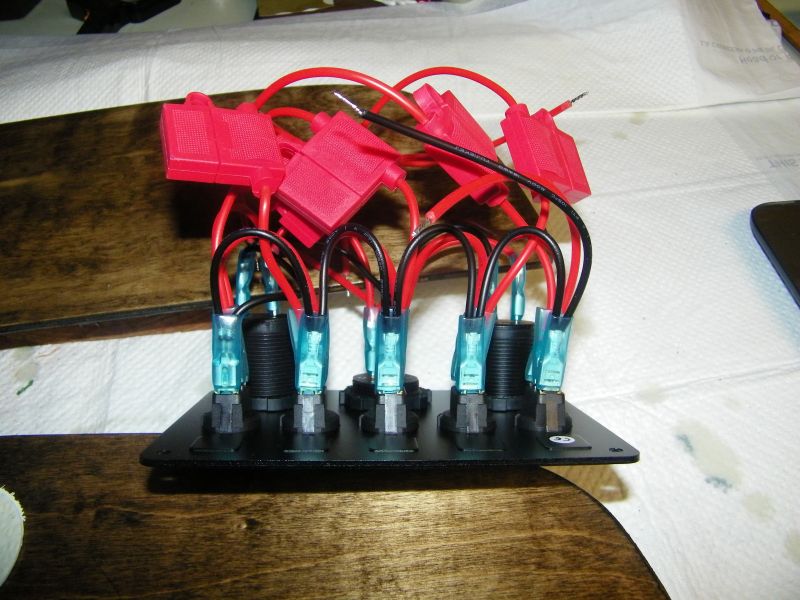
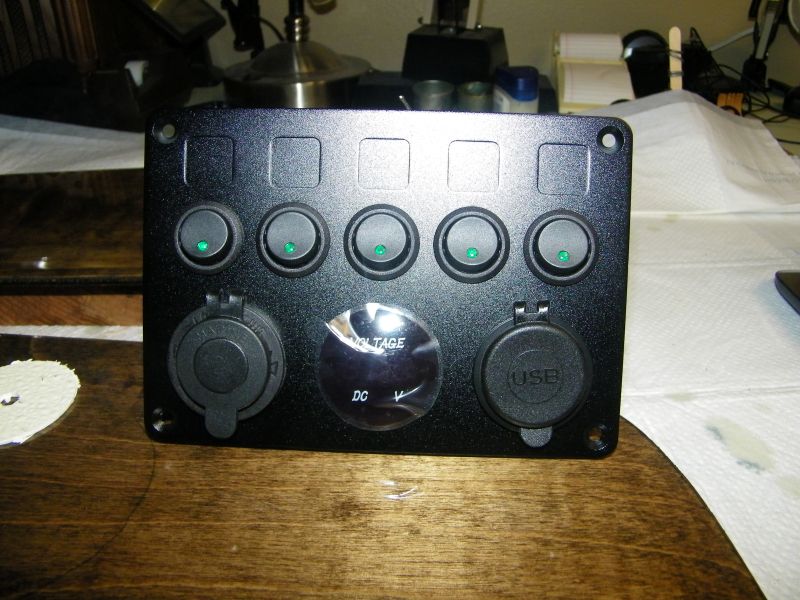
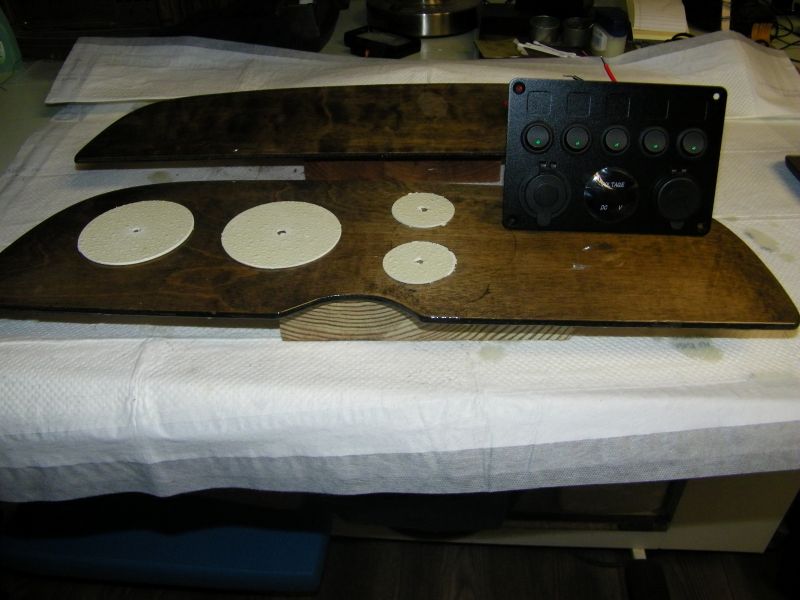
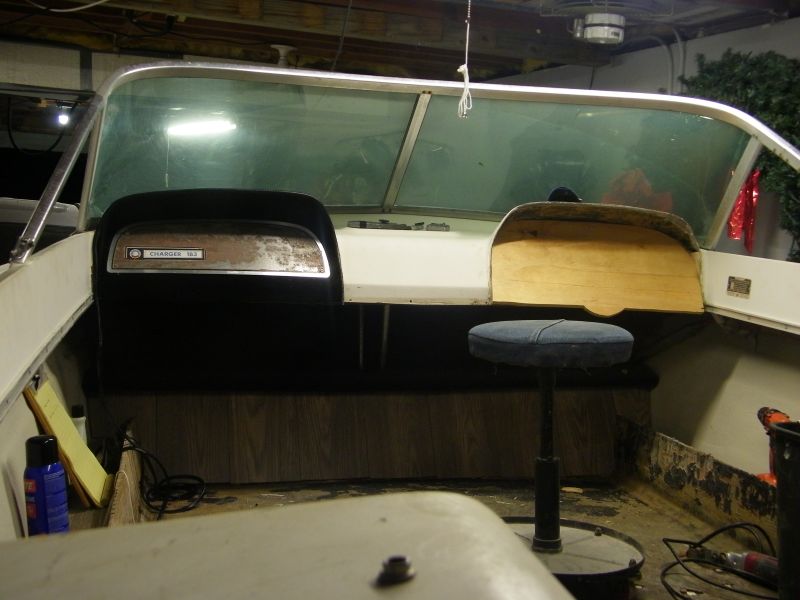
The control panel arrived in the mail yesterday so now I can continue with the helm. Drilled out some blanks for the gauges so I can re-arrange and make room for the switches. The dash pic with the old insert on the port side was for reference only. The new inserts are high gloss epoxy (took 4 days for the stuff to cure). Going to remove all those inline fuses from the back and wire everything up to the main fuse panel. I just don't like all the spaghetti. Going to keep the amp gauge hooked up along with the digital volt meter. Seems like a good way to monitor the system.
Attachments:

Please Log in or Create an account to join the conversation.

Chrysler Rebuild 1 month 1 week ago #149330

  • 63 Sabre
  • 63 Sabre's Avatar Topic Author
  • Offline
  • Contributing Member
  • Contributing Member
  • Posts: 4761
  • Karma: 147
  • Thank you received: 170
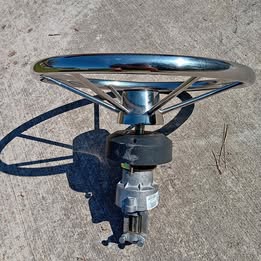
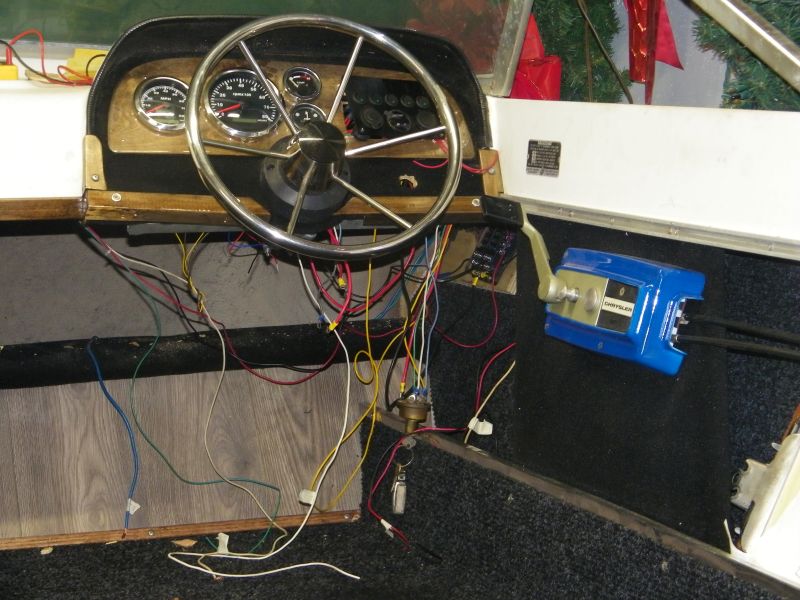
Just about finishing up on the helm but ran into a roadblock. I somewho misplaced the nut and key for the steering wheel. Anyone have a spare nut I can borrow?? The key I can get at Ace hdw but I don't know about the nut. What are the thread sizes? I ran my old worn out measuring tape across the shaft and it seems to be 5/8". Later perusing marketplace I found a complete stainless wheel with steering shaft included for $40 about 40 minutes away. Looks a lot better that that welded together POS that was on the boat.
Attachments:

Please Log in or Create an account to join the conversation.

Chrysler Rebuild 1 month 1 week ago #149335

Looks good!

What wood are you using between the helm and the floor?
Did you stain it?
What epoxy and how did you apply it?

Please Log in or Create an account to join the conversation.

Chrysler Rebuild 1 month 1 week ago #149336

  • 63 Sabre
  • 63 Sabre's Avatar Topic Author
  • Offline
  • Contributing Member
  • Contributing Member
  • Posts: 4761
  • Karma: 147
  • Thank you received: 170
Famowood Glaze Coat. 1:1 mix. Pour it on and spread with a small trowel. The "wood" is actually some vinyl plank flooring I had. Also used it in the gunnel/freeboard sidewall storage shelves to match up. Water proof. The epoxy took 3-4 days to cure. The new helm wheel is a slight bit different to mount so I'll be doing the modifications tomorrow. Still working on the wood trim to complete the dash area.
The following user(s) said Thank You: Larsspar

Please Log in or Create an account to join the conversation.

Chrysler Rebuild 4 weeks 2 days ago #149356

  • 63 Sabre
  • 63 Sabre's Avatar Topic Author
  • Offline
  • Contributing Member
  • Contributing Member
  • Posts: 4761
  • Karma: 147
  • Thank you received: 170
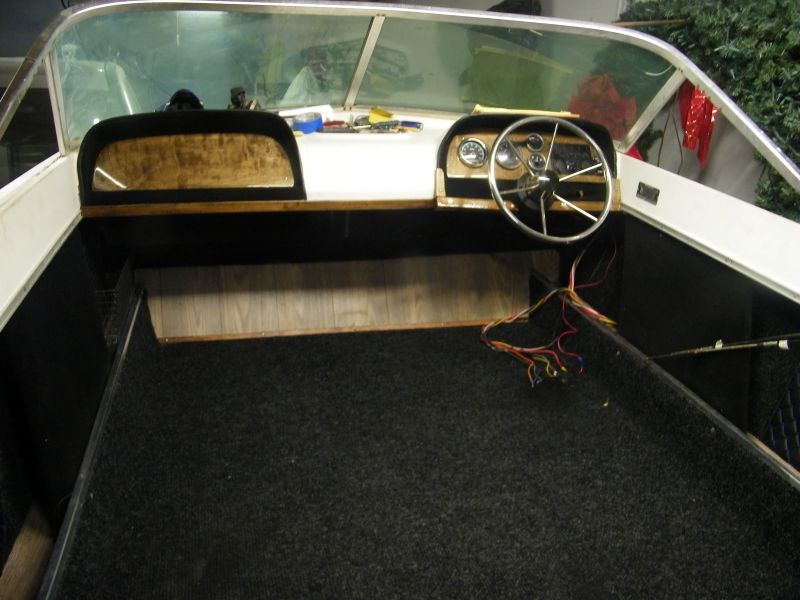
Some progress this past week. Ran wires connected the motor steering, shift cables ran wires. Installed the carpet and side panels.
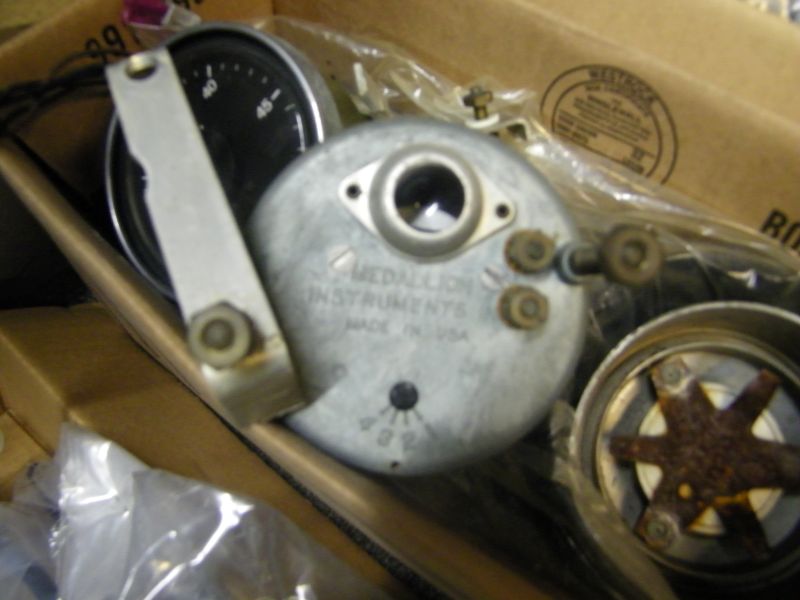
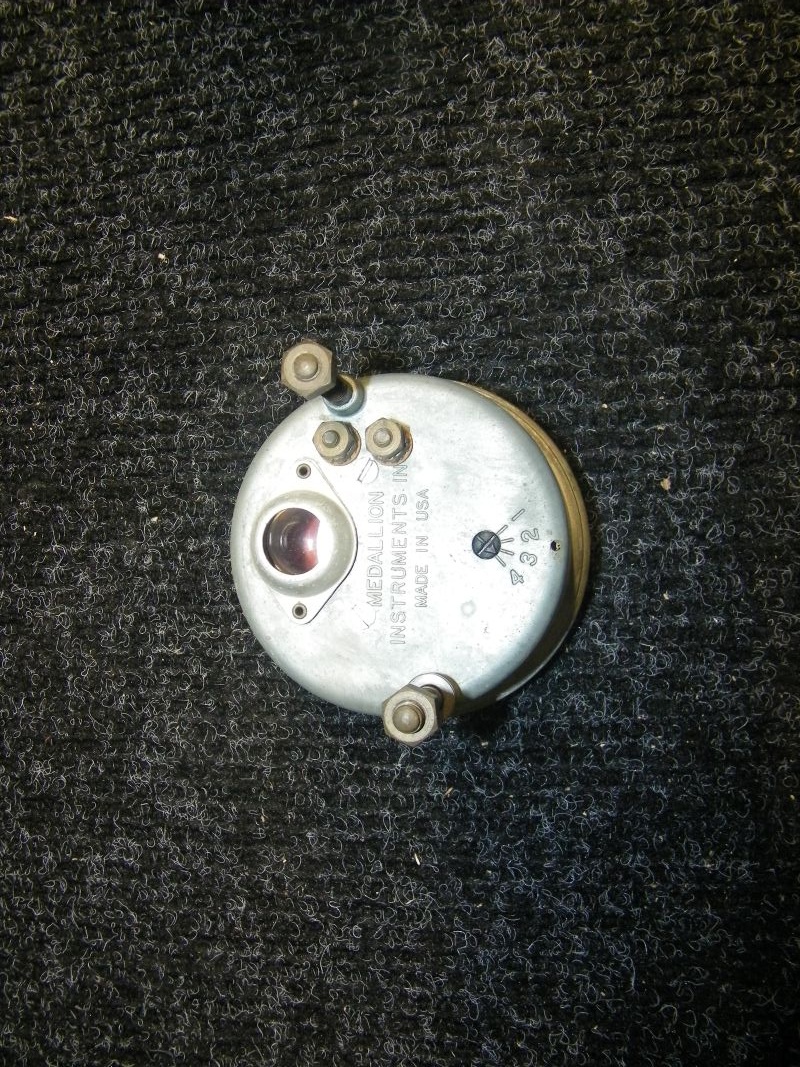
I need some help with the tach wiring. I posted this on the Chrysler/Force forum but not expecting much there. The Tach is a Medallion with two lugs on the back close together with NO labeling. I know which wire is signal (white) from the motor but which lug does it attach to? I searched Medallion and they still make tachs but I cannot find a wiring diagram for this particular one. Schematics from the Chrysler manual are no help. I emailed Medallion instruments engineering dept. with pictures hoping I'll get a reply.
Guessing it's grounded through the mounting bracket so what are the two lugs for other than signal?
Attachments:

Please Log in or Create an account to join the conversation.

Chrysler Rebuild 4 weeks 1 day ago #149357

In order for the light (not installed in picture) to function it will use the case as a ground. Presumably because a ground wire will like you say go to a mounting stud.

So, check for continuity for each stud to case ground. If both are insulated from the case (& it looks like there is a micarta insulating washer on each) then 1 gets signal & the other probably ignition switched power.

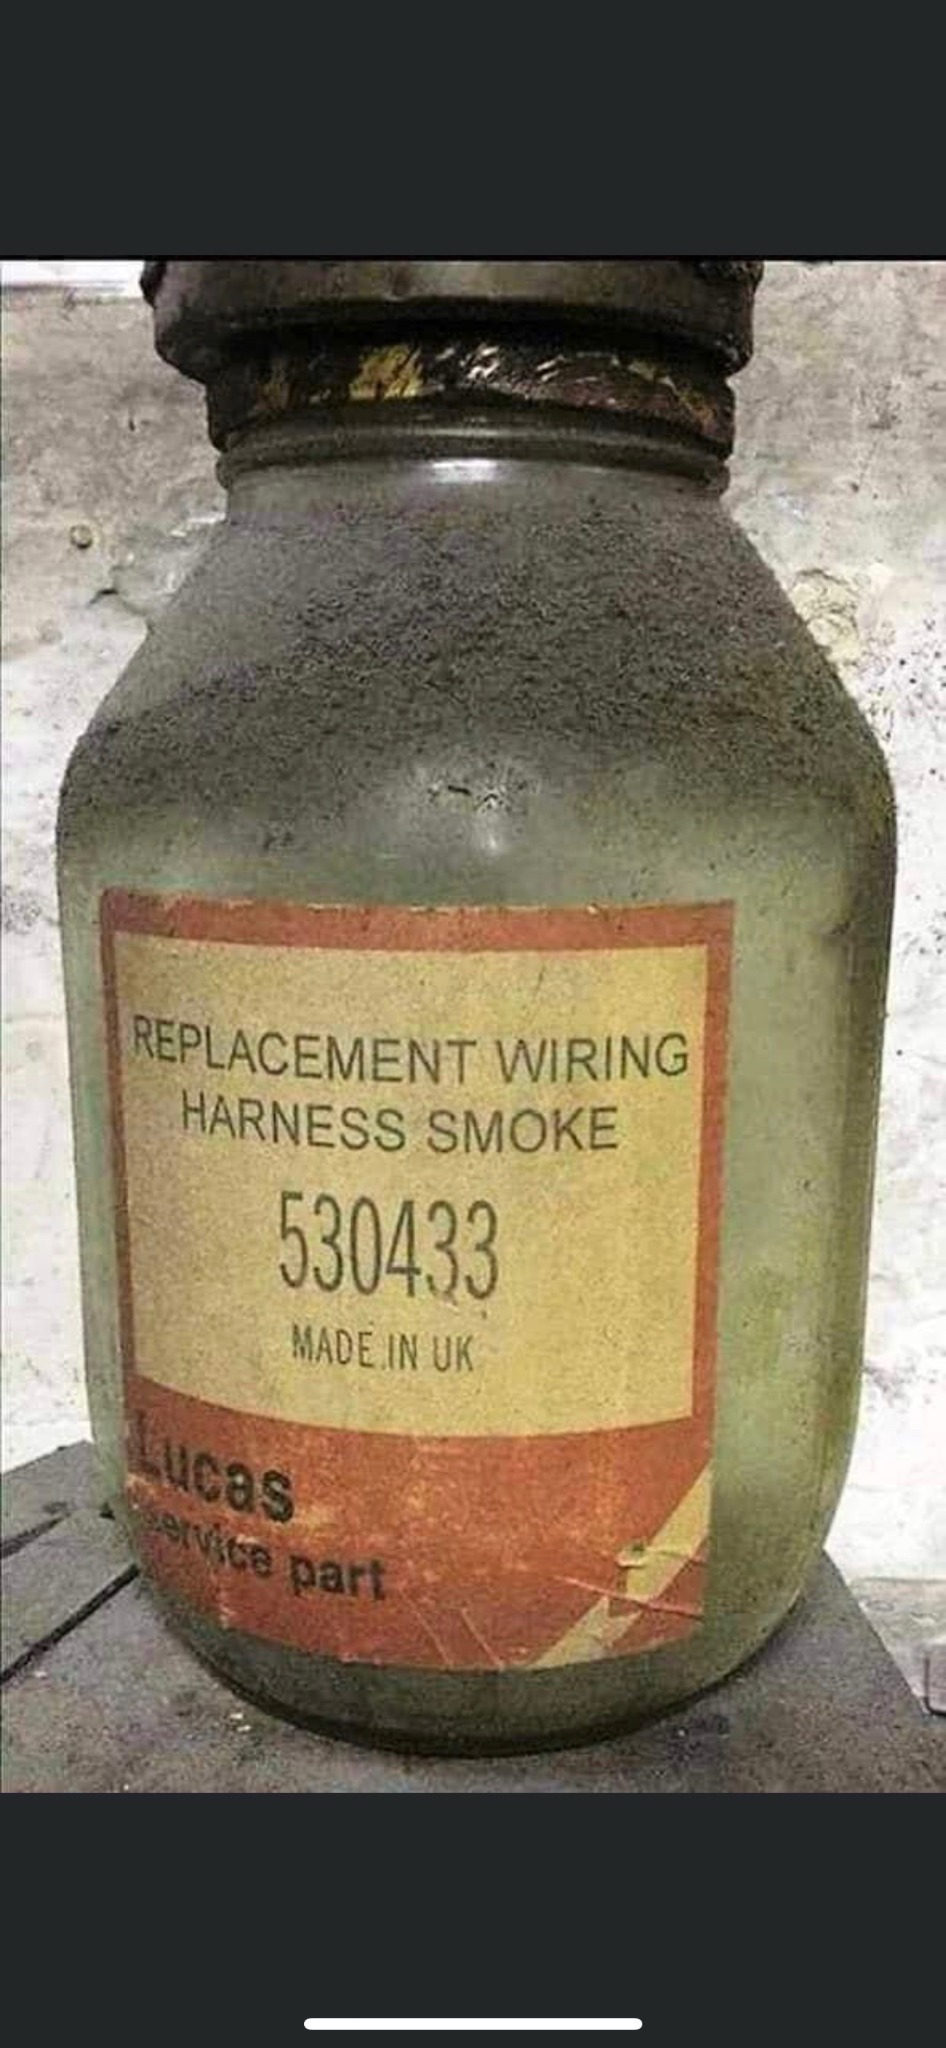
Worst that can hapen is you let the blue smoke out of the wires. If so, you will need some of this....
Attachments:

Please Log in or Create an account to join the conversation.

Chrysler Rebuild 4 weeks 1 day ago #149358

  • 63 Sabre
  • 63 Sabre's Avatar Topic Author
  • Offline
  • Contributing Member
  • Contributing Member
  • Posts: 4761
  • Karma: 147
  • Thank you received: 170
I'll check continuity. good suggestion. If neither are ground then I'll order a bottle of blue smoke detector. I'll wait to see if I get any reply from Medallion engineering dept. Long shot but if I do get anything I'll post it.

Please Log in or Create an account to join the conversation.

Chrysler Rebuild 4 weeks 1 day ago #149363

I've realized now that the tach won't work. There is no hose barb on it.

Please Log in or Create an account to join the conversation.

Chrysler Rebuild 4 weeks 1 day ago #149364

A tach doesn't have any kind of hose attached to it.

Please Log in or Create an account to join the conversation.

Chrysler Rebuild 4 weeks 1 day ago #149365

Read "Newbie checking in" in next thread....

Please Log in or Create an account to join the conversation.

Chrysler Rebuild 4 weeks 13 hours ago #149367

  • 63 Sabre
  • 63 Sabre's Avatar Topic Author
  • Offline
  • Contributing Member
  • Contributing Member
  • Posts: 4761
  • Karma: 147
  • Thank you received: 170
If there is no barb for the fresh water to enter how does the tack get lubricated?

Please Log in or Create an account to join the conversation.

Chrysler Rebuild 4 weeks 13 hours ago #149368

  • 63 Sabre
  • 63 Sabre's Avatar Topic Author
  • Offline
  • Contributing Member
  • Contributing Member
  • Posts: 4761
  • Karma: 147
  • Thank you received: 170
Just for giggles I ordered a Chinee tach off eBay for $32. Really high quality, what could possibly be better than new instruments right??? Still hanging on to the original Chrysler logo'd. I did put a analog ohm meter on the two lugs. there is a small reading between them but hard to see exactly what it is. They are not grounded to the case so I'm guessing they are signal and batt. will do the blue smoke check later.

Please Log in or Create an account to join the conversation.

Chrysler Rebuild 3 weeks 6 days ago #149371

  • 63 Sabre
  • 63 Sabre's Avatar Topic Author
  • Offline
  • Contributing Member
  • Contributing Member
  • Posts: 4761
  • Karma: 147
  • Thank you received: 170
INCREDIBLE! I actually received a response from Medallion instruments with an answer about the tach wiring.
Put the jar of blue smoke back on the shelf for another day.
"Shawn Knapp
From:
This email address is being protected from spambots. You need JavaScript enabled to view it.
To:
Cal Martell,
info
Mon, Oct 27 at 7:35 AM
Cal,
The good news is that if you get them on the wrong lug, you will not damage anything. I believe that the lug next to the IN is the positive (or input).

Thank you,
Shawn Knapp
17150 Hickory Street
Spring Lake, MI 49456
Phone 866-492-3686
Fax 616.842.7114

I wrote him back thanking him for restoring my faith in USA corporate relations.
Now I would recommend Medallion instruments to anyone who would ask.

Please Log in or Create an account to join the conversation.

Chrysler Rebuild 3 weeks 2 days ago #149374

  • 63 Sabre
  • 63 Sabre's Avatar Topic Author
  • Offline
  • Contributing Member
  • Contributing Member
  • Posts: 4761
  • Karma: 147
  • Thank you received: 170
Another bump in the road. Taking a few days off from the wiring, my mind is going to Jello every time I look under that dash. must be all the different colors. Anyway I moved the boat out to my driveway to see if I had the ign wired correctly....I didn't. Got it all turned around and running with muffs, now finding that it is not cooling, no water circ. I pulled the thermostat and found 24 yr old seaweed in there so I guessing there's more where that came from. Ran it without the thermostat cover on and still wasn't getting any water shooting up and out. Don't want to backflush it cuz that will just push the garbage back down to the impeller so....off comes the LU again and I have to shove a hose up it's butt and hopefully push all the stuff out the thermostat passage, I really don't want to pull the head. Any other options??
Attachments:

Please Log in or Create an account to join the conversation.

Chrysler Rebuild 3 weeks 2 days ago #149375

  • ed-mc
  • Offline
  • Platinum Boarder
  • Platinum Boarder
  • Posts: 1460
  • Karma: 235
  • Thank you received: 127
I hate boat wiring, too! Never any fun and hardly ever is there a wiring diagram!!

Pulling the lower unit is the best bet for flushing the powerhead. You can puff a bit of air up there and see if that helps. Hook up the hose to the water supply tube and flush away. Hopefully that gets it.

Unfortunately if it's still clogged, you'll likely have to pull the head. Or pull the powerhead to check for obstructions. Hopefully it doesn't get to that.

BTW the head gasket is readily available, and surprisingly enough, it's the same gasket used on the later 120hp Force models. Guess they kept the same bore and stroke configuration of the 105hp. Talk about Stone Age Outboards!

Just search on eBay for "(824615, 476529) head gasket" and it pulls up several that are just a bit over $40 shipped. Marineengine.com wants over $72 plus shipping for the Merc gasket, and around $52 plus ship for the Sierra equivalent. Ebay for the Win!

Just a thought, you might be able to run a coat hanger or other stiff wire up the water tube all the way to the powerhead, to poke around for obstructions up top.

Good Luck!

Please Log in or Create an account to join the conversation.

Chrysler Rebuild 3 weeks 1 day ago #149376

  • 63 Sabre
  • 63 Sabre's Avatar Topic Author
  • Offline
  • Contributing Member
  • Contributing Member
  • Posts: 4761
  • Karma: 147
  • Thank you received: 170
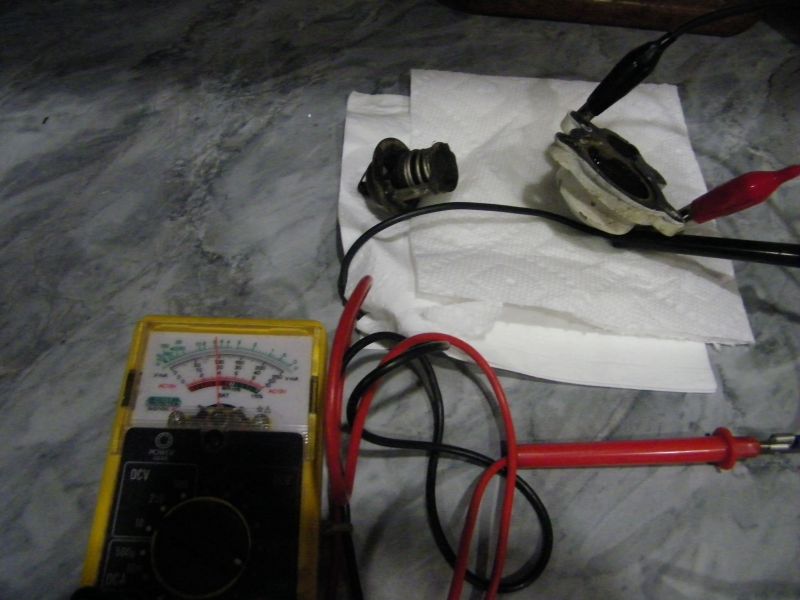
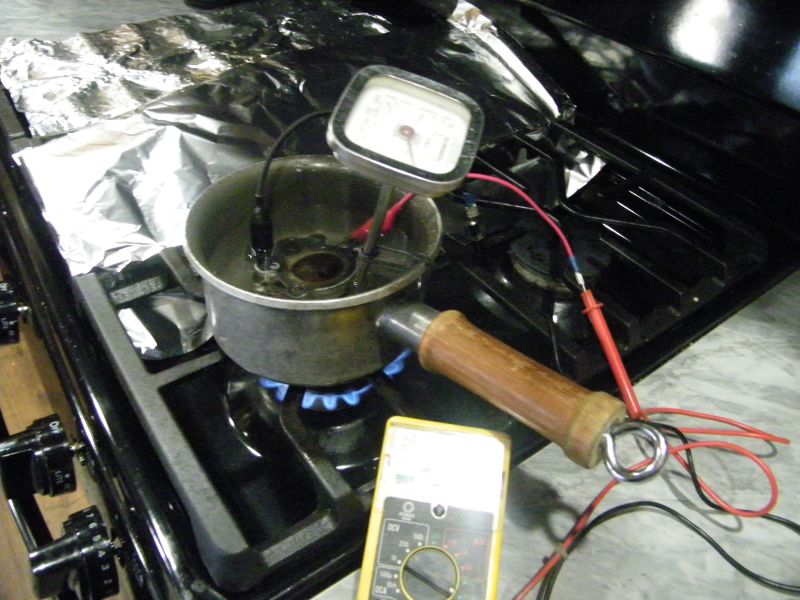
Good idea again. Yes I did check marineengine and ebay and found what you did about those gaskets. Holding off on that for now to see if I can blow/flush the system passages. Took advantage of the thermostat and sensor being out and tested them. both worked perfect after I boiled the seaweed out of the spring. Funny on this motor it has two temp sensors, one by the thermostat and the other in the water jacket. only the thermostat sensor was wired up.
Attachments:

Please Log in or Create an account to join the conversation.

Chrysler Rebuild 3 weeks 1 day ago #149377

  • ed-mc
  • Offline
  • Platinum Boarder
  • Platinum Boarder
  • Posts: 1460
  • Karma: 235
  • Thank you received: 127
The one hooked up probably went to the overheat horn. Maybe the other sensor was for a temperature gauge?

Either one is really of little use, by the time the block gets really hot from loss of cooling water at speed, the pistons and rings are probably already smoked.

A valuable instrument, however, is a water pressure gauge. You can keep track of normal running pressure, and if pressure goes way down all of a sudden, you can hopefully catch it before damage occurs.

Maybe pull the non-used sensor, and then a fitting for a pressure gauge could be plumbed in?

Please Log in or Create an account to join the conversation.

Chrysler Rebuild 3 weeks 14 hours ago #149378

  • 63 Sabre
  • 63 Sabre's Avatar Topic Author
  • Offline
  • Contributing Member
  • Contributing Member
  • Posts: 4761
  • Karma: 147
  • Thank you received: 170
Over temp horn not included in the boat but a temp gauge is. The gauge is what is wired to the thermostat area. The pressure gauge is intriguing. Never thought of that. Checked out a few online. Both sensors and thermostat work so I have options.
Got the air horns wired, anchor light, running lights and bilge pump finished up. Jumping into the 5 pin tilt/trim relay fiasco today...I hate relays!!!?!. The old pump was simple three wire up/down the new pump is only 2 wire. Jim Andros had the new pump running for me...simple for him, brain freeze for me. Wondering if I can run directly from the battery (+) through a fuse to the relays and bypass the starter relay and circuit breaker since my relays will be set under the bow area alongside the fuse panel. I do have a spare breaker. Don't have the relays handy right now but think they are 40amp. There would be about #10 wire running to the unit from the relays. Wire is from the old setup.
Attachments:

Please Log in or Create an account to join the conversation.

Chrysler Rebuild 3 weeks 9 hours ago #149381

I would mount the relays under the splash well not the dash. Much less 10 ga wire required.
Let me find a good wire diagram later, need to mulch leaves at the moment.

Please Log in or Create an account to join the conversation.

Chrysler Rebuild 3 weeks 8 hours ago #149382

  • 63 Sabre
  • 63 Sabre's Avatar Topic Author
  • Offline
  • Contributing Member
  • Contributing Member
  • Posts: 4761
  • Karma: 147
  • Thank you received: 170
There's enough room under the cowl to mount the relays directly on the motor. If I do this what gauge wire would be needed from the switch to the relays? 16? 14?. The 10 gauge is already run to the bow area, leftovers from the previous setup
Attachments:

Please Log in or Create an account to join the conversation.

Chrysler Rebuild 3 weeks 4 hours ago #149383

  • ed-mc
  • Offline
  • Platinum Boarder
  • Platinum Boarder
  • Posts: 1460
  • Karma: 235
  • Thank you received: 127
14-gauge should work for all of the control wiring. Plenty of big Mercs have their PT&T solenoids mounted on the side of the powerhead. I don't recall their control wiring being huge. The solenoids shouldn't draw a ton of current on their closing coils. You could test with an ammeter to be sure.

Or upgrade using Merc solenoids. If you found a scrap engine with all the parts, you could steal the mounting setup and all.

The Merc solenoids have 2 mounting tabs, you could mount those to a bracket and then bolt to the bottom cowl or wherever is convenient. Search eBay for "96158T" there are a ton of them cheap. Or maybe your solenoids are still in good shape?

You could still use the starter solenoid big battery +12V terminal as your power source, and wiring in the trim motor circuit breaker as well, long as that stuff is in good shape. Then the 10-gauge to the trim motor and you're off and running!

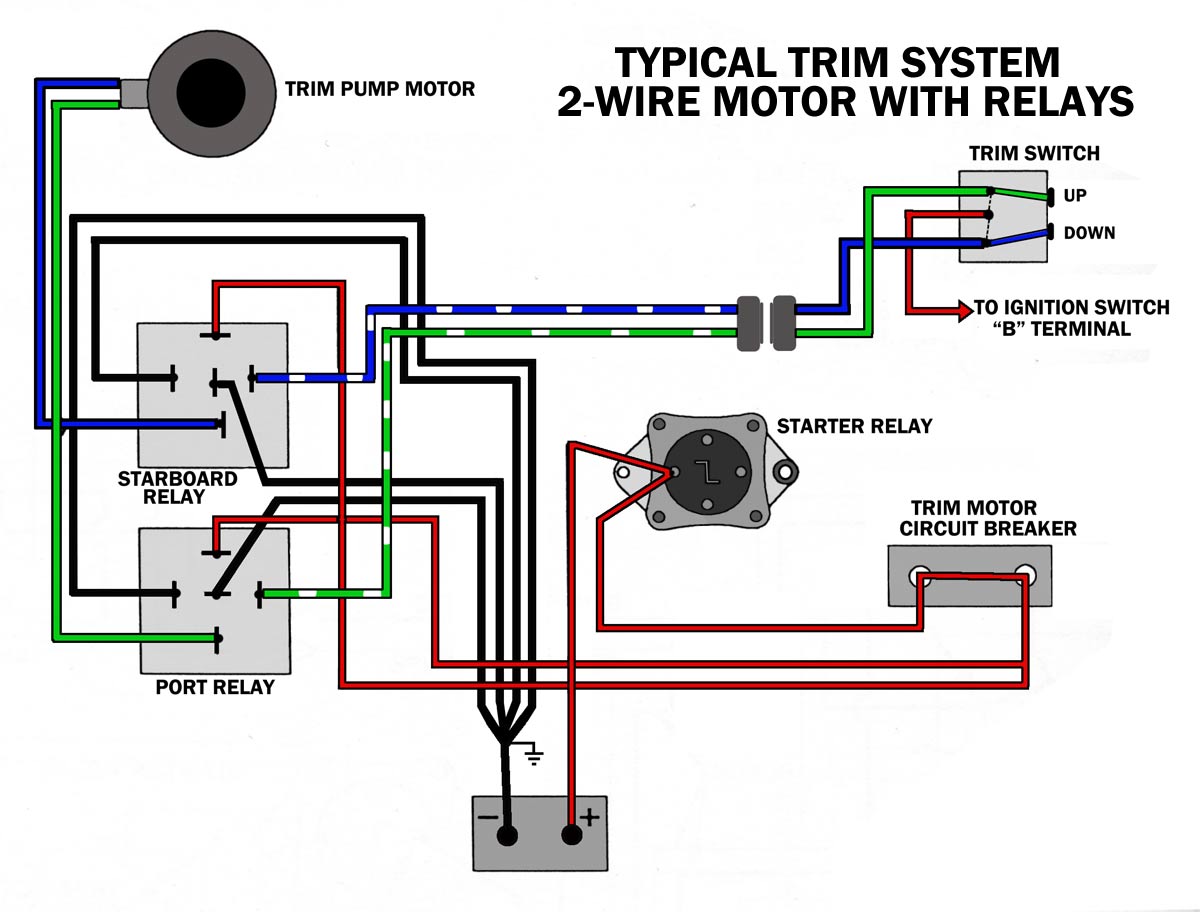
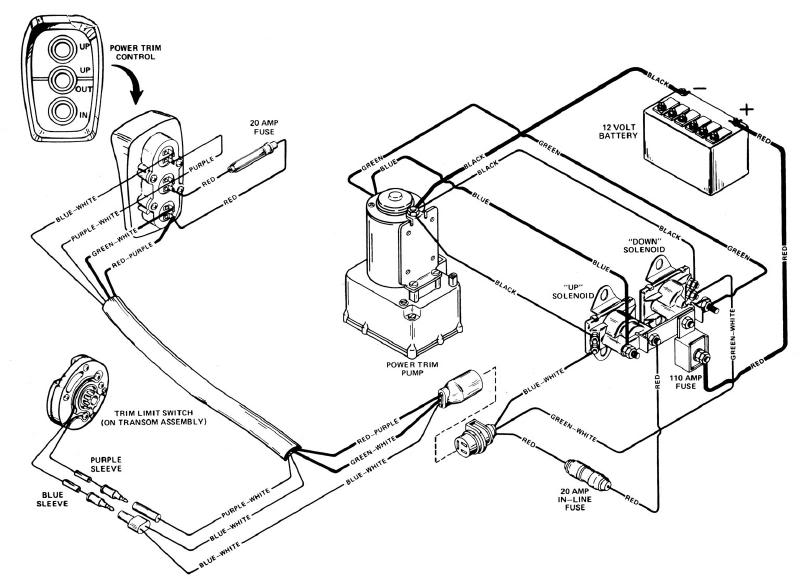
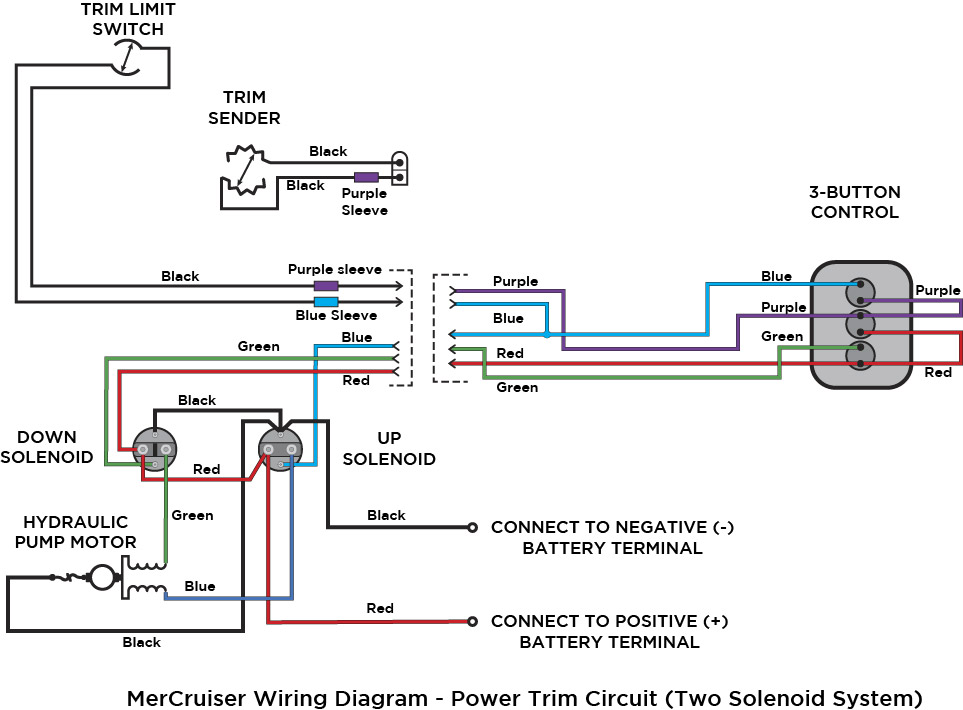
I found a couple of PT&T 2-wire diagrams. The Mercruiser one is probably easier to read. The other has a few extra wires (such as trim limit switch circuit) that you won't have in your setup, but does show all the control circuitry, and in color.

Note in the black and white Mercruiser diagram, they're using a 20 amp fuse for control circuitry and a 110 amp fuse for main battery power to the solenoids. The current rating for the motor is quite high. I'd use the original circuit breaker if it's still in good condition, otherwise one of these 110A Merc fuses would be a good substitute.

Note the neat way they tie the 2 Positive-feed sides together on the dual solenoids, with a copper bar. Slick! I guess a short chunk of #10 with lugs would be the same electrically.

Anyway, hope that helps a bit............ed
Attachments:

Please Log in or Create an account to join the conversation.

Chrysler Rebuild 3 weeks 3 hours ago #149384

  • 63 Sabre
  • 63 Sabre's Avatar Topic Author
  • Offline
  • Contributing Member
  • Contributing Member
  • Posts: 4761
  • Karma: 147
  • Thank you received: 170
I think the mounting inside the cowl is the wiser choice, sure would be a lot easier, less complicated. Tomorrow I'll be tearing my relays down from under the dash area and pick up blue and green coils of #14. Local farm store would have those., going to be an easy switch. Thanks.

Please Log in or Create an account to join the conversation.

Chrysler Rebuild 3 weeks 3 hours ago #149385

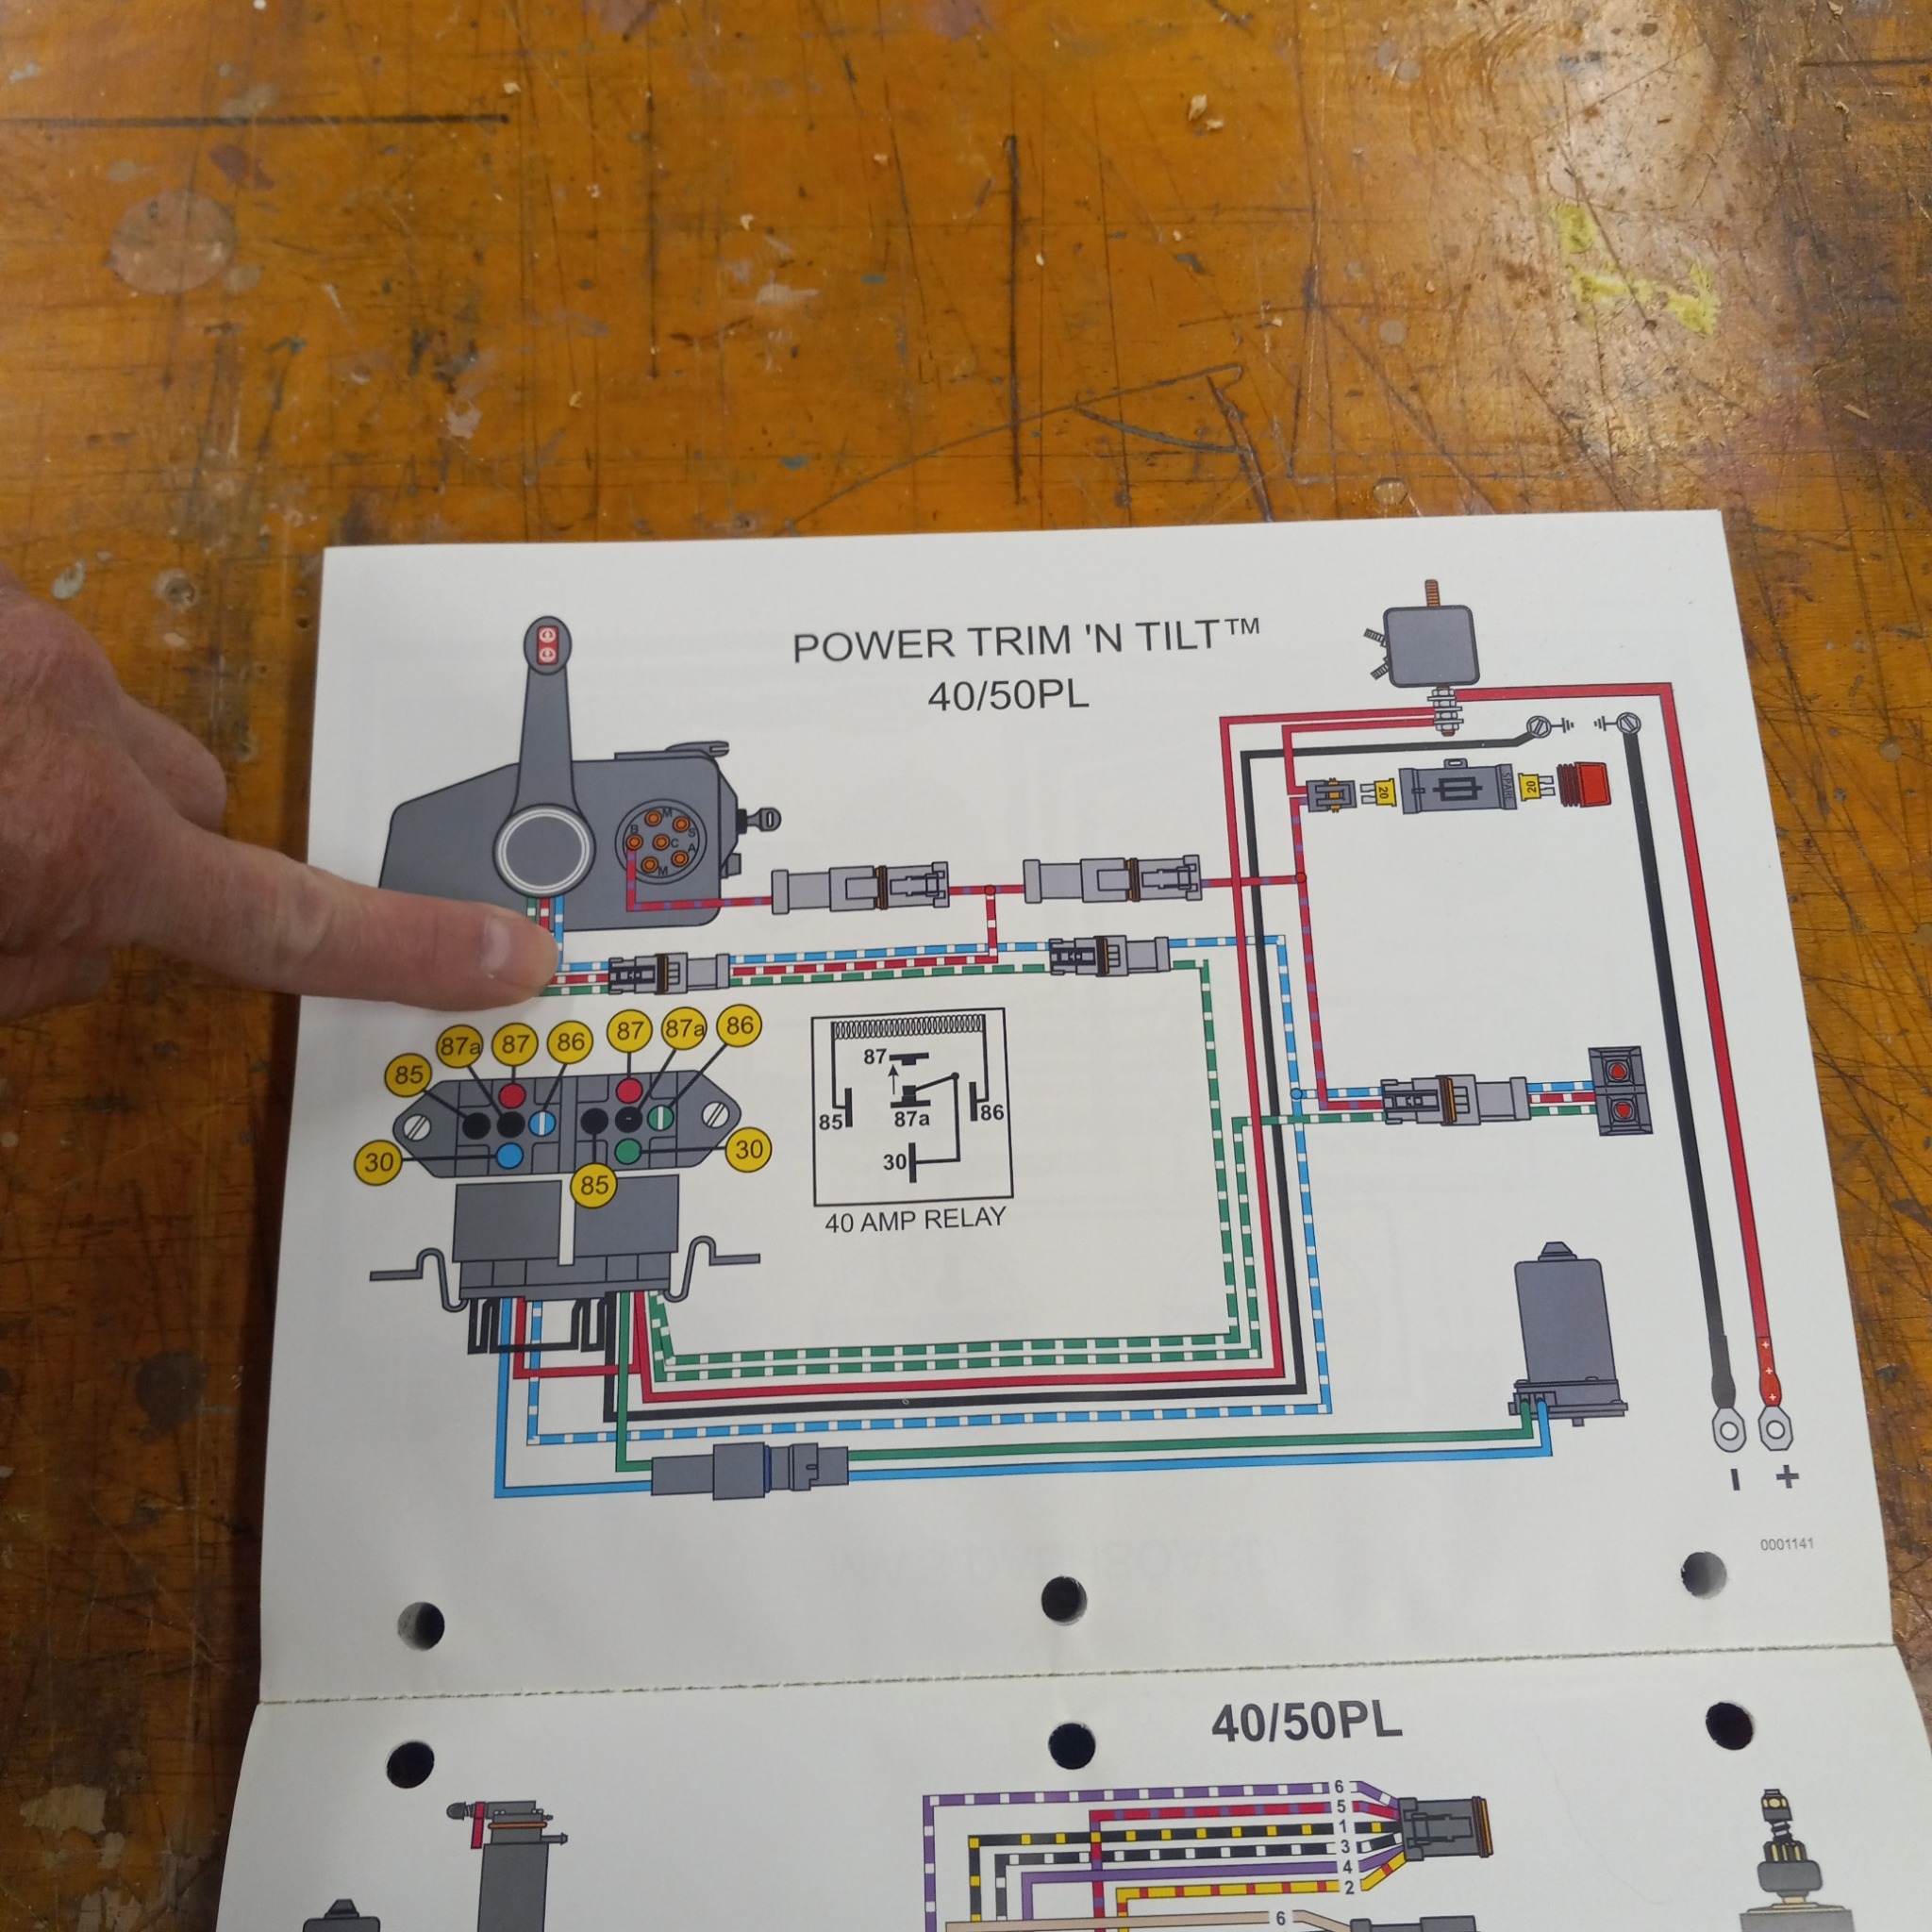
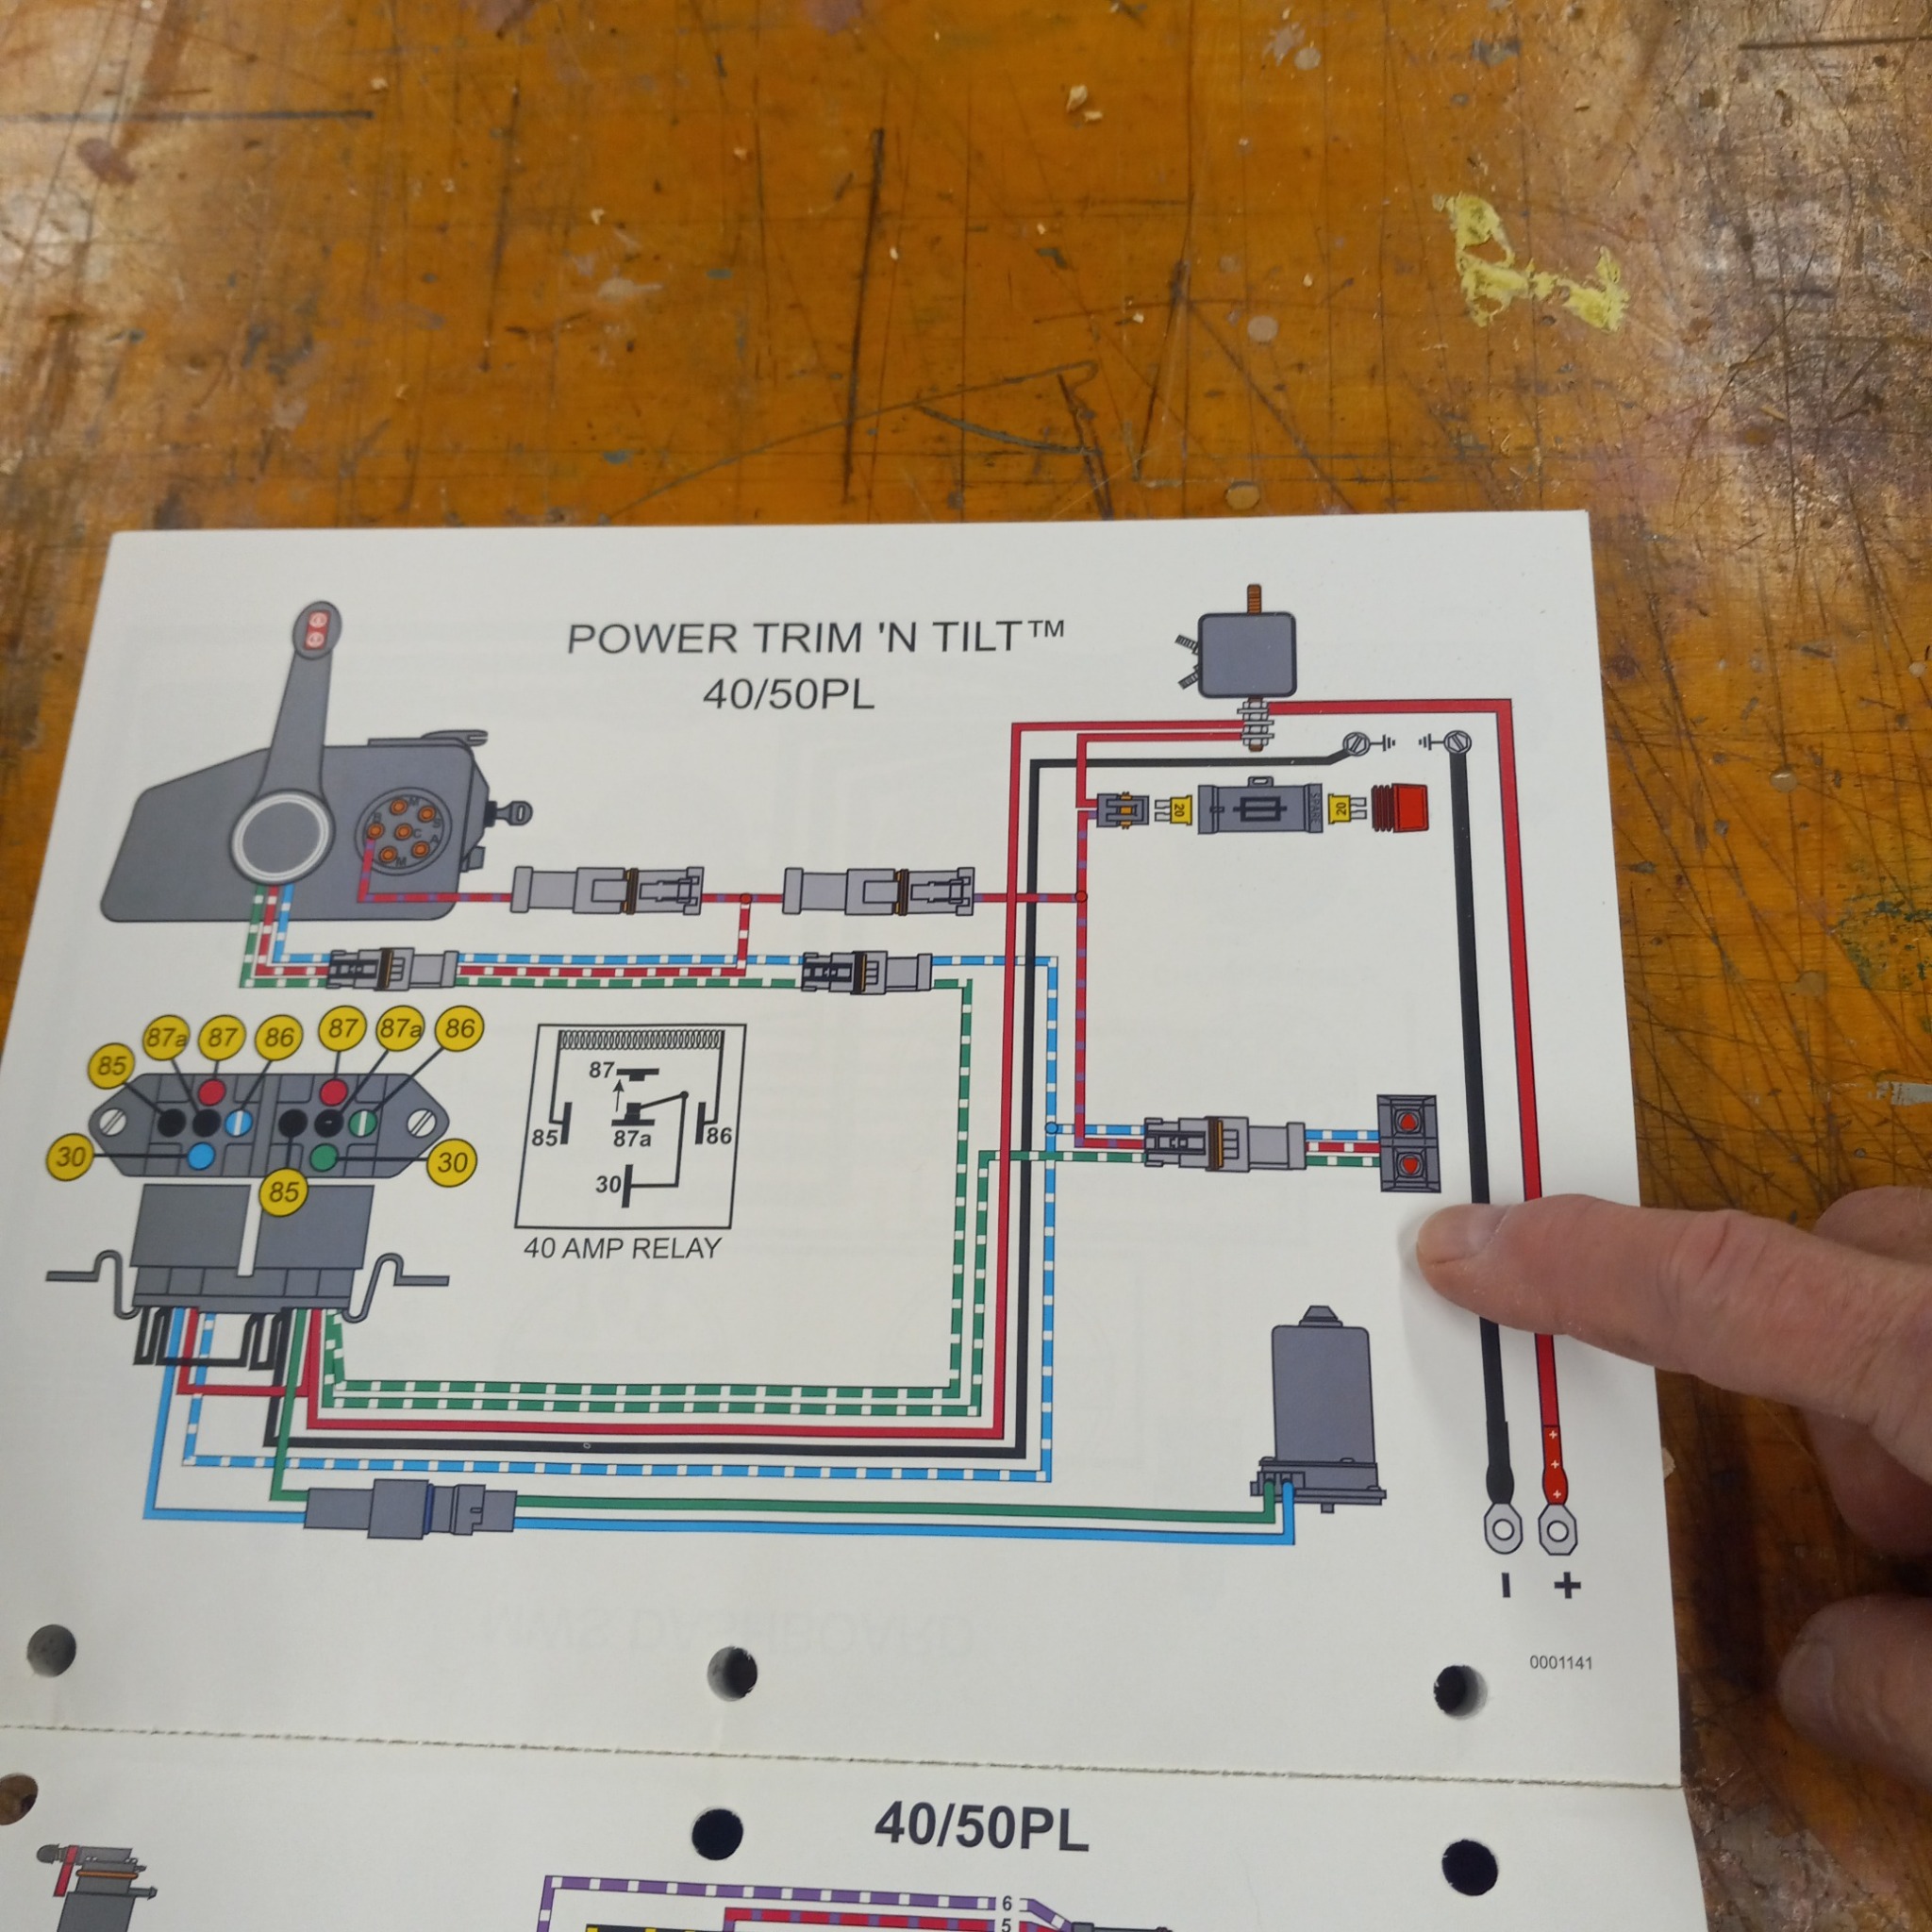
You can't use the diagrams Ed posted, those are for 3 wire pumps.
Here are 2 pictures from 04 Johnstone 2 stroke.
Same diagram twice, 1 picture with me pointing to remote control connection. 2nd picture with me pointing to switch on engine cowl.
You have dash mounted switch, so follow picture 1.
If you choose to add a transon switch somewhere, follow picture 2 also.
Attachments:

Please Log in or Create an account to join the conversation.

Chrysler Rebuild 3 weeks 2 hours ago #149386

  • 63 Sabre
  • 63 Sabre's Avatar Topic Author
  • Offline
  • Contributing Member
  • Contributing Member
  • Posts: 4761
  • Karma: 147
  • Thank you received: 170
thanks Jim. The slave trim switch on the motor is a nice addition and easy hookup. The day tomorrow is cut out now:)

Please Log in or Create an account to join the conversation.

Chrysler Rebuild 3 weeks 1 hour ago #149387

  • ed-mc
  • Offline
  • Platinum Boarder
  • Platinum Boarder
  • Posts: 1460
  • Karma: 235
  • Thank you received: 127
OK, I get it! The "third wire" on those pumps I posted is the Neg connection.

Whereas a True "2-wire" pump does only have two wires going to the pump and direction is strictly controlled by current flow thru the motor, same as the power window motor on my Son-In-Law's 2005 Honda Element!

I got a very instructive class in troubleshooting that, last month! Fortunately my Brother had given me a Power Probe for Christmas years ago, I never used it until this Fall, and then I ended up using the Heck out of it!

Pretty cool how the myriad of switches and wiring just reverse the current flow in the PW motor, to make the window go up or down. I substituted all that with the Power Probe right at the connector and proved there was nothing wrong with the motor or window regulator. Connector pin was burnt, ordered new parts. Waiting for nice weather to work on it. Spring??

Anyway, back to outboards, nice diagram and a bit simpler too!

Please Log in or Create an account to join the conversation.

Chrysler Rebuild 2 weeks 6 days ago #149388

Finding a donor OMC I'd guess late 80s & up to rob the relay panel from would be the ticket. But I don't have any handy.

Please Log in or Create an account to join the conversation.

Time to create page: 0.861 seconds

Donate

Please consider supporting our efforts.

Glassified Ads

Flying Scott 60
( / Engines)

noimage
10-22-2025

FOR SALE : YAMAHA 300 HP 4 STROKE
( / Boats)

FOR SALE : YAMAHA 300 HP 4 STROKE
10-02-2025

1964 Aristo-Craft Funliner
( / Boats)

1964 Aristo-Craft Funliner
09-12-2025

FG Login

FiberGoogle

Who's Online

We have 4721 guests and no members online