|
Welcome,
Guest
|
|
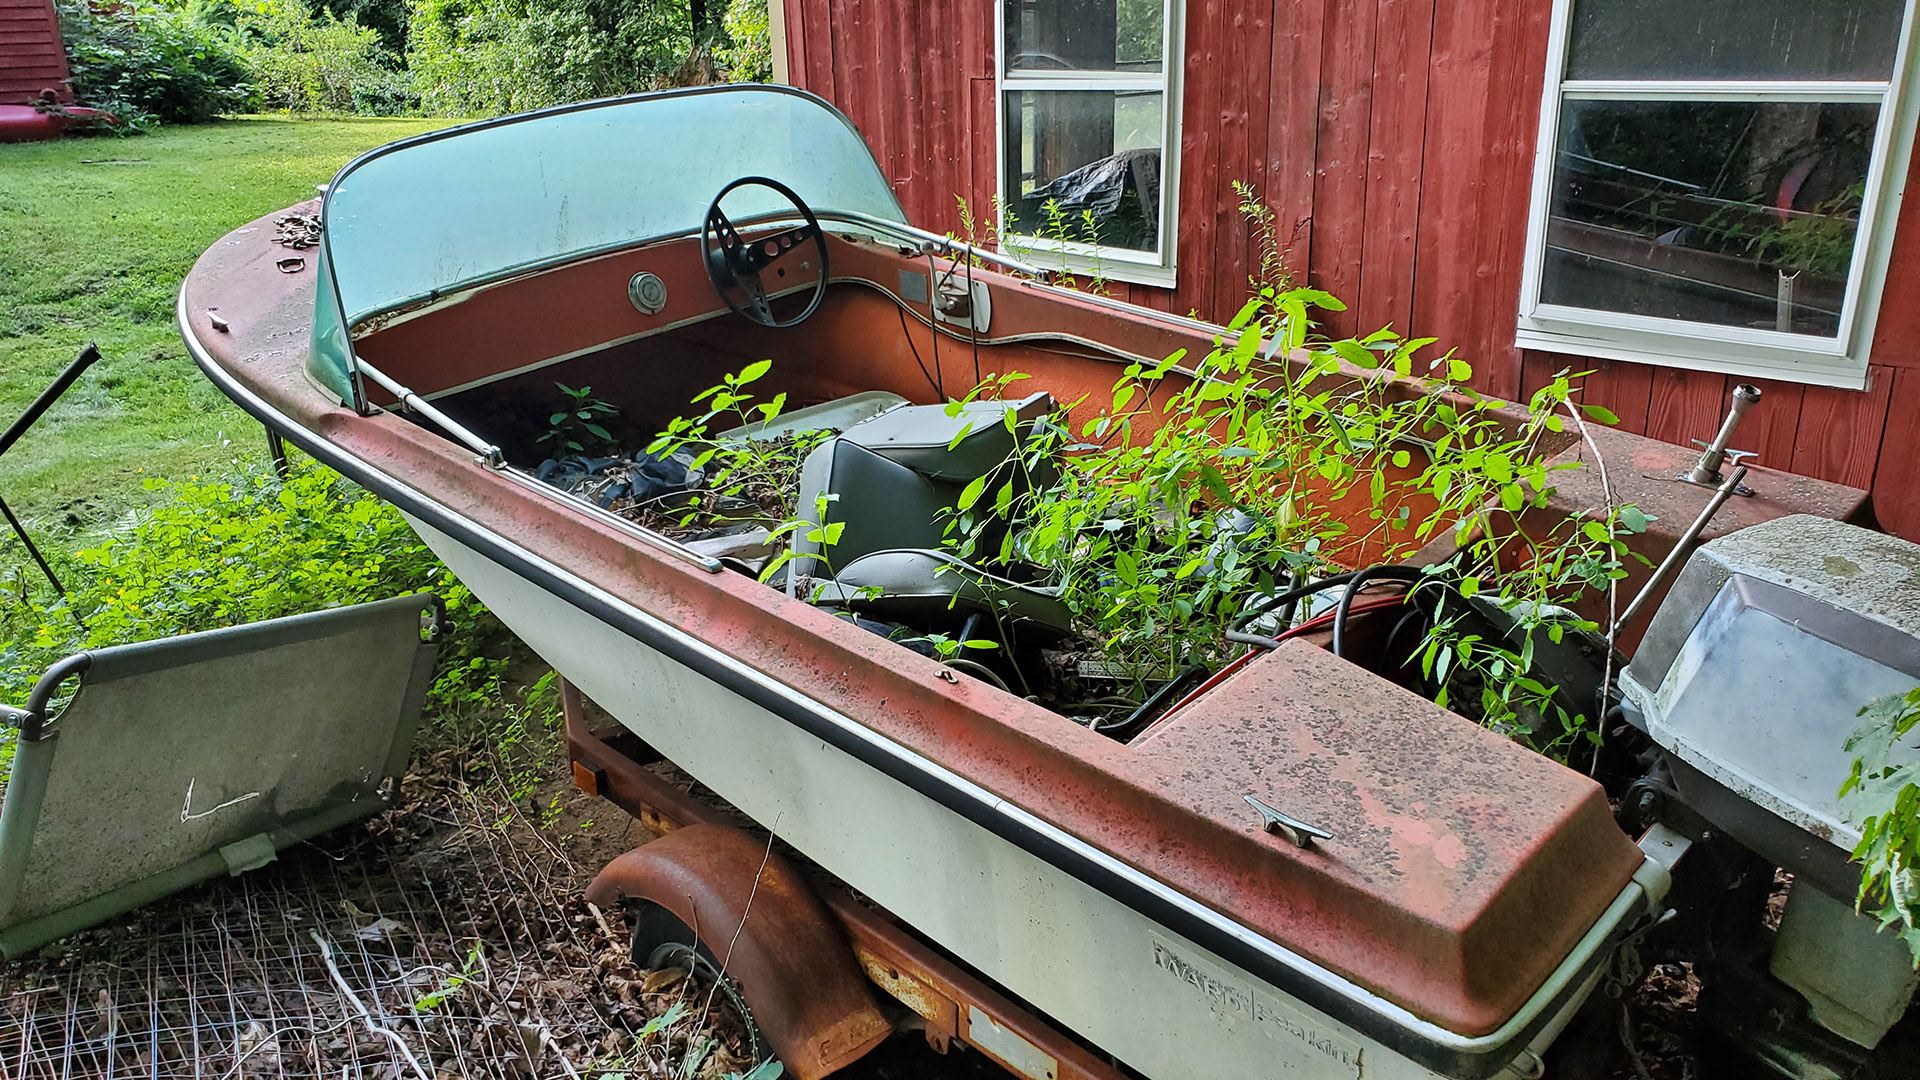
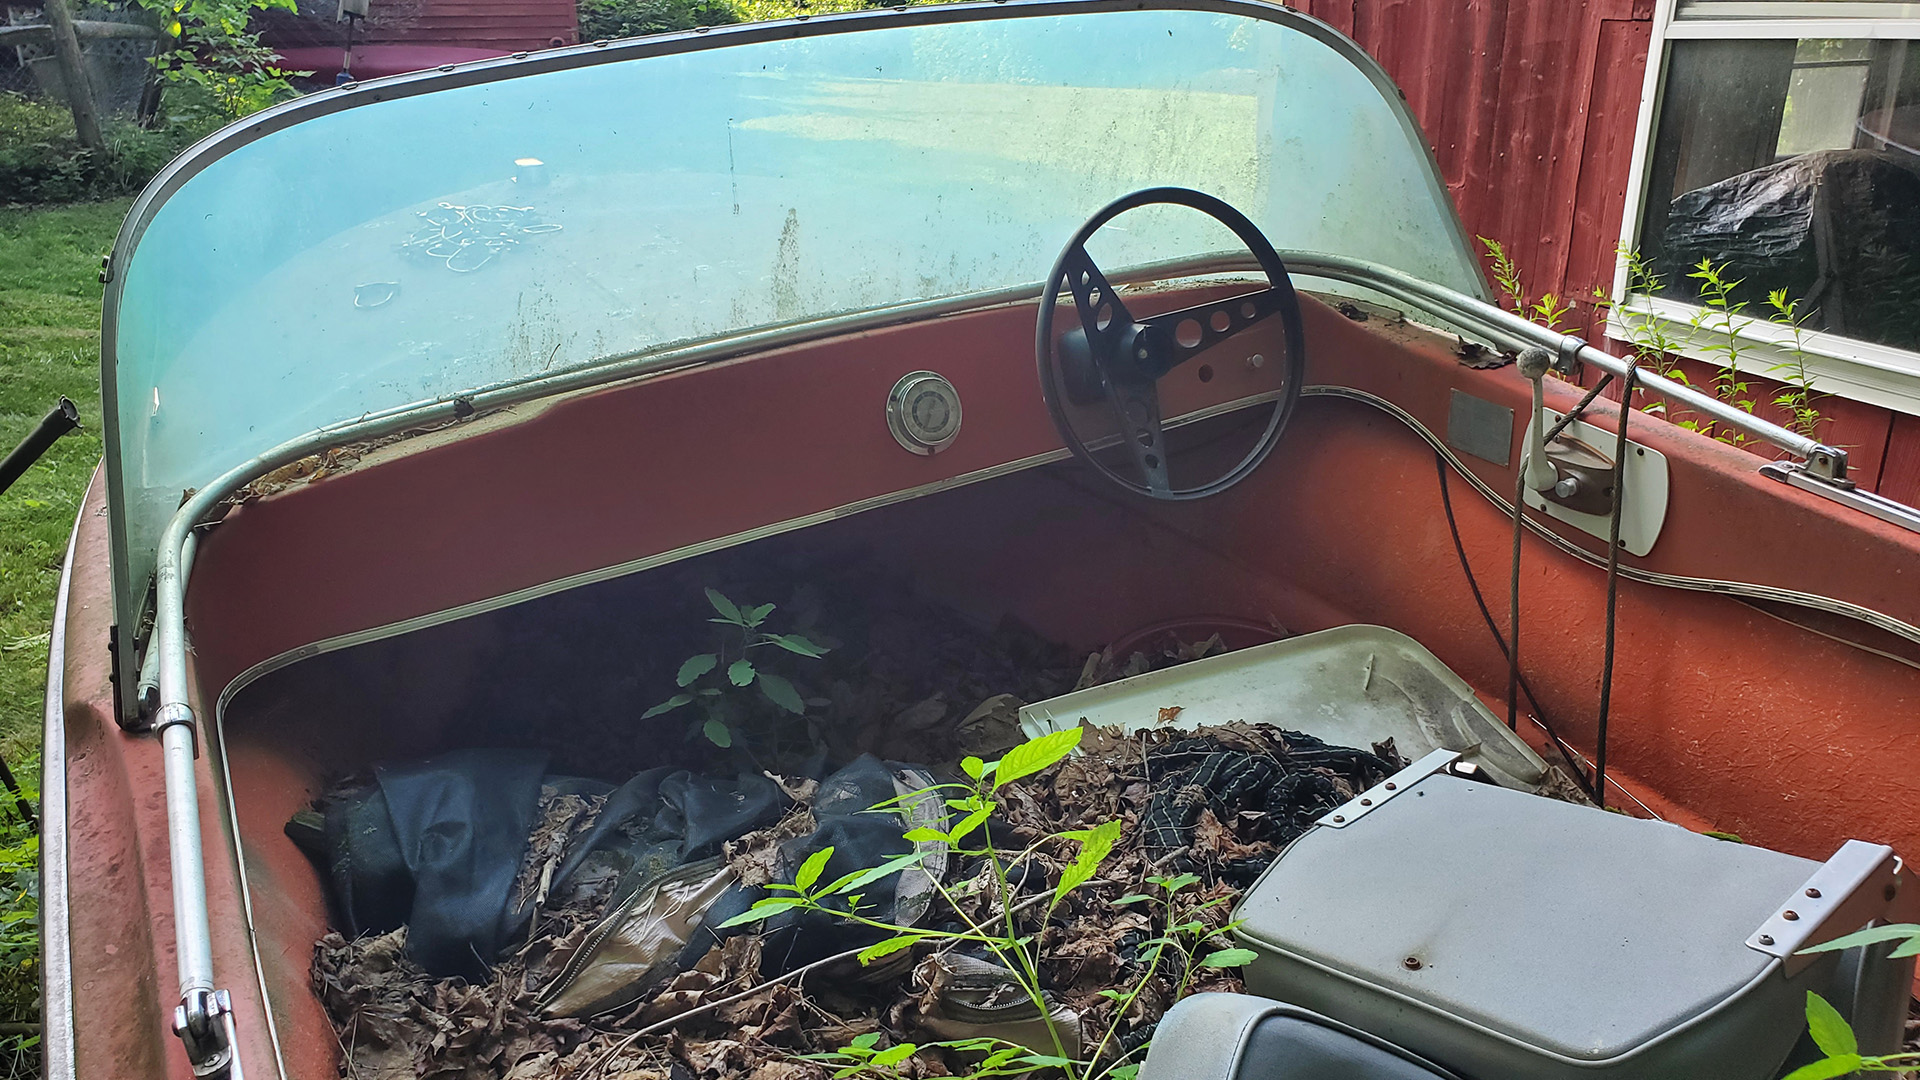
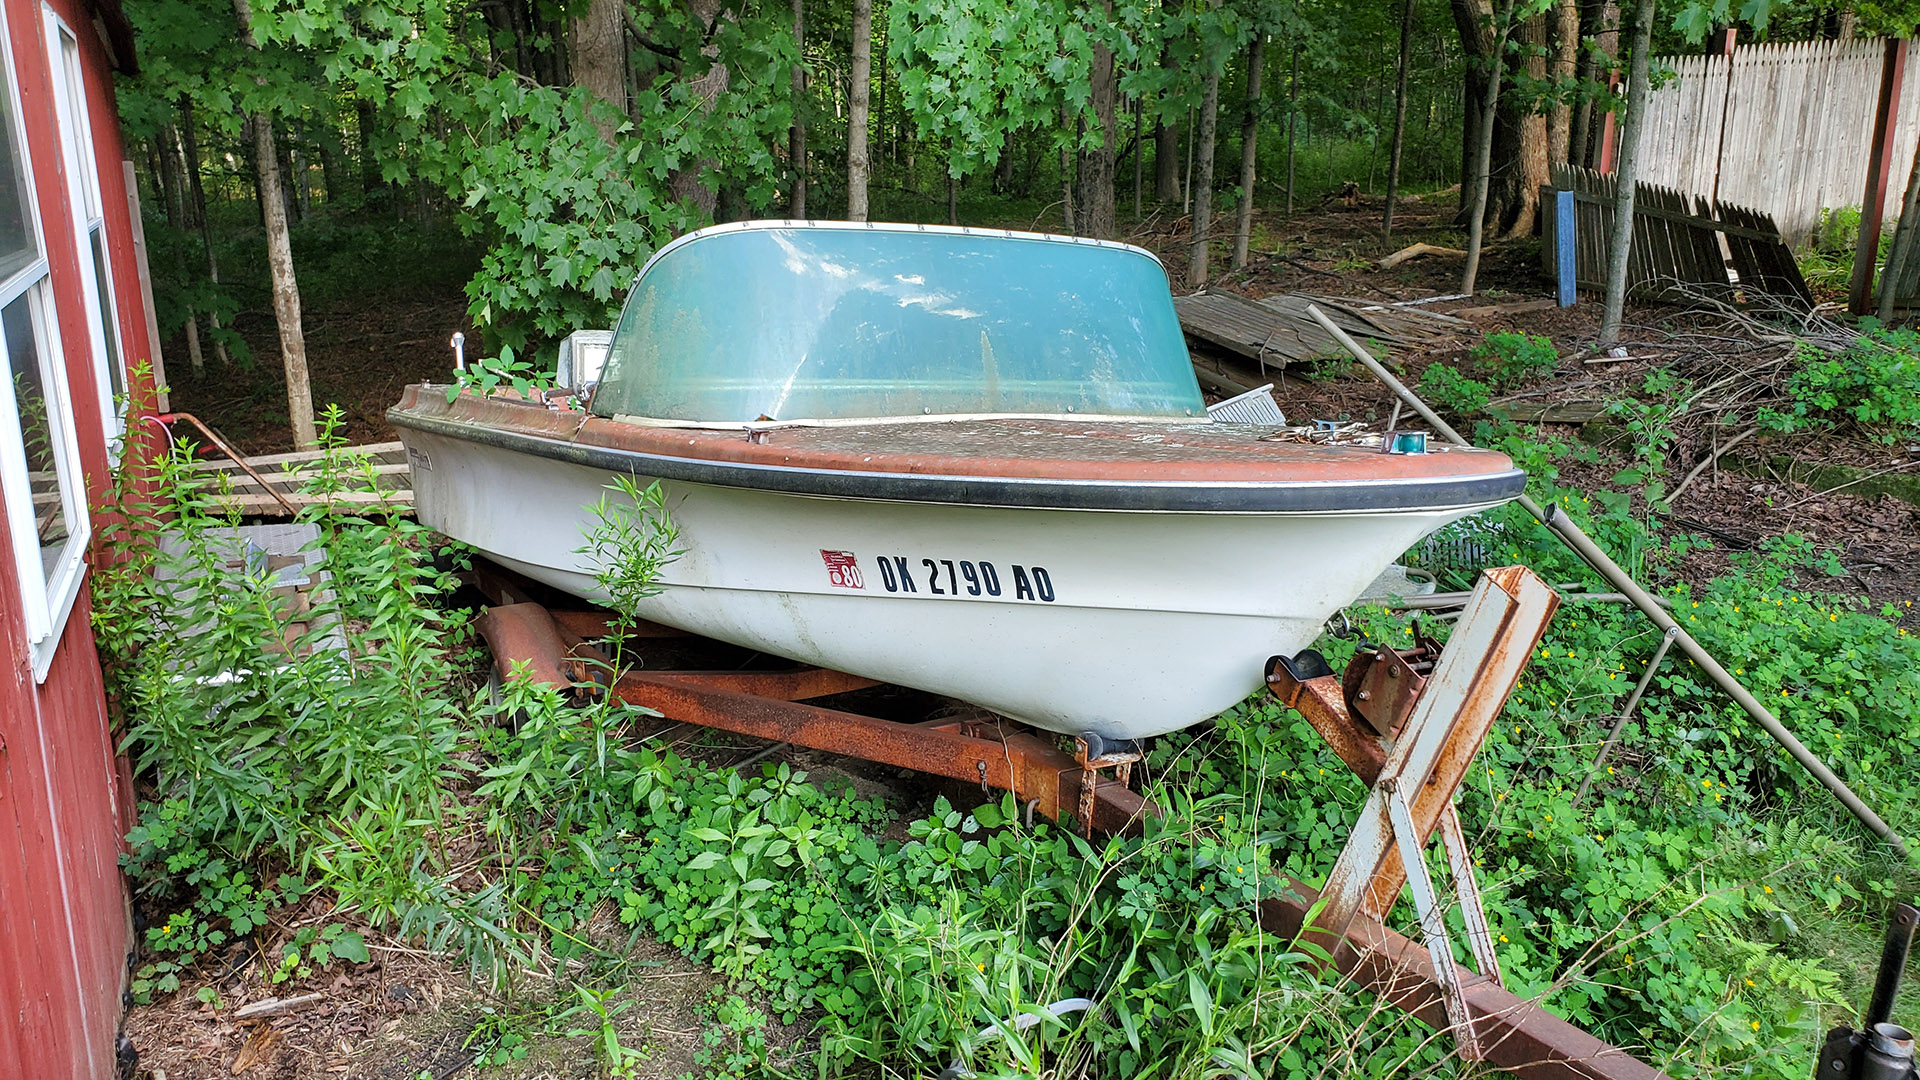
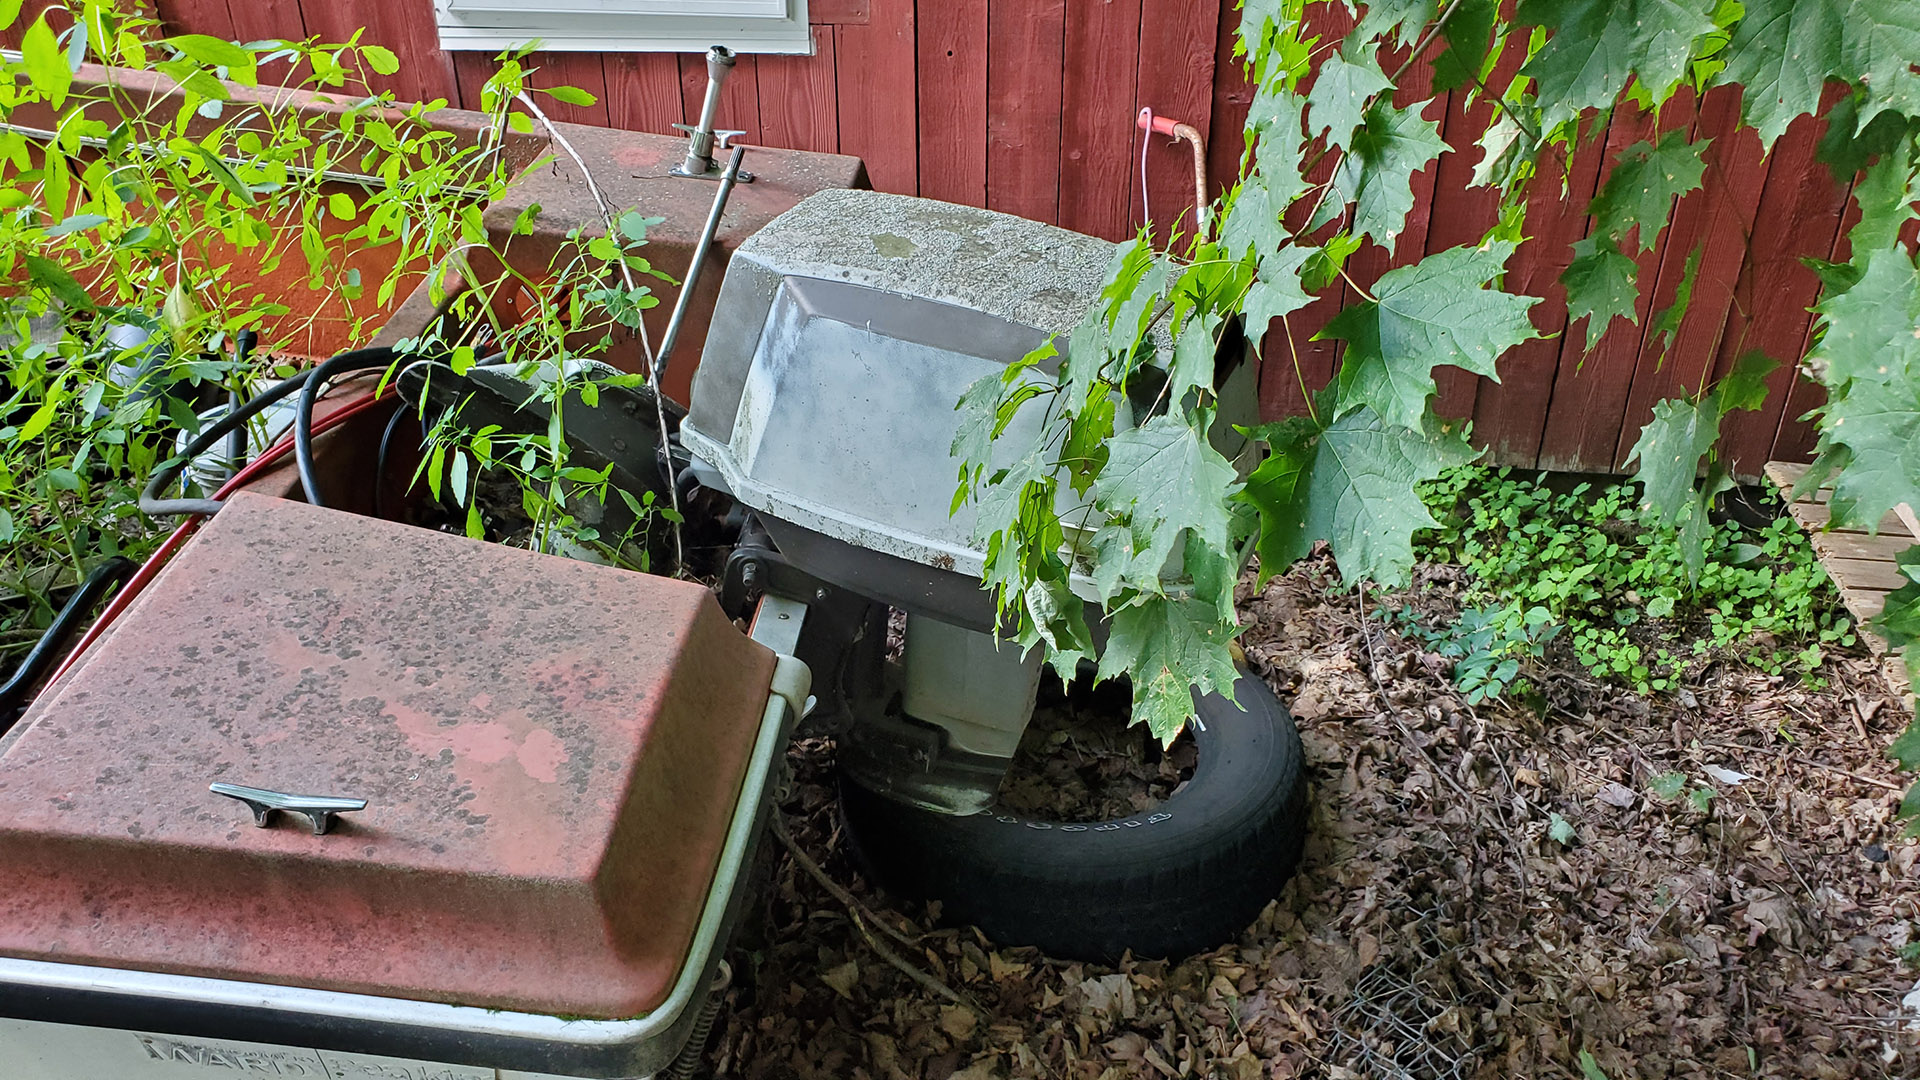
TOPIC: Monkey Ward Sea King Project and Questions
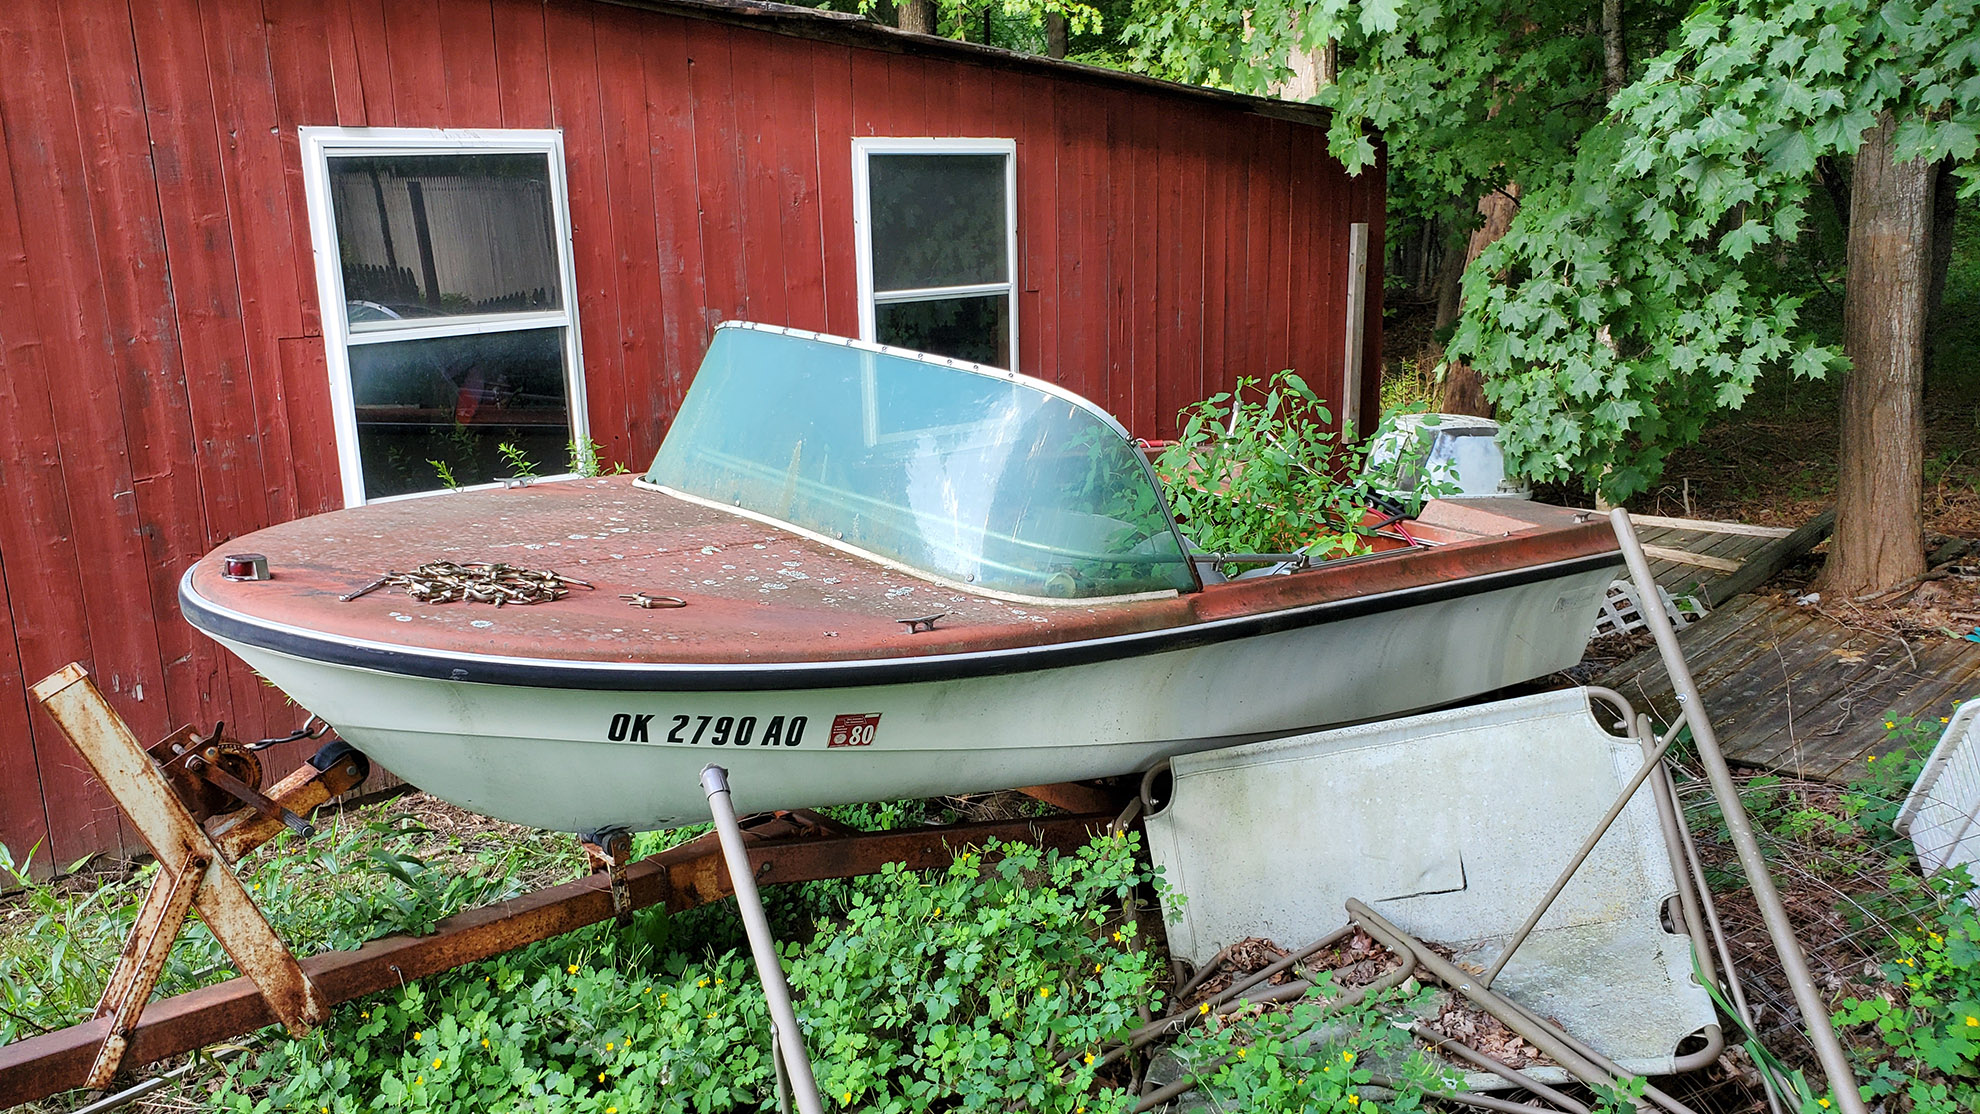
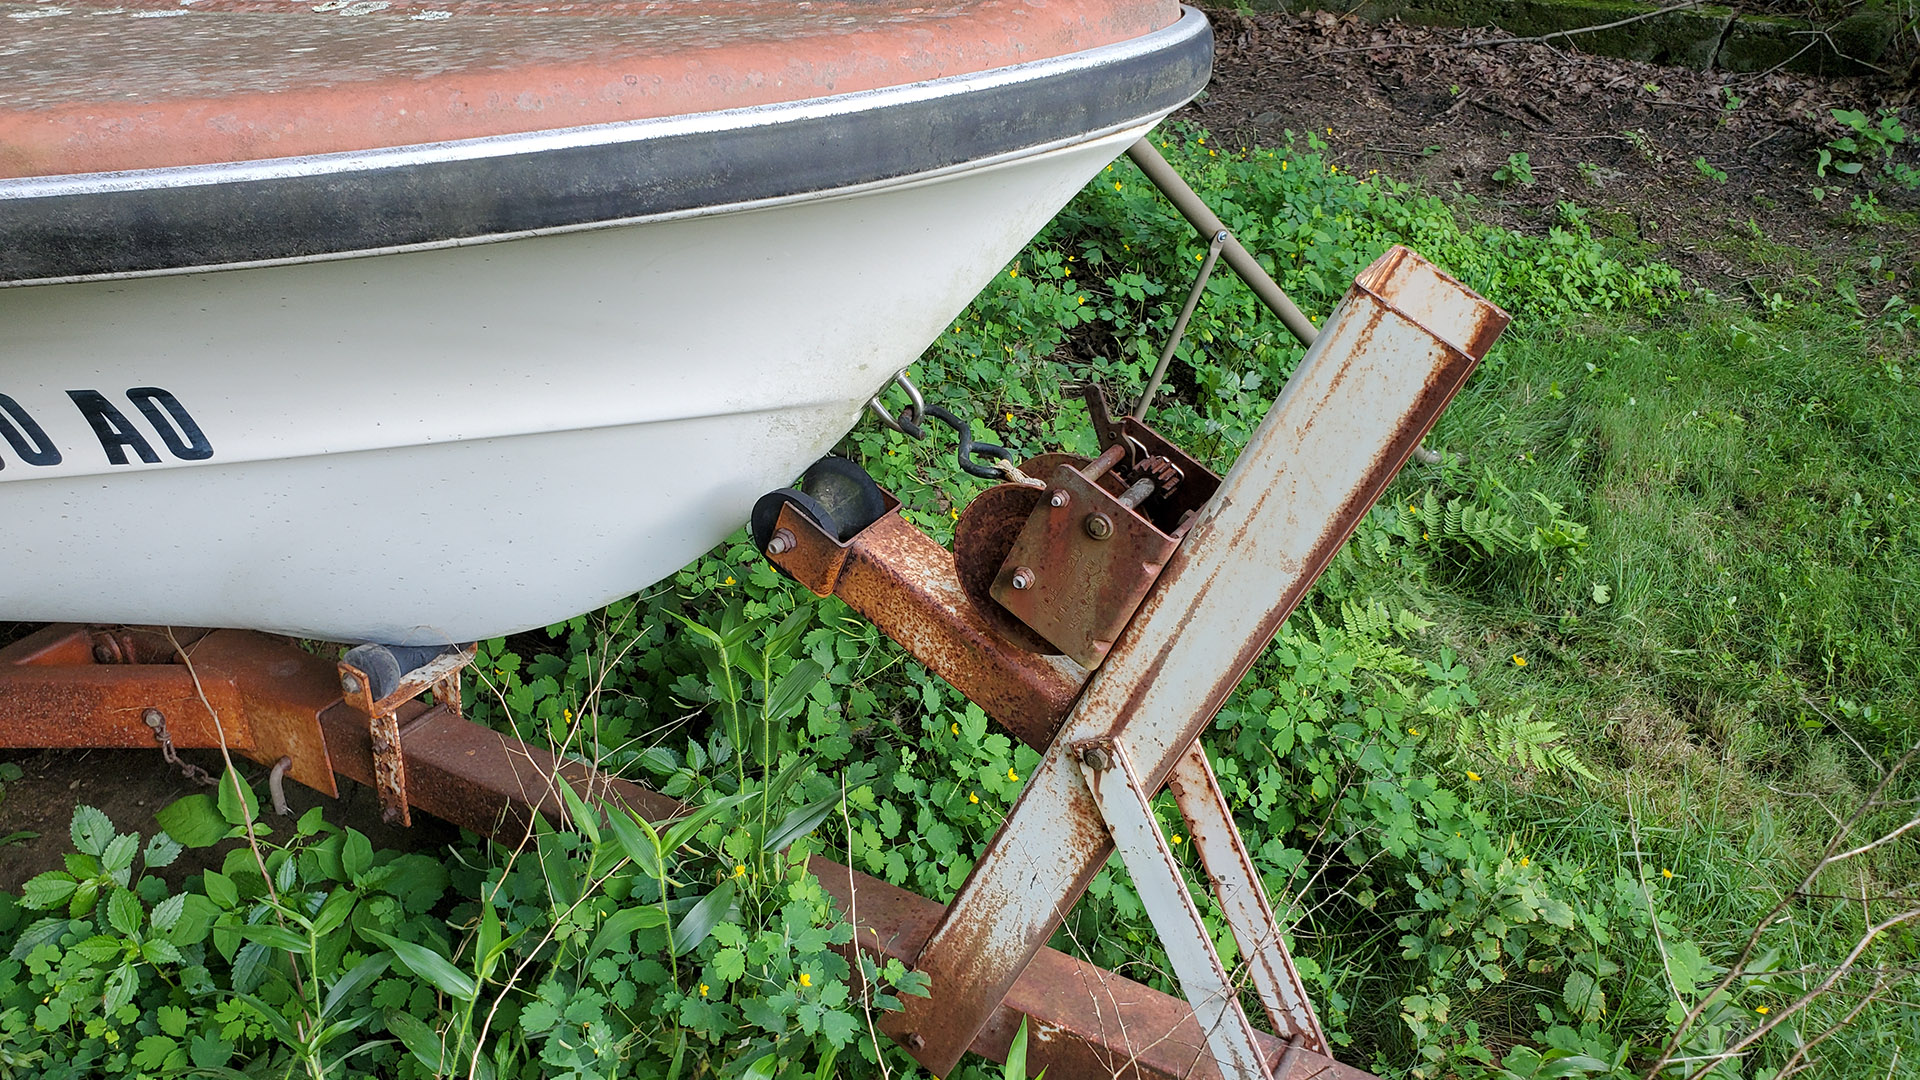
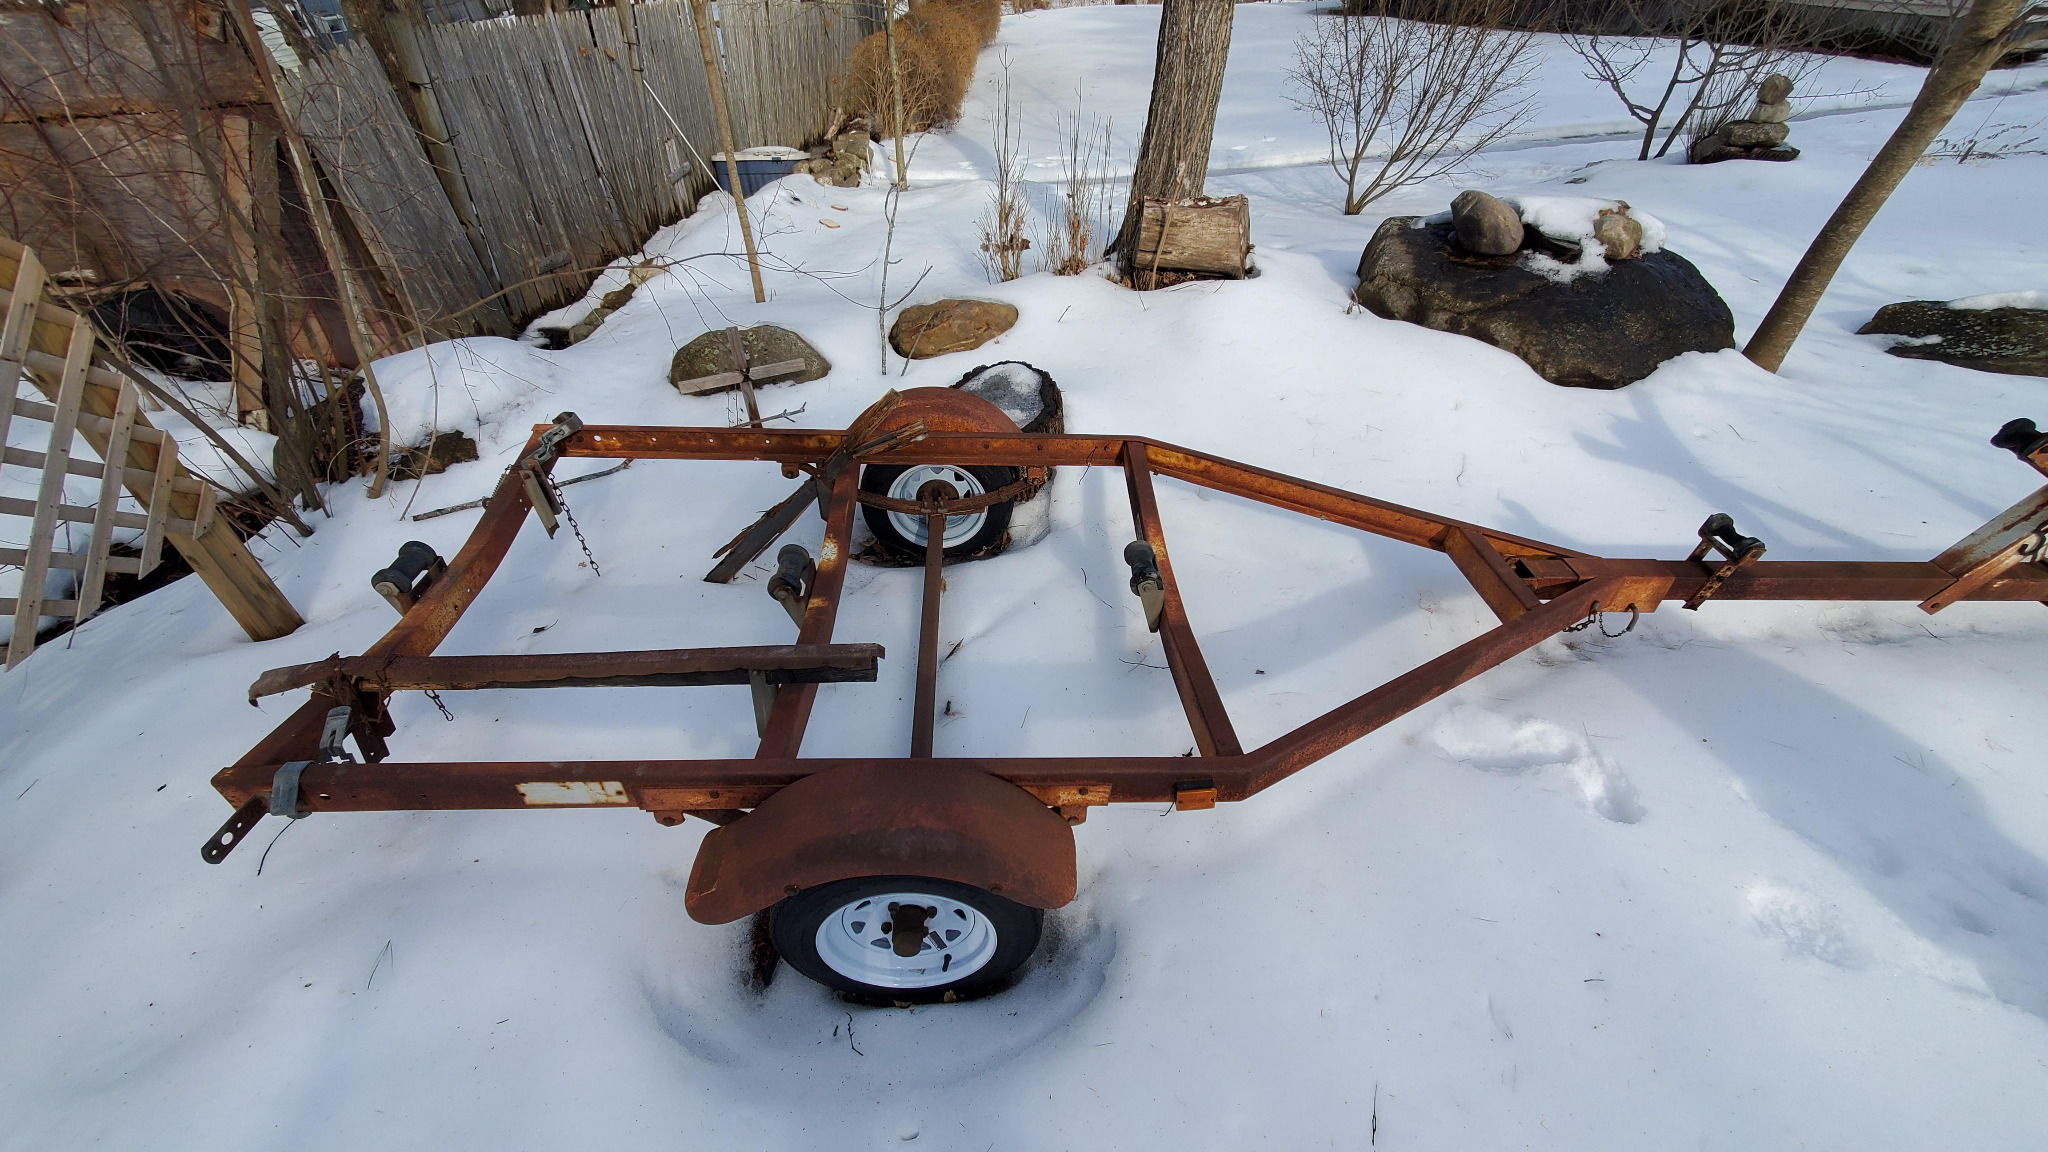
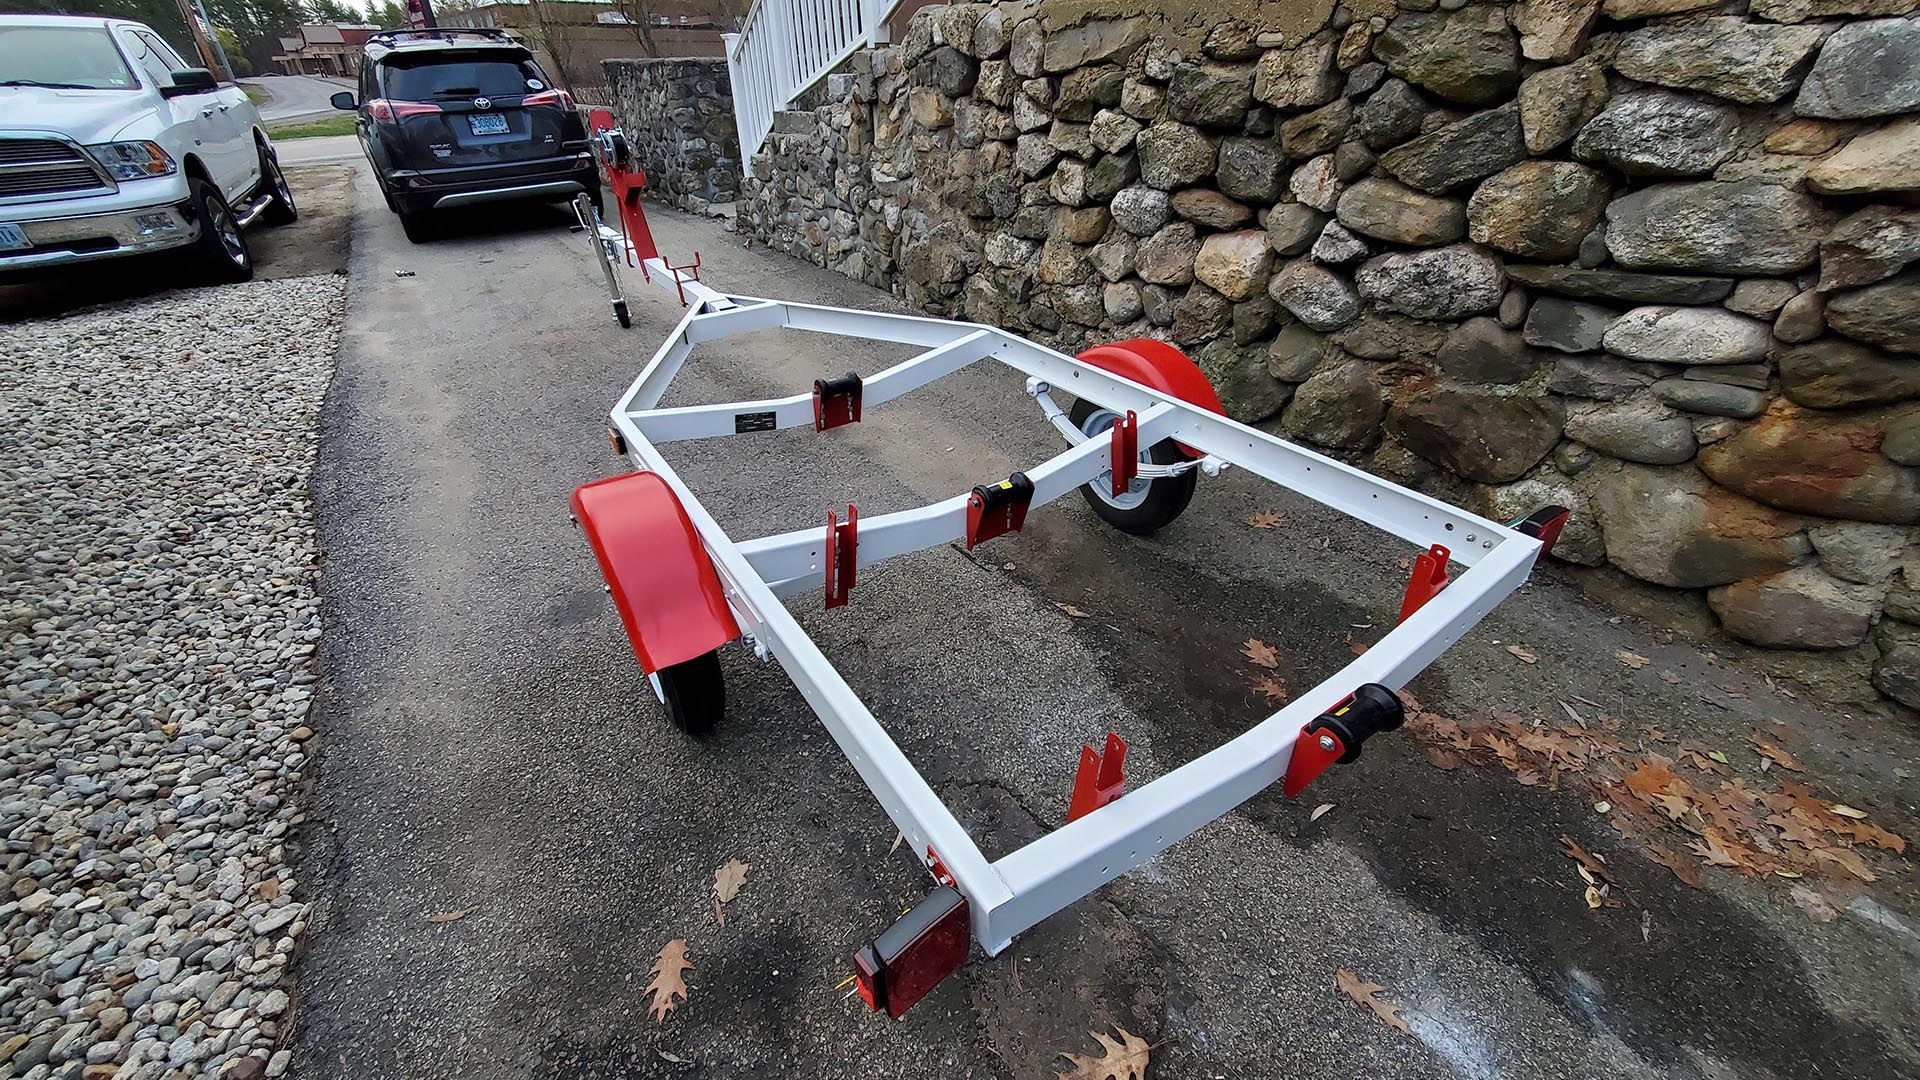
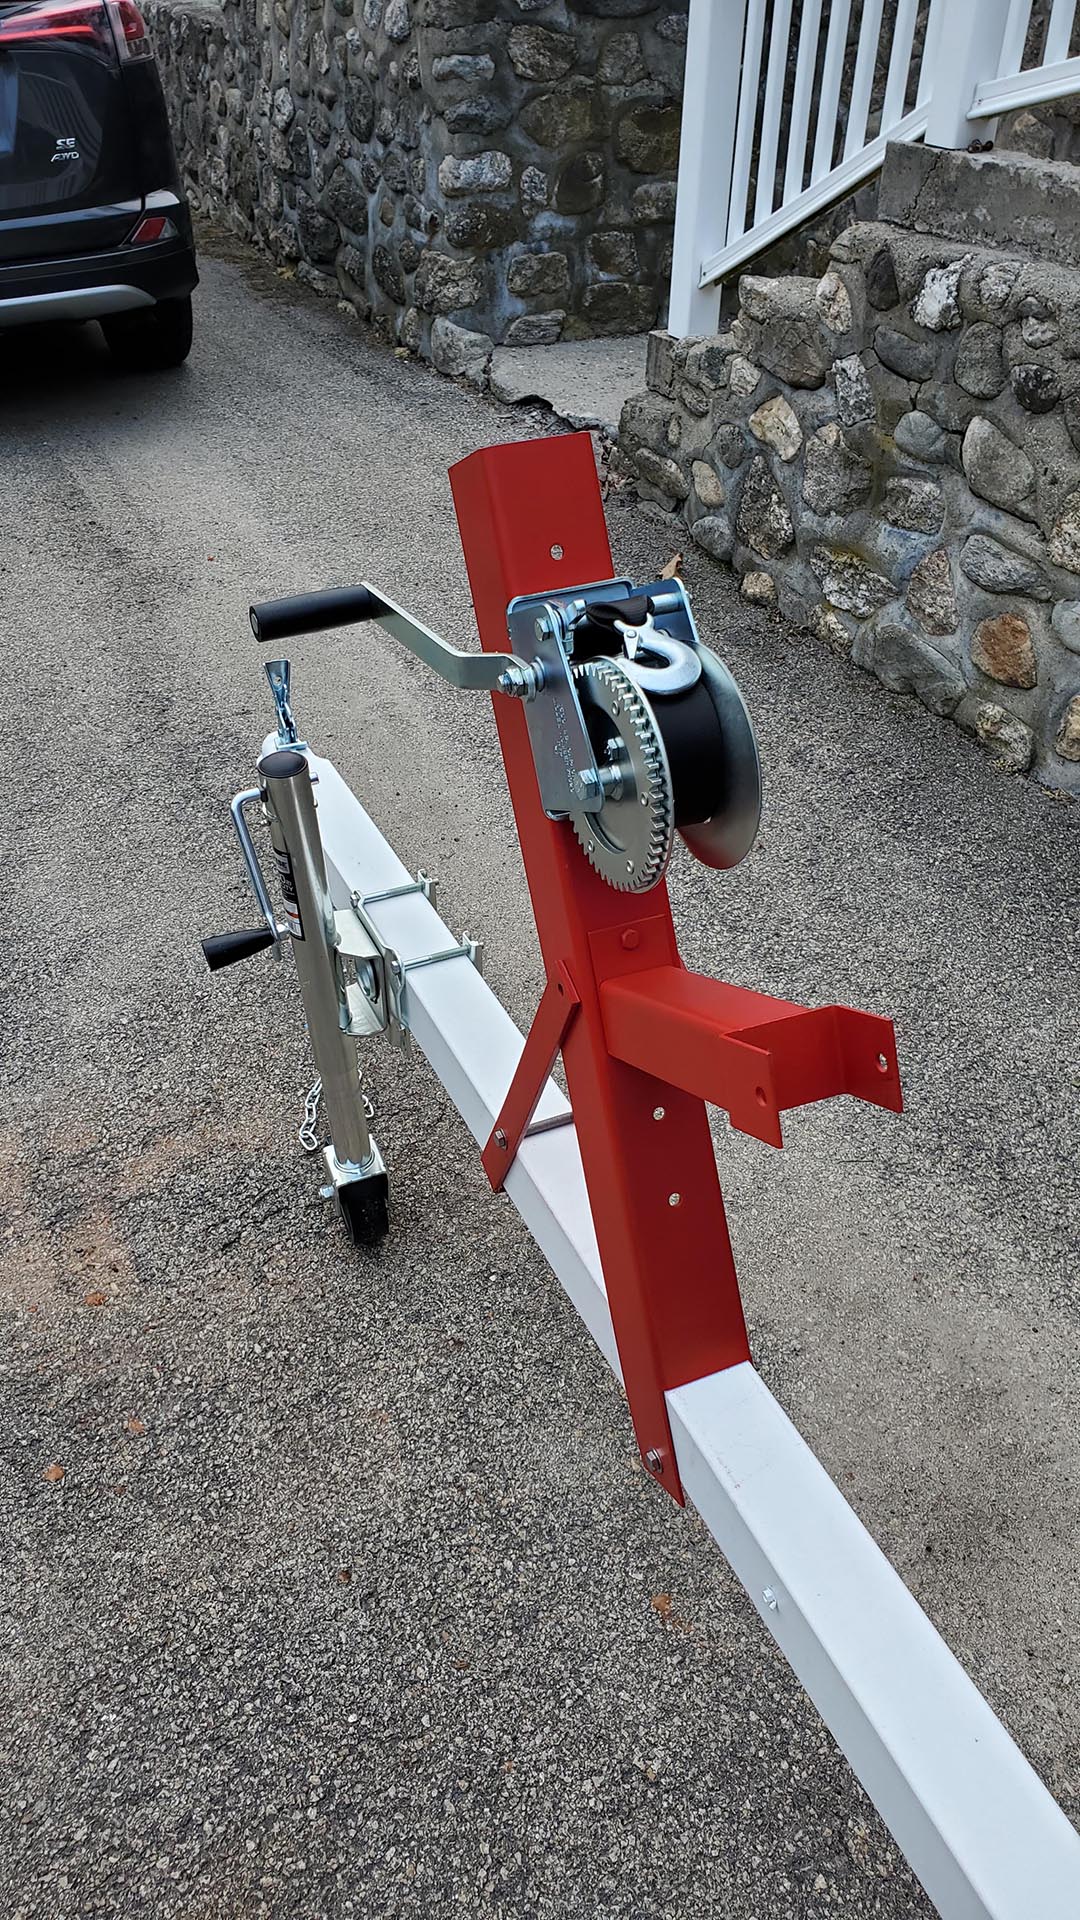
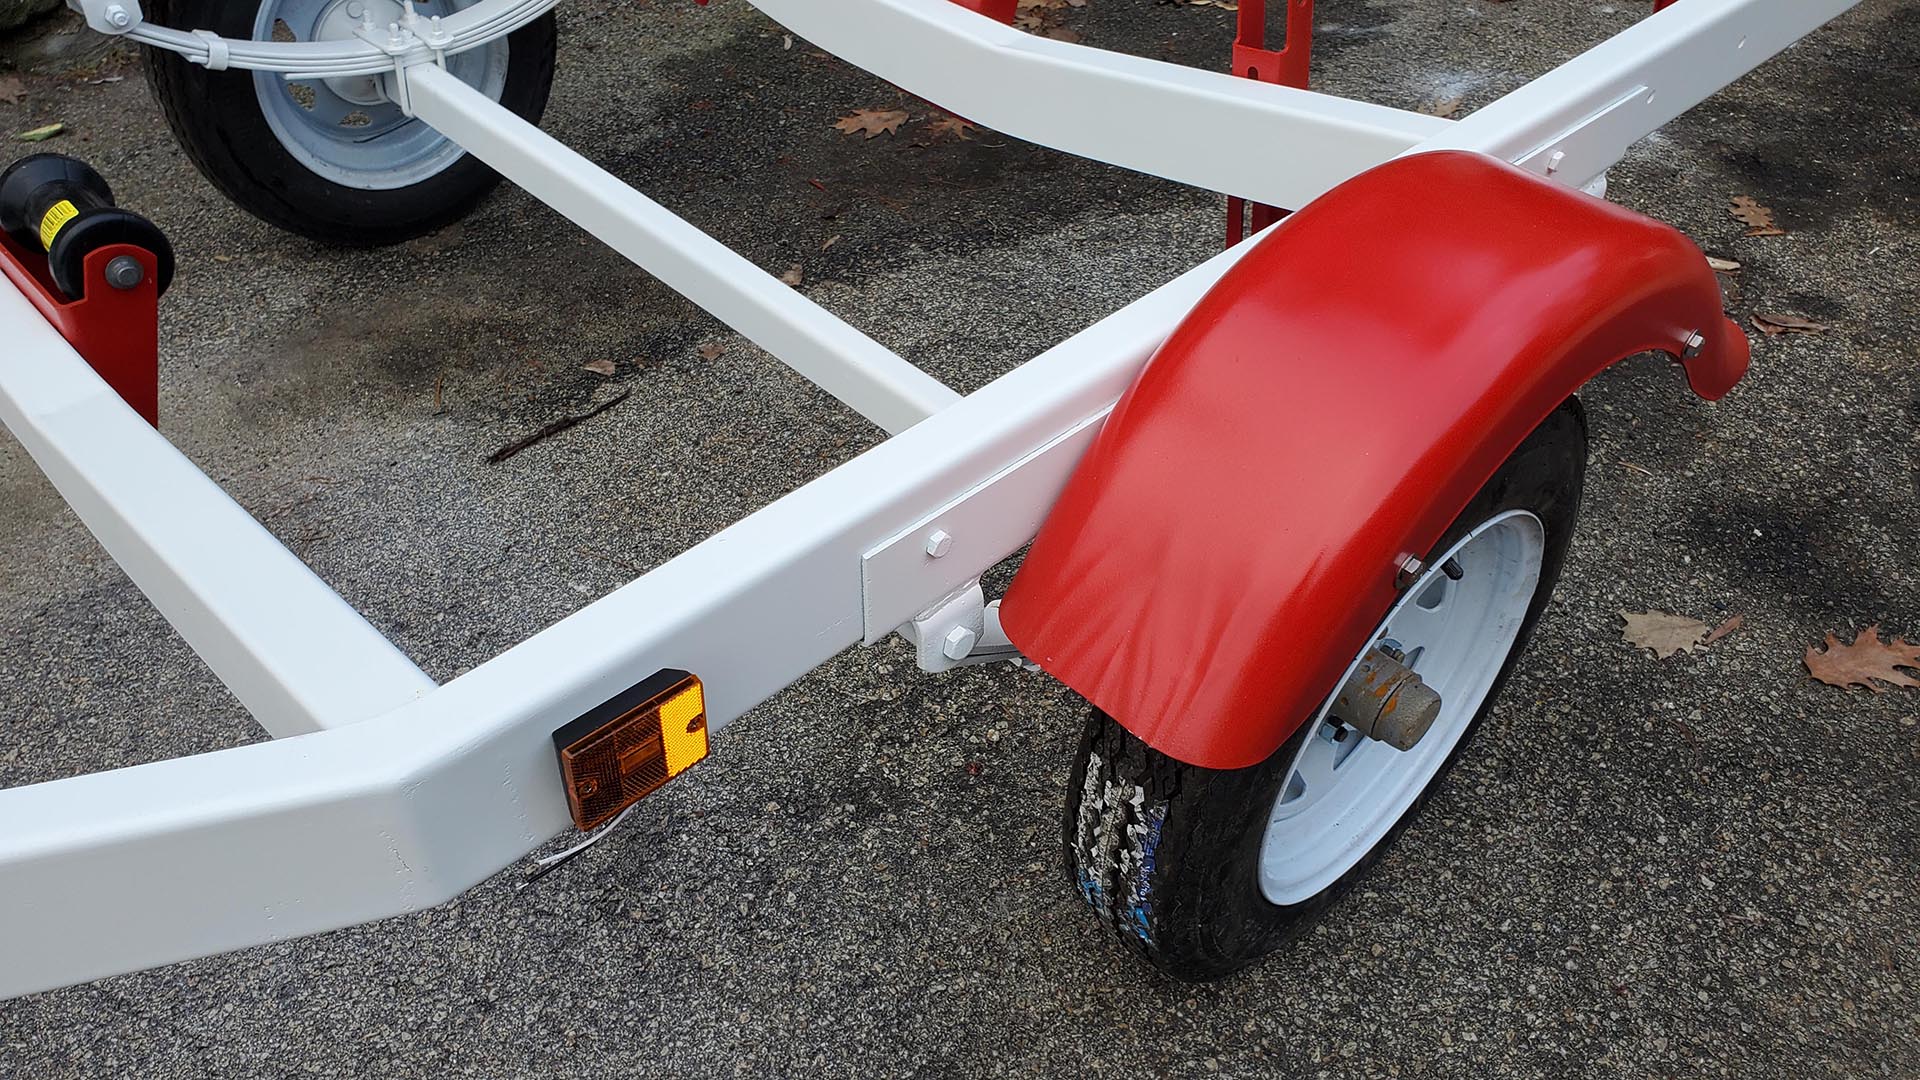
Monkey Ward Sea King Project and Questions 4 years 9 months ago #145207
|
Please Log in or Create an account to join the conversation. |

Monkey Ward Sea King Project and Questions 4 years 9 months ago #145216
|
|
Please Log in or Create an account to join the conversation. |

Monkey Ward Sea King Project and Questions 4 years 9 months ago #145218
|
Please Log in or Create an account to join the conversation. |
Monkey Ward Sea King Project and Questions 4 years 9 months ago #145219
|
|
Please Log in or Create an account to join the conversation. |
Monkey Ward Sea King Project and Questions 4 years 9 months ago #145226
|
Please Log in or Create an account to join the conversation. |
Monkey Ward Sea King Project and Questions 4 years 9 months ago #145300
|
Please Log in or Create an account to join the conversation. |

Monkey Ward Sea King Project and Questions 4 years 9 months ago #145305
|
Please Log in or Create an account to join the conversation. |
Monkey Ward Sea King Project and Questions 4 years 8 months ago #145374
|
Please Log in or Create an account to join the conversation. |


Monkey Ward Sea King Project and Questions 4 years 7 months ago #145585
|
Please Log in or Create an account to join the conversation. |


Monkey Ward Sea King Project and Questions 4 years 7 months ago #145587
|
|
Please Log in or Create an account to join the conversation. |
Monkey Ward Sea King Project and Questions 4 years 7 months ago #145590
|
Please Log in or Create an account to join the conversation. |
Monkey Ward Sea King Project and Questions 4 years 7 months ago #145593
|
|
Please Log in or Create an account to join the conversation. |
Monkey Ward Sea King Project and Questions 4 years 7 months ago #145611
|
Please Log in or Create an account to join the conversation. |

Monkey Ward Sea King Project and Questions 4 years 7 months ago #145615
|
Please Log in or Create an account to join the conversation.
Dr.Go!
|

Monkey Ward Sea King Project and Questions 4 years 7 months ago #145616
|
Please Log in or Create an account to join the conversation.
Dr.Go!
|
Monkey Ward Sea King Project and Questions 4 years 7 months ago #145619
|
Please Log in or Create an account to join the conversation. |
Monkey Ward Sea King Project and Questions 4 years 7 months ago #145622
|
Please Log in or Create an account to join the conversation.
Dr.Go!
|
Monkey Ward Sea King Project and Questions 4 years 6 months ago #145659
|
Please Log in or Create an account to join the conversation. |

Monkey Ward Sea King Project and Questions 4 years 6 months ago #145663
|
|
Please Log in or Create an account to join the conversation. |
Monkey Ward Sea King Project and Questions 4 years 6 months ago #145666
|
Please Log in or Create an account to join the conversation. |
Monkey Ward Sea King Project and Questions 4 years 6 months ago #145676
|
Please Log in or Create an account to join the conversation. |

Monkey Ward Sea King Project and Questions 4 years 6 months ago #145683
|
Please Log in or Create an account to join the conversation. |
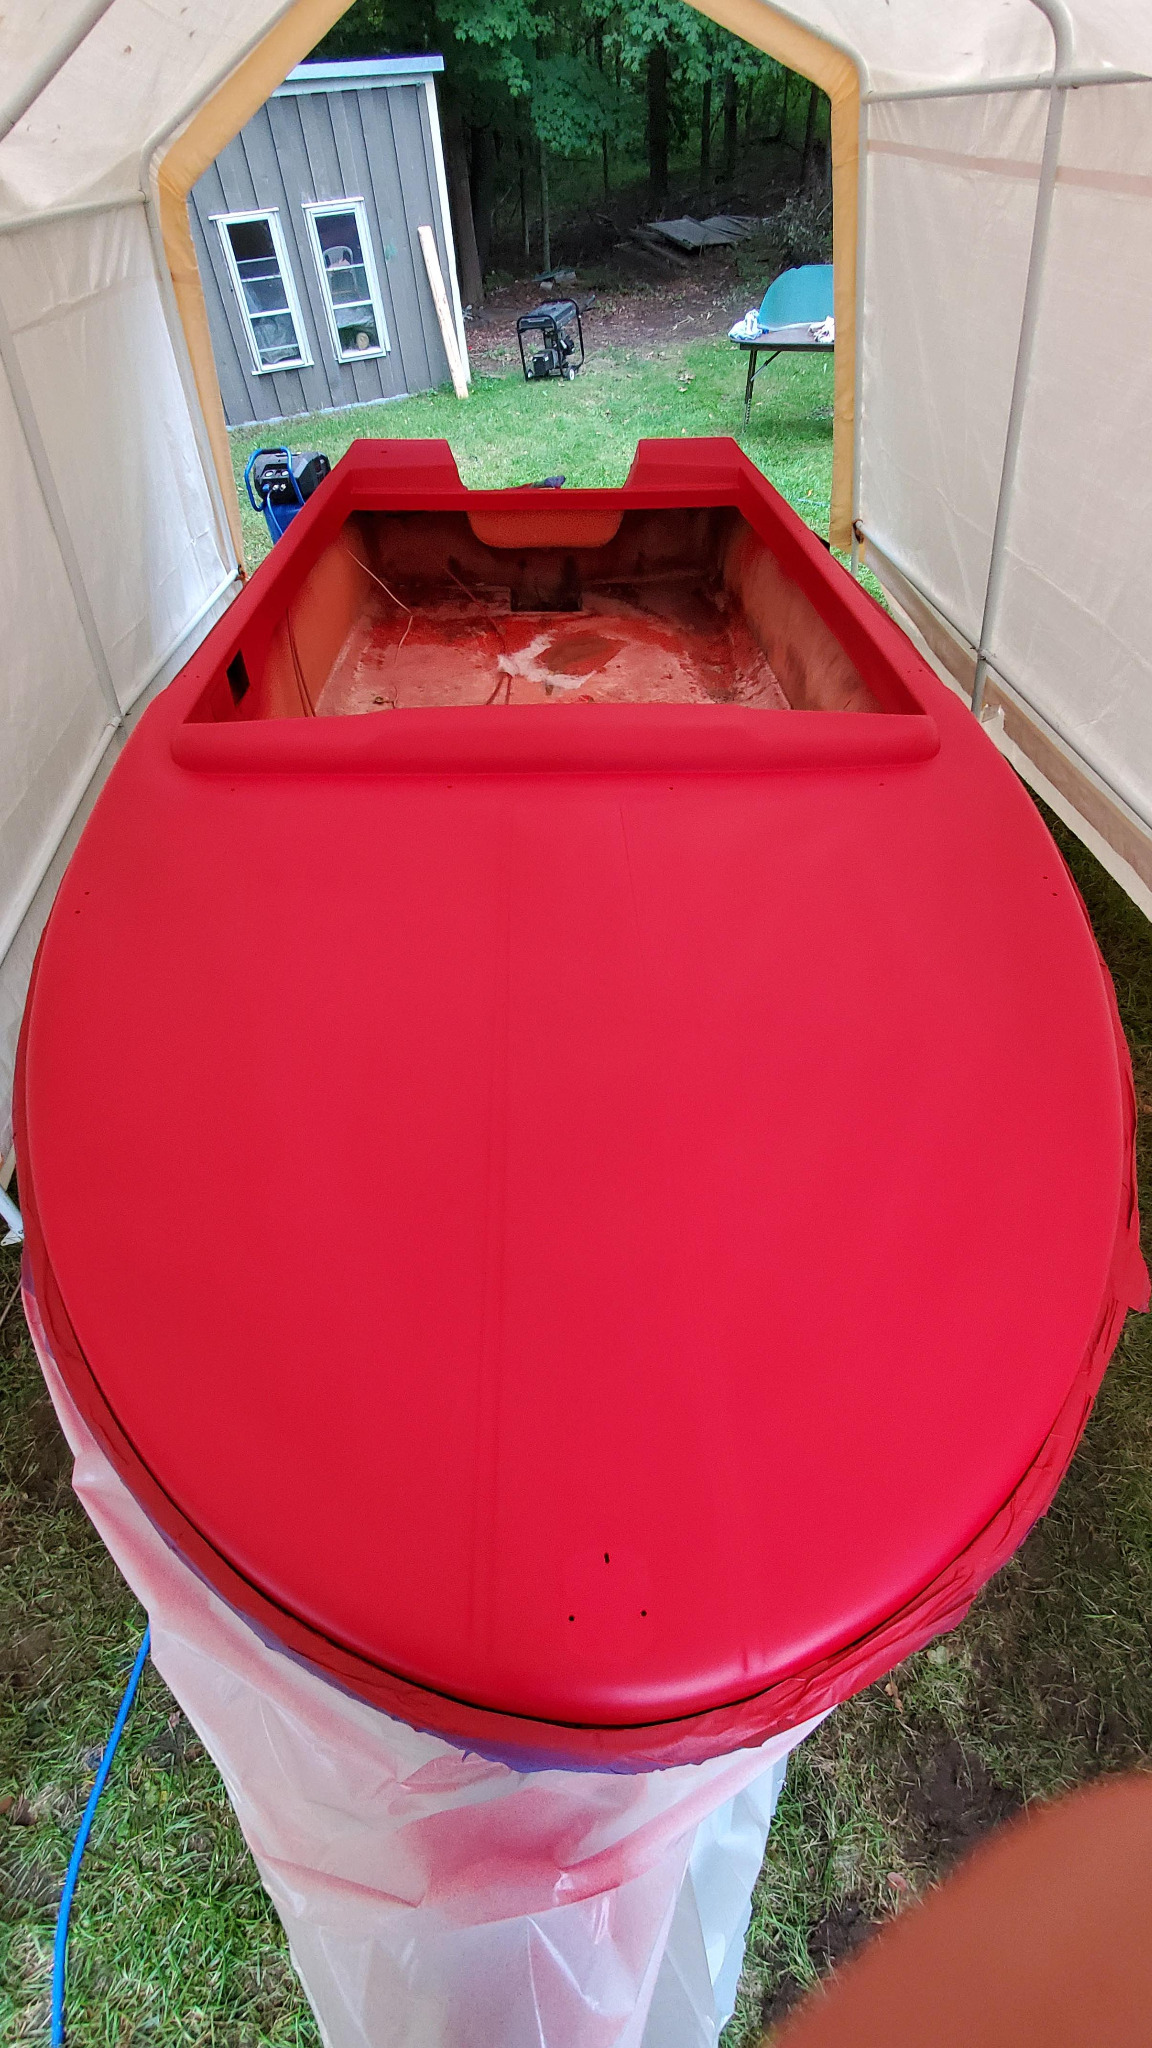
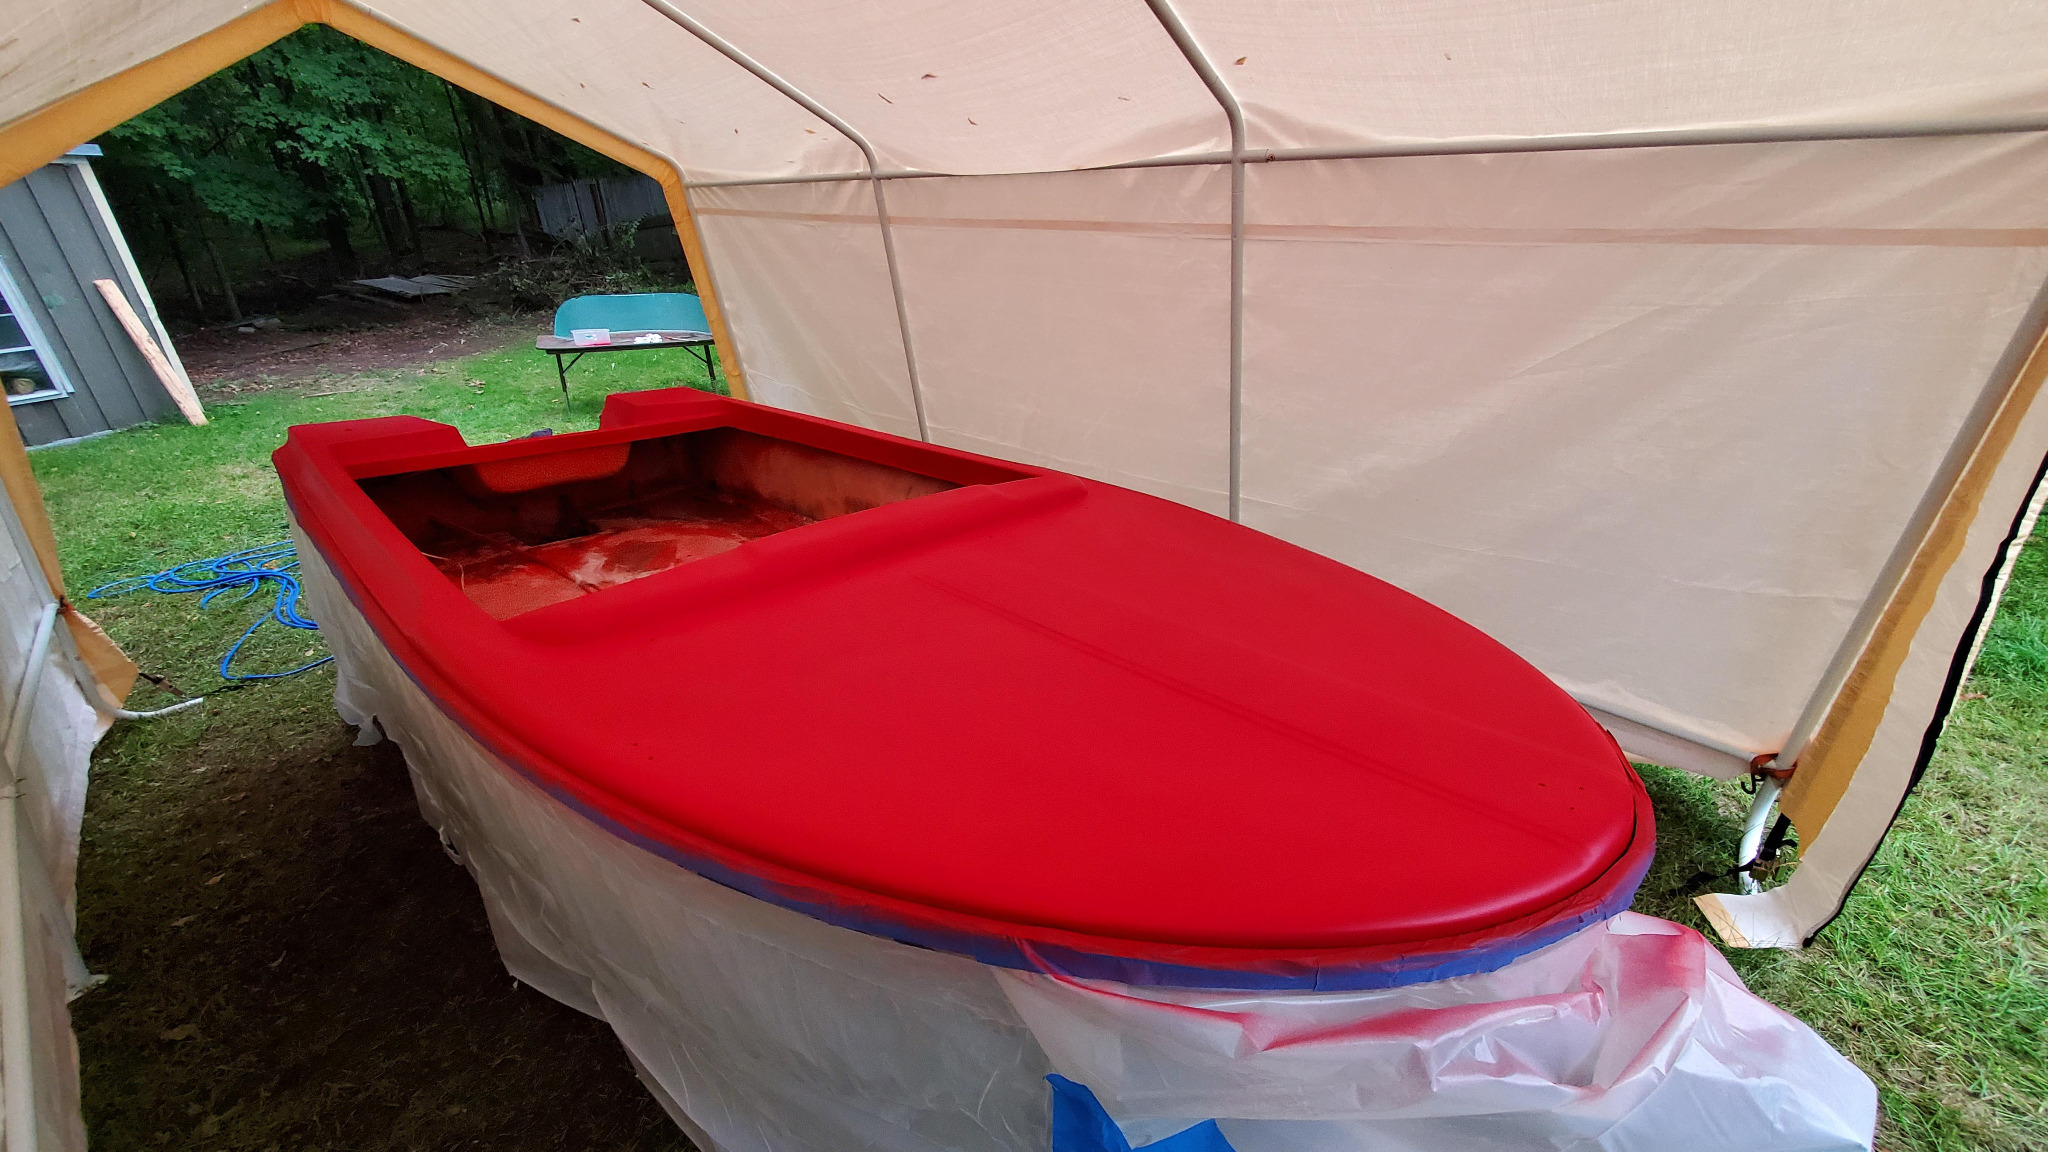
Monkey Ward Sea King Project and Questions 4 years 4 months ago #146154
|
Please Log in or Create an account to join the conversation. |

Monkey Ward Sea King Project and Questions 4 years 3 months ago #146320
|
Please Log in or Create an account to join the conversation. |
Monkey Ward Sea King Project and Questions 4 years 3 months ago #146326
|
Please Log in or Create an account to join the conversation. |

Monkey Ward Sea King Project and Questions 4 years 3 months ago #146327
|
Please Log in or Create an account to join the conversation. |
Monkey Ward Sea King Project and Questions 4 years 2 months ago #146329
|
Please Log in or Create an account to join the conversation. |
Monkey Ward Sea King Project and Questions 4 years 2 months ago #146368
|
Please Log in or Create an account to join the conversation. |

Monkey Ward Sea King Project and Questions 4 years 2 months ago #146372
|
Please Log in or Create an account to join the conversation.
Dr.Go!
|
Monkey Ward Sea King Project and Questions 4 years 2 months ago #146375
|
Please Log in or Create an account to join the conversation. |
Monkey Ward Sea King Project and Questions 4 years 2 months ago #146378
|
Please Log in or Create an account to join the conversation.
Dr.Go!
|
Monkey Ward Sea King Project and Questions 4 years 2 months ago #146384
|
Please Log in or Create an account to join the conversation. |

Monkey Ward Sea King Project and Questions 4 years 2 months ago #146428
|
Please Log in or Create an account to join the conversation. |


Monkey Ward Sea King Project and Questions 4 years 2 months ago #146429
|
Please Log in or Create an account to join the conversation. |
Monkey Ward Sea King Project and Questions 4 years 2 months ago #146430
|
Please Log in or Create an account to join the conversation.
Dr.Go!
|
Monkey Ward Sea King Project and Questions 4 years 2 months ago #146431
|
Please Log in or Create an account to join the conversation. |
Monkey Ward Sea King Project and Questions 4 years 2 months ago #146432
|
Please Log in or Create an account to join the conversation. |
Monkey Ward Sea King Project and Questions 4 years 1 month ago #146479
|
Please Log in or Create an account to join the conversation. |
Monkey Ward Sea King Project and Questions 4 years 1 month ago #146555
|
Please Log in or Create an account to join the conversation. |


Monkey Ward Sea King Project and Questions 4 years 1 month ago #146562
|
Please Log in or Create an account to join the conversation. |

|
Donate
Please consider supporting our efforts.
Glassified Ads
1965 Glasspar Avalon |

1959 RedFish( / Boats)


Glasspar Tacoma( / Boats)


FG Login

FiberGoogle
Who's Online
We have 7592 guests and one member online