Welcome, Guest
Username: Password: Remember me

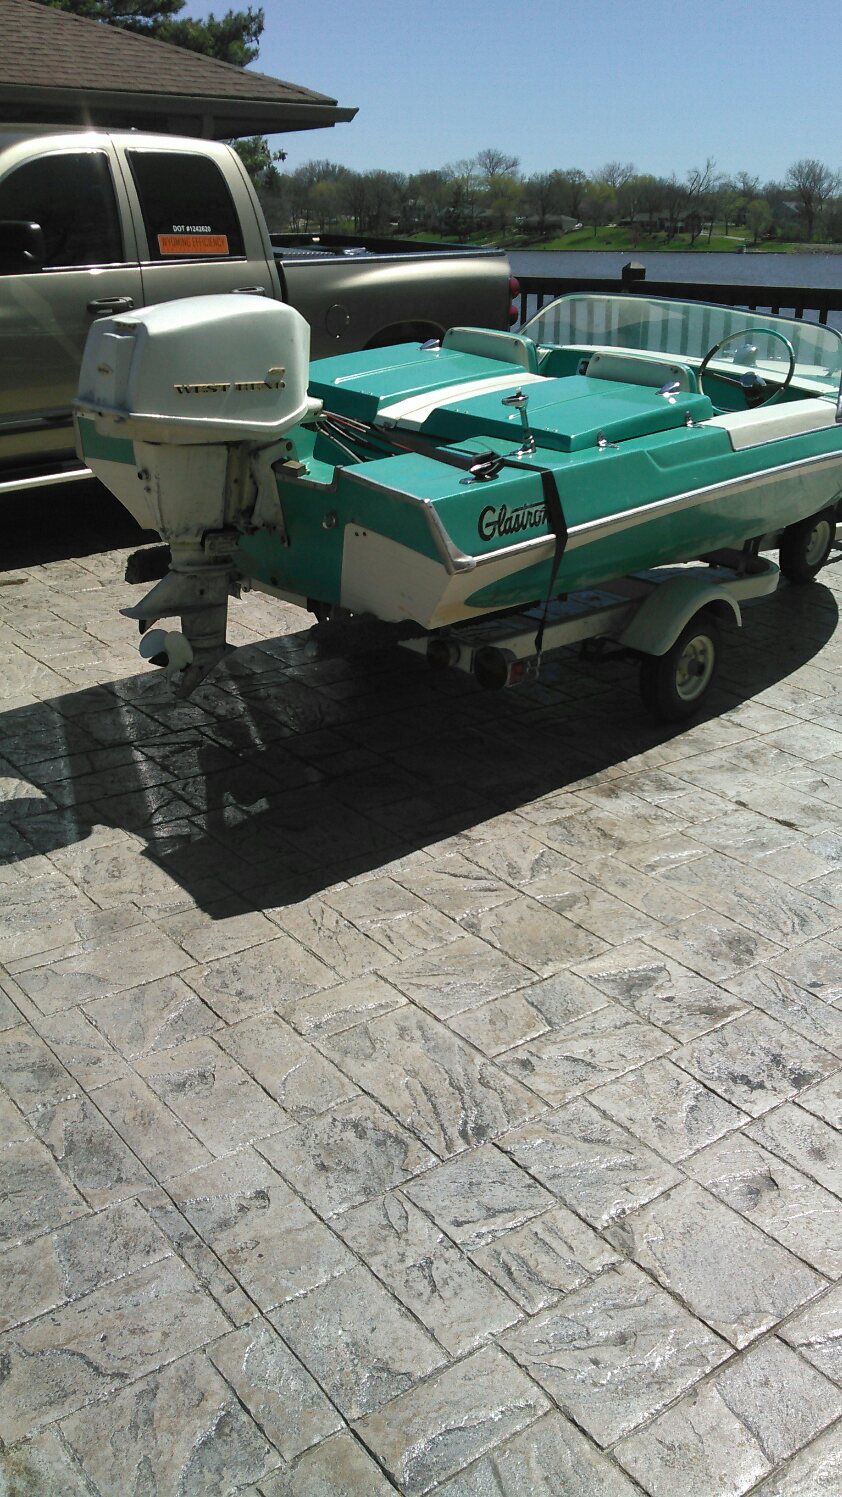
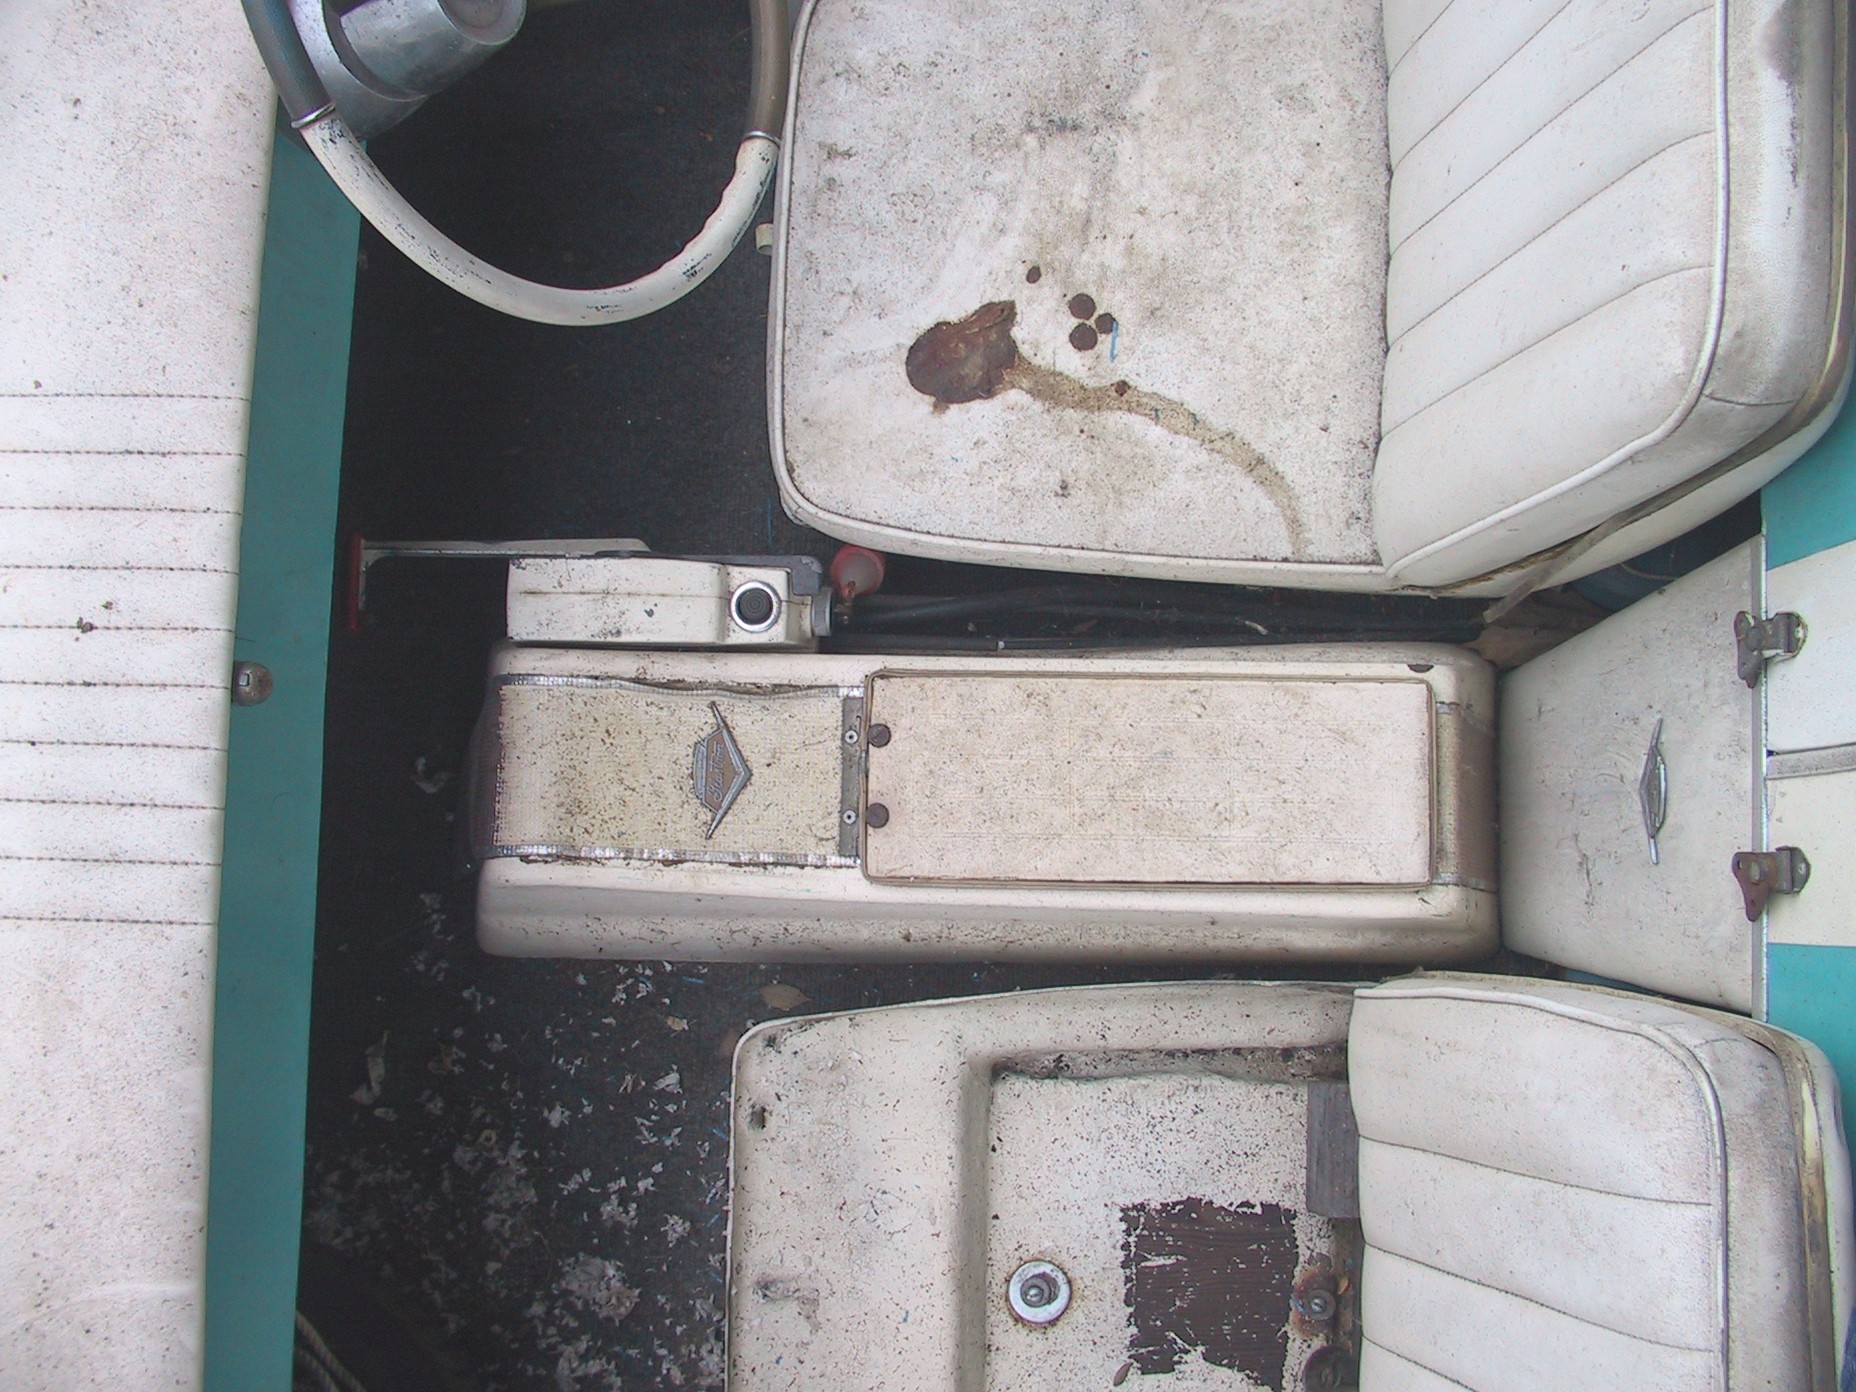
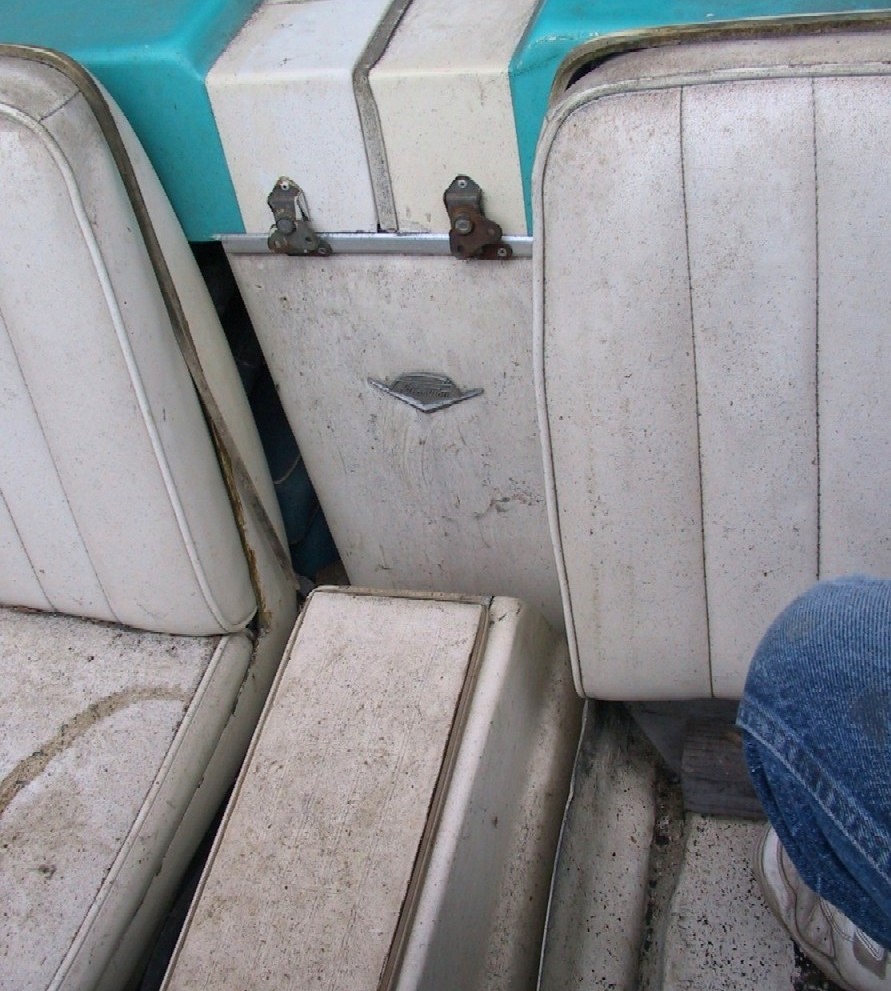
TOPIC: 1963 Glastron V143 JetFlite Restoration

Re:1963 Glastron V143 JetFlite Restoration 8 years 4 months ago #118002

Hi Kern,

Thank you for taking the time to keep us up on this superb restoration!!

I've been watching this thread for some time but must have missed the posts about where you grew up. We were close neighbors at that time, I grew up in Delmar Ia. and my brother and mother still live there. I also have a niece and her husband who run a (thing of the past) full service gas station in Dewitt on old Hwy 30.

Your name seems to ring a bell with me and was wondering if you might share your age? I will be 63 on Jan 2nd.

Best regards, Gene

Oh and here is a short YT vid walk around of a 1962 Thunderbird Sport Roadster (sure would make a cool tow buggy for your boat)
https://www.youtube.com/watch?v=WaUdR5knZ68

Please Log in or Create an account to join the conversation.

Re:1963 Glastron V143 JetFlite Restoration 8 years 4 months ago #118017

  • Kern
  • Offline
  • Junior Boarder
  • Junior Boarder
  • Posts: 105
  • Karma: 17
  • Thank you received: 1
Hello Gene,

Thank you for the kind words about my project. I agree that a Thunderbird Sports Roadster would make a great tow vehicle for the JetFlite. However, I already have too many cars and too many expensive projects to consider adding one to my fleet. Perhaps when I eventually sell the JetFlite some Sports Roadster owner will decide to tow it around.

We were geographically close at one time. I am currently 77 (almost 78) and lived in DeWitt from 1943 to 1960 when I left for college. My mom lived in her DeWitt house until early this year and moved to Grand Haven in Eldridge.

My brother, Harlan Fischer lives in Bettendorf and my sister Debby, who is closer to your age, lives in Colorado.

What gasoline station do your neice and husband operate?

If you ever get down to the Branson area, give us a call. I cannot take you for a ride in the JetFlite (yet) but I can give you a nice ride around Table Rock Lake in the Rinker deck boat and can give you a tour of the JetFlite project.

Please Log in or Create an account to join the conversation.

Re:1963 Glastron V143 JetFlite Restoration 8 years 4 months ago #118410

Hello Kern,

The gas station is a FS (farm service) station and called Schmidt Auto Repair, it is located about 1 block east of the Tasty Freeze.

Thanks for the invite, my uncle had a vacation home on Table Rock in the 60's I never did see it but he said it was a beautiful area. I remember he was boating when we were ice fishing here. Amazing how much a couple hundred miles makes.

I bought my 65 Plymouth Sport Satellite from a man in DeWitt and thought you might remember the car. It had a 426 wedge motor in it.

Merry Christmas to you and yours, Gene

Please Log in or Create an account to join the conversation.

Re:1963 Glastron V143 JetFlite Restoration 8 years 3 months ago #119071

  • Kern
  • Offline
  • Junior Boarder
  • Junior Boarder
  • Posts: 105
  • Karma: 17
  • Thank you received: 1
The original instrument panel was plain with the steering wheel mount and a small push-pull two position switch for the navigation lights. The top of the panel had a cover that was a plywood board trimmed in vinyl that matched the front deck vinyl. When purchased, this vinyl was discolored in a small area. An inquiry to Glastron resulted in them sending a replacement vinyl piece for no charge - very good customer relations.

When the upholstery and deck trims were reupholstered, the instrument panel top cover was covered to match. For this restoration it is being recovered again with trim to match the rest of the interior and deck trim.

Early in the life of the boat, surface mount speedometer and tachometer instruments were installed along with a cigarette lighter/map light combination. The speedometer was functional but the tachometer was never connected. These instruments were later removed.

The new panel will have a wrap-around design that will extend aft along the sides to meet the side deck trim.
As previously mentioned, the new instrument panel will have a teak veneer facing to match the console trim. Instrumentation will be upgraded to a VDO speedometer, tachometer, fuel gauge, and hourmeter. The instruments had black bezels when originally purchased. Chrome bezels are more appropriate for the era of the boat so the instruments were sent to a VDO repair facility and the bezels were changed to chrome.

A new switch panel will have switches for the anchor light, navigation light, interior lights, and rear compartment blower.

The new and old wood parts. The original panel backup board is shown at the bottom. It was not full height behind the instrument panel area. The center board is the new backup board. It is full height. The upper board is the new face board with the cutouts for the instruments.

The new face panel with the components in position to check the appearance. Clearance holes have been cut into the back up panel.

To create the wrap around and extensions of the panel, side pieces were cut from ¼ plywood and the main panel and side panels were grooved on the back for 1/8 inch stainless steel rods. These rods were formed to conform to the corners at the ends of the original fiberglass panel. Then the grooves in the wood parts were filled with epoxy and the parts were positioned over the rods and left while the epoxy cured. The epoxy used for this purpose was JB Weld as it has great bonding capabilities to metal.

The wood parts with the grooves cut into the back surfaces and the stainless rods taped into place.

The wood parts in place with the JB Weld bonding the wood to the stainless rods. Note the waxed paper behind the parts to prevent the JB Weld from bonding to the original fiberglass surface of the boat panel.

The bonded face and extension panels held together by the stainless rods.

After the rods were bonded into place as a basis for the corner structure, strips of ¼ plywood were cut and grooved on the back sides so they could be bonded to the stainless rods to form the corners. The gaps between the strips were then filled with a resin/microballoon mixture to create the front and rear corner surfaces and the surfaces were sanded to the desired contour. A layer of glass cloth was applied to the front surface for strength. Then the outer edges were sanded to the final shape desired for the panel.

The narrow plywood strips are bonded to the stainless rods to create the curvature desired for the corner contours.

The back side of the corner was filled with an epoxy/microballoon mix to fill the gaps and add rigidity to the corners.

A layer of glass cloth was added to the front surface to add strength and provide a smooth surface for bonding the face veneer later.

Trial fitting the new panel structure into the hull prior to bonding the veneer to the surface.

Please Log in or Create an account to join the conversation.

Re:1963 Glastron V143 JetFlite Restoration 8 years 2 months ago #119176

Great ideas. I have another project this will really help with.Thanks for posting.

Please Log in or Create an account to join the conversation.

Florida's Amphicar restoration destination

Re:1963 Glastron V143 JetFlite Restoration 8 years 2 months ago #119784

  • Kern
  • Offline
  • Junior Boarder
  • Junior Boarder
  • Posts: 105
  • Karma: 17
  • Thank you received: 1
As originally built, the interior side panels were terminated near the instrument panel at the front and near the rear of the cockpit area. This left some of the hull interior exposed at the front and left the entire rear area open. The boat ran most of the time with the tonneau covers in place so the open rear area was not exposed. However, if it were finished it would look better when the covers were off the hull.

The front of the original side panel allowed viewing of the unfinished hull surfaces ahead of the panels.

The rear of the original side panel with the open rear compartment, which allowed viewing of the battery, fuel tank, and rear well areas.

The plan is to enclose the rear area to hide the battery and fuel tank as both will be permanently mounted. The side trim panels will be extended forward to provide a more finished look in the footwell area and at the rear will meet side extensions of the rear closure panel. The rear panel will have a door for access to the rear compartment for priming the carburetors and inspection of the compartment. The rear panel will be removable for any servicing of the components in the rear compartment.

Enclosing the rear area will present the possibility of gasoline fumes accumulating in that space with the possible hazard of an explosion. Additional venting will be provided for air flow when under way and a blower will be added for venting prior to starting the motor.

New side panels were cut from ¼ inch plywood and fitted to the shape of the desired coverage. Allowance was made at the bottom for the floor carpet and the top edge was cut to closely match the chrome trim that will be installed around the instrument panel and the side deck trim. A cutout was made in the inner side deck extensions and in the new side panels for the new interior lights that will be added to illuminate the area behind the seats.

The new side panel in place showing the extended coverage ahead of the foot well area and forward floor step. Note how the instrument panel side extension blends into the top of the side panel.

The initial trial fit of the side and rear panels prior to forming the corners.

Per a suggestion from Dave at Schober’s Trim, the panels will be attached to the inner deck extensions using the plastic tree type fasteners used for many automotive panel attachments. Holes were drilled in the plywood side panels for the fasteners and matching holes were drilled into the side deck extensions. The heads of these fasteners will be hidden under the upholstery.

The main rear panel was cut from 3/8 plywood and the side extensions were ¼ plywood. The curved corner areas were made in the same way as the corners of the instrument panel extensions. The main panel and hinged door tended to warp when laid out in any way except perfectly flat, so stiffening ribs were added to both to maintain flat surfaces. Various gaps were created between the panel edges to allow for the thickness of the vinyl trim where it wrapped around panel edges. The rear panel will be held in place by stainless steel brackets and machine screw fasteners hidden behind the panel.

A closeup of the starboard rear corner construction showing how the curvature was created.

Fitting the rear panel into place with both corners formed. The round holes in the rear panel will have louvered vents installed to help circulate air through the enclosed rear compartment.

The access door in the rear panel is hinged at the bottom with a white plastic piano hinge and the door is held closed by quarter turn latches in each upper corner.

The method of hinging the access door for the rear compartment. Note the stiffening ribbing on the backside of the door. Ribbing was necessary on the door and on the rear panel to keep them flat in use.

The panels will be upholstered primarily in white but will have an aqua stripe, consisting of three pipes, that will extend from the foot well area on one side all around the rear and then forward to the foot well on the other side. The piping on the side panels is the same width as the piping on the seats. The new rear compartment lights are centered vertically within the stripe.

The upholstered panels being trial fitted into the hull. They do not align precisely as they are not fastened into place, just sitting in position. The chrome button at the top of the door on the port side is the quarter turn latch to secure the door closed. A hole is provided on the starboard side for a similar latch.

The inside of the rear compartment door will be occasionally exposed during operation of the boat so this surface was fully trimmed to look good when open.

Please Log in or Create an account to join the conversation.

Re:1963 Glastron V143 JetFlite Restoration 8 years 2 months ago #119789

  • 63 Sabre
  • 63 Sabre's Avatar
  • Offline
  • Contributing Member
  • Contributing Member
  • Posts: 4676
  • Karma: 147
  • Thank you received: 167
Gorgeous, can't wait to see what you have planned for the seating.
Attachments:

Please Log in or Create an account to join the conversation.

Re:1963 Glastron V143 JetFlite Restoration 8 years 2 months ago #119801

  • Kern
  • Offline
  • Junior Boarder
  • Junior Boarder
  • Posts: 105
  • Karma: 17
  • Thank you received: 1
Refer back to page 2 of the thread, about half way down, details of the seats are posted. Unfortunately, even though I am trying to get all the details right and completed with quality, the full effect will not be available until all the parts come together.

Hopefully, I can get back at it sometime soon. Our move has taken much time out of my various projects.

Please Log in or Create an account to join the conversation.

Re:1963 Glastron V143 JetFlite Restoration 8 years 2 months ago #119829

Outstanding she's coming along nicely!

Bob

Please Log in or Create an account to join the conversation.

Re:1963 Glastron V143 JetFlite Restoration 8 years 2 months ago #119884

You are really doing an unbelievable job with that jetflite! I am jealous.

Please Log in or Create an account to join the conversation.

Re:1963 Glastron V143 JetFlite Restoration 8 years 1 month ago #120107

  • Kern
  • Offline
  • Junior Boarder
  • Junior Boarder
  • Posts: 105
  • Karma: 17
  • Thank you received: 1
Thank you, gentlemen, for the compliments. If this project were not absorbing so much time and money, I would have liked to get an example of every JetFlite model built so I could have a collection of them. However, that is out of the realm of possibility at this point.

Please Log in or Create an account to join the conversation.

Re:1963 Glastron V143 JetFlite Restoration 8 years 1 month ago #120109

shipwrights disease.......... If I had been diagnosed years ago......LOL

Please Log in or Create an account to join the conversation.

Florida's Amphicar restoration destination

Re:1963 Glastron V143 JetFlite Restoration 8 years 1 month ago #120118

  • Kern
  • Offline
  • Junior Boarder
  • Junior Boarder
  • Posts: 105
  • Karma: 17
  • Thank you received: 1
Guilty, as diagnosed. This applies not only to the Glastron but to various other car and house projects upon which I have embarked.

I do not have it nearly as bad as a neighbor that I had in Illinois. He was an extreme perfectionist and had a very tenacious streak. It drove his wife crazy!

Please Log in or Create an account to join the conversation.

Re:1963 Glastron V143 JetFlite Restoration 8 years 1 month ago #120139

  • 63 Sabre
  • 63 Sabre's Avatar
  • Offline
  • Contributing Member
  • Contributing Member
  • Posts: 4676
  • Karma: 147
  • Thank you received: 167
I would go along with his wife. Just the opposite here. The admiral is a perfectionist and it drives me nutz.

Please Log in or Create an account to join the conversation.

Re:1963 Glastron V143 JetFlite Restoration 8 years 1 week ago #121288

Kern,

I just purchased the exact same boat in MN and have moved it to my home in MO. Mine is very complete, but is missing the front tonneau cover support. Can you show a better photo of yours so I can try to duplicate it?

Thanks, Mark
Attachments:

Please Log in or Create an account to join the conversation.

Re:1963 Glastron V143 JetFlite Restoration 8 years 1 week ago #121328

  • Kern
  • Offline
  • Junior Boarder
  • Junior Boarder
  • Posts: 105
  • Karma: 17
  • Thank you received: 1
Hi Mark,
It looks like you have scored a nice boat. Where did you find it? What horsepower is on it? Thus far I know of only four that have responded to my online inquiries. Yours may be one of those four or it may be another. One of the four was for sale by the original owner and pictures that I received looked like it was in good shape. As I recall, it was in the MN area.

In looking at your picture, there are several differences to my boat, specifically, the bow light location, the air scoops on the covers, the rear cleats, and the Glastron emblem on the sides at the stern. Yours may have been an earlier production version than mine. Do you have a serial number for your hull?

I have attached pictures of the cover support that was originally with the boat. It is not the original upholstery. It was 3/8 inch plywood, had a piano hinge on the rear bottom, and used the aluminum extrusion and quarter turn latches shown to fasten the covers down. It all worked but I never liked the look and the fact that when the covers were off for extra passengers, the support was lying on the rear floor.

I had the original support board and hardware before we moved. I can do a quick check to see if I still have it. If so, you are welcome to whatever I have. My e-mail is: This email address is being protected from spambots. You need JavaScript enabled to view it.. Send me your address and we can correspond off list.

A top view of the support. It is mounted to the floor immediately behind the console.


Front view showing how the cover edges sit into the aluminum extrusion and the quarter turn latches.

For my new design, the support channel and tabs are on the back side, the hinges are a removable type so the support can be left with the covers when they are not on the boat, and I reshaped it slightly to fill the gaps to the seats. The latches are not shown but are stainless steel toggle latches that are very smooth and clean looking. The latches will have stainless steel pads under their mounting surfaces.

The back side of the new support board. The covers will have tabs that drop into the wood grooves on the back side of the new board.

I believe that I have more pictures of the new support but cannot find them just now. I will continue to look and send them to you when I get them.
Attachments:

Please Log in or Create an account to join the conversation.

Re:1963 Glastron V143 JetFlite Restoration 8 years 1 week ago #121333

  • Dr.Go!
  • Dr.Go!'s Avatar
  • Offline
  • Contributing Member
  • Contributing Member
  • Posts: 1719
  • Karma: 19
  • Thank you received: 125
Nice project and pictures Kern. I love these boats!

Mark - very nice find. I had not know about those back hatches (have seen these boats, but never saw the hatch feature)...pretty cool.

Once in a while I see these boats in Wisconsin or Mn craigslist. Would you want me to "Post" the links in the "Sightings" forum when I see them? Prices usually seem reasonable from time to time.

Great to see you guys keeping these sports car looking boats out on the water!

Please Log in or Create an account to join the conversation.

Dr.Go!

Re:1963 Glastron V143 JetFlite Restoration 8 years 1 week ago #121337

  • Kern
  • Offline
  • Junior Boarder
  • Junior Boarder
  • Posts: 105
  • Karma: 17
  • Thank you received: 1
Hello Dr. Go,

Glad to hear you are a fan of our boats. Not only do the 1963 JetFlites look like sports cars, they handle like one also. I have always been amazed at how well mine is able to turn corners, and it does not lean like a soft chine or V hull does.

Perhaps you have seen the 1961-62 versions of this hull, or the 1964 and later versions of the JetFlite. None of those had the rear tonneau covers. That is what makes this boat interesting to me. The colors and the covers made it a one model year boat. I feel very fortunate to have lucked into buying one when they were new and being able to keep it over all the time that has elapsed.

I would be interested in any other 1961-63 versions that you see listed for sale or if you know of any owners who have one. I am trying to get some feel for how many were produced. I have not been able to find any factory production records to indicate how many were built so I can only guess at this time.

If you find any others, please e-mail me directly at: This email address is being protected from spambots. You need JavaScript enabled to view it..

Please Log in or Create an account to join the conversation.

Re:1963 Glastron V143 JetFlite Restoration 8 years 1 week ago #121339

  • Dr.Go!
  • Dr.Go!'s Avatar
  • Offline
  • Contributing Member
  • Contributing Member
  • Posts: 1719
  • Karma: 19
  • Thank you received: 125
Kern - the two boats I used to hang around I think would be interesting to you. The first was named "Pokey" and ran a 110 merc on it with no power trim. As he fought to plane it off, it would get a little crazy just as it hooked up and bounced a bit...then after settling in, he would hammer it and it would go pretty well...though would eventually chine walk and he would have to back down and settle it again...then one day as we sat on the beach with it parked, another one that had the same color and stripes approached the beach to look at his...then he turned a half circle to pull away. As I looked for what outboard he might be running, I saw none (but could hear the sound of a car engine V-8). Then BAM - he hit that throttle and jumped that boat 3' clear of the water to the transom...I will never forget that...he just let it slap back in the water at an idle and then came to shore. He bought his new and never put the outboard on it - (thought rated for 85hp outboard), he decided he wanted to put a 300+hp 350 chevy in it with a V-drive. He could hit around 80mph with his and it was crazy quick. It handled because the negative prop shaft angle kept the whole hull wet and in the water and he could just SHOVE that boat to speed. About a decade later when I grew up and got my own boat. I was the only one I ever saw that could slightly out run him in a Hydrostream Viking with a 200 merc, 30 pitch prop, nose cone, hydro-electric transom and disconnected rev limiter. What fun the two of us had that day. I first saw that boat in like the late 60's and from what I hear, he still has it today. I will look for the two boats I saw for sale recently and get those to you.

Please Log in or Create an account to join the conversation.

Dr.Go!

Re:1963 Glastron V143 JetFlite Restoration 8 years 1 week ago #121344

  • Dr.Go!
  • Dr.Go!'s Avatar
  • Offline
  • Contributing Member
  • Contributing Member
  • Posts: 1719
  • Karma: 19
  • Thank you received: 125
Kern, I just direct e-mailed you 2 separate links for JetFlites for sale. Let me know if you did not get them.

Happy Hunting!

Please Log in or Create an account to join the conversation.

Dr.Go!

Re:1963 Glastron V143 JetFlite Restoration 7 years 8 months ago #125301

  • Kern
  • Offline
  • Junior Boarder
  • Junior Boarder
  • Posts: 105
  • Karma: 17
  • Thank you received: 1
The JetFlite project was on hold for over a year during the preparation for our move, the move, and getting projects completed at the new location. Meanwhile, I keep my boating desires satisfied using the deck boat that I bought and keep at a dock about three miles from the house. During the latter part of 2015 I had more time on the water here than I had in the previous 25 years in Illinois.

I now have some time to devote to continuing on the JetFlite.

It was desired to attach the new panel to the existing panel surface with hidden fasteners. Prior to adding the face veneer to the panel, flat head screws were installed in the panel with washers and nuts on the back side. This hardware was bonded into the panel with epoxy resin. Holes were drilled in the original fiberglass panel to accept these screws. Then fender washers and nuts were added on the back side to hold the entire new panel in place.

A closeup of the head of one of the mounting screws countersunk into the surface so the veneer can be glued over it. The screw is bonded into place along with being mechanically clamped by a washer and nut.

A simulation of the mounting showing the method and hardware. The white board is the simulated instrument panel of the hull with part of it cut away to show how the screws are retained to the panel.

The teak veneer was then bonded to the new panel structure using contact cement and the various holes were cut into the veneer and the edges were dressed smooth. Then the veneer was coated with several coats of polyurethane with sanding between some of the coats. The final coat was sanded and then rubbed with steel wool for a smooth, satin finish like the console. One forum member commented that steel wool particles left on the surface may show rust over time. To minimize this possibility, a strong magnet was swept over the surface after finishing.

The veneer and face panel coated with contact cement prior to assembling them. Only the flat face of the panel and the mating area of the veneer are coated. The ends will be coated later and brought together to insure a good fit to the curvature of the panel extensions.

Placing the two parts together for initial positioning. Wax paper has been put between the parts to separate the cemented surfaces prior to getting the proper location of the veneer. A small area at top center has been left unpapered to provide the initial bond for location. The wax paper is then progressively removed and the veneer is pressed to the face panel with a small wooden roller.

The completed panel ready for gauge and switch insertion. The veneer has been trimmed and the surface coated with polyurethane.

The instruments and switch panel were installed and the entire assembly was wrapped and put into storage awaiting final installation. The final installation will have chrome strips along the angled end and bottom edges. These strips will match strips used to edge the vinyl deck trim and console trim.

The panel with gauges and switch panel installed, ready for installation in the hull when the time is right.

A closeup of the gauges in the panel.

A closeup of the new switch panel with blower and interior light functions added.

Please Log in or Create an account to join the conversation.

Re:1963 Glastron V143 JetFlite Restoration 7 years 6 months ago #127892

  • Kern
  • Offline
  • Junior Boarder
  • Junior Boarder
  • Posts: 105
  • Karma: 17
  • Thank you received: 1
Continuing work on the bottom structure was interrupted by the move to the new residence and the project was delayed for about a year. To aid in the move, the floor was temporarily installed and the boat was used to carry a wide variety of items to the new location.

Picking up the story line where we left off, the stringers were installed into the hull and bonded into place. A poster on one of the forums indicated that it was not usual practice to bond the stringers to the bottom fiberglass as this created hard spots along the stringers and the fiberglass bottom would flex between the stringers and cause gel coat cracking.

This flexing may not be a problem with this build as the volumes between stringers are being filled with rigid foam that will be bonded into place with resin. Then the floor will be bonded to the tops of the stringers and to the foam, creating a rigid assembly that should provide good support for the bottom.

The foam and resin are being used to completely fill the underfloor cavity for two reasons:
1. To provide flotation for the hull. Due to its irregular shape, it is difficult to precisely measure
the foam volume. The estimated flotation due to the underfloor foam is about 200 pounds.
2. To prevent any water entry into the lower hull, thus keeping the wood structural components
dry and strong.

Fitting the foam pieces into place was made more time consuming by the bottom shape being a slightly rounded very shallow vee from the keel to the chine area. At the keel the foam thickness was slightly over two inches, tapering to a pointed edge at the chine. Each part had to be shaped and fitted and no two were alike. Fortunately, the foam is easy to cut, file, and sand to the desired shape. Each cavity between the stringers was filled to a level that was flush with the tops of the stringers. All minor gaps and joints were filled with resin so that each piece of foam was totally enclosed in resin.

The first layer of foam bonded to the bottom.

Please Log in or Create an account to join the conversation.

Re:1963 Glastron V143 JetFlite Restoration 7 years 6 months ago #127901

  • Kern
  • Offline
  • Junior Boarder
  • Junior Boarder
  • Posts: 105
  • Karma: 17
  • Thank you received: 1
A minor change was made to the shape at the front of the bilge well. The original front surface for the well was vertical and the corners were difficult to clean. The new front surface was set at a 45 degree angle for easier cleaning.

Forward view with all the foam in place. Some blocks are slightly higher than the stringers and will be trimmed flush.

Looking aft.

Looking forward - all the blocks have been trimmed. There are still some minor cracks and cavities that will be filled with a resin/microballoon mixture. Then the floor boards will be bonded to the surface.

Looking aft.
Attachments:

Please Log in or Create an account to join the conversation.

Re:1963 Glastron V143 JetFlite Restoration 7 years 6 months ago #127922

Excellent!

Bob

Please Log in or Create an account to join the conversation.

Re:1963 Glastron V143 JetFlite Restoration 7 years 6 months ago #128198

  • Kern
  • Offline
  • Junior Boarder
  • Junior Boarder
  • Posts: 105
  • Karma: 17
  • Thank you received: 1
Because the helm station is quite constricted on the right side, the motor control was never mounted there. Instead, it was mounted on the starboard side of the center console near the front. The original control cable routing had them lying on the floor angling toward the starboard rear corner. This routing was not usually a problem because passengers were not often carried back there and when the tonneau covers were in place, the cables were not visible.

A more finished look for the rear compartment was desired so the decision was made to route the cables under the floor using a recessed channel. A tube could not be used because the size of the cable ends would not easily push through a tube, so an open channel was designed, using a gasketed cover to close the channel.

The channel was made by using a length of pvc tubing with 45 degree elbows bonded to the ends. The elbows were the same ID size as the tubing to provide more uniform sizing at the ends. The outer tube ends and the inner elbows were ground at an angle to provide more area for bonding the parts and they were attached using epoxy resin.

The elbow bonded to the tube.

The tube assembly.

After bonding the parts, the assembly was attached to a 2X4 board and run through the table saw to open the top of the tube assembly and create a channel. Then a surround was cut from ¼ inch plywood and bonded to the channel so the surface of the plywood was flush with the open top of the channel.

Cutting the top off the tube and elbows to create a channel.

The channel and the plywood flange that will be bonded to it.

The location of the channel was established for its under floor positioning. The foam filler and small portions of the starboard stringers were cut away so the top of the channel assembly would be at the same level as the tops of the stringers and foam. The channel was then bonded into place using resin.

The channel assembly lying upside down next to the cavity that has been cut to receive it.

Cutting into the tops of the stringers weakened them slightly in those areas. Once the channel was bonded into place some or all of that strength was restored. Bonding of the floor into place further stiffened the entire structure. When the channel cover is screwed into place, this will add more stiffness to that area. Summary - it is felt that the structural strength of the bottom was not compromised by the addition of the cable channel assembly.

The channel assembly bonded into place.

After installation of the cable channel, the floor panels could be installed. The floor was comprised of seven panels for easier fitting and installation. To install each panel, the tops of the foam and stringers in that area were fully wetted with a resin/microballoon mixture and the bottom of the floor panel was wetted with plain resin. The side edges were left dry until the main area had cured. They were then filled with a resin/microballoon mixture. The resin/microballoon mixture was selected as it could be slightly more viscous and better filled any small gaps or cavities. After complete wetting the floor panel was laid into place and weighted during resin cure. No screws were used to attach the floor panels to the stringers, so there is no place for water entry into the wood.

Starting the installation of the floor panels.

The floor panels were cut so the floor overlapped the edges of the cable channel surround by about ¼ inch all around. This overlap allowed a good resin bond and seal all around the perimeter of the cable channel to prevent water entry into the bottom structure.

A closer view of the floor panel installation showing the slight overlap to the channel flange.

Please Log in or Create an account to join the conversation.

Re:1963 Glastron V143 JetFlite Restoration 7 years 5 months ago #128238

Great idea, well done.

Bob

Please Log in or Create an account to join the conversation.

Re:1963 Glastron V143 JetFlite Restoration 7 years 5 months ago #128714

  • Kern
  • Offline
  • Junior Boarder
  • Junior Boarder
  • Posts: 105
  • Karma: 17
  • Thank you received: 1
Continuing the build of the floor structure, the forward floor panels were bonded into place in the same manner as the rear panels. Then a single strip of woven fiberglass was laid along the floor edge to hull chine joint and wetted into place.

The forward floor panels in place, coated with resin.

The support blocks for the fuel tank were positioned and bonded into place in the port rear corner. The tank is being placed on blocks to allow an air space under the tank for ventilation and to prevent any water accumulation.

The fuel tank support blocks, bonded into place in the port stern corner.

Trial fitting the fuel tank onto the blocks.

Then the entire floor was given a coat of resin to seal it from any water penetration. Mounting screws for various components will be attached to the floor but a special process will be used to attach them firmly and seal against water entry.

The cover for the cable channel was cut from ¼ inch plywood, the ends were notched for cable entry and exit into the channel, and holes were drilled for the attachment screws. The screw hole pattern was transferred to the cable channel flange for drilling to accept the screws.

Fitting the channel cover into the floor recess.

To protect the wood from water exposure, the holes in the channel flange and cover were drilled significantly oversize and the countersink drillings in the cover were cut deeper than needed. These larger cavities were then filled with resin and allowed to cure. The cover holes were then drilled to size and the countersink drillings were cut to the correct depth.

Oversize holes drilled into the channel flange preparatory to filling them with resin.

The holes in the channel flange were drilled with a tap drill for a 10-24 machine screw and the holes were tapped for that thread size. The tap tended to load with resin so each hole required about three insertion and removals, each insertion being used to cut deeper and each removal required to clean the tap of resin. Failure to take the time to do this results in threads that get smoothed down to where they are ineffective.

Tapping the channel flange holes to accept the machine screws - an example shown. The threaded holes are totally encased in the resin plugs.

The holes in the channel cover drilled and countersunk to size. Note that each hole is totally surrounded by resin so no water can reach the wood.

An alternate solution would be to drill the resin with the proper size bit and insert wood screws. This would have been easier and quicker, but when have I ever taken that route? I guess my automotive background likes machine screws better.

Final construction of the channel will be shown on the next posting. The next set of mounting holes will be for the seats, console, and tonneau cover support panel. Preparing for this layout, one seat, the console, and the tonneau cover support were positioned on the floor. Seeing them in place helps to keep the motivation up.

A preview of the final result.

Please Log in or Create an account to join the conversation.

Re:1963 Glastron V143 JetFlite Restoration 7 years 5 months ago #128730

I continue to enjoy and appreciate the commitment to detail that you continue to do in this project.
Very amazing.
Thank you for sharing all the details & pictures as you continue.
Doc Frankenmerc

Please Log in or Create an account to join the conversation.

Re:1963 Glastron V143 JetFlite Restoration 7 years 5 months ago #128769

She's going to be phenomenal when your done!!!!!!!!!!

Bob

Please Log in or Create an account to join the conversation.

Re:1963 Glastron V143 JetFlite Restoration 7 years 5 months ago #128785

  • Kern
  • Offline
  • Junior Boarder
  • Junior Boarder
  • Posts: 105
  • Karma: 17
  • Thank you received: 1
Gentlemen,

Thank you for your kind words of support.

I felt that this boat was worth the extra effort considering it is a unique one year design, I have a long history with it, I have found only four others with my online inquiries, and, as far as I know, this is the only one being rebuilt/restored/upgraded.

I wish I could determine how many were originally built but have been unable to unearth any records that might provide that information.

Will I get back what I have invested (Both time and money)? Not a chance!! However, I suspect there are many other boat projects out there that will have a similar result and, hopefully, someone new can become a caretaker of history.

Please Log in or Create an account to join the conversation.

Re:1963 Glastron V143 JetFlite Restoration 7 years 5 months ago #128883

  • Kern
  • Offline
  • Junior Boarder
  • Junior Boarder
  • Posts: 105
  • Karma: 17
  • Thank you received: 1
After the cover was fully prepped for size, shape, and screws, it was painted as it will be exposed during any servicing of the cable channel. The cable channel, its flange, and the floor surrounding it were also painted for the same reason. The rest of the floor in the cockpit area was left unpainted as it will have carpeting glued down to cover the resin coated plywood.

After painting, the channel cover had two strips of 1/8 inch thick rubber glued to the underside to seal against the channel flange. Each end of the channel has a ¾ O.D. vinyl tube bonded into place to position the cables at the entry and exit points of the channel. These had to have a linear cut to allow the cables to be inserted as the ends of the cables are too large to pull through the tubes. After final installation, the cables will be sealed into the tubes with silicone seal, preventing any water entry.

Starboard view of the channel with the cover lying top up nearby.

Port view with the cover lying bottom up, showing the gasket strips along the sides.

Detail view of the cables entering the channel through the vinyl tube. Carpeting will cover the entry with only a slit in the carpeting for the cables to pass through.

The cables laid into the channel. The rear exit from the channel will be behind the interior trim panel so will not be covered or trimmed to look pretty.

The cover installed with a few screws. The aft end sits slightly high and will require some detail work to fit better.

The carpeting will be installed with a non-glued flap over the cable channel area. The edge of this flap will be held down with a series of small screws, which can be removed for any required service or replacement of the cables.

Please Log in or Create an account to join the conversation.

1963 Glastron V143 JetFlite Restoration 6 years 2 months ago #135656

  • Kern
  • Offline
  • Junior Boarder
  • Junior Boarder
  • Posts: 105
  • Karma: 17
  • Thank you received: 1
Hello Fellow Boaters,

I have not posted any progress on the JetFlite for some time now. I have been occupied with several projects around the house that take some of my time.

The big project, however, has been getting a new garage built. When purchased, the house had a two car attached garage and an outbuilding that was about 1 ½ cars. I needed more capacity and the outbuilding was not well constructed so it was decided to remove it and replace it with a four bay building.

The covenants of our subdivision require that any outbuildings have a style similar to the house. I had an architect design a building with a roofline that mimicked the house and has similar siding and details. There are occasional tornadoes in this area so the decision was made to use concrete block construction with plenty of cavity fill and rebar for strength to protect the vehicles and boat inside the building. I also incorporated a personal storm shelter under the floor on the downhill side of the building.

The expected occupancy date is about May 2018. Then the JetFlite will be moved into its new home and work will continue. The plan is to have it ready to show at the Keels & Wheels show in Houston in May of 2019.

When work starts anew, I will continue posting the progress.
Attachments:

Please Log in or Create an account to join the conversation.

1963 Glastron V143 JetFlite Restoration 6 years 2 months ago #135661

Excellent, Great plan!!!!!!!!! Yeah I know the feeling, the Resorter is on hold until I get a house bought down here in Florida. Told the Admiral that requirements are, no postage stamp lot, must have 3 car garage and a pool the rest is up to her. A 3 car should give me enough room for the boat and all the woodworking equipment. Cars can sit outside, have the whole time we've been in Maryland.

Bob

Please Log in or Create an account to join the conversation.

1963 Glastron V143 JetFlite Restoration 6 years 2 months ago #135662

  • 63 Sabre
  • 63 Sabre's Avatar
  • Offline
  • Contributing Member
  • Contributing Member
  • Posts: 4676
  • Karma: 147
  • Thank you received: 167
Ya, You have your priorities in order. You really need the room after following your restoration and seeing the limited space you worked in. A four car would be better. If you find something with a really deep garage that you can park cars end to end. That way you could put all your equipment, parts, tools in one side, put the resorter in another side, lumber in another area, your car in the last area and park hers outside. After all it's sunny FL, right?? Been over 50 years since I lived in FL, was stationed at Mayport, if I remember correctly I had to make sure the top was up on the car by 4:30 since it always rained about that time.

Please Log in or Create an account to join the conversation.

1963 Glastron V143 JetFlite Restoration 5 years 4 months ago #138532

  • Kern
  • Offline
  • Junior Boarder
  • Junior Boarder
  • Posts: 105
  • Karma: 17
  • Thank you received: 1
Hello,

After a year and four months, the new garage/workshop is close to being finished and I am moving items into the spaces. The JetFlite project has been on hold since the start of this project. It ended up sitting outside, usually covered, during the time of construction, so suffered somewhat from the exposure.

I will be resuming the work on the hull soon. I had hoped to have it ready to take it to the Keels and Wheels show in the Houston area next May but the work to be done yet will probably prevent that. We should definitely be ready by 2020.

Meanwhile, I thought I would show you what took so long. The garage is concrete block construction, has two levels, and using stackers and lifts can accommodate seven vehicles along with other equipment. The work bay where the boat sits is fully insulated, heated and cooled. All lighting is LED strips and can light up the interior like daytime. There are two large storage balconies above lower level spaces. There is a trolley rail and a chain hoist to lift heavy items up to one balcony.

File Attachment:

File Name:
File Size: 0 KB

The new garage/workshop viewed from the front yard.

File Attachment:

File Name:
File Size: 0 KB

Looking into the work bay/work shop. The large doors at the top open to one of the balcony storage areas.

File Attachment:

File Name:
File Size: 0 KB

The workshop area shown beyond the boat. The cabinets are all steel from Baldhead in Bend, OR.

File Attachment:

File Name:
File Size: 0 KB

The other rear corner of the work bay. The large sliding door leads to the center bay, also on the lower level.
The following user(s) said Thank You: 69Jetflte

Please Log in or Create an account to join the conversation.

1963 Glastron V143 JetFlite Restoration 5 years 1 month ago #138950

  • Kern
  • Offline
  • Junior Boarder
  • Junior Boarder
  • Posts: 105
  • Karma: 17
  • Thank you received: 1
One step forward, three steps back!!

Due to the extensive interior work that had to be done, and subsequent damage to the finish, after the hull was painted, it became necessary to repaint the hull again. The hull already had the gel coat and two paint coats on it and I became concerned about the added weight of another finish coat, considering that I was already adding weight with additional hardware and flotation.

A decision was made to remove all the old layers of paint and gel coat, get all the surfaces fair, and refinish in a fresh gel coat that would be applied in my neighbor’s fiberglass boat repair shop. Weighing some of the material removed from the upper deck surfaces, I have already removed about 20 pounds from the hull. It is estimated that removing the finish on the sides and bottom will result in an additional 30 pound saving. Later in the project I will be looking at also removing weight from the outboard motor.


The upper deck with most of the old finishes removed.

I had my neighbor come over to look at the hull in its current state and offer some suggestions regarding preparing for the new finish and other thoughts regarding the repairs completed to date. In looking at the transom repair work and the corrosion on the aluminum angle that I had installed many years ago, he suggested making cuts to remove the stern portion of the upper deck, cut out all of the transom repair work that was previously completed, and install a new composite transom board that could span the full width of the transom. He indicated that this would be a permanent repair without worry about future water intrusion and rot. He also stated that the composite boards were lighter than plywood. I was not aware that composite boards existed for this purpose. He also indicated that I could have used composite boards for the stringer and floor replacements.

I am considering all the implications of cutting out the transom boards and replacing them with composite. I could remove the aluminum angle and save some weight there. It would definitely require removing the rear deck section to be able to install the new, full width transom board. No decision has yet been made. I will definitely not remove the floor and stringers as I feel that they are adequately protected against water and further rot will not be a problem.


The aluminum angle bracket that was inserted many years ago to strengthen the transom. The other leg of the angle is under the rear portion of the motor well. Corrosion is very evident from being wet for many years.

Any input from others will be welcome and considered in making a decision on how to proceed.
Attachments:

Please Log in or Create an account to join the conversation.

1963 Glastron V143 JetFlite Restoration 4 years 11 months ago #139398

  • STN19
  • STN19's Avatar
  • Offline
  • Junior Boarder
  • Junior Boarder
  • Posts: 84
  • Karma: 1
  • Thank you received: 4
wow boat is looking great, sucks to have to redo things but it will be worth it in the end. your shop is absolutely amazing have you ever heard of garagejournal.com ? the guys over there would love to see that place

Please Log in or Create an account to join the conversation.

1963 Glastron V143 JetFlite Restoration 4 years 11 months ago #139522

  • Kern
  • Offline
  • Junior Boarder
  • Junior Boarder
  • Posts: 105
  • Karma: 17
  • Thank you received: 1
As discussed previously regarding removing all of the finishes off the hull, I am looking for various ways to remove weight. The various changes being made to the boat are adding weight that was not incorporated into the original design or build and extra weight will affect the performance of the boat..

Two changes that are being incorporated are to eliminate the flanges between the deck and hull moldings and to drill lightening holes where material is not needed for strength.

The deck to hull flanges were not fully bonded at the factory and there were cracks between the hull and deck moldings at many places along the flanges. This could allow water into the slight cavity behind the flanges. I had previously sealed the interior surfaces with a strip of fiberglass cloth and resin so the water would not have been able to penetrate to the interior. Removing the flanges and sealing the outer surface with a fiberglass strip and resin would provide a good seal against any water entry, strongly bond the deck to the hull and save some weight by removing the flanges. The fiberglass strip will be faired into the deck/hull joint and will then be partially covered by the rub rail.


A section of the deck/hull flanges showing the crack between the two, which would allow water into the cavity behind the flanges.


A close up of the new sealing/bonding strips between the deck and hull moldings.


Three sections of sealing strip bonded in place. Portions of the original flanges were left to serve as references for the pattern that was made to duplicate the white side scallop. These portions will be removed and replaced by sealing/bonding strips.

Some of the lightening holes are shown in the interior picture. There is a wood strip attached to the edge of the side panel at each angled end. This strip is just to add stiffness to the edge of the side panel and does not have to be as strong as originally installed. A row of lightening holes was drilled full length on each of the strips. These holes will be covered by the side trim panels when they are installed.

The other lightening holes were drilled through the instrument panel and its back up board. These holes are the geometric pattern shown on the port side of the instrument panel surface. Here again, the strength is not needed to stiffen the panel and the holes will be covered by the new instrument panel trim.


The port front corner of the cockpit showing the lightening holes along the front, angled edge of the side panel and on the port side of the instrument panel.
Attachments:

Please Log in or Create an account to join the conversation.

1963 Glastron V143 JetFlite Restoration 4 years 11 months ago #139526

  • 63 Sabre
  • 63 Sabre's Avatar
  • Offline
  • Contributing Member
  • Contributing Member
  • Posts: 4676
  • Karma: 147
  • Thank you received: 167
Ok. I can see you cutting and grinding off the clam shell flange and just glassing it together. When you remove the flange that would be the perfect opportunity to separate the two halves and build up the new transom. I've done that. What are your intentions for a bump rail if any. There are tons of stick-on chrome moldings available on line used by the auto industry. How many pounds do you figure you're actually removing with all those holes? What is your final goal here, if its more speed why go through all that trouble. Increase your power to weight ratio and accomplish the same end. Install the new transom, maybe 2" thick vs 1 3/4" with some gussets to the bilge and put on a killer motor. I think that dash panel strengthens the forward portion of the hull against the twisting caused by rough water.

Please Log in or Create an account to join the conversation.

1963 Glastron V143 JetFlite Restoration 4 years 11 months ago #139532

  • Kern
  • Offline
  • Junior Boarder
  • Junior Boarder
  • Posts: 105
  • Karma: 17
  • Thank you received: 1
Hello 63 Sabre,

Thank you for your thoughts regarding my project.

I am glad you asked about my final goal. The end result I am seeking actually has many facets. I have owned this boat from new and used it for many years. During that time I learned of the various design and/or construction compromises that were made. So, the goals are:
1. Correct or improve compromises that were made in designing and building the boat.
2. Make the hull assembly stronger and stiffer than original.
3. Add enough flotation so the boat will never sink, even if totally swamped.
4. Improve the interior trim and instrumentation.
5. Keep the whole package as light as possible, given the previous goals.

I gave some serious thought to possible separation of the sections. My neighbor (the boat repair person) suggested that I separate only the rear section to rebuild the transom. Reviewing all the effort that has been put into the boat already, and all the additional work that would be required to dig into the transom, I have decided to leave it as is. I believe that the structural work I have incorporated is more solid than the original design and I have put much effort, and there will be more, to prevent water from getting to any of the existing wood in the boat, to maintain the strength.

The boat was delivered with an extruded aluminum bump rail that runs entirely around the hull except for the transom. It will be reinstalled and will cover the strips added between the deck and hull.

Drilling the holes and removing the flanges will not remove great amounts of weight. However, I am looking at every pound I can find. My projections are that I will be adding about 100 pounds to the hull just in epoxy resin, with all the changes I am making. Other additions will probably add about another 100 pounds. Keeping the whole rig as light as possible will make for easier handling on and off the trailer, the boat will float higher in the water, it will accelerate and plane more easily, and it will return better fuel efficiency. I am not seeking more top speed as it is quite adequate to enjoy the boat.

I am keeping the original 65 HP outboard for the boat, so will not be upgrading to a larger and more powerful motor. However, I do plan to do some detail changes to the powerhead to provide better breathing and more power. I also plan to look at all the motor components to review weight removal.

As a mechanical engineer, I tend to get somewhat anal about weight removal when it comes to performance. To me it is an engineering challenge. I rebuilt a 4 cylinder, 1.6 liter engine for one of my sports cars and worked on weight removal to increase engine and vehicle response. I was able to remove about 15 pounds from the block, 5 pounds from the 28 pound crankshaft, about ¼ pound from each connecting rod and each piston, and about 11 pounds from the flywheel. The engine response change was very noticeable. I also removed about 15 pounds from the front crossmember and suspension components to decrease the front weight on the tires. That weight removal improves steering response and cornering capability.

A boat engine does not need the response that a car engine does, as the RPM changes are less frequent. Therefore, I will not be doing any lightening of the crankshaft, rods, and pistons. I may look at the flywheel weight to just remove weight from the powerhead.

Weight removal is not simple and is time consuming, but I do it as an exercise in what can be accomplished by that route as opposed to just throwing more horsepower at something, which also increases fuel consumption.

You are probably right about the dash panel aiding in resisting twisting. This boat is quite small (14 feet) and I have added significant stiffness to the front deck and underfloor areas, so I am hoping that the entire structure will be quite stiff. I am quite certain that it will be better than what I found of the original factory construction. I understand that they had to build the boat to time and financial constraints that I am not facing. I have already spent way more money and time than I will ever see as a monetary reward for this project. I am doing it as a project of passion and to save the boat and pass it on to a new caretaker in better form than it was when I purchased it new.

Please Log in or Create an account to join the conversation.

Time to create page: 0.428 seconds

Donate

Please consider supporting our efforts.

FG Login

Glassified Ads

FiberGoogle

Who's Online

We have 8099 guests and 2 members online