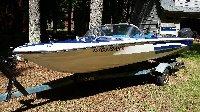
That cl ad will be gone eventually so here it is for future reading....
Begin>>>>>>
The Truth About Boat Detailing
Date: 2010-04-27
The following is a tutorial about boat detailing done right. I've been a professional boat detailer for over fifteen years and every Spring I see the same thing: Guys who spent a few months learning how to detail cars decide they want to start detailing boats too. Usually they do more harm than good. If your interested in hiring a detailer for your boat, please read this whole ad. At least then you'll be able to tell the professionals from the hacks.
The truth is, boat detailing and automotive detailing have very little in common with each other. The end result for both is a visually-appealing layer of protection, but that is where the similarities begin and end.
Most (fiberglass) boats are built the same way. First, a female mold of the boat is sprayed with catalyzed, air-inhibited gelcoat. Air inhibited means the gelcoat won't fully cure when exposed to air. This is done to aid the boat builder. Once the gelcoat has “kicked”, the surface will remain slightly tacky, this provides a good mating surface for the first layer of fiberglass. The boat is then built from the outside-in with successive layers of fiberglass. When the fiberglass is the appropriate thickness, the boat is popped out of the mold and, voila! You have a boat (or hull, or deck, or whatever).
The nuances of boat detailing I referred to in the first paragraph deals specifically with the gelcoat and how to protect it. Most people think gelcoat is as maintenance-free as the fiberglass itself. The opposite it true, gelcoat requires more ongoing maintenance that any other element of a fiberglass boat. The reason it is ubiquitous in the boating world is not because it's a superior finish for boats, but simply because it makes boat-building easier. The truth is gelcoat is committing a slow suicide beginning the day it's popped out of the mold.
Nothing is as damaging to your boat's gelcoat as UV exposure. As gelcoat ages and degrades, it becomes porous and chalky. Run your hand alongside any unprotected boat and you will see your palm turn white from the dead layer of gelcoat. The porosity, which looks like microscopic pinholes has a cumulative effect of reducing the overall gloss, even when buffed out. The result of both the porosity and the chalkiness creates a surface that degrades faster and faster as time goes by.
How NOT to protect it.
Any detailer who shows up at your boat armed with aggressive rubbing compound and a jug of cleaner/wax should be immediatley fired (and frankly, flogged). This person is about to vandalize your boat. Unfortunately, this usually goes unnoticed by the boat owner because the end result looks quite nice; the boat is shiny and water appears to bead up on the surface.
The problem with my fictional detailer is two-fold. First, aggressive rubbing compounds (in almost every case) remove far too much gelcoat to achieve a proper gloss. Because the gelcoat is only 20-30 mils thick (about the same thickness as 4-6 sheets of paper) great care should be taken to preserve the surface. If you cut through the gelcoat, your only other option is a costly paint job. Second, “Cleaner/Waxes” neither clean nor wax. They are cheap to buy, make detailing a quick process and do a LOUSY job. Two months after hiring a detailer using these products your boat will look like it did before he (or she) ever showed up and it will have far less gelcoat than before.
How to ACTUALLY protect it.
Step One: Wash the boat! Start from the top-down and from forward-aft. Use a good quality MARINE soap. Most household soaps have either abrasives in them or have chemical compounds that will strip wax. I prefer Mermaid's boat soap (and so does just about every single other professional yacht detailer). Take your time to do a good job here. A clean boat will dramatically reduce the amount of compounding necessary to achieve a proper gloss.
Step Two: (You must use a variable “slow speed polisher” to build up the appropriate amount of heat for most compounds to work effectively, usually between 1,500 and 2,500 RPMs. Compounding by hand will never achieve the appropriate level of gloss and automotive buffers oscillate way too fast which can damage the surface) Compound only as necessary. Not all parts of the boat will require the same attention. Horizontal areas exposed to sun will degrade much faster than vertical protected areas. Use only the mildest compounds necessary to achieve a suitable gloss. For protected areas, this will probably be a finishing material like finesse-it II (3M), while more exposed areas might require something meatier like Imperial Compound (also 3M). Only in drastic situations should a fast-cut or super-duty compound be used and even then, only with judicious use.
Step Three: Rag out the whole boat. A clean dry flannel rag (I go through about 20lbs of rags on a thirty foot boat) should be used to remove any swirl marks or residue left over from compounding. DO NOT SKIP THIS STEP! Be thorough, look at the surface from all angles. What looks nice with the sun behind you might look like a swirly nightmare with the sun in front of you. If the surface cleaned very well in step one, you shouldn't have major problems with this step.
Step Four: Sealing the boat. By this point the boat is polished and looks beautiful. Most people erroneously think wax is what gives it gloss. Nope. Wax will add a little gloss, but it's main objective is to seal and protect the gloss. For this reason, you want the wax that is strongest and longest lasting. The best paste waxes will have UV inhibitors in them. DO NOT BUY YOUR WAX FROM AN AUTOMOTIVE STORE! Carnauba waxes designed for automobiles are not designed to weather an entire season, much less an entire year (which is how often most people have their boats detailed), no matter what it says on the can.
The best way to seal the boats finish is with a two part system. The first step is to use a polymerized sealant (I use Starbrite's Teflon Marine Polish – it's both the easiest to apply and the longest lasting) and then follow it up with a coat of quality paste wax (3M Ultra-performance paste wax or Collinite's Fleetwax which is made for airplanes. Both are very good and have UV inhibitors).
If you follow these steps, not only will your boat look better, not only will it protect better, not only will it last longer, but, most importantly it will extend the life of your boat's finish and it will cost less to do each year.
End<<<<<<
mike


