|
Welcome,
Guest
|
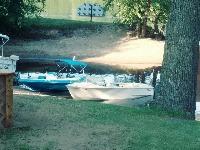
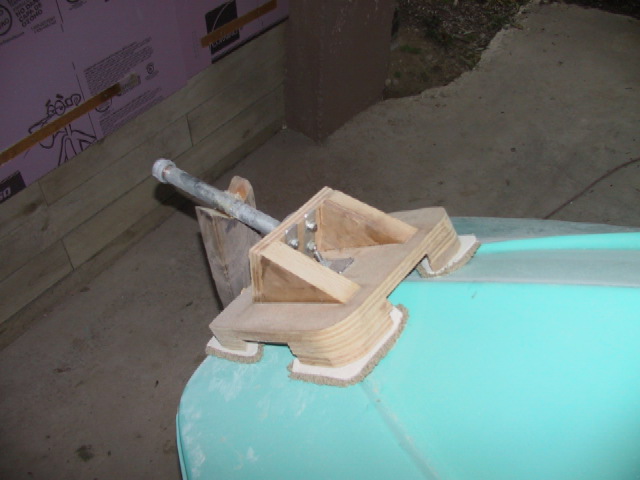
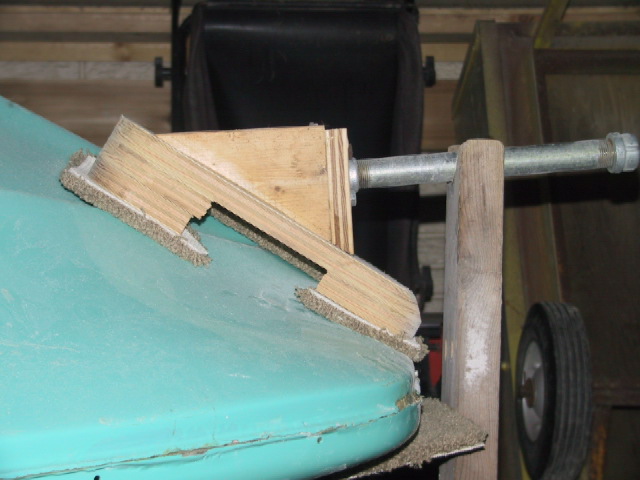
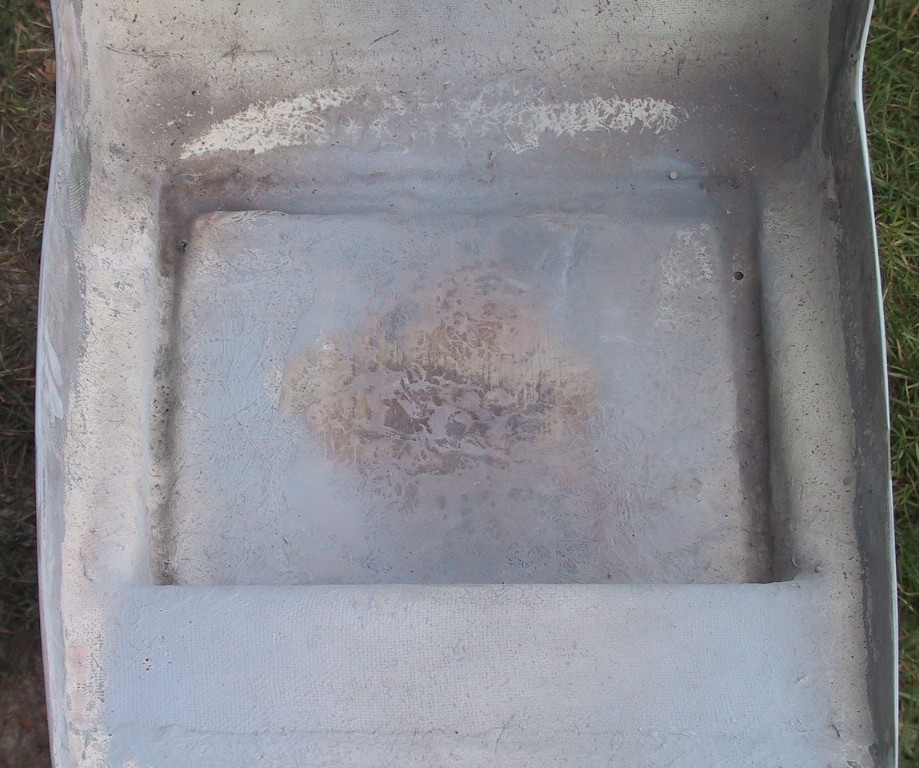
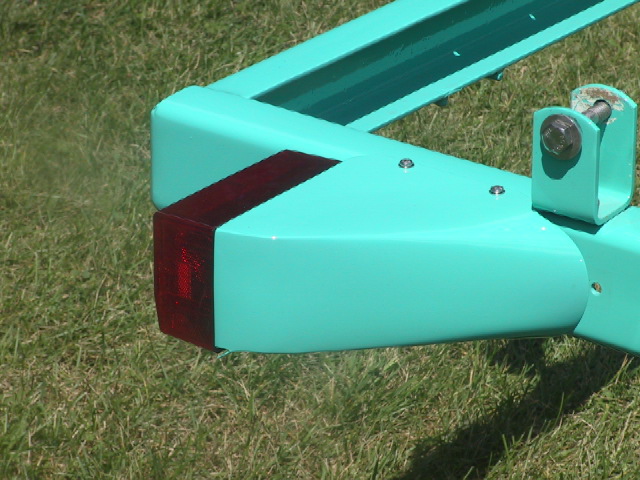
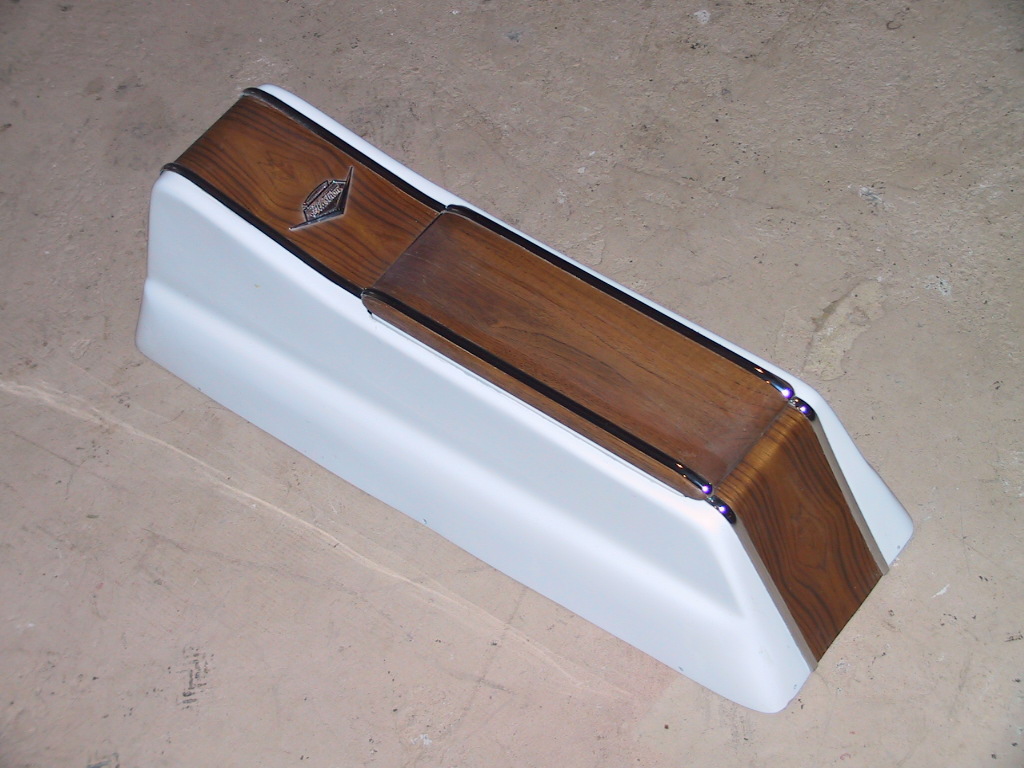
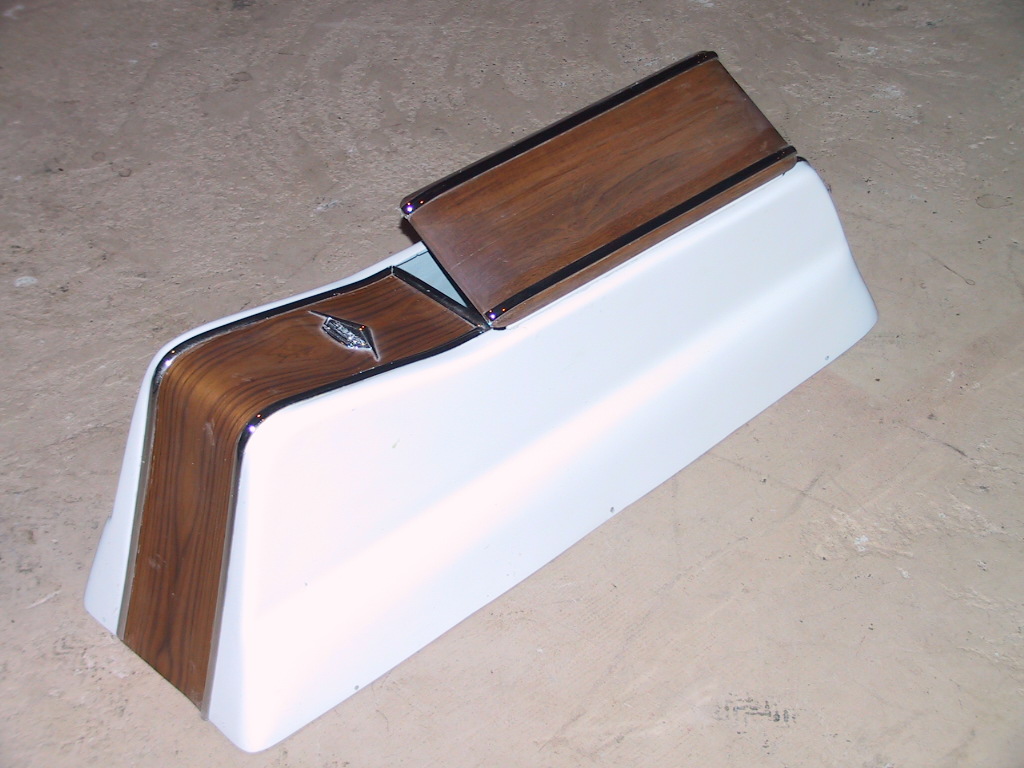
TOPIC: 1963 Glastron V143 JetFlite Restoration
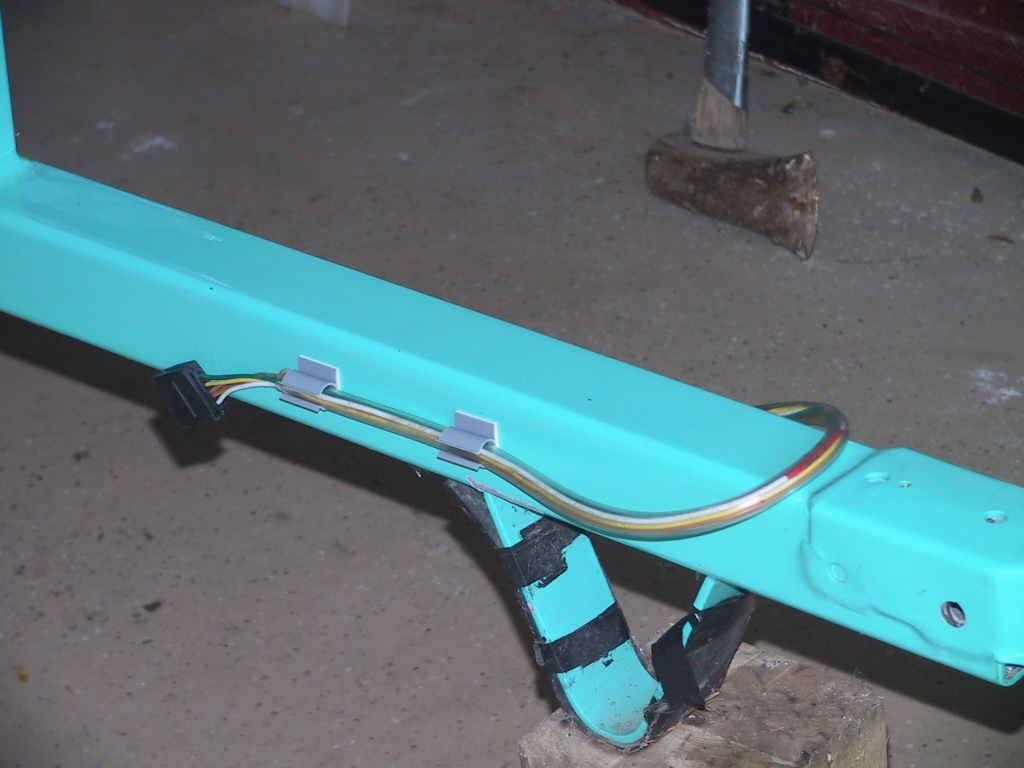
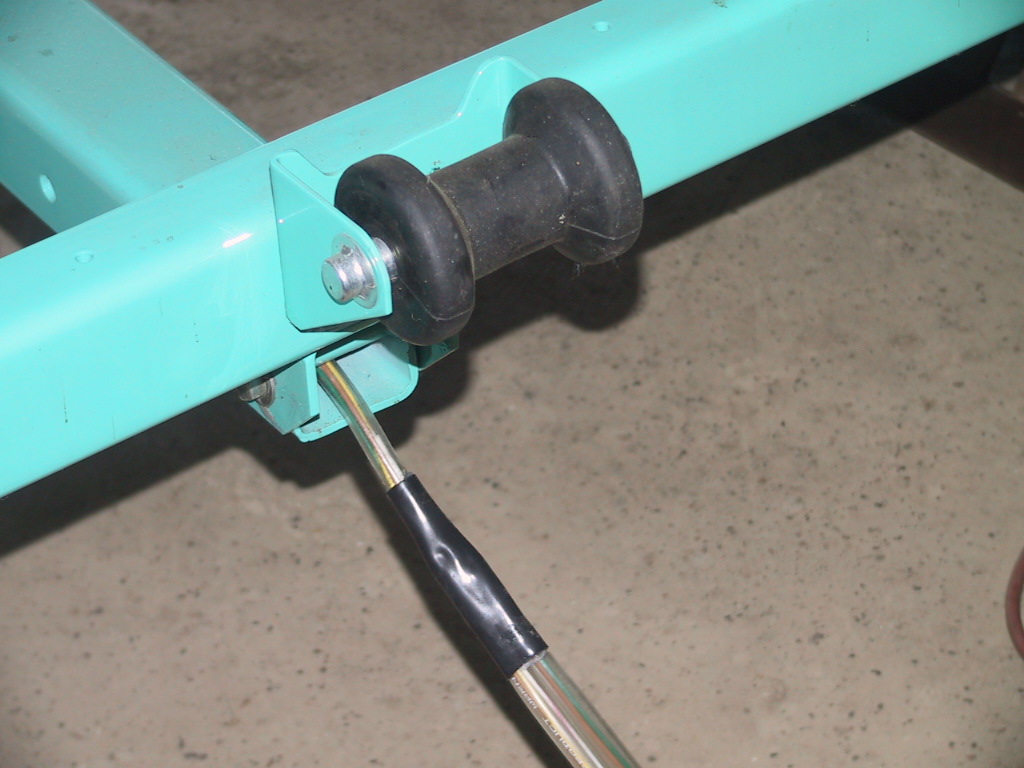
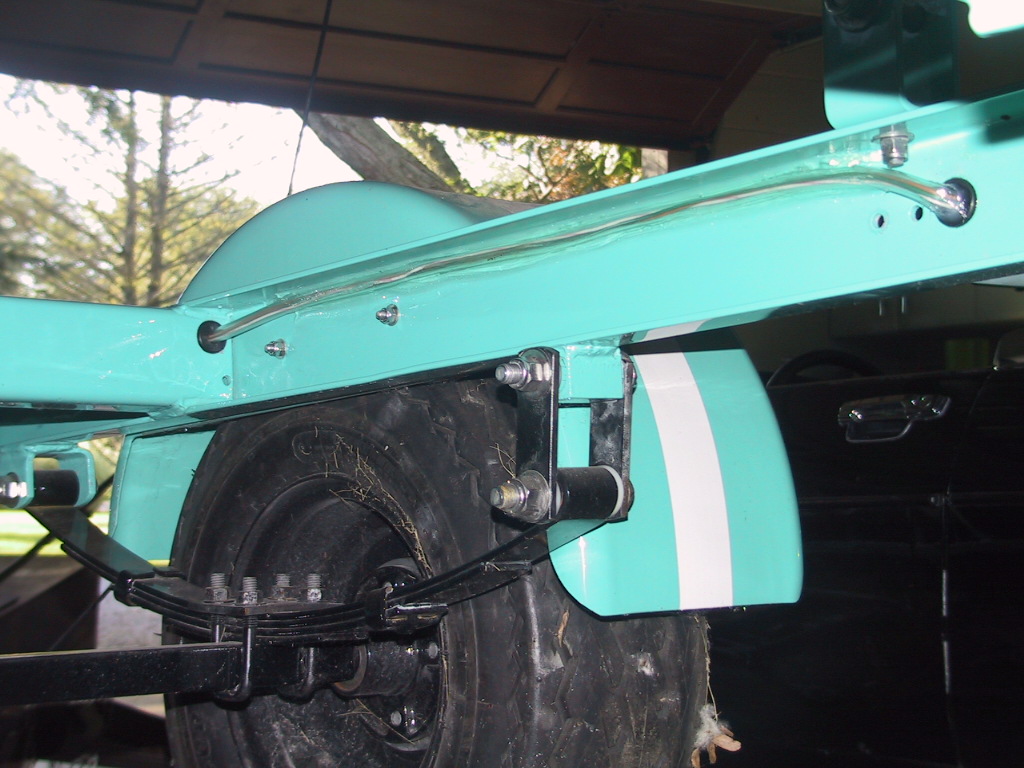
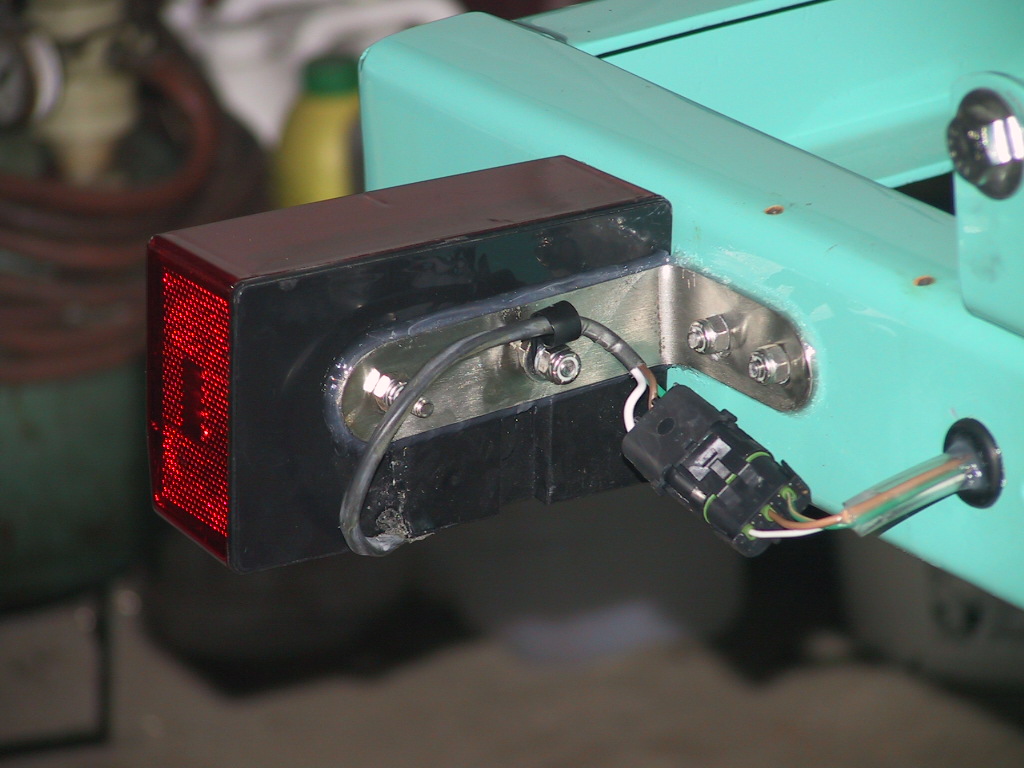
Re:1963 Glastron V143 JetFlite Restoration 12 years 3 months ago #86048
|
Please Log in or Create an account to join the conversation.
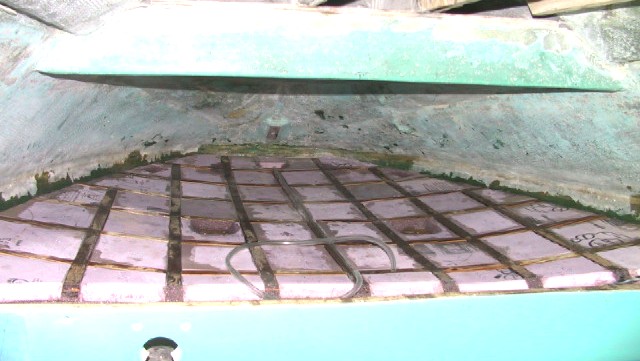
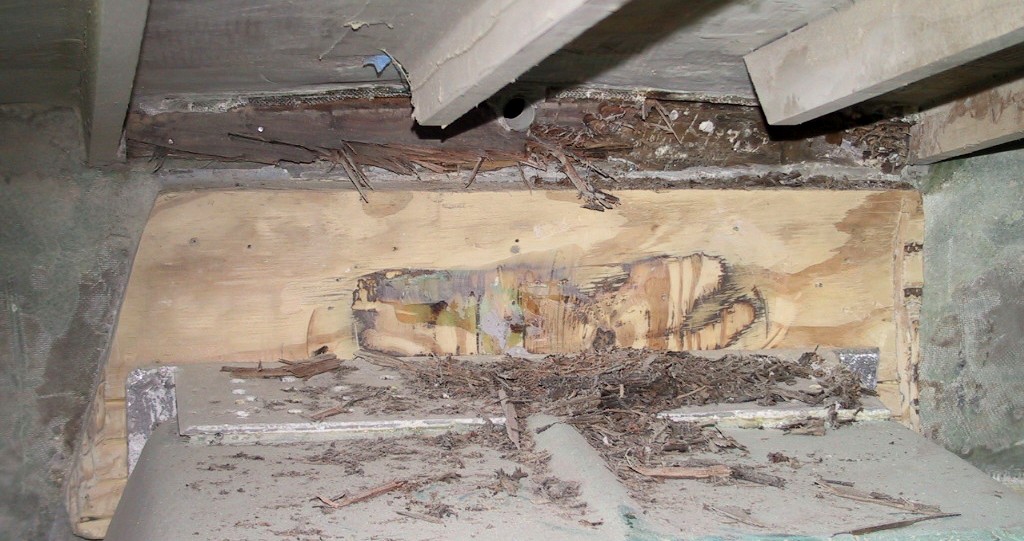
Golden Rule number one; While working in the bilge, absolutely under no circumstances, NO FARTING!!!! Captn Shake aka Joe.
|
Re:1963 Glastron V143 JetFlite Restoration 12 years 3 months ago #86115
|
Please Log in or Create an account to join the conversation. |
Re:1963 Glastron V143 JetFlite Restoration 12 years 3 months ago #86153
|
Please Log in or Create an account to join the conversation. |

Re:1963 Glastron V143 JetFlite Restoration 12 years 3 months ago #86218
|
Please Log in or Create an account to join the conversation. |


Re:1963 Glastron V143 JetFlite Restoration 12 years 3 months ago #86235
|
Please Log in or Create an account to join the conversation. |
Re:1963 Glastron V143 JetFlite Restoration 12 years 2 months ago #86481
|
Please Log in or Create an account to join the conversation. |

Re:1963 Glastron V143 JetFlite Restoration 12 years 2 months ago #86652
|
Please Log in or Create an account to join the conversation. |


Re:1963 Glastron V143 JetFlite Restoration 12 years 2 months ago #86654
|
Please Log in or Create an account to join the conversation. |
Re:1963 Glastron V143 JetFlite Restoration 12 years 2 months ago #87340
|
Please Log in or Create an account to join the conversation. |


Re:1963 Glastron V143 JetFlite Restoration 12 years 2 months ago #87341
|
Please Log in or Create an account to join the conversation. |

Re:1963 Glastron V143 JetFlite Restoration 12 years 2 months ago #87344
|
Please Log in or Create an account to join the conversation. |
Re:1963 Glastron V143 JetFlite Restoration 12 years 2 months ago #87352
|
|
Please Log in or Create an account to join the conversation.
www.liquidassetsonline.org
, 63\'PowerCat14-C w/twin64\'650\'s,14\'Glen-L Zip w/Mark58E,58\'TeeNee,
Mark55AE,Mark55E,PairMark58E\\\'s,Mark58AE,Mark78AEL, 6-7RBM\'s.Keep EM\' Alive! Always looking to add to collection. |


Re:1963 Glastron V143 JetFlite Restoration 12 years 2 months ago #87356
|
Please Log in or Create an account to join the conversation. |
Re:1963 Glastron V143 JetFlite Restoration 12 years 2 months ago #87358
|
|
Please Log in or Create an account to join the conversation.
www.liquidassetsonline.org
, 63\'PowerCat14-C w/twin64\'650\'s,14\'Glen-L Zip w/Mark58E,58\'TeeNee,
Mark55AE,Mark55E,PairMark58E\\\'s,Mark58AE,Mark78AEL, 6-7RBM\'s.Keep EM\' Alive! Always looking to add to collection. |


Re:1963 Glastron V143 JetFlite Restoration 12 years 2 months ago #87370
|
Please Log in or Create an account to join the conversation. |
Re:1963 Glastron V143 JetFlite Restoration 12 years 2 months ago #87383
|
|
Please Log in or Create an account to join the conversation.
www.liquidassetsonline.org
, 63\'PowerCat14-C w/twin64\'650\'s,14\'Glen-L Zip w/Mark58E,58\'TeeNee,
Mark55AE,Mark55E,PairMark58E\\\'s,Mark58AE,Mark78AEL, 6-7RBM\'s.Keep EM\' Alive! Always looking to add to collection. |
Re:1963 Glastron V143 JetFlite Restoration 12 years 3 weeks ago #88648
|
Please Log in or Create an account to join the conversation. |


Re:1963 Glastron V143 JetFlite Restoration 12 years 1 week ago #89200
|
Please Log in or Create an account to join the conversation. |


Re:1963 Glastron V143 JetFlite Restoration 11 years 11 months ago #90693
|
Please Log in or Create an account to join the conversation. |


Re:1963 Glastron V143 JetFlite Restoration 11 years 11 months ago #90715
|
|
Please Log in or Create an account to join the conversation. |

Re:1963 Glastron V143 JetFlite Restoration 11 years 11 months ago #90732
|
Please Log in or Create an account to join the conversation.
Mark
|
Re:1963 Glastron V143 JetFlite Restoration 11 years 11 months ago #90873
|
Please Log in or Create an account to join the conversation. |
Re:1963 Glastron V143 JetFlite Restoration 11 years 10 months ago #91806
|
Please Log in or Create an account to join the conversation. |


Re:1963 Glastron V143 JetFlite Restoration 11 years 10 months ago #91829
|
|
Please Log in or Create an account to join the conversation. |
Re:1963 Glastron V143 JetFlite Restoration 11 years 9 months ago #93179
|
Please Log in or Create an account to join the conversation. |


Re:1963 Glastron V143 JetFlite Restoration 11 years 7 months ago #96333
|
Please Log in or Create an account to join the conversation. |


Re:1963 Glastron V143 JetFlite Restoration 11 years 7 months ago #96567
|
Please Log in or Create an account to join the conversation. |


Re:1963 Glastron V143 JetFlite Restoration 11 years 7 months ago #96816
|
Please Log in or Create an account to join the conversation. |


Re:1963 Glastron V143 JetFlite Restoration 11 years 4 months ago #100571
|
Please Log in or Create an account to join the conversation. |


Re:1963 Glastron V143 JetFlite Restoration 11 years 4 months ago #100627
|
Please Log in or Create an account to join the conversation. |
Re:1963 Glastron V143 JetFlite Restoration 11 years 4 months ago #100633
|
Please Log in or Create an account to join the conversation.
Resistance to tyrants is obedience to Almighty God.
Thomas Jefferson, 1803 |
Re:1963 Glastron V143 JetFlite Restoration 11 years 4 months ago #100653
|
Please Log in or Create an account to join the conversation. |
Re:1963 Glastron V143 JetFlite Restoration 11 years 4 months ago #101020
|
Please Log in or Create an account to join the conversation. |


Re:1963 Glastron V143 JetFlite Restoration 11 years 4 months ago #101034
|
Please Log in or Create an account to join the conversation.
Mark
|
Re:1963 Glastron V143 JetFlite Restoration 11 years 4 months ago #101055
|
|
Please Log in or Create an account to join the conversation. |
Re:1963 Glastron V143 JetFlite Restoration 11 years 2 months ago #102613
|
|
Please Log in or Create an account to join the conversation. |
Re:1963 Glastron V143 JetFlite Restoration 11 years 2 months ago #102814
|
Please Log in or Create an account to join the conversation. |
Re:1963 Glastron V143 JetFlite Restoration 10 years 11 months ago #105956
|
Please Log in or Create an account to join the conversation. |


Re:1963 Glastron V143 JetFlite Restoration 10 years 2 months ago #117356
|
Please Log in or Create an account to join the conversation. |
Re:1963 Glastron V143 JetFlite Restoration 10 years 2 months ago #117983
|
Please Log in or Create an account to join the conversation. |


Donate
Please consider supporting our efforts.
Glassified Ads
1959 Bowman with its 1959 Mercury Mark 58A Fully Restored |

I am a private money lender( / Wanted)


New/Used:Kids/Adults Go-Kart,Golf Cart,Snowmobiles/Jet Ski,( / Boats)


FG Login

FiberGoogle
Who's Online
We have 6043 guests and one member online