Welcome, Guest
Username: Password: Remember me

TOPIC: Slipping gear or Prop

Slipping gear or Prop 8 months 4 weeks ago #148253

  • ed-mc
  • Offline
  • Platinum Boarder
  • Platinum Boarder
  • Posts: 1395
  • Karma: 232
  • Thank you received: 114
Oh, Yeah, Brand New OMC forward gear, 377870, list at Marine Engine is over $305.00, eBay price $72 shipped!

Listing No. 391347374946

Another little secret:

1) Do you know what Forward gear is? It's a Reverse gear with a flanged bushing pressed into it.

2) Do you know what a Reverse gear is? It's a Forward gear without the pressed-in flanged bushing, and instead a floating bushing insert.

The trick in the old days was to find a good Reverse gear, because there was far less stress and wear put on them and usually no jumping-out-of-gear wear.

Then you just takes your press and presses out the old Fwd gear bushing, and presses it into the Reverse gear. Make sure the lubrication hole(s) line up.

Presto! "New" Forward gear. It's Magic!!

I think the later Reverse gears that came in Spring-Loaded clutch dog gearcases might have had the internal groove in them, too. If not, then it wouldn't be such a beneficial workaround. But in the Very Old Days when you were working with non-spring-loaded clutch dogs and they were jumping out of gear like mad, it was a good way to get it going again. Providing you had access to a good store of used parts. Which I did!! Lucky me!

Please Log in or Create an account to join the conversation.

Slipping gear or Prop 8 months 4 weeks ago #148257

Upon further review....
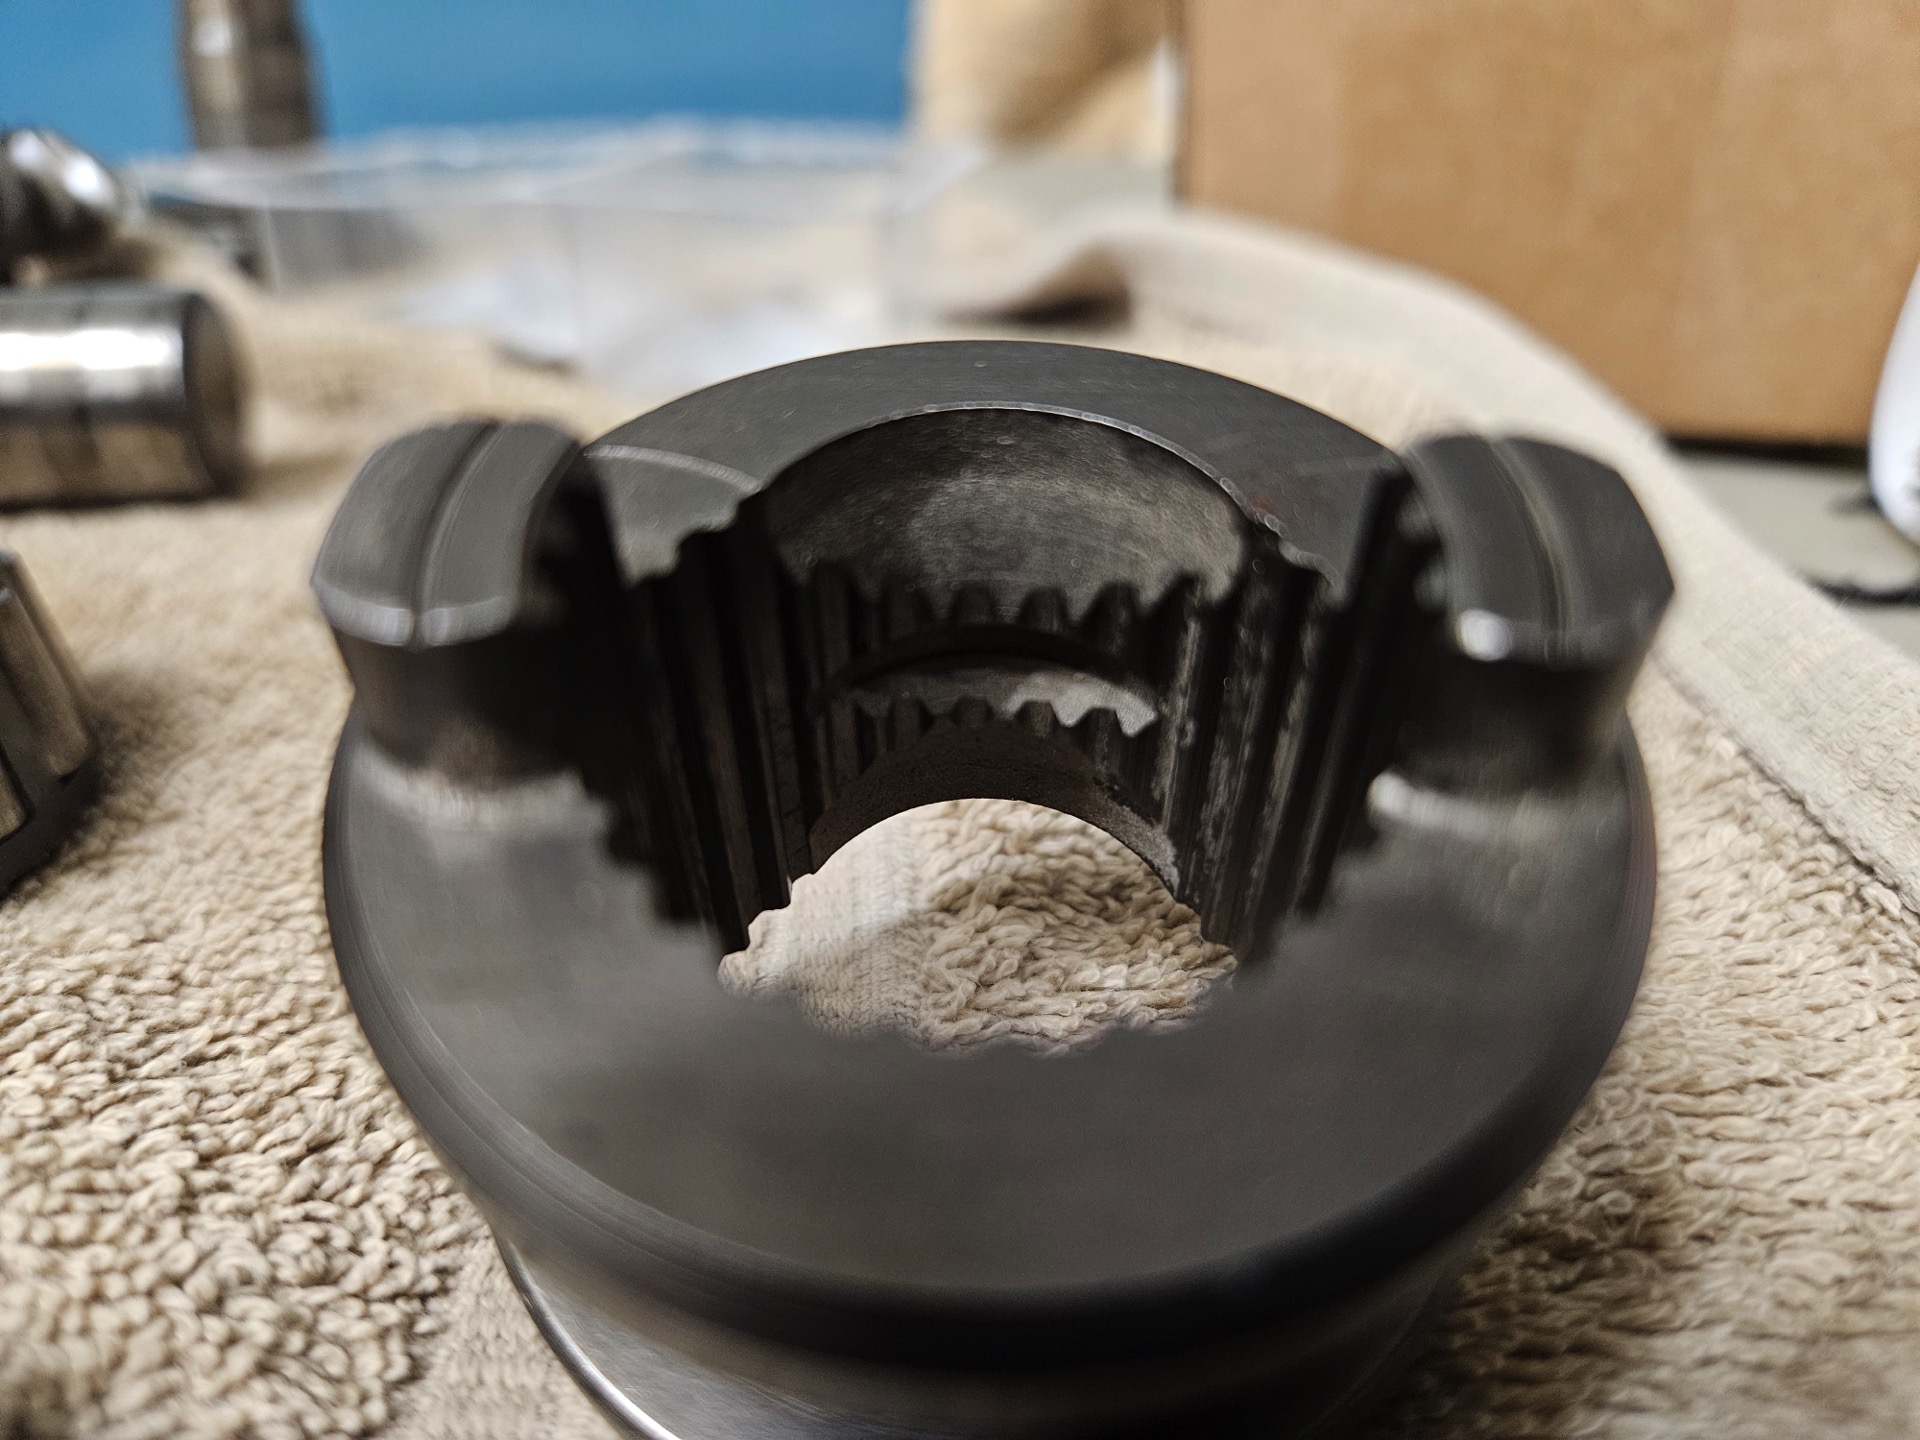
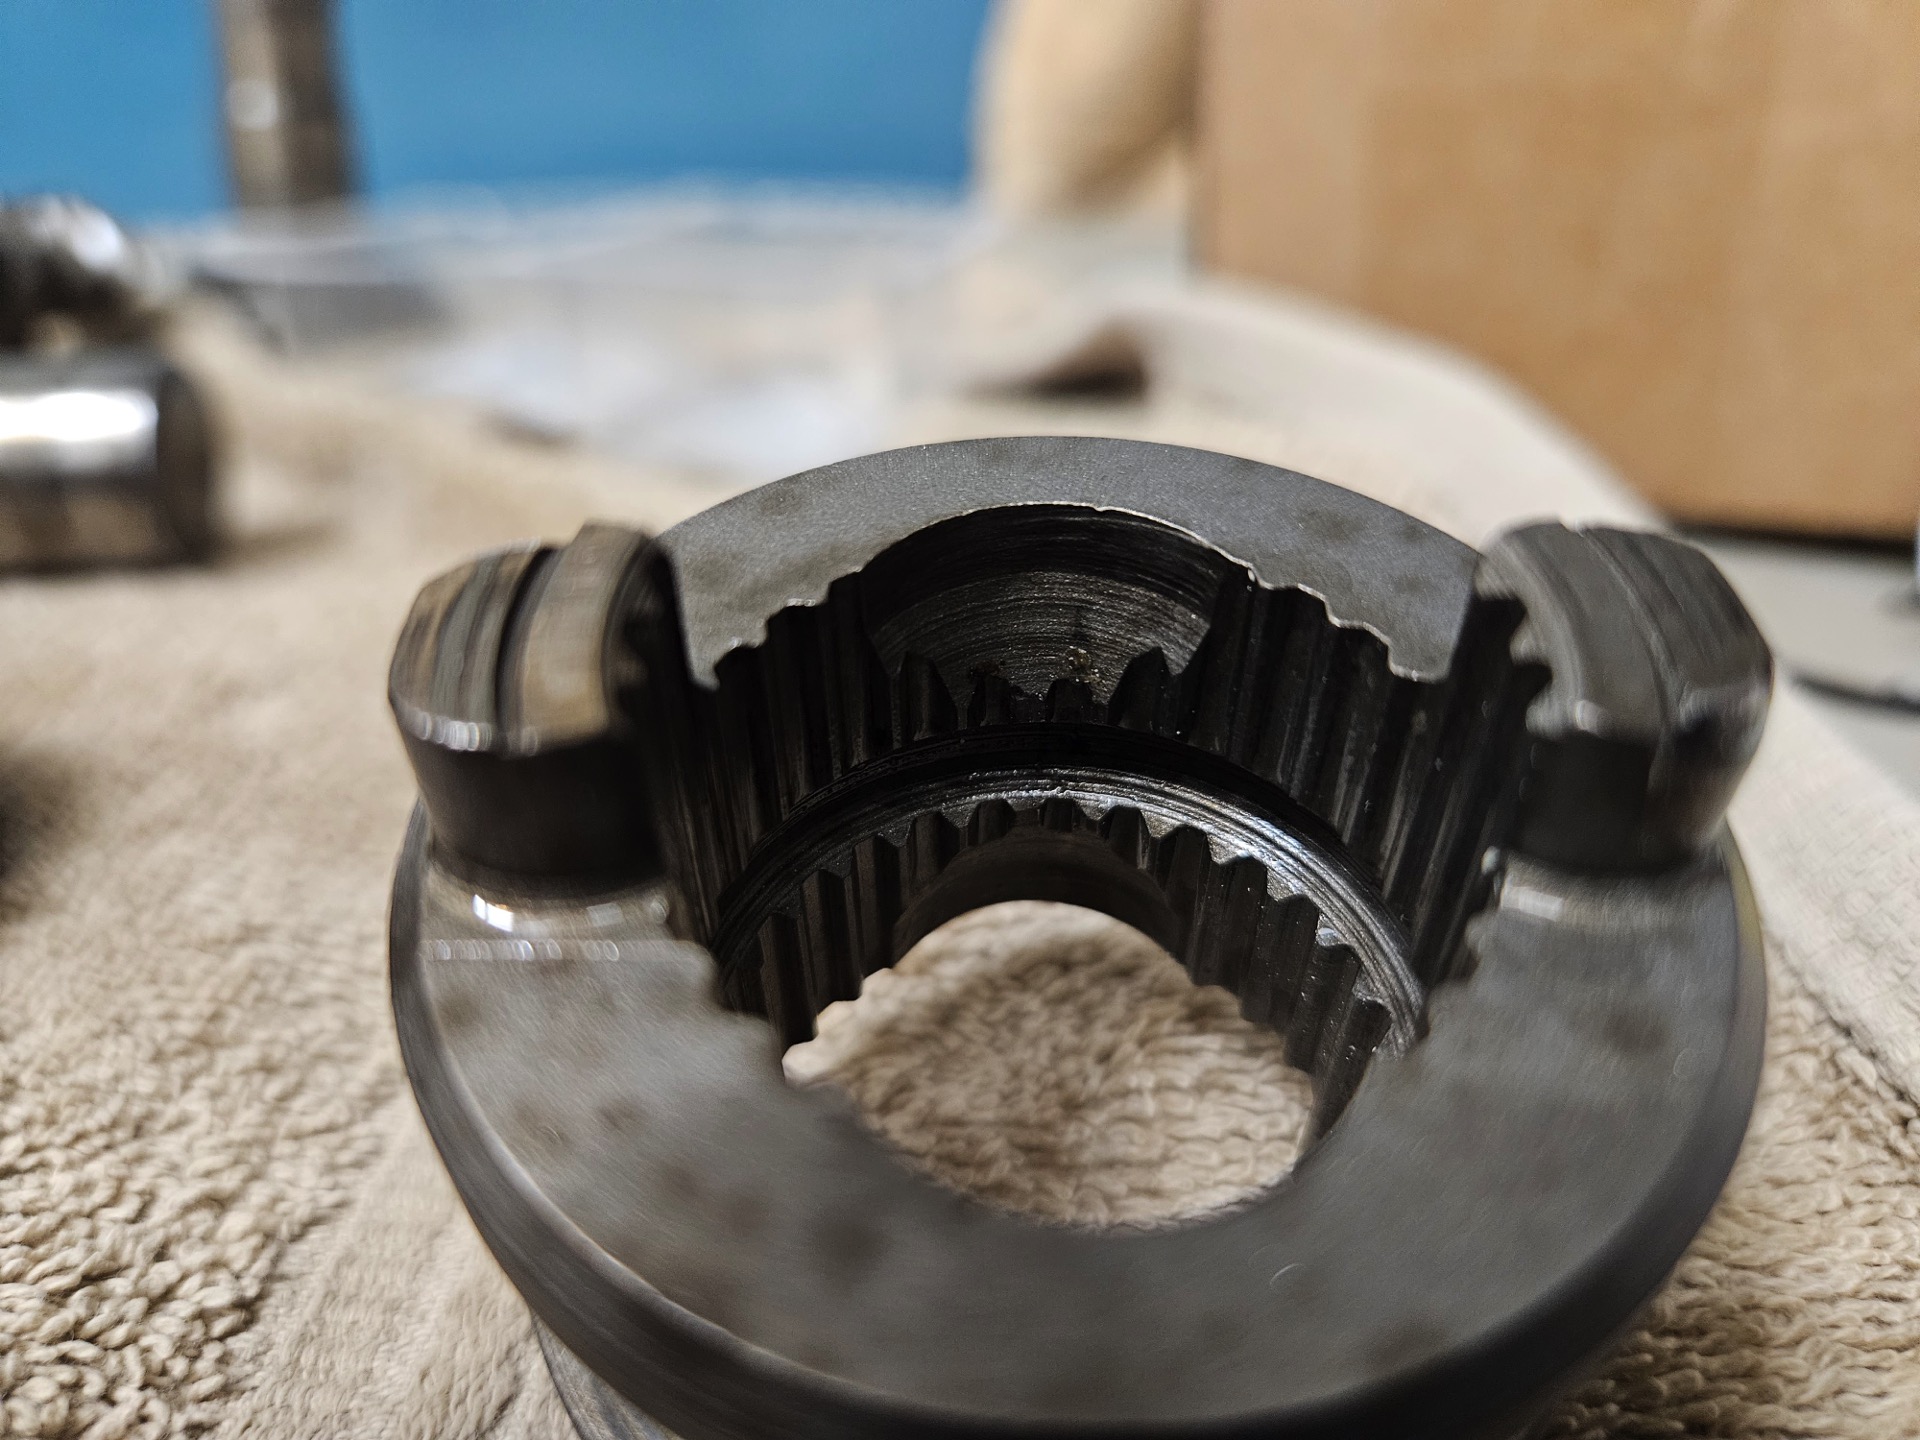
Maybe I do have the correct part. The original part had a ring in the center and all around the inside. The new one has a small indent in the center just under one of the rounded out area where the ball and spring go in.
Also, is there a forward and a reverse side of this clutch dog? I have seen other lower units where the clutch dog needs to face one way or the other depending on FWD or REV.
One last thing, all of the pins fell out of one of the bearing assemblies..need to figure out which one that was. Anyway, is it possible to line up all of those pins again or should i get a new one?
Thanks again for all of the help - I feel like I have a couple of people looking over my shoulder to keep me out of trouble!
Attachments:

Please Log in or Create an account to join the conversation.

Slipping gear or Prop 8 months 4 weeks ago #148259

  • ed-mc
  • Offline
  • Platinum Boarder
  • Platinum Boarder
  • Posts: 1395
  • Karma: 232
  • Thank you received: 114
One side has some machining marks on the ends of the ears; I'd point those to to the Fwd gear.

And by "pins" I assume they're the loose needles of the bearing? If so, you can pack the bearing shell with Vaseline and that will hold the needle/rolker bearing in place for assembly. Don't use heavy grease, it won't wash away as Vaseline will. And that will cause problems!

Please Log in or Create an account to join the conversation.

Slipping gear or Prop 8 months 4 weeks ago #148261

Just to double check, so you think the new dog clutch will work, correct? I guess I am confused about why they did the entire ring on one and just a divot on the other...

Please Log in or Create an account to join the conversation.

Slipping gear or Prop 8 months 4 weeks ago #148262

  • ed-mc
  • Offline
  • Platinum Boarder
  • Platinum Boarder
  • Posts: 1395
  • Karma: 232
  • Thank you received: 114

JEShore66 wrote: Just to double check, so you think the new dog clutch will work, correct? I guess I am confused about why they did the entire ring on one and just a divot on the other...


The angle or "divot" cut out of one side would allow the ball to slide up on that ramp, and this would put pressure on the gear, helping to keep the clutch from skipping.

The big groove in the middle is when it's in Neutral, and I suppose that gives a very positive stop for Neutral, since you wouldn't ever want to be so far out of adjustment that the 2 "ears" on the clutch would be ever-so-gently "kissing" the face of the gear. This of course would eventually cause a lot of wear.

So if you even had a bit of slop in the shift linkage, it wouldn't matter so much since the clutch is gonna be either slapping into Neutral or being driven by the ball and spring into the gear. Hope that makes sense!

And why they only did it on one side of the clutch? I can only guess that maybe they tried the groove on both sides, and having a ball on both sides caused too much effort to get out of Neutral. Other than that, who knows but the Evil JohnRude Engineers!

Anyway, be sure that when you install the shift clutch on the prop shaft, that you hold both of the stainless ball detents in (against spring pressure), so they go into the clutch easily. And also be sure to align the groove on the i.d. of the clutch so that it is centered (or as close as you can get it) on one or the other of the ball detents.

Obviously if you didn't get the ball detent aligned with the groove, their purpose would be defeated.

On the side with no groove, I expect that 1) it was cheaper for OMC to drill a hole all the way thru the shaft than to drill a blind hole and 2) the ball on the side with no groove will just slide harmlessly on the internal clutch splines. And of course you couldn't just have the open end of the spring sliding on the clutch. Thus the 2nd ball. 2 balls better than 1, ?Yes? :lol:

Please Log in or Create an account to join the conversation.

Slipping gear or Prop 8 months 2 weeks ago #148278

Oh Thank God the site is back up! I thought I would have to get this thing back together without all of you looking over my shoulder and saying..."nooooo...don't do that!"
Anyway, things are progressing well, I am waiting for some paint to come in so I can make the lower unit look good after all of this work. I thought I was ready for the reassembly mentally until I found the lower unit extension piece under a table...need to rework my rebuild mentally now.
Is my order correct on the rebuild:
1. reassemble lower gearcase - I need to get this at least to the clutch dog or should I do everything up to the prop?
2. reassemble upper gearcase - waterpump and then attach extension piece.
3 attach extension, upper and lower sections together
4. insert gearcase assembly back to motor.
I know there are lots of steps in between 1-4 but am I do thing is the correct order or missing anything major?
thanks to all of you and especially to whoever runs the site. I was actually a little panicked when it was down for a couple of days.

Please Log in or Create an account to join the conversation.

Slipping gear or Prop 8 months 2 weeks ago #148279

Forgot a couple questions...
I was reviewing all of the posts that I have received (again, thanks to everyone) and I never figured out whether or not to reinstall the lower unit extension. I will measure everything but I do believe that my transom is 15" and it sounds like the extension will do more harm that good. What do you all think I will get myself into trying to remove the extension. I am not familiar with all of the parts enough to be able to tell what I need to take out and maybe replace. Is this just more hassle than it is worth?

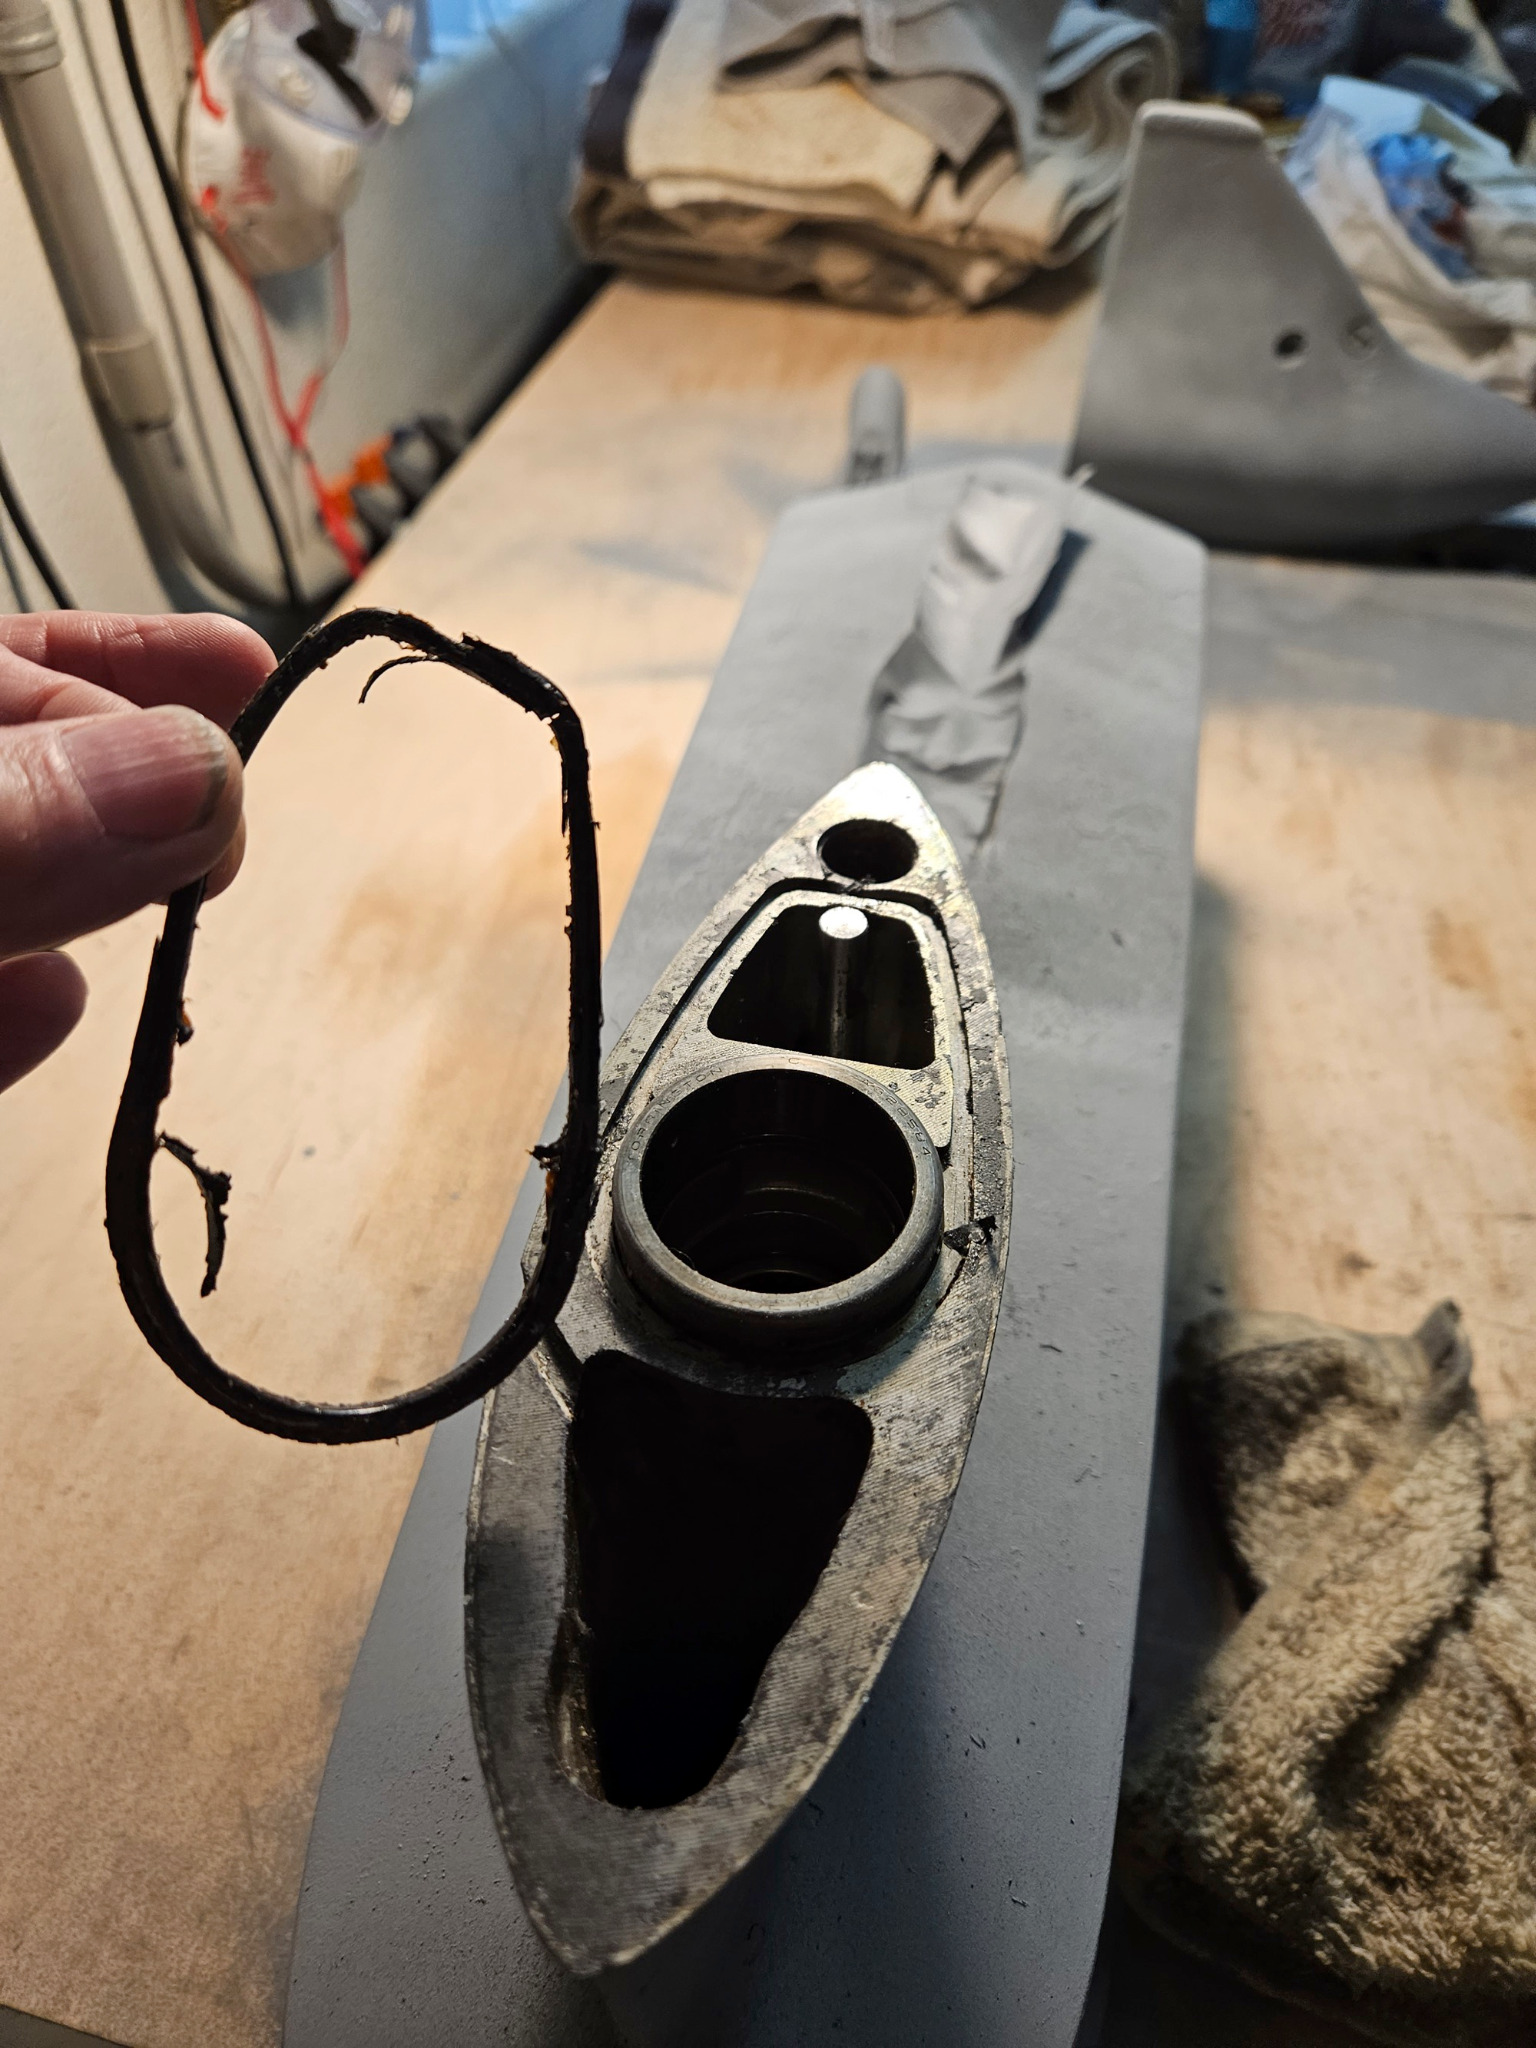
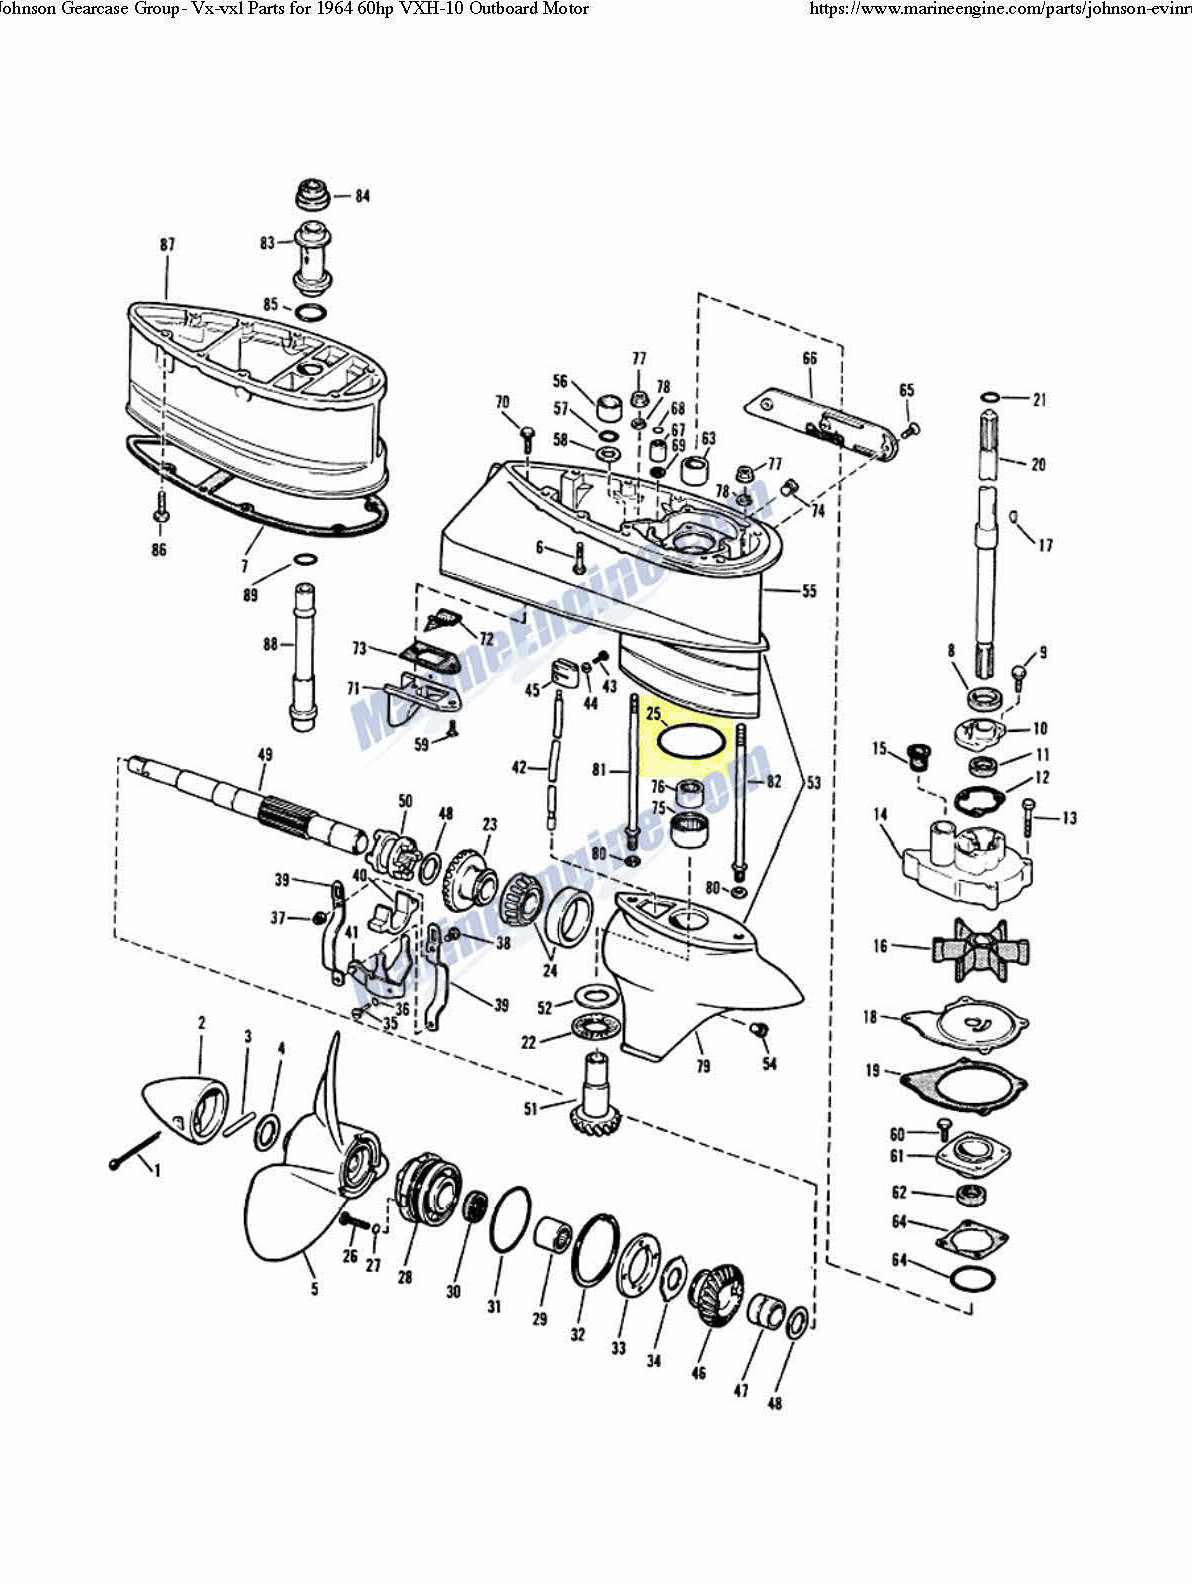
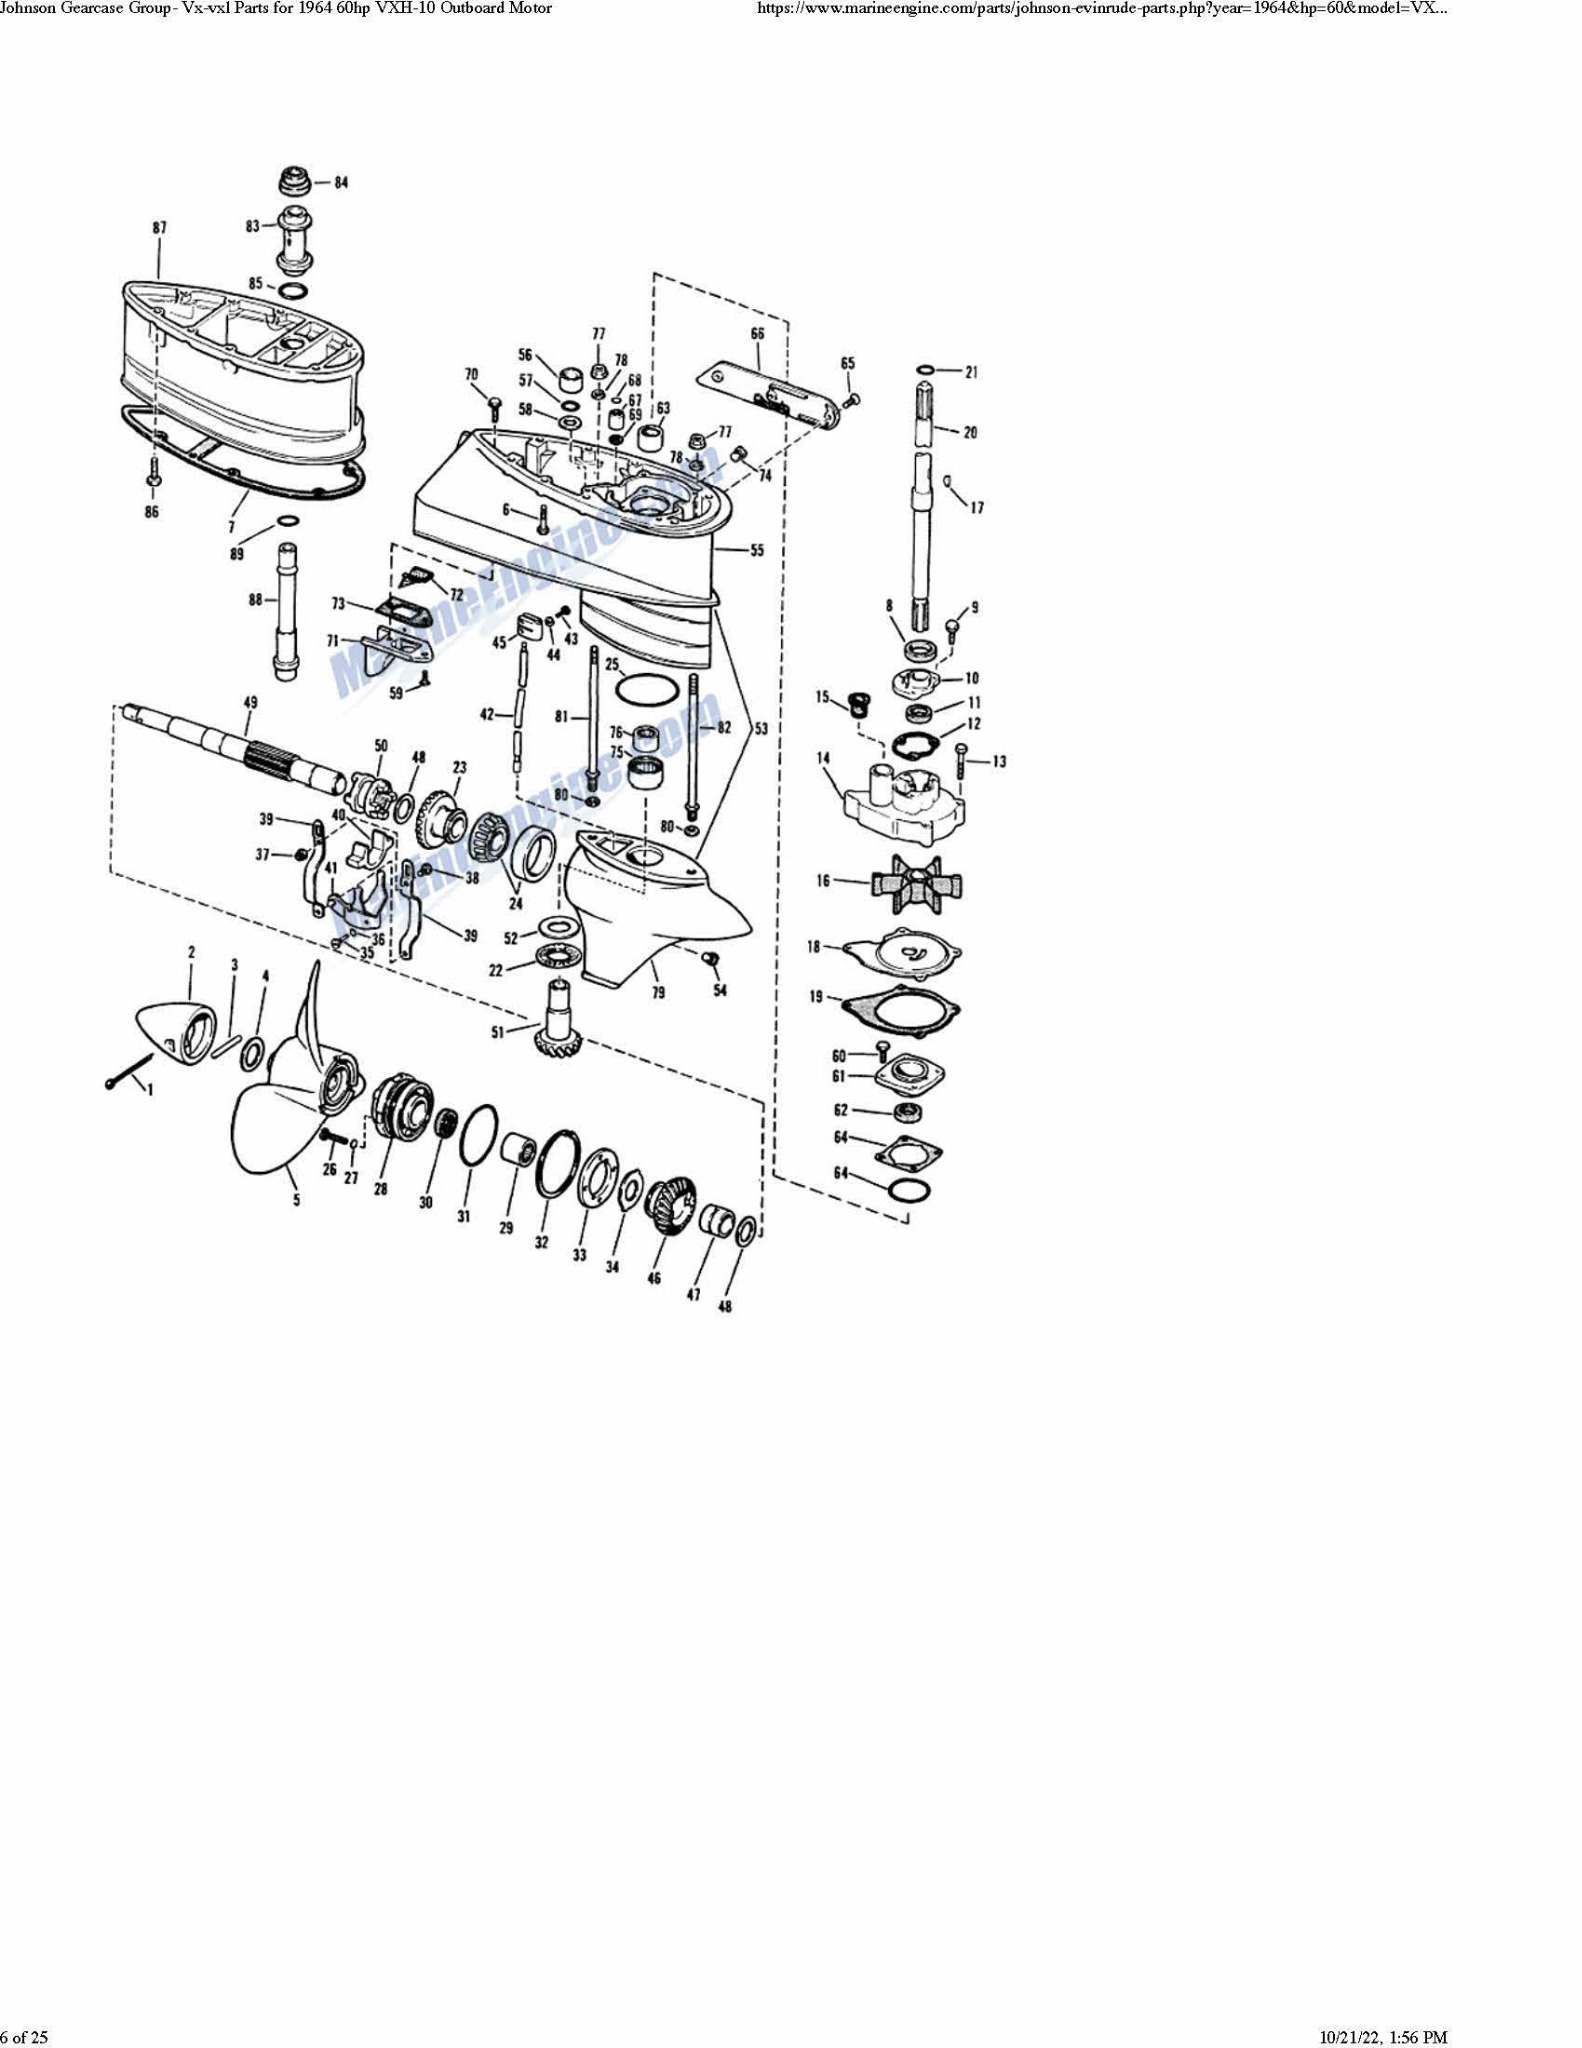
And hopefully my last question for the day. I have a o-ring part # 307103 that doesn't seem to fit anywhere. There is a gasket (not listed on parts list) and I can make one of those. I included two attachments, one of the existing gasket and the parts page from a manual. Can someone give me an opinion on what to do here? Obviously missing an o-ring is consider bad in may countries so I don't want to assume anything. The o-ring is highlighted on the parts list image.
Attachments:

Please Log in or Create an account to join the conversation.

Slipping gear or Prop 8 months 2 weeks ago #148280

  • ed-mc
  • Offline
  • Platinum Boarder
  • Platinum Boarder
  • Posts: 1395
  • Karma: 232
  • Thank you received: 114
That O-ring is the same as the "square" one you're holding in your hand. Obviously the one in your hand has assumed that shape after many many Moons of sitting there, but I assure you it started out just as round as the one in the diagram!

You're gonna have to glue it in place, because it ain't gonna want to stay there by itself. IIRC in the past there was an OMC sealer for that, which was rather sticky. Stickier than Permatex #3, sorta half-way between that and a contact adhesive. NLA but there could be old stock out there still.

See if you can slather some Permatex #3 in the groove then work the O-ring in there.

If you can't get that to stay in place long enough for reassembly, maybe try some Permatex Hi-Tack. That stuff is quite sticky and should do the job.

www.amazon.com/Permatex-80062-High-Gasket-Sealant/dp/B000HBGHB8

Just be really careful when you're joining the upper and lower halves. Once the halves are mated you can't pull them apart even the slightest bit, because the "stick-um" might just pull the O-ring out of the groove.

So make sure EVERYTHING is lined up properly and in its proper place, before you smash the upper and lower halves together! It's a bit of a juggling act, especially doing it the 1st time!!

Another tip, apply a thin coating of Permatex #3 to the long gearcase studs, that way salt and other hard deposits can never build up around the studs and lock the gearcase in place such that it's a real chore to remove.

BTW did you replace the shift shaft O-ring? As I described earlier you would have needed to tap the bronze shift shaft bushing with a 5/16-24 tap (really easy) and use a puller bolt to yank the bushing out, for access to the old O-ring. So you might want to review that post if you didn't. Otherwise, there's a good chance oil will get out of there and water will find its way into the gearcase.

On the long shaft "delete", you'll need a "short" brass coupler vice the 5" extension. These are all over the place including eBay and should be cheap, as JILLIONS of OMC short-shaft motors were sold! P/N 45 on the diagram, "Shift Rod Connector" or "coupler", P/N 303794.

Is your driveshaft one-piece or does it have a 5" extension? If it's one-piece, you'd also have to pick up a new, shorter driveshaft. There is a good used 379882 shaft on eBay under $80. Marineengine.com wants $110 + shipping for a new one.

Note I found (2) NOS shafts that were labeled as 379882 but don't have the bearing collar under the water pump, so they must be for an older motor or just aren't the right ones period. Make sure you compare your longshaft driveshaft to the one you're buying. The short driveshaft should have the identical features to yours, but be 5" shorter.

How about your water tubes? Do they have the slip-on extension tubes? If so, just take 'em out. If not, you're gonna have to cut 'em shorter. Measure the extension housing, it should be exactly 5" tall, but whatever it is, cut that exact amount off each tube. Angle your cut to match the original. And clean up the burrs with a round file, sandpaper, etc.

As a sanity-check, with the extension housing mounted, measure how far each tube sticks down below the housing. Make SURE that with the housing removed, the amount you cut off the water tubes puts them at the same length, that way they'll properly engage the pump grommets. Shoud be 5" but many years of experience have shown you can't assume anything!!

Note also that P/N 83 the exhaust tube extension and its O-ring/Seal won't be used. That's for the extension. Not used in the Short Shaft.

Anyway, that's just for this post, I need to review your other posts to see if there's anything else to comment on..........ed

Please Log in or Create an account to join the conversation.

Slipping gear or Prop 8 months 2 weeks ago #148281

  • ed-mc
  • Offline
  • Platinum Boarder
  • Platinum Boarder
  • Posts: 1395
  • Karma: 232
  • Thank you received: 114
Oh Thank God the site is back up! I thought I would have to get this thing back together without all of you looking over my shoulder and saying..."nooooo...don't do that!"

Anyway, things are progressing well, I am waiting for some paint to come in so I can make the lower unit look good after all of this work. I thought I was ready for the reassembly mentally until I found the lower unit extension piece under a table...need to rework my rebuild mentally now.

Is my order correct on the rebuild:


1. reassemble lower gearcase - I need to get this at least to the clutch dog or should I do everything up to the prop?


You could reinstall the gearcase cover but it might be easier to leave it off, that way you’ll be able to see what’s going on inside as you put the 2 halves together. You might need to manipulate the shift rod or move the pinion gear around for alignment, and of course with the gearcase cover on it won’t be as easy to do that.

2. reassemble upper gearcase - waterpump and then attach extension piece.

Once the 2 gearcase halves are together and you’ve tightened the nuts on the 2 long gearcase studs, you need to reinstall the driveshaft. Then the driveshaft upper bearing/seal retainer goes on. I would do it in that order.

Depends on whether your driveshaft has a bearing sleeve (collar) under the water pump, or it’s just all the same diameter from the pump all the way down. Be sure to put some marine grease on the upper bearing and seal, it’ll slip down the driveshaft better and gives a bit of pre-lube for the area.

There are different styles of shafts, too. As I’m now remembering, some of the very old V4’s had a bronze sleeve under the pump which served as the driveshaft “bearing”. The shaft just slid right on down, and you could pull it up and out after the pump was removed.

Later engines with a needle bearing under the water pump (as yours has, P/N 63) may or may not have had a hardened collar pressed onto the shaft, which rides in the needles. That type of shaft ain’t coming out unless you pull the seal/bearing retainer, as I recall.
At any rate, you can install the shaft 1st with either type then plop down the seal/bearing retainer assy. Put some grease or Permatex #3 on the sealing surfaces (O-ring and lower flange) of the retainer, to keep out salt/mineral deposits. Also a thin coat on the bolt threads.

3. attach extension, upper and lower sections together.

If you end up reinstalling the extension, then you would bolt it to the mid-section 1st and not the lower unit, if that's what you mean. It's durned near impossible to get the thing back together with the extension bolted to the L/U vice mid-section.

4. insert gearcase assembly back to motor.

Sounds about right! And yeah that was pretty scary to have the site go down again, not long after it came up.

Give us a post if you have any other Q’s or get stuck!.............ed
The following user(s) said Thank You: JEShore66

Please Log in or Create an account to join the conversation.

Slipping gear or Prop 8 months 2 weeks ago #148284

Am back from Tomahawk Wis. and the antique outboard show and swap meet. Loved it.
Have read through the latest posts and Ed has you well covered. It is truly a pleasure when a knowledgeable person is there to help that actually has a writing style to match his years of experience! Hey Ed......don't let that go to your head! :P :P
The following user(s) said Thank You: ed-mc

Please Log in or Create an account to join the conversation.

Slipping gear or Prop 8 months 2 weeks ago #148285

  • ed-mc
  • Offline
  • Platinum Boarder
  • Platinum Boarder
  • Posts: 1395
  • Karma: 232
  • Thank you received: 114
Thanks, Pappy. Don't worry, have made plenty of mistakes to get there! It's definitely a self-learning experience.

And a privilege to be able to help others here.

Please Log in or Create an account to join the conversation.

Slipping gear or Prop 8 months 1 week ago #148301

I am finally reassembling the gear case!
Couple o questions:
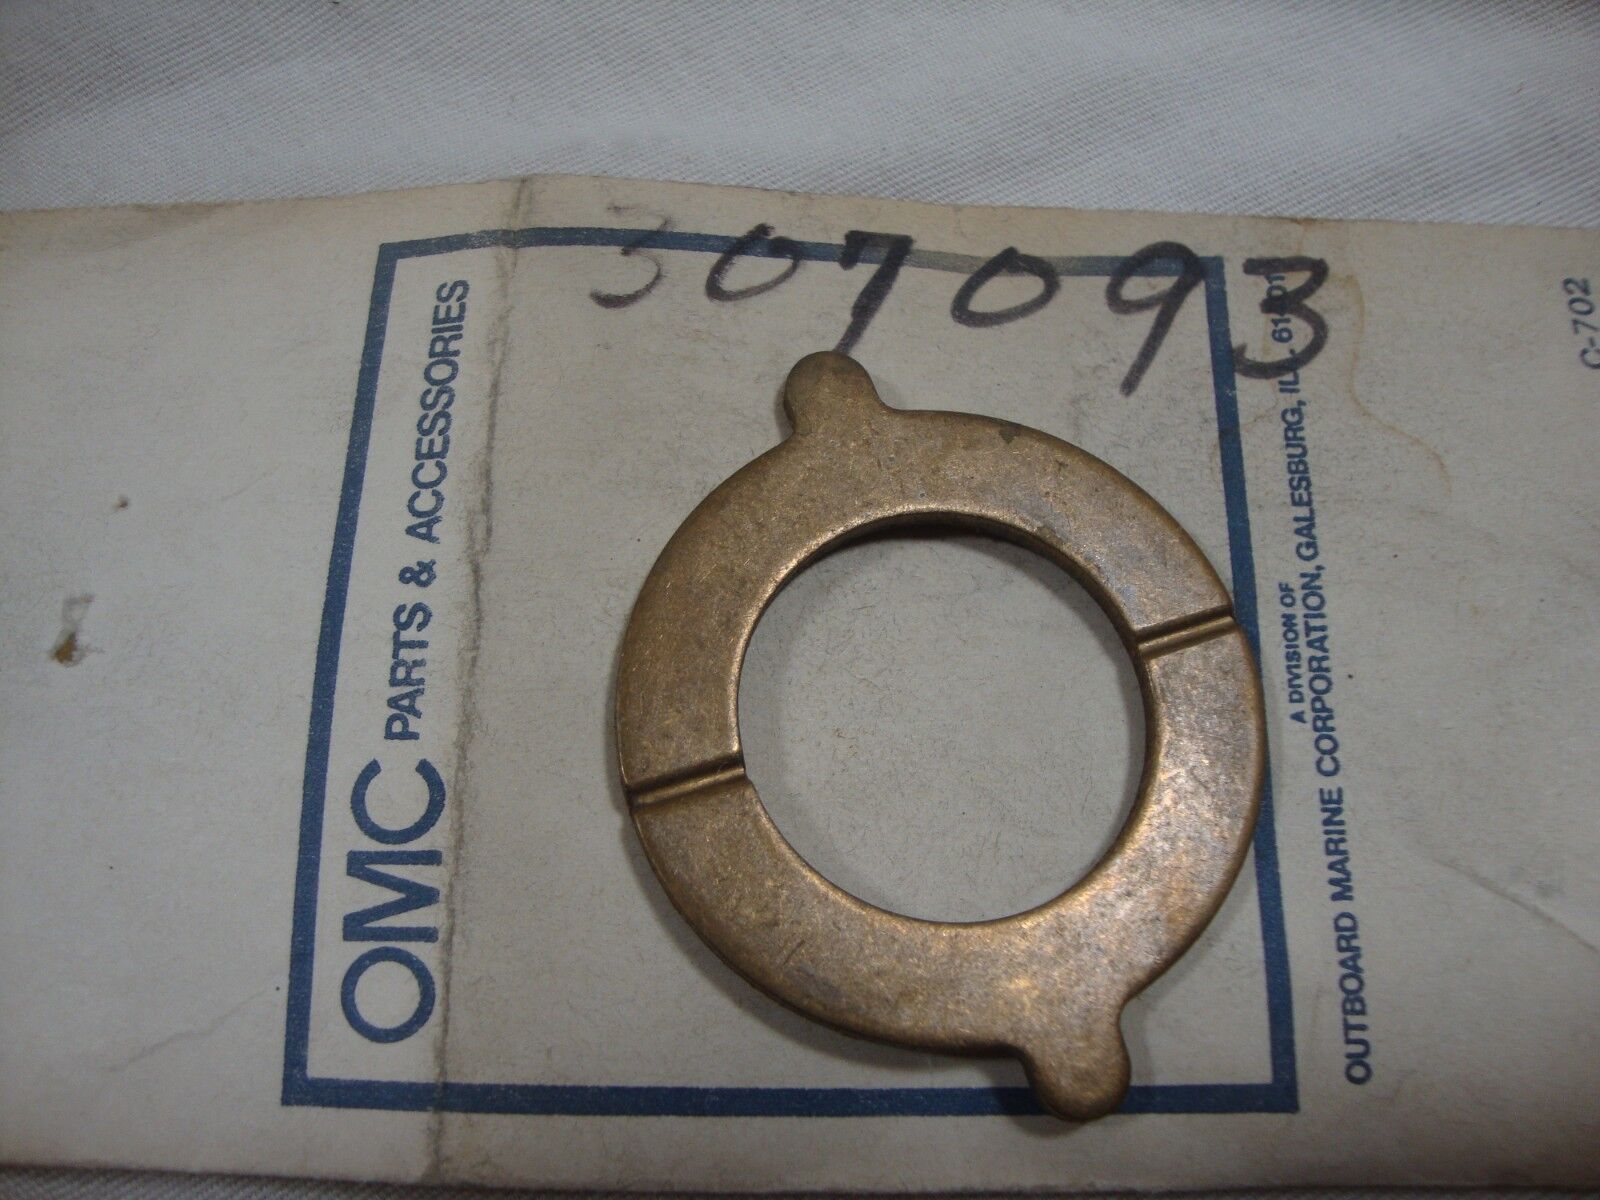
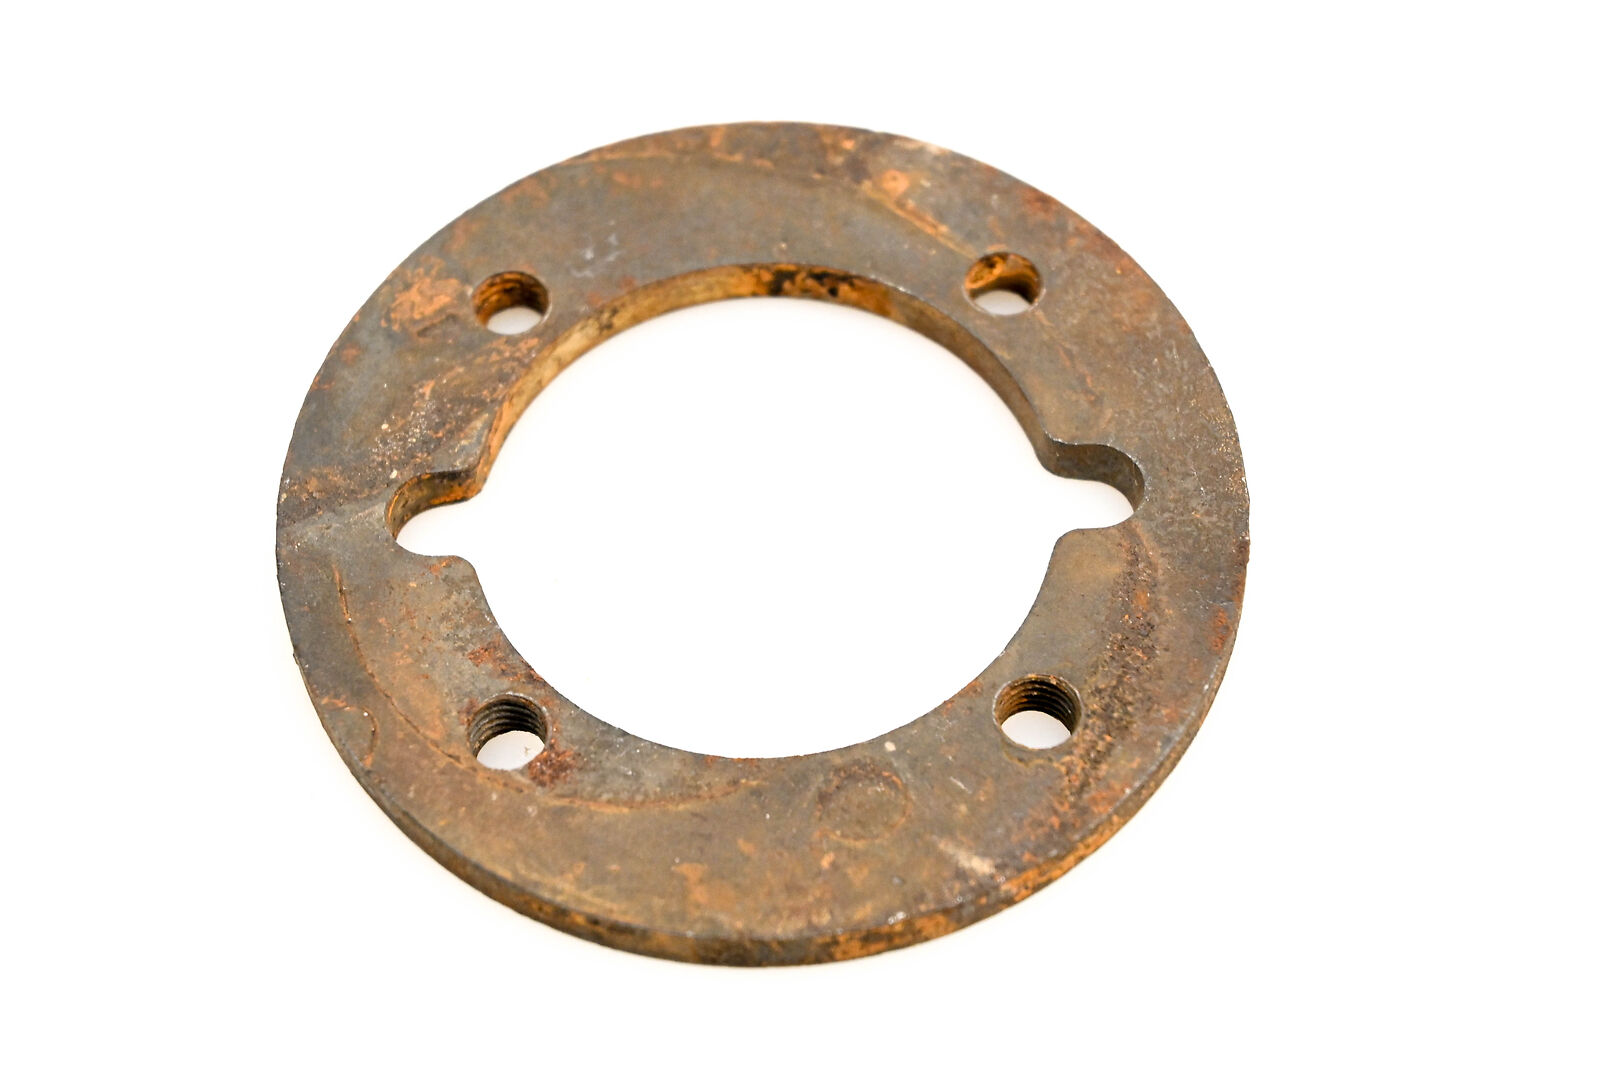
1. Parts #33 and 34. Head retainer plate and thrust washer. I see how those two parts fit together, but when I put them in after the reverse gear to do not lay flat against each other. Should the thrust washer fit into the retainer plate? The thrust washer is kind of in front of the retainer plate. I can't see how the would lay flat together. I haven't put on the retainer ring yet, it is so hard to get off I wanted to make sure this was correct before I put that in.
2. Clutch dog - Ed, you gave me a great deal of info on the type I have and how it is retained by a spring and ball-bearings. I have put the prop shaft in but I am not 100% certain that it is in the proper place as far as hold the clutch dog in. My best guess is that the shaft is not inserted far enough through the clutch dog. Any words of wisdom on this? I have tapped it a few times with a rubber mallet and it seems to move okay but how do I know for sure? This might be related to issue #1 maybe because the prop shaft is not in the correct position it is throwing everything off.
3. Everything else seems to be going well, hoping to at least get the gears in place first thing tomorrow.
Attachments:

Please Log in or Create an account to join the conversation.

Slipping gear or Prop 8 months 1 week ago #148302

  • ed-mc
  • Offline
  • Platinum Boarder
  • Platinum Boarder
  • Posts: 1395
  • Karma: 232
  • Thank you received: 114
Take a look at the 2 pics I've attached. You'll note that in the i.d. of retainer plate (P/N #33), there are some slots.

Also note the tabs on the thrust washer (P/N #34). These tabs line up with the slots in the retainer plate. So line those up when you assemble the propshaft in the lower unit, and the thrust washer will sit in there properly.

I re-read your post and I guess you figure that out already! Anyway, upon final assembly the thrust washer tabs have to be far enough into the retainer that when it's all put back together, the thrust washer cannot spin in the case. It would quickly wear and cause damage if it did.

Make doubly sure that the small-diameter thrust washer, P/N 48 is correctly assembled to the prop shaft before you install reverse gear. If this washer were missing, the gear would go too far forward and you could have an extra gap at the back. Also make sure the bushing is inside the gear (P/N 47).

Note how that retainer works (of course you took it apart, but a refresher sure won't hurt!); the retainer is in front of the big gearcase snap ring. Such that when you thread a bolt thru the gearcase head, when that bolt or screw is engaged with the retainer and tightened down, it pulls the retainer against the snap ring and of course pulls the gearcase head hard up against the gearcase.

Be sure to lube up those O-rings and bearings with marine-grade waterproof grease.

When you've got the entire prop shaft assembly in the gearcase with the end up the prop shaft sticking up, the thrust washer should be laying flat against the back of reverse gear, then you'd lay the retainer plate on top of it, aligning the tabs and slots.

An easy tip on how in the world are you gonna ever get the holes in the plate lined up with the holes in the gearcase head: Cut the head off of a long, 1/4-28 bolt (at least that's what I recall it is, check to make sure), and thread that bolt into the retainer.

Then, when you're ready to install the gearcase head, just plop it down on the long guide bolt and Voila! your bolt holes are aligned. Once you get fasteners opposite of each other snugged down a bit, pull out the guide bolt and install and torque all 4 fasteners.

Now here's the "magic" part that's not readily apparent. When you tighten down the gearcase head, you'll note the machined smaller i.d. sticks quite a way in. You'll also note that it's deeper than the thickness of the retaining ring.

Such that when it's all tightened down, the i.d. of the gearcase head is going to be right up against the thrust washer. The tabs and slots are just a convenient way of making sure that the thrust washer doesn't turn. It's just riding inside the retaining ring, whereas the gearcase head is the positive rear structure that supports the thrust washer/bearing.

Far as your shift clutch, as you recall the groove in the i.d. of the clutch, for the spring-loaded ball upgrade, is right in the middle of the clutch. So when you install the dog clutch on the shaft, you've got to hold in both balls and work them into the clutch. As you push the clutch some more onto the prop shaft, you should feel the ball lock into the detent.

Once it's locked in, it's pretty well positively located. You might not be able to move it from there with just a bit of hand pressure, but if you carefully rap on the other (non-gear-teeth-side) of Fwd gear with a mallet, you should be able to get it out of the detent and then it'll move freely.

Of course if you move it too far, them balls and spring are gonna go SPROINNNNG! So be careful with those, the teeny little stainless balls could easily disappear into the bowels of the shop!

Then you can move it back towards the middle, and should be able to feel the ball lock into the detent groove. That's the position you want it in, when it's in Neutral.

So just make sure the ball is in the clutch detent groove, and it should be good to go.

Hope that all makes sense, now I need to attach those pics!

Last thought: Note that the bronze-bearing side of the thrust washer, which also has a couple of oiling slots in it, goes towards the reverse gear. The other side is just plain metal and it wouldn't last long against reverse gear thrust!
Attachments:

Please Log in or Create an account to join the conversation.

Slipping gear or Prop 8 months 1 week ago #148315

The Martian Quote of the day: "I hate Retainer Rings with the fiery passion of a thousand suns". Ok, so the original quote was about potatoes but I am sure you get the idea. I have spent hours trying to get the retainer ring back into the gearcase. I tried to purchase a new snap ring plier but the nubs didn't fit. Not much on youtube except people either cussing about it or making it look easy. I am thinking of notching the removable nubs that I have on my pliers, I realize that this will weaken them a little and there is so much force on them could this be dangerous? Maybe just use eye protection when I try it. Ideas?

Please Log in or Create an account to join the conversation.

Slipping gear or Prop 8 months 1 week ago #148316

  • ed-mc
  • Offline
  • Platinum Boarder
  • Platinum Boarder
  • Posts: 1395
  • Karma: 232
  • Thank you received: 114
Sounds like a Rube Goldberg fix is in order! I'd modify what you have, any way you deem necessary. Definitely wear safety glasses!

As I recall there used to be a special OMC snap ring pliers tool, now that they're out of business it's probably as rare and $$$ as hen's teeth. And I just did a search "OMC snap ring tool" and P/N 766505 comes up. Out of stock of course! One site was out of stock and the list price on the tool was $160!

Here's some nice BRP 331045 pliers for ONLY $171.99 !!

www.boatersland.com/brp-331045-snap-ring-pliers-331045.html

A query on Amazon came up with a whole bunch of long-nose internal snap ring pliers:

www.amazon.com/s?k=EXTRA+LONG+internal+Straight+Retaining+Ring+Clip+Circlip+Removal+Plier&i=tools&crid=3L8DGQQUYV56T&sprefix=extra+long+internal+straight+retaining+ring+clip+circlip+removal+plier+%2Ctools%2C254&ref=nb_sb_noss

So, check out the reviews and pick your best Chinesium pair of pliers!

I'd say that likely there's one suited to the task, and should be good enough to get the job done. And not break the bank doing it.

If you have a Harbor Freight local, check there. They show a number of sets online:

www.harborfreight.com/search?q=internal%20snap%20ring%20pliers

And if it breaks, you can take it right back to the store!

Of course Amazon returns are pretty easy nowadays, just go to your local UPS shipping station, they give you a receipt and throw the bad item in the big box of returns.

Good luck with that Evil Johnrude Snap Ring, and don't let it bite you!

Please Log in or Create an account to join the conversation.

Slipping gear or Prop 8 months 1 week ago #148317

I have a Harbor Freight set that I will modify on Friday. I tried a larger pair from there today but the nib was larger than the ring hole. I will never give up, just more cursing is necessary.

Please Log in or Create an account to join the conversation.

Slipping gear or Prop 8 months 1 week ago #148318

  • ed-mc
  • Offline
  • Platinum Boarder
  • Platinum Boarder
  • Posts: 1395
  • Karma: 232
  • Thank you received: 114
Just grind down the nib until it fits!

Please Log in or Create an account to join the conversation.

Slipping gear or Prop 8 months 1 week ago #148328

So. grinding (or hacksawing) the nib for the retainer ring pliers worked kind of... I had to make a Frankenwrench to finally get it in. Then the stupid retainer went past the indent where it is suppose to live so a hour of fighting with that and the retainer ring is in! Yup a mere 5 hour total time for one retainer ring.
Gear case is now reassembled and I attached it to the upper gear case assembly. I feel like I need to do a pressure test to make sure my seals are good but I don't have a pressure tester and just don't want to buy another tool I will use 1 time. I saw that you can use a air compressor with a schrader value so I can pump some air in then check it with a gauge. Think this will work?
After verifying the pressure I will start the waterpump rebuild. I was watching a video where they used RTV Seal, is the Permatex a good substitute or should I get the RTV?
I am hoping to finish this tomorrow but of course I live in the Palm Springs area so a little tropical storm you might have heard about might delay my plans.
Thanks as always for your help -

Please Log in or Create an account to join the conversation.

Slipping gear or Prop 8 months 1 week ago #148329

  • ed-mc
  • Offline
  • Platinum Boarder
  • Platinum Boarder
  • Posts: 1395
  • Karma: 232
  • Thank you received: 114
Yes, you can use a rubber-tipped air gun to blow into either the vent hole or drain hole, with the other plug installed. If you have an air compressor, throttle the air pressure down to 12 psi max. You don't want or need to go any higher, as you may blow out the seals or worse, the O-ring between the gasket halves.

Spray a solution of soapy water around the driveshaft seal, shift shaft bushing, propshaft seals. And maybe around the gap between upper and lower halves. Any bubbles and you'll know what you have to do!!

And I always use Permatex #3 as a gasket dressing on the water pumps. It helps seal the gaskets and assures you won't be sucking air around the pump body.

In the Olde Times OMC didn't even use a gasket between the aluminum pump body and the stainless pump plate. A very good old Outboard Wrench friend of mine turned me onto using Permatex to seal that joint, it makes sure they're gonna pump right.

Well, you're making good progress at last!!!

Please Log in or Create an account to join the conversation.

Slipping gear or Prop 8 months 13 hours ago #148352

I have the lower gearcase and upper gearcase back together but, I am not sure that the gear shift is working correctly. From what I've read if it is engaged in forward then the prop shaft should only turn in that direction, same for reverse. Is this true? If so, then i am either not getting the gear into place or something is wrong. I still have not installed the new water pump, I wanted to make sure the clutch dog and shifter are working first. What do you think?

Please Log in or Create an account to join the conversation.

Slipping gear or Prop 8 months 13 hours ago #148353

  • ed-mc
  • Offline
  • Platinum Boarder
  • Platinum Boarder
  • Posts: 1395
  • Karma: 232
  • Thank you received: 114
Nope, this one does not "ratchet" in forward due to the design. Since there are 2 ears that engage the machined spaces in the forward and reverse gears, there's gonna be some movement back and forth but beyond that it'll lock.

You can tell it's working because in forward gear, if you turn the prop clockwise, the driveshaft will rotate clockwise (as viewed from the top). Or I guess since you already have the lower unit installed, just move the flywheel in the clockwise direction. Pull the spark plugs and it'll be a lot easier to do.

It'll also help to rotate the prop as you're trying to shift, because you can get the ears of the clutch dog positioned such that they're jamming into the face of the gear instead of into the machined area. And of course it ain't gonna shift well like that. With the engine running the alignment will naturally occur, when it's not running you sometimes need to "help" it. Just move the prop back and forth while you're moving the shifter, and you should feel it fall into alignment and into gear.

Are you able to shift into Neutral? That's about the most important thing.

Also as I recall there may be some adjustment in the shift linkage or detents up on top, be sure when you adjust that there's a bit of preload in the forward shift direction. This puts a small amount of pressure on the clutch to help push it into forward gear. And of course the improved ball detents help in that respect as well.

You want it to go firmly into forward, and just be able to shift back to neutral. Don't worry so much about reverse as long as it still shifts cleanly, there's not as much pressure on the reverse dogs and you've got the spring/ball clutch assy in there now, to help.

Hope that makes sense....................ed

Please Log in or Create an account to join the conversation.

Slipping gear or Prop 7 months 2 weeks ago #148400

Hello all,
I am ready to do a pressure test the lower unit, do I need to out the waterpump assembly back on before I test it? Not sure if some part of that assemble seals in the lower unit too.
Sorry for the 2 week delay - hip replacement - seems like everything is getting in the way of this repair!

Please Log in or Create an account to join the conversation.

Slipping gear or Prop 7 months 2 weeks ago #148401

  • ed-mc
  • Offline
  • Platinum Boarder
  • Platinum Boarder
  • Posts: 1395
  • Karma: 232
  • Thank you received: 114
The driveshaft seal under the water pump assembly is part of the oil-containing envelope, so if you want to do a proper air test, you'd need to expose that so you can spray soap solution and check for air bubbles (i.e. a leak). You can also soap-test the shift shaft O-ring's seal.

Otherwise since it's already assembled to the mid-section, you can still test the integrity of the gearcase halves' O-ring, bearing carrier, and propshaft seal.

Up to you if you want to pull the L/U again.

No more than 12 psi air pressure, or you run the risk of blowing out a seal.

HTH..........ed

Please Log in or Create an account to join the conversation.

Slipping gear or Prop 7 months 2 weeks ago #148403

Ed.....with the older units I seldom go over around 4-5PSI these days. Just my .02
We have been away for a while so catching up a bit.

Please Log in or Create an account to join the conversation.

Slipping gear or Prop 7 months 2 weeks ago #148404

  • ed-mc
  • Offline
  • Platinum Boarder
  • Platinum Boarder
  • Posts: 1395
  • Karma: 232
  • Thank you received: 114
Can't argue with that, especially on a used one. Even that low of pressure should find a leak.

Please Log in or Create an account to join the conversation.

Slipping gear or Prop 7 months 1 week ago #148414

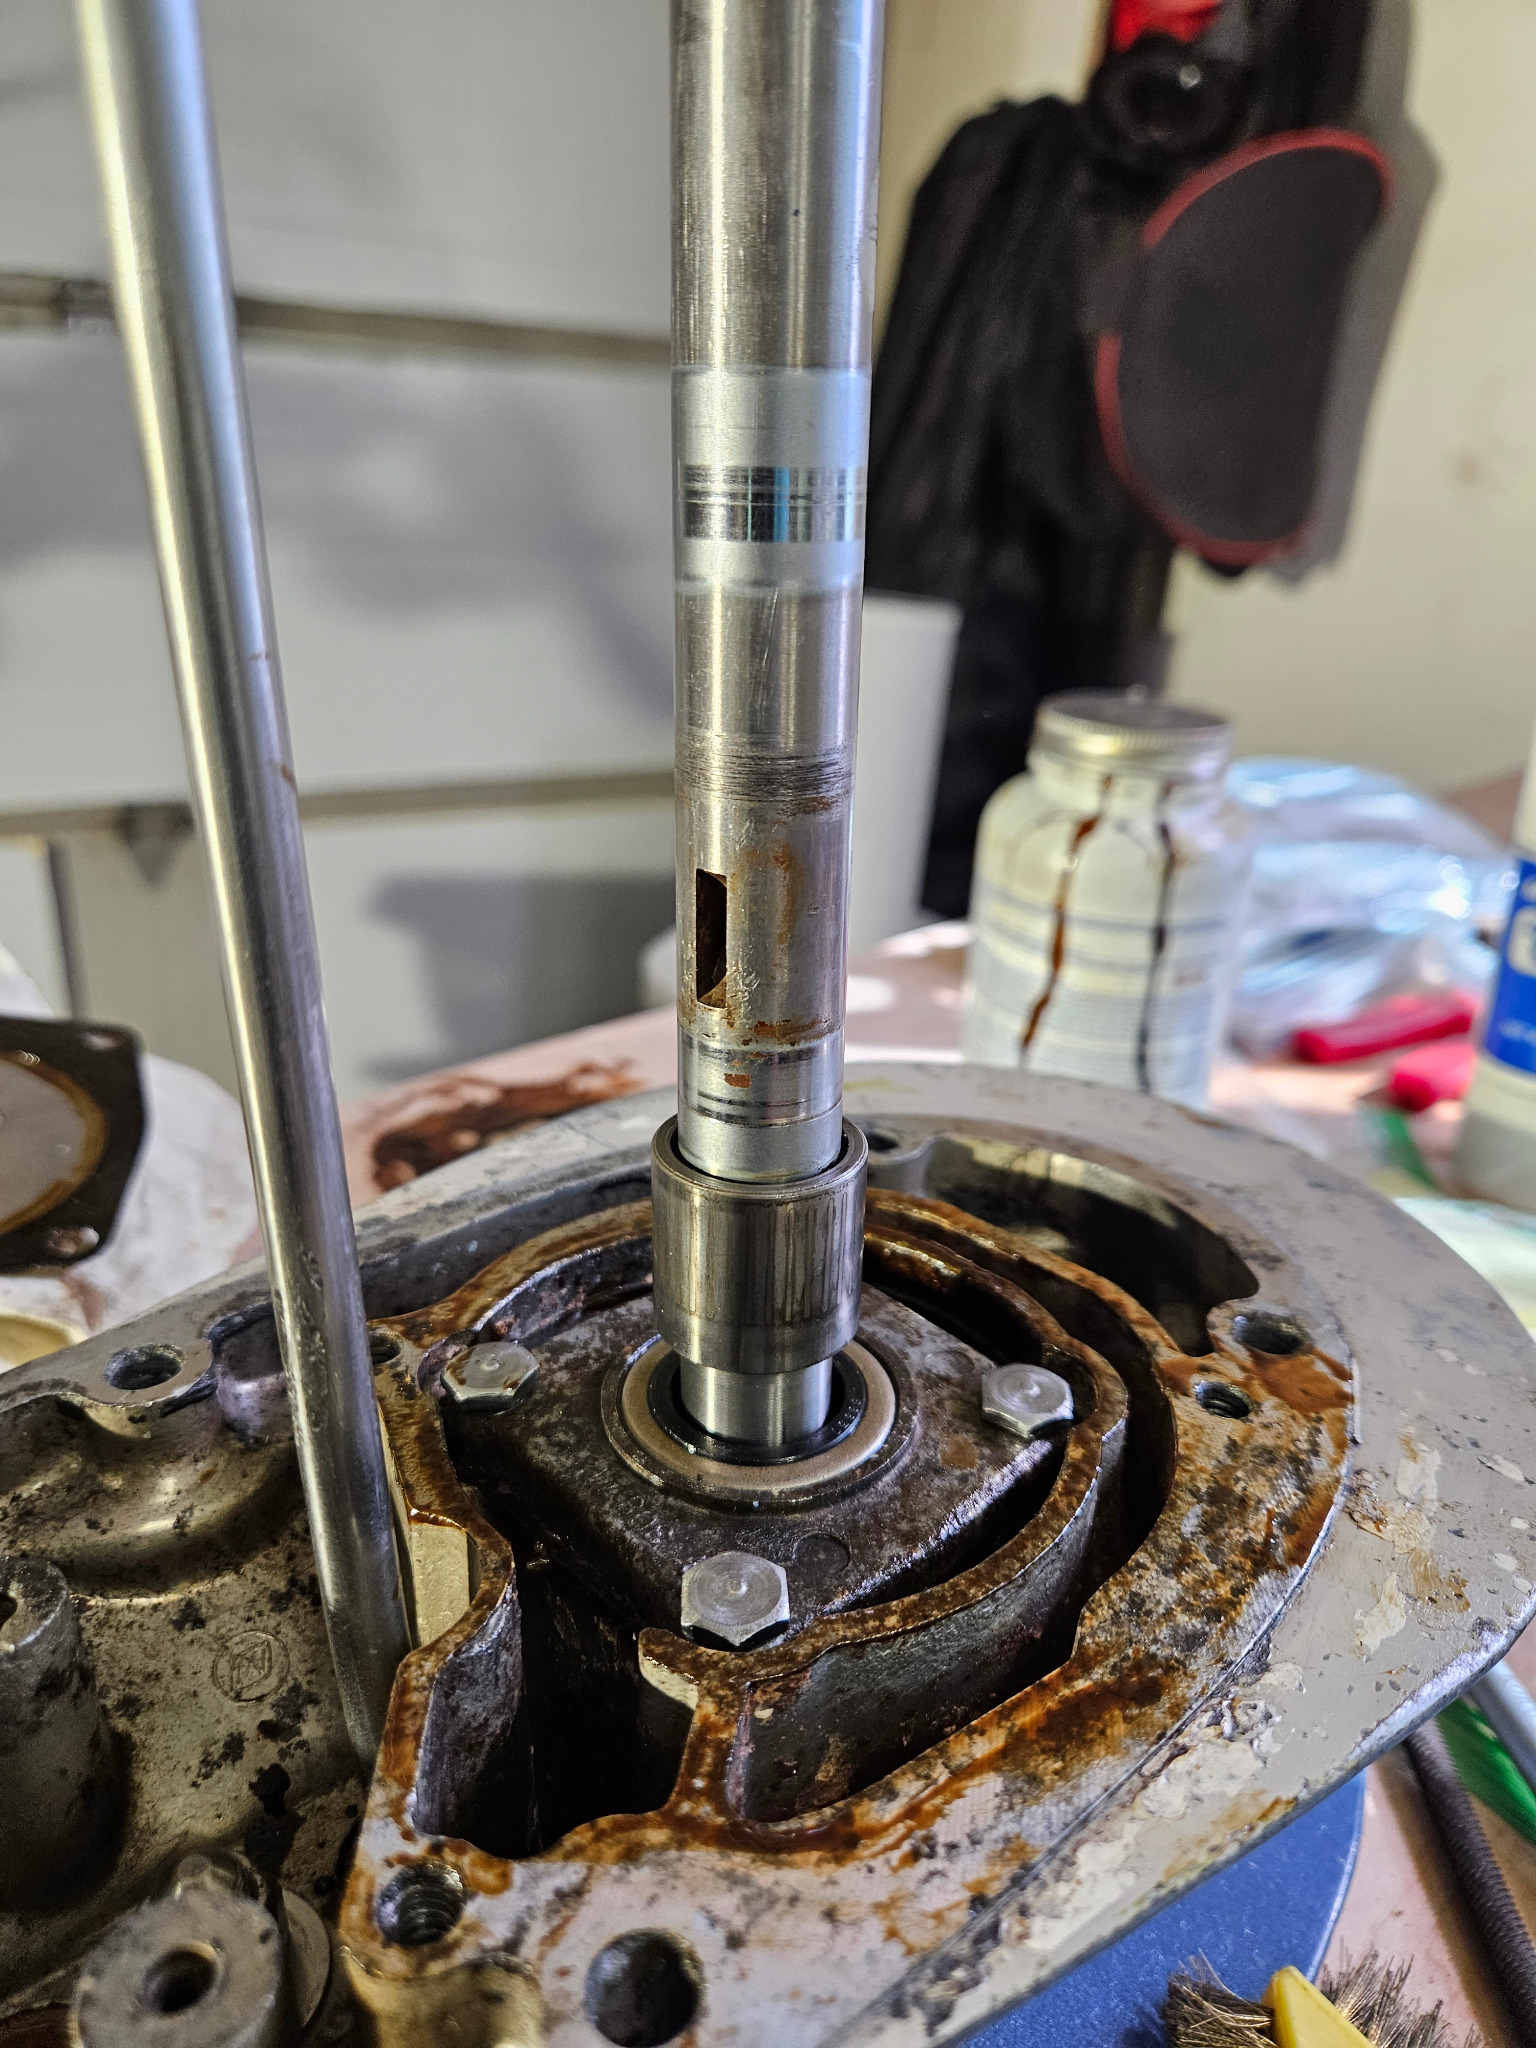
What is the best way to get the drive shaft to seat correctly. Do I pound it in? Also, is there any lining up that I need to do before brute force? That knob thing on the drive shaft I am assuming needs to go in the housing below.
Attachments:

Please Log in or Create an account to join the conversation.

Slipping gear or Prop 7 months 1 week ago #148415

  • ed-mc
  • Offline
  • Platinum Boarder
  • Platinum Boarder
  • Posts: 1395
  • Karma: 232
  • Thank you received: 114
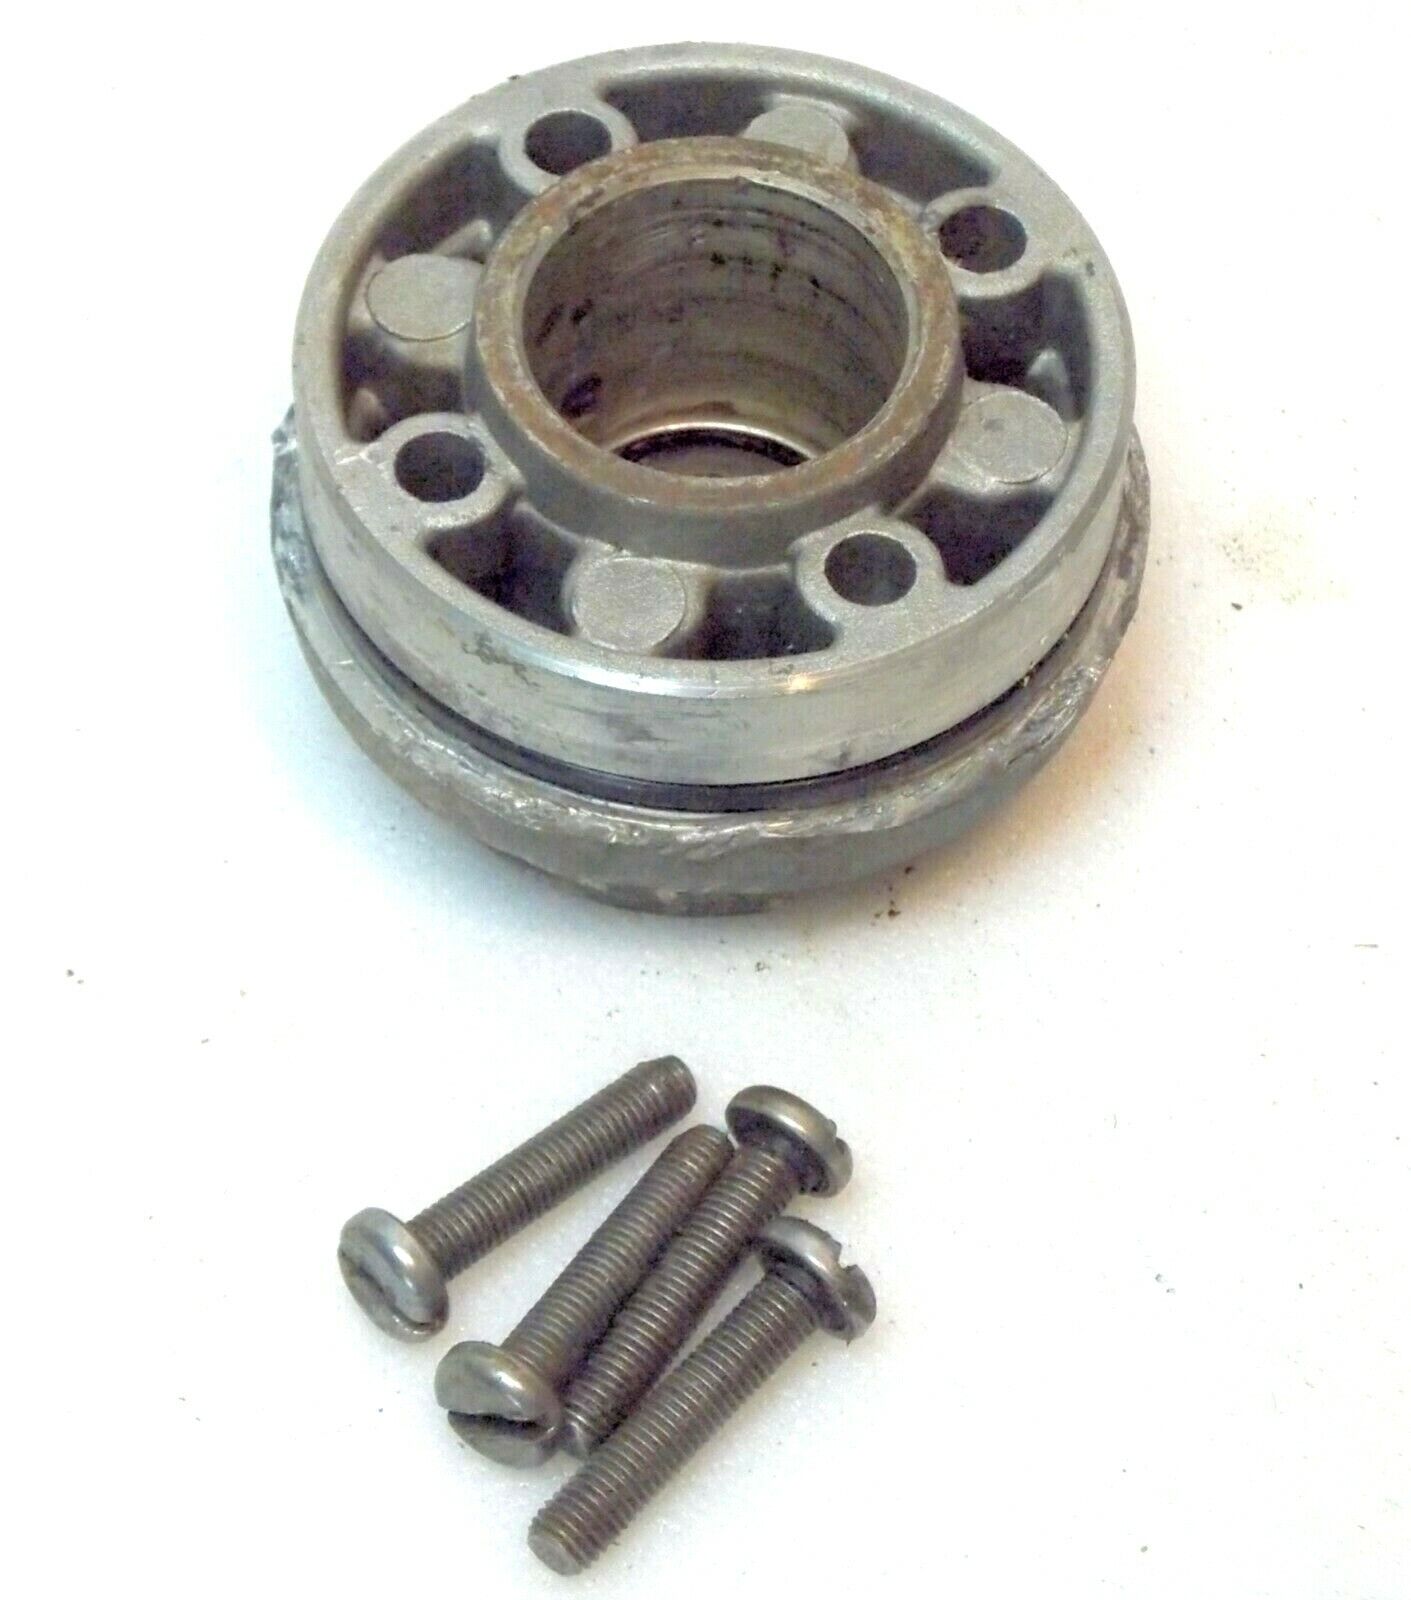
All you're gonna accomplish by pounding on the driveshaft is to destroy the oil seal. The seal and bearing carrier (the one with 4 bolts) should be installed Last. Pull the 4 bolts, remove the seal/bearing carrier, install the driveshaft, then slip the seal/bearing carrier over the driveshaft and down into place. Liberally grease the lips of the oil seal and use extreme caution while installing,so the seal lips don't catch on any part of the driveshaft going down. You can even use some electrical tape around the driveshaft splines & O-ring groove, to keep the seal from catching there. Grease it up good. You should have a new O-ring in the bottom groove of the bearing carrier.

Liberally grease that O-ring, or apply a thin coating of Permatex #3. Also spread a thin coating of Permatex #3 on the lower flange of the bearing carrier, this prevents salt and other minerals/debris from getting down past the metal-to-metal joint and corroding the bearing carrier in place. Grease or Permatex on the bolt threads as well.

Please Log in or Create an account to join the conversation.

Slipping gear or Prop 7 months 1 week ago #148416

Okay, that was much easier! I discovered that my impeller cover and seal is bad so ordering new ones. Getting down the the last few stages. Still not sure where all of the o-rings go that I got with the waterpump kit but I will work on that while waiting for the other part.
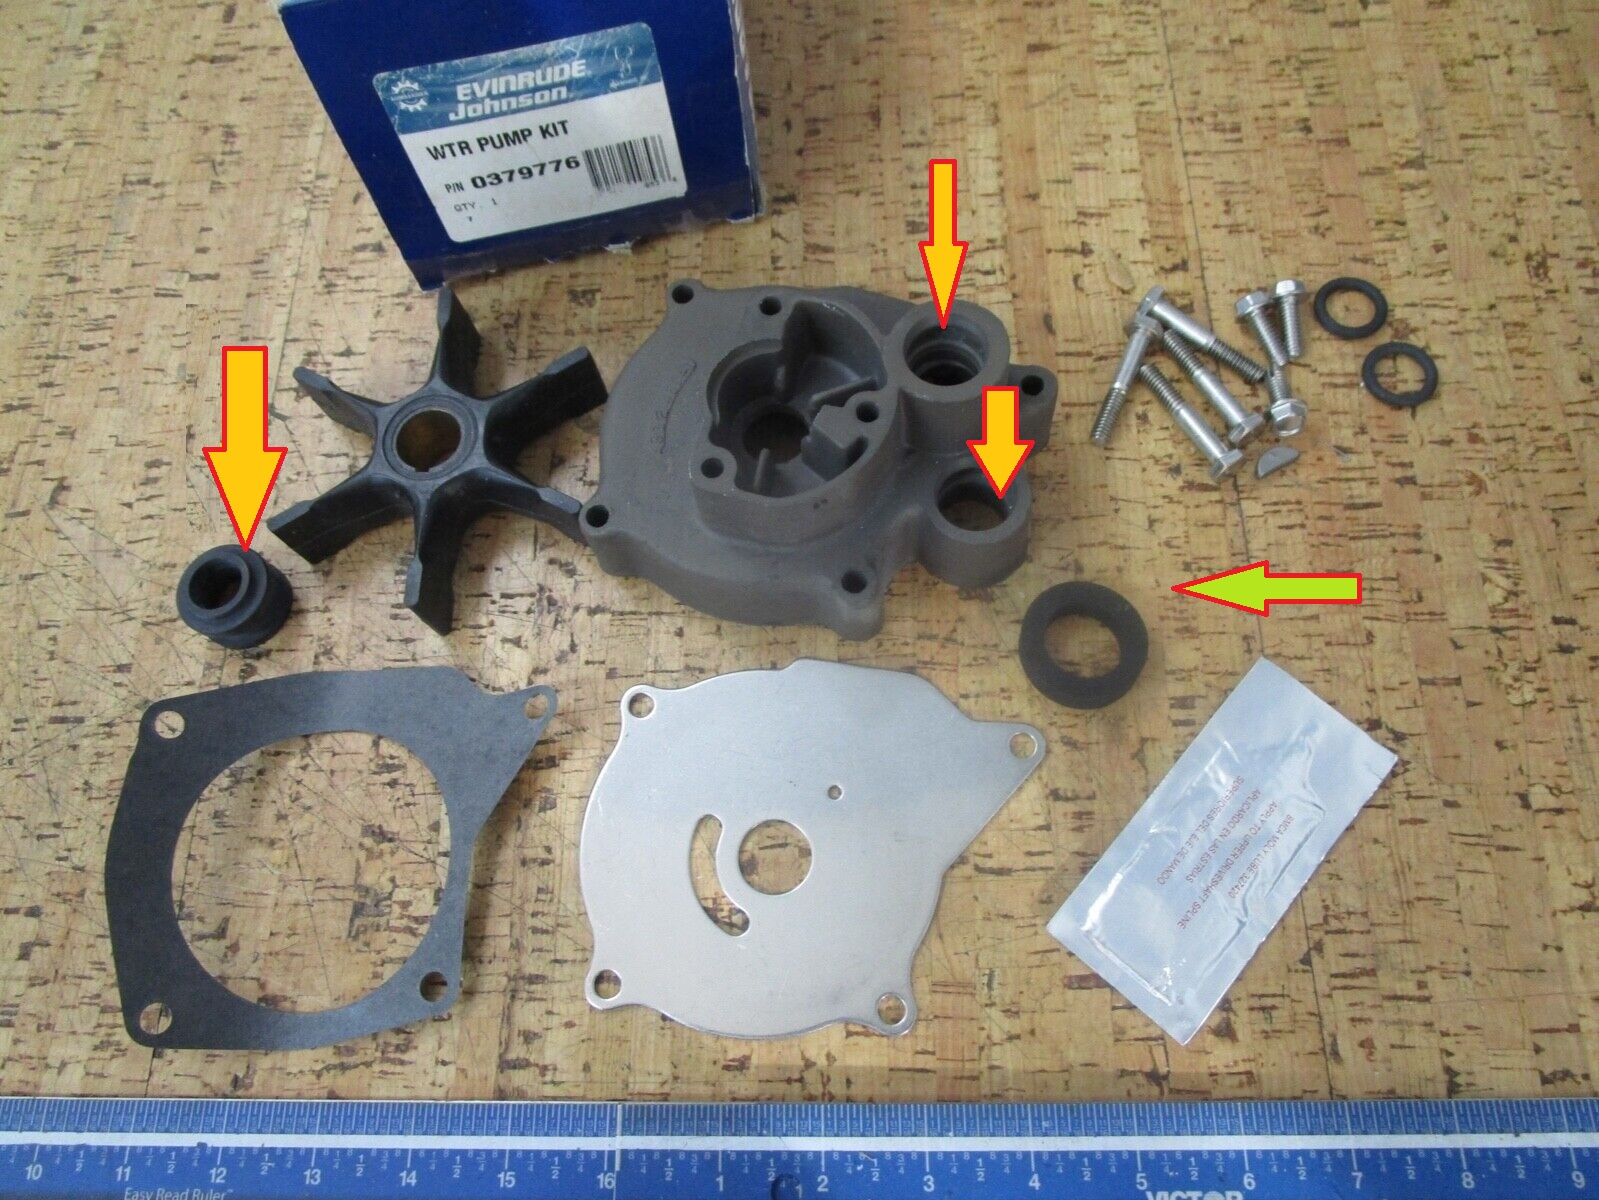
I had previously ordered a waterpump kit and I think I am missing a grommet. Can you look at the image with the orange colored arrows - I have one grommet and 2 places for a grommet. Is this correct? Also the yellow arrow is pointing to a foam kind of seal, I think that goes on the impeller cover but I am not sure, if it does it sure compresses down to almost 1/4 of it's thickness.
Attachments:

Please Log in or Create an account to join the conversation.

Slipping gear or Prop 7 months 1 week ago #148417

  • ed-mc
  • Offline
  • Platinum Boarder
  • Platinum Boarder
  • Posts: 1395
  • Karma: 232
  • Thank you received: 114
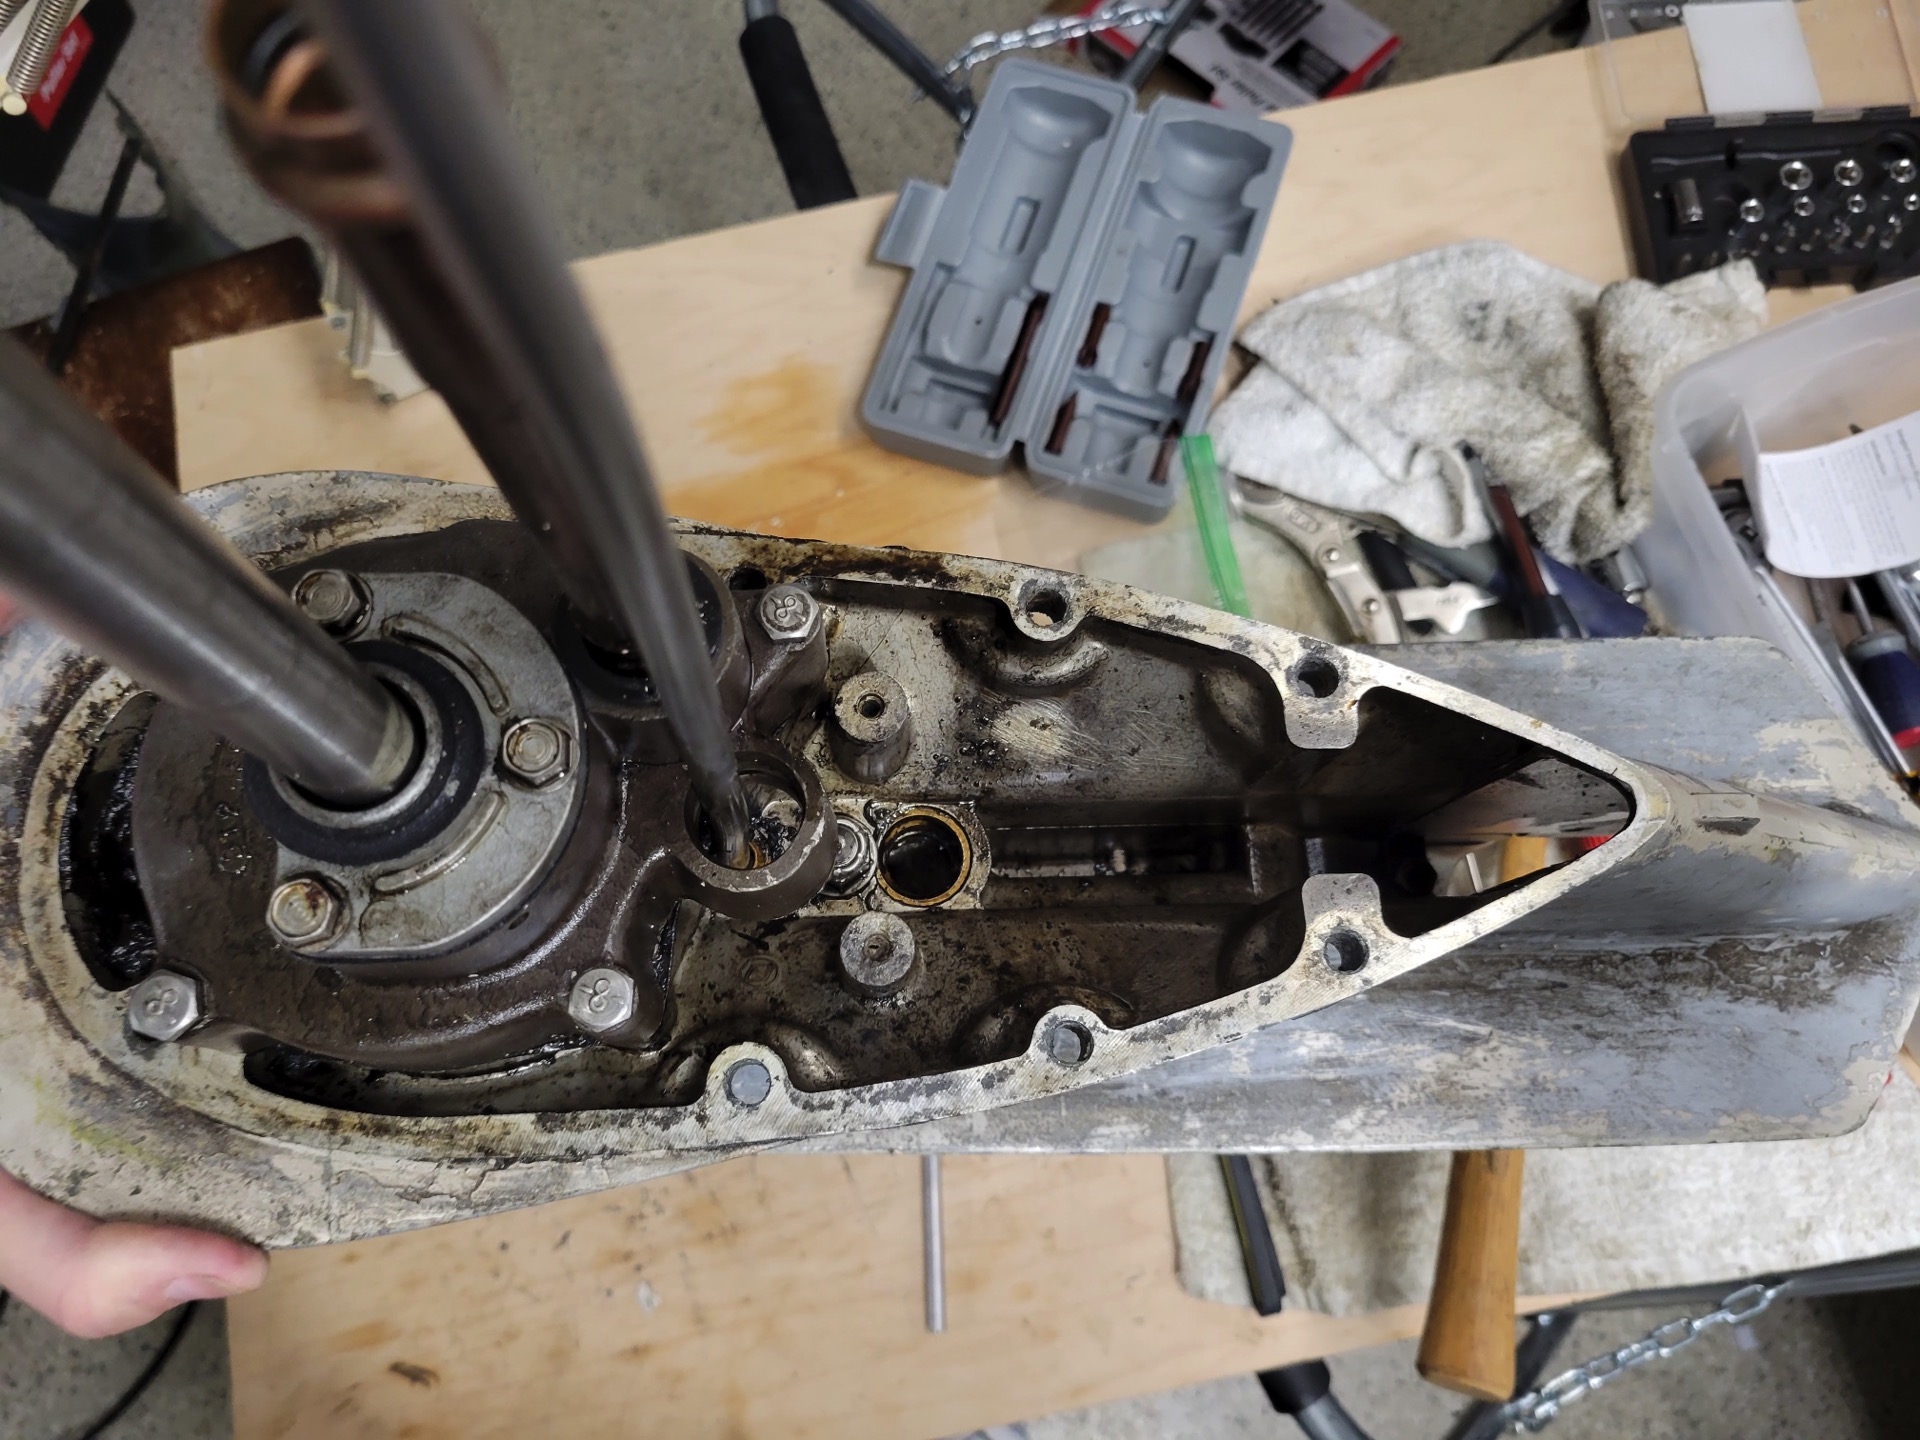
I'll refer you to one of your pics posted previously, the top of the gearcase. It shows the main water supply tube from the water pump, that's where the thick grommet on the left in your newest pic goes.

Next arrow down from that hole in the water pump, is just where the shift shaft goes thru.

To the right of the shift shaft and the gearcase stud is another hole. That should be where the 2nd copper water tube coming down from the center section plugs into. I think you can even see the O-ring in that hole if you look carefully.

So that water tube hole doesn't have a grommet, it's just sealed by an O-ring, one of the ones on the right in your pic, by the bolts.

The other O-ring, P/N 89 in the drawing, IIRC, is what seals the extension water tube against the 5" longshaft extension housing. You won't need that because that tube and the extension housing are no longer there, and the main water tube from the center section is going to be going straight into the big grommet in the water pump. Make Sense? I hope so!!

www.marineengine.com/parts/johnson-evinrude-parts.php?year=1964&hp=60&model=60432S&manufacturer=Evinrude§ion=GEARCASE+GROUP+STANDARD
Attachments:

Please Log in or Create an account to join the conversation.

Slipping gear or Prop 7 months 1 week ago #148418

  • ed-mc
  • Offline
  • Platinum Boarder
  • Platinum Boarder
  • Posts: 1395
  • Karma: 232
  • Thank you received: 114
Oh, and I forgot, that foam seal does go over the top of the water pump against the cover with 3 bolts holding it on. And yeah it does get squished pretty good. Far as I could tell that's just a seal against exhaust gasses.

Please Log in or Create an account to join the conversation.

Slipping gear or Prop 7 months 1 week ago #148419

  • ed-mc
  • Offline
  • Platinum Boarder
  • Platinum Boarder
  • Posts: 1395
  • Karma: 232
  • Thank you received: 114
Next observation, if you look very carefully at the top of that extension water tube, guess what, you can see right where the 2nd O-ring was supposed to go! Guess you'll have an extra now!

Please Log in or Create an account to join the conversation.

Slipping gear or Prop 7 months 1 week ago #148422

I do have the extension so I will be using parts 83-85. I should be to that point later this week after I get the other parts I ordered. How did you ever do this without the internet? I now have a better appreciation for all of the boat mechanics I have used over the years, just sourcing parts is a full time job.

Please Log in or Create an account to join the conversation.

Slipping gear or Prop 6 months 1 week ago #148492

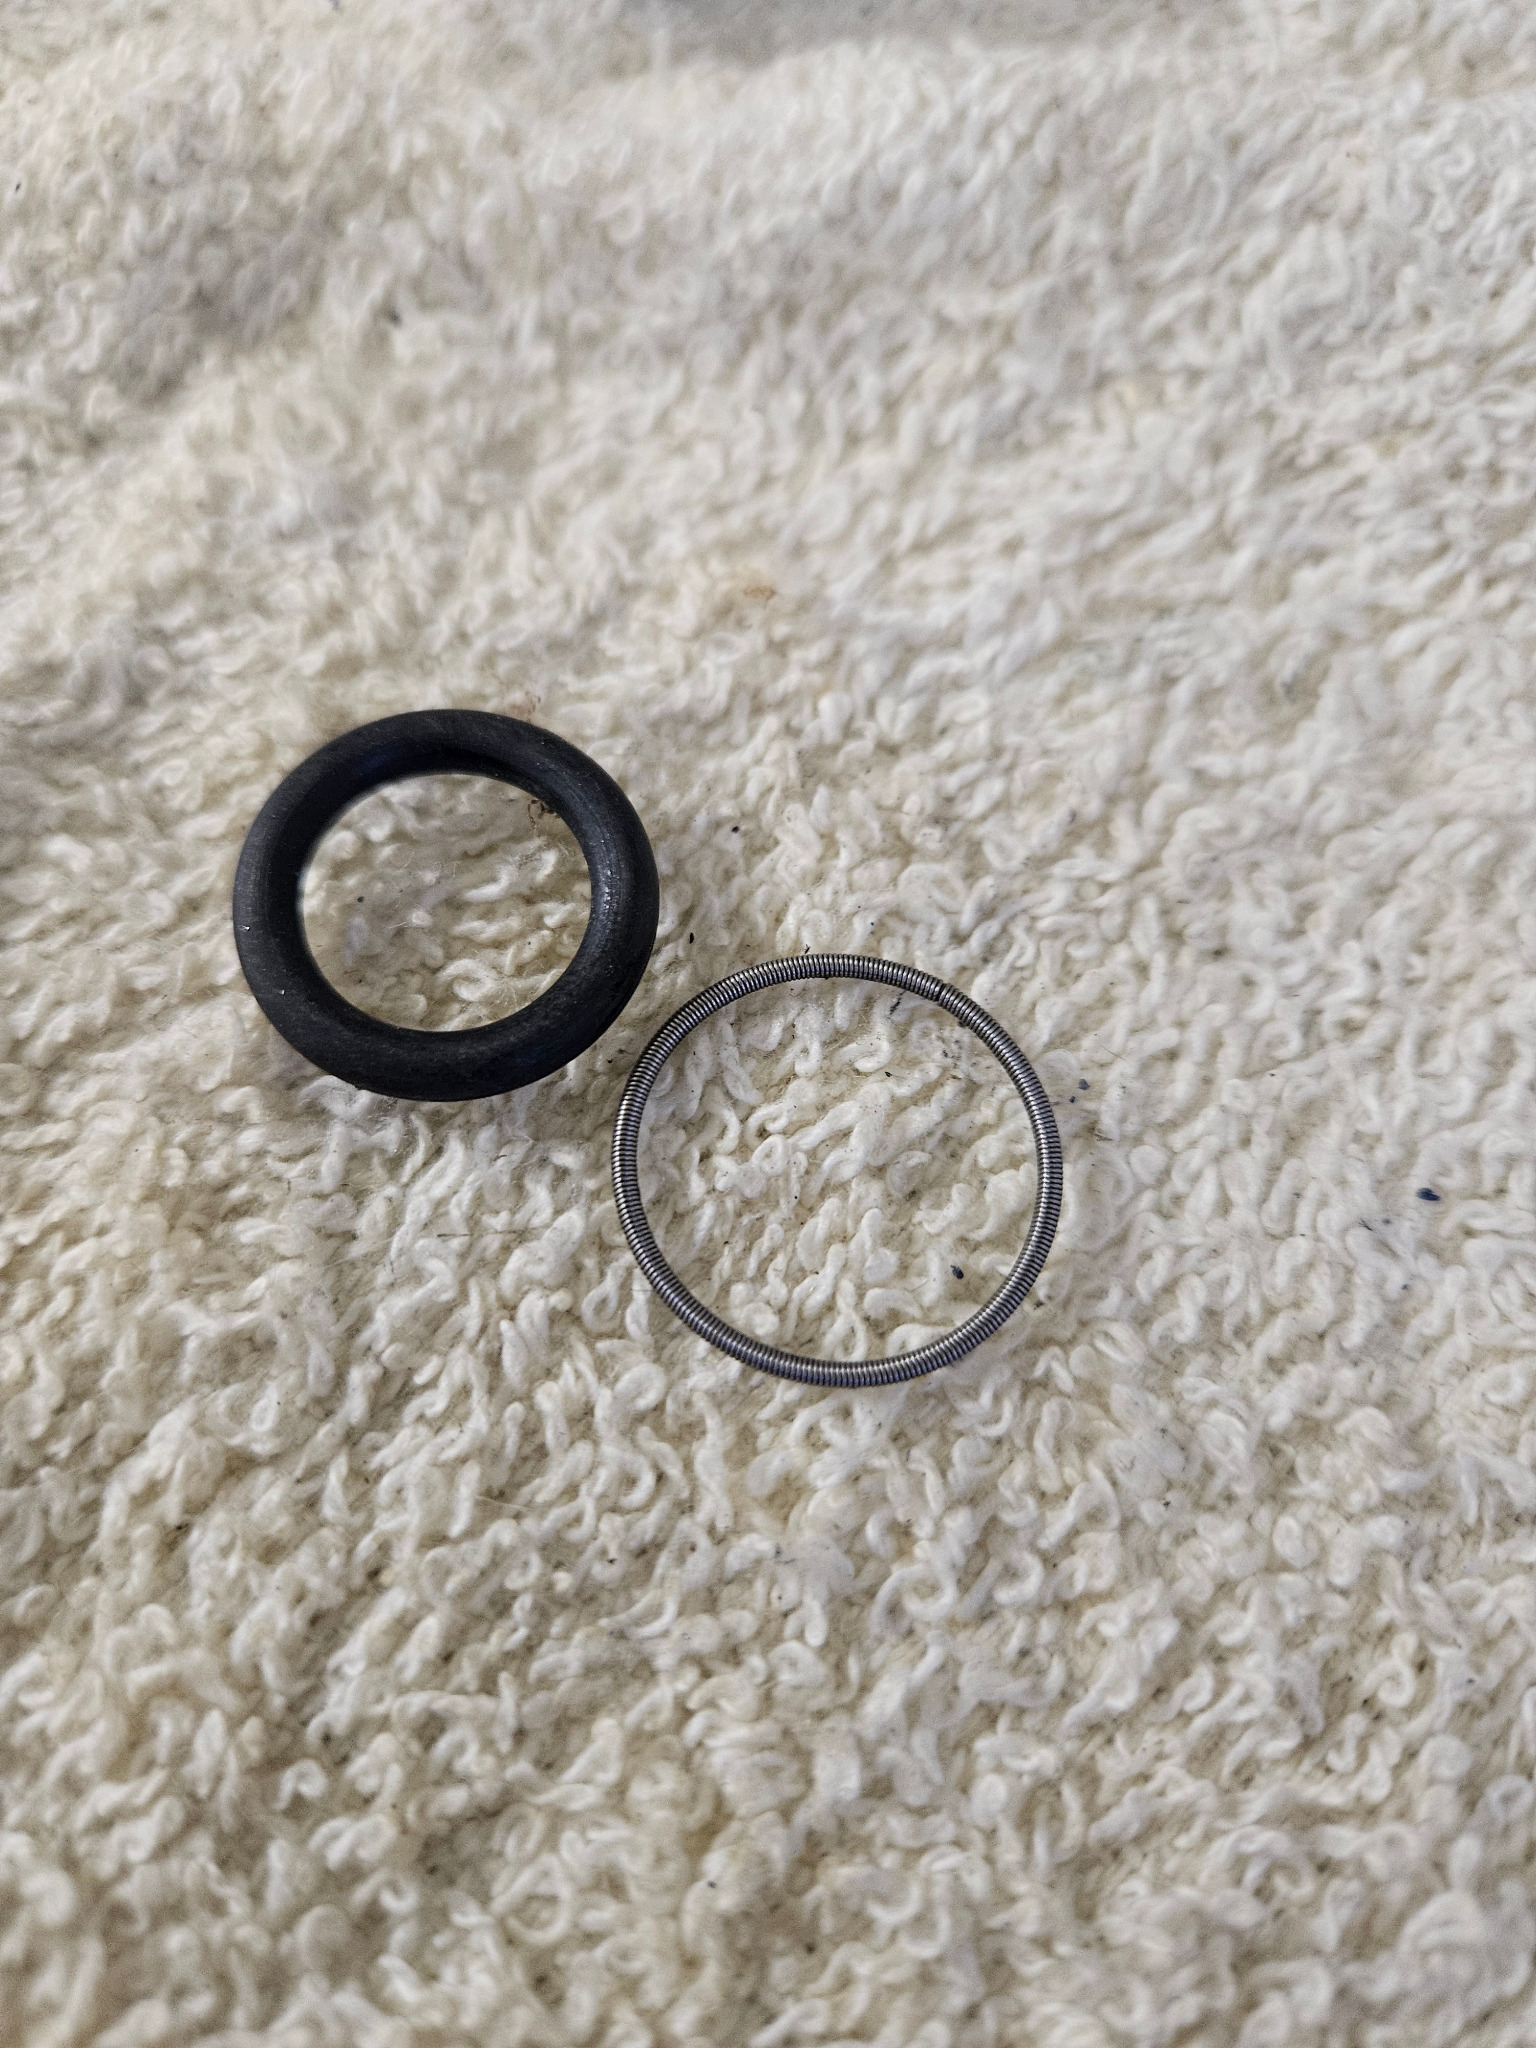
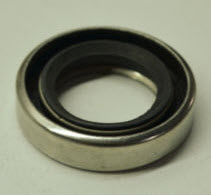
Well, back at it after a couple of weeks break. I have one part that I can't figure out where it goes. In the attached photo it is the metal o-ring. I have gone over the parts manual but cannot figure out where this goes. I am at the last part of the project where i am putting it back together. I think this has something to do with the gear extension housing and the tube extension. Also, I have the gasket for the gear extension housing but is should I also use the gasket sealer stuff that I have to give it a little extra protection?
Attachments:

Please Log in or Create an account to join the conversation.

Slipping gear or Prop 6 months 1 week ago #148493

  • ed-mc
  • Offline
  • Platinum Boarder
  • Platinum Boarder
  • Posts: 1395
  • Karma: 232
  • Thank you received: 114
The metal spring is for an oil seal, which one is missing its spring? The spring snaps around the O.D. of the seal lips, and provides a bit of tension on the lips to seal better. The seal may leak without its spring installed.

The O-ring, can't tell, if you have all the appropriate O-rings on the water tubes, and also have an O-ring in the groove at the end of the driveshaft (where it goes into the powerhead), IDK.

BTW the driveshaft splines where they engage the crankshaft should be greased. If there was a packet with OMC special grease in your pump kit, use that.

Otherwise you can use some Mercury anti-corrosion grease (the really sticky stuff), or use some blue water-proof boat bearing grease. Wipe any excess grease off the top of the crankshaft, else you could get a hydraulic lock into the bottom of the crank when installing.

On the extension housing flanges, you could use Permatex No. 3 but it's a bit messy when you're taking it apart the next time. You could also use the boat bearing grease on the flanges and it'll serve just about as well as a corrosion barrier.

Please Log in or Create an account to join the conversation.

Slipping gear or Prop 6 months 1 week ago #148494

uh oh. I have no idea where this goes. Can you help me narrow it down to a part number? From your post it sounds like this metal ring is inside another part. i have everything reassemble up to putting the extension piece on. I am hoping that this is inside the water pump assembly, if it is further down in the gear case then I will kind of be starting from scratch.
I only put the rubber o-ring in the photo to show the contrast to the metal one. Sorry for the confusion.

Please Log in or Create an account to join the conversation.

Slipping gear or Prop 6 months 1 week ago #148495

  • ed-mc
  • Offline
  • Platinum Boarder
  • Platinum Boarder
  • Posts: 1395
  • Karma: 232
  • Thank you received: 114
If your water pump housing has a rubber seal at the top of it, maybe that's the one. Otherwise the only 2 oil seals in the gearcase are the prop shaft seal, and the driveshaft seal which is contained in the bearing carrier (the assembly that's held in by 4 bolts, under the water pump).

You can pull the gearcase cover with the oil seal and bearing, and you can pull the driveshaft seal/bearing carrier. I'd check the pump first.

The seals in question, having a seal retaining spring, would be 11, 30, and 62 on the parts breakdown. See the attached pic, the spring on the seal lips is visible.
Attachments:

Please Log in or Create an account to join the conversation.

Slipping gear or Prop 5 months 2 weeks ago #148527

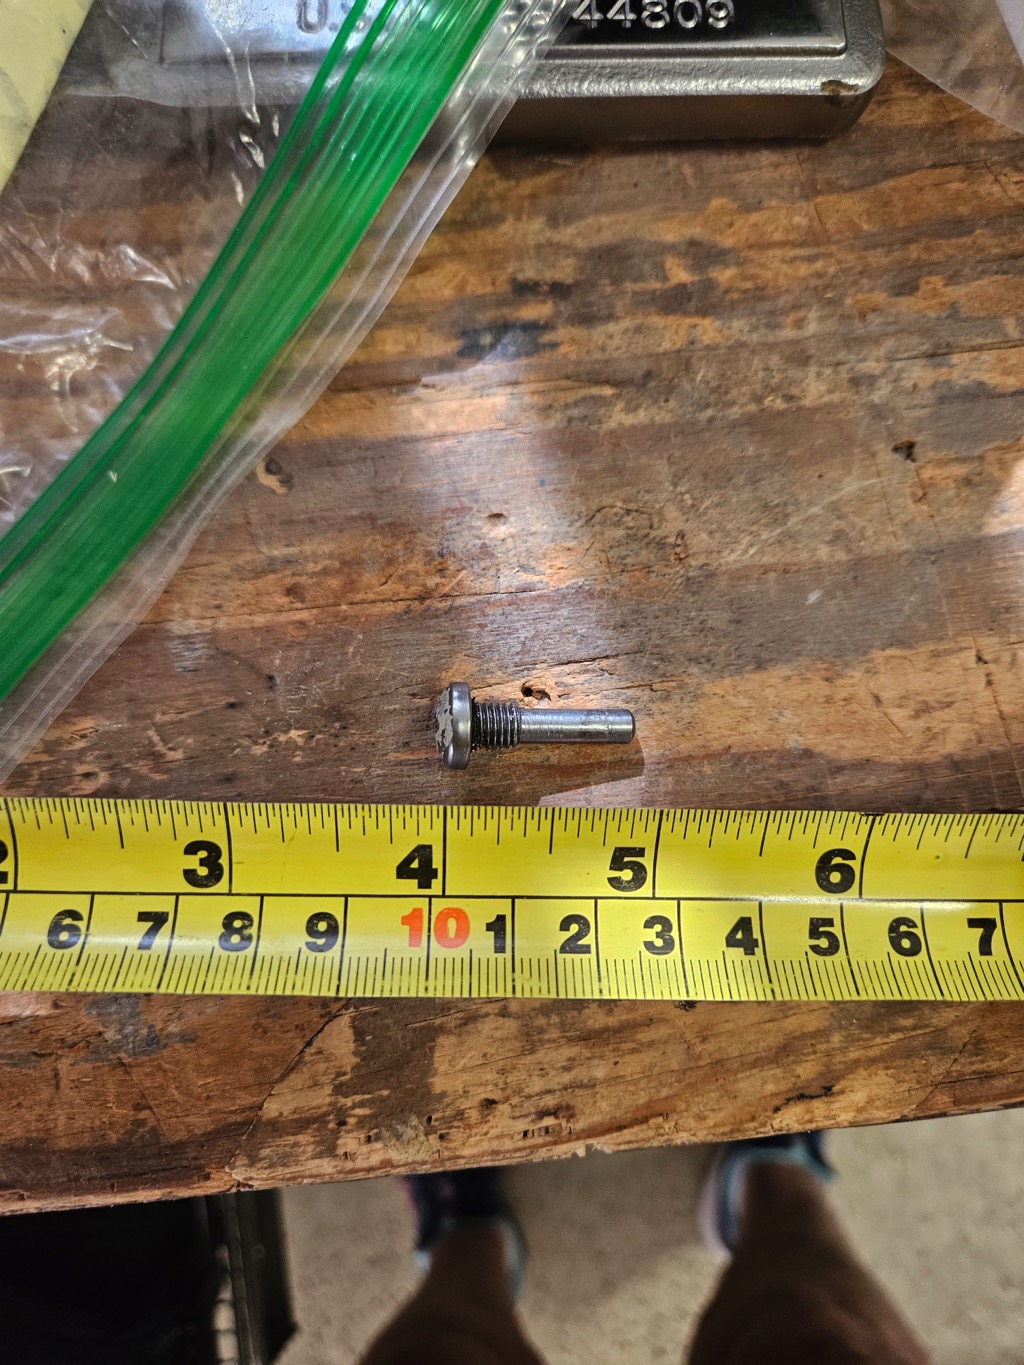
I started this post a year and a week ago so I think it is about time I get the boat back together. I have one last (I am hoping it is the last question. Does anyone know where this bolt goes? I had it in a bag labeled Shifter Yoke Starboard. But it is not from the real shifter yoke in the gear housing.
Why is there always one part left over????
I have looked at the parts manual and can't find it but it is a little blurry on some pages.
Attachments:

Please Log in or Create an account to join the conversation.

Slipping gear or Prop 5 months 2 weeks ago #148528

Yes, it is the pivot pin for the shift cradle. I have no idea what you have installed in its place.

Please Log in or Create an account to join the conversation.

Slipping gear or Prop 5 months 2 weeks ago #148529

  • ed-mc
  • Offline
  • Platinum Boarder
  • Platinum Boarder
  • Posts: 1395
  • Karma: 232
  • Thank you received: 114
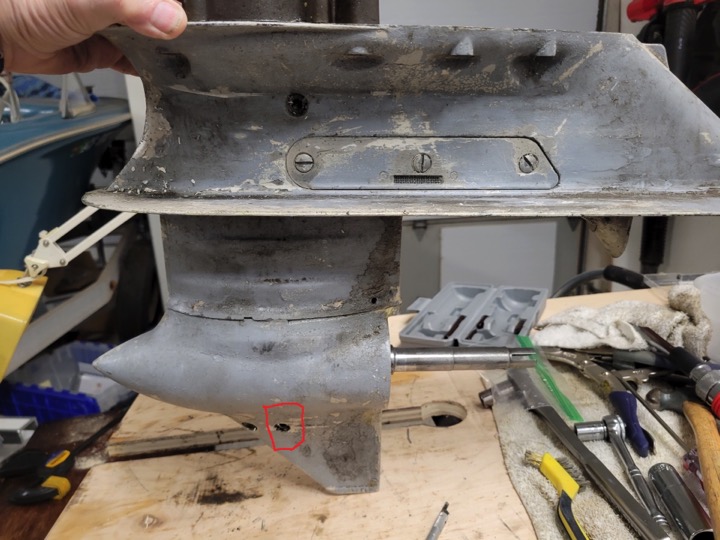
You should be able to get that pivot pin installed without taking the entire gearcase apart. Find the hole where it's supposed to go; wiggle the gear shift lever around a bit, while looking in that hole with a strong light. You should be able to see the shift yoke move, and the hole where the pin is supposed to go.

Take a scribe or similar tool and stick it in there, to align the hole in the yoke with the hole for the pin.

Once aligned, insert pin and tighten down. Put a light coating of sealer on the threads of the pivot pin and also on the underside of the screw head. There should be an O-ring there in a groove on the underside, IIRC.

BTW that pin is part number 35 in the gearcase diagram.

Good Luck!!

Please Log in or Create an account to join the conversation.

Slipping gear or Prop 5 months 2 weeks ago #148530

If this the bolt that goes from the outside of the gearcase to hold the gear shifter, I have a bolt in there. Is it worth it to take that one out and look at it? I don't think I replaced it but I can check my orders.
Attachments:

Please Log in or Create an account to join the conversation.

Time to create page: 0.334 seconds

Donate

Please consider supporting our efforts.

FG Login

Glassified Ads

Gator 9" wheels Wanted
( / Wanted)

noimage
04-24-2024

1969 Stern Craft Boat 19'
( / Boats)

1969 Stern Craft Boat 19'
04-08-2024

‘62 Dorsett Catalina
( / Boats)

‘62 Dorsett Catalina
04-08-2024

FiberGoogle

Who's Online

We have 6712 guests and 2 members online