Making Boat Seat Cushions
This impressive and comprehensive pictorial was written and photographed by Andrew Gott. It was originally published in the forums, but Andrew has given us permission to reprint it here. All rights are reserved by the author and may not be reprinted without his permission.
A few members have expressed some interest in a 'tutorial' showing how I made my boat seats... So, Today I did a little 'practice' seat, so I could take step by step photos of how it's done.
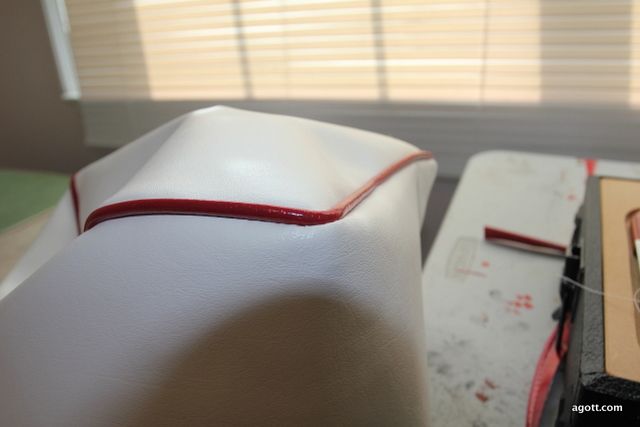
This is what we're going to end up with...

It's a basic, plywood based cushion, like you'd find in a seat. The same basic design could be used for seats, seat backs, settees- wherever. Of course, this one is smaller than most you'd make for a boat- But you just need to size it to however big you need...
First of all, You're going to need some tools and materials.
Tools-
Sewing Machine-
This is a big one. You CAN use a household machine for some work, BUT keep in mind that they are NOT intended for sewing material this heavy. You might have to simplify your work a bit, so a lighter duty machine can handle it. This might mean no piping on the seams, since it will be fewer layers to sew through. Don't even THINK of using your wife's machine (unless, of course, she agrees to it!)- You are likely to screw up the timing or worse- sending it to the shop for repairs.
An alternative is to find an older household machine, think 1960's or before. There are a ton of them out there, and they can be had pretty cheap if you look around. They are usually a lot tougher than modern machines, the insides are usually all metal, as opposed to the plastic found in most of today's machines. They'll probably have an external motor, look for 1 amp or more. If you can't find one locally, try Ebay. Lots of great deals on there. These older machines will allow you to work with thicker material.
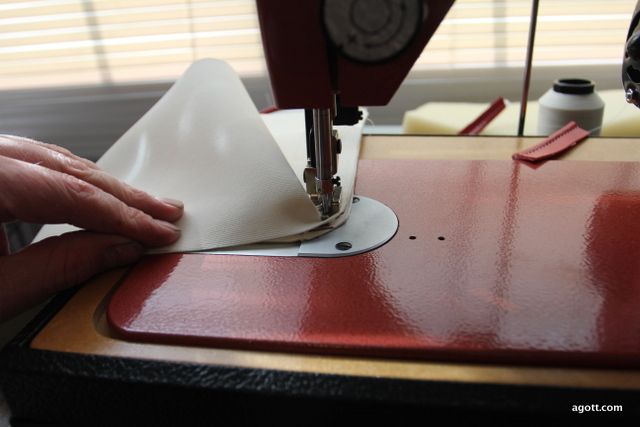
The ultimate, though, is to use a true industrial machine- especially one with a walking foot. Keep an eye out for used ones- I see them on Craigslist all the time. New ones are not cheap, but in my opinion worth every penny. This is my machine, a Sailrite LS-1-
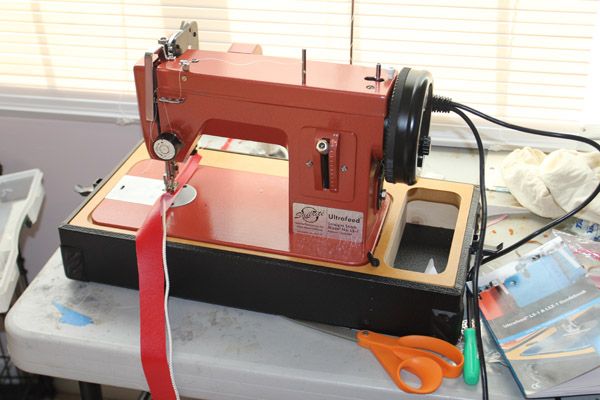
It is a compact, portable industrial walking foot machine designed specifically for this type of heavy sewing. The top foot 'walks' as it feeds the material through, which results in easier feeding and far more consistent stitching.
Use the best machine you can get your hands on, but don't let not having an industrial machine stop you- There is a lot that can be done with a heavy household machine.
Needles-
Your machine will need a good supply of needles, bigger than the ones that are usually used for home sewing. You'll want at LEAST #16 or #18 needles (the bigger the number, the thicker the needle). Some like to use leather needles for vinyl. I use a #20 needle in mine, but that's bigger than a lot of home machines will take.
Scissors-
This is a pretty basic item, but not something you want to skimp on. Go buy a NICE pair of scissors from a fabric store, intended for fabric. Cheap scissors are frustrating.
Materials
Vinyl-
You want to use a good grade of MARINE vinyl. There are a lot of vinyls out there, but not all of them are suited for use on a boat. The interior vinyls will fade quickly in the sunlight, and will be prone to cracking and peeling over time. Most marine vinyls are fabric backed, which makes them tough.
Some fabric stores stock marine vinyls- The Jo-Ann stores near me have it. It runs about $15 or so a yard, in a 54" width. They have a very limited color selection available, though. There are plenty of places online to get it, and some are priced pretty well. There are HUNDREDS of different colors to be had.
One tip- Make sure you get all the material you'll need at once. If you don't buy enough, then go back later, the material might not come from the same roll- and might not be the same dye lot. The color will be close, but it might not be a dead-on match.
Thread-
Using a good thread is as important as a good vinyl- and often overlooked! Don't even THINK about going to the local fabric store for thread- They don't have what you need. What you want is a bonded polyester thread intended for outdoor use. The threads in fabric stores are a spun thread, often a cotton poly blend... They will not last long outside. You might get a few seasons out of it, but with all the time and money you are investing in the project, use the right stuff.
These industrial threads come on large cones- You'll likely want to use v-69 size. It is available larger (v-92), and smaller (v-46) as well. It's nice to have the strength of the 69, but some lighter machines can't take it- in which case you might need to use the 46.
Home machines are notorious for having trouble with these industrial threads... If your machine simply won't do it, you CAN use a household thread, just be aware that it will have a limited lifespan.
Also, make sure that you pull the tread from the TOP of the cone, using a cone stand. That's how they are designed to work.
Foam-
You're going to need foam to fill the seats with. There are a lot of foams out there, of various grades. You want a medium firm foam that will support a person sitting on it without bottoming out. You also want a foam that doesn't absorb water, if at all possible. The best foams for boat seats are an open cell that passes water through it. There are also closed cell foams available, but they are pricey and tend to be kind of hard.
Staples-
You will be stapling the vinyl to the plywood backing. use a heavy duty stapler with 't-50' staples. Make sure you use Stainless steel or Monel staples, so they don't rust! Monel is more corrosion resistant, so plan on using it in a saltwater environment for sure.
Ok, So now on to the good stuff.
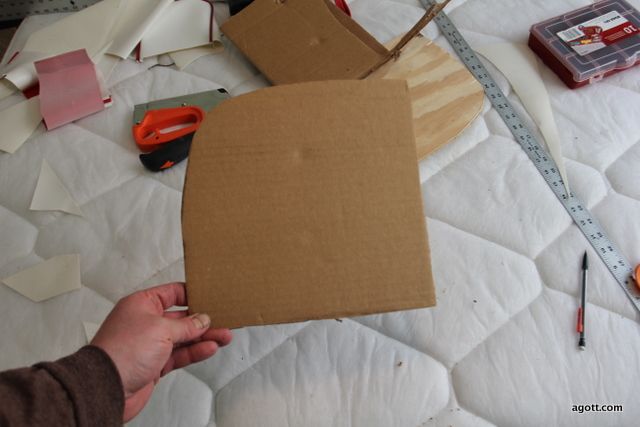
First, you are going to need a pattern in the shape of the cushion that you want to make. I like to make mine out of cardboard, since they hold their shape well. Get the pattern PERFECT- The finished cushion will only be as good a fit as the pattern that you start with.
Here is the pattern we're using-
This cushion will have a plywood base, so we need to cut a piece of plywood to size-
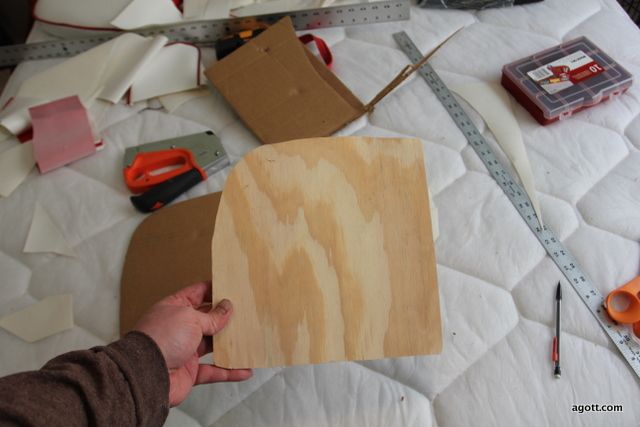
You should use a decent plywood, and certainly an exterior grade. 1/2" or so is sufficient. If I were actually going to use this one on a boat, I'd paint or coat it somehow... But for this demo I'll just leave it raw.
Now, we need to make some piping to go around the edge of the cushion.
Piping provides a clean way of joining a seam, adding strength and a touch of style, too. You can do piping in the same color, or a contrasting color, as you wish. I like a contrasting color personally.
You can buy piping, but it's easy enough to make it. One advantage to making it yourself, other than saving money, is that you can make ANY color that you want, rather than having to use what's available.
To make piping, you'll need a piping or zipper foot for your machine. They are inexpensive, and you should be able to get one at a local sewing or fabric shop. If you can't find one there, try E-Bay. My machine has a foot that's already set up to do piping, so I don't have to change it.
First, you need to cut a LONG strip of vinyl. If you cut it across the width, you'll only get 54" strips... You can cut them along the LENGTH of the material, to get them longer, or you can join multiple strips together to get whatever length you need. They need to be about 1 1/4" or so wide. Mark and cut them accurately, as it will make sewing them a lot easier. For this project, we're going to use a flashy red glitter vinyl for our piping-
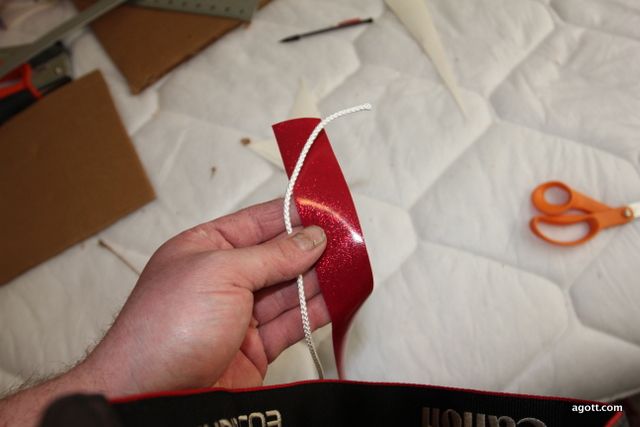
The piping cord is what we're going to sew the vinyl around. It will provide the form, shaping the vinyl, and adding structure to it. In this example, I'm using 1/8" nylon rope. Just make sure you use a synthetic material that won't rot...
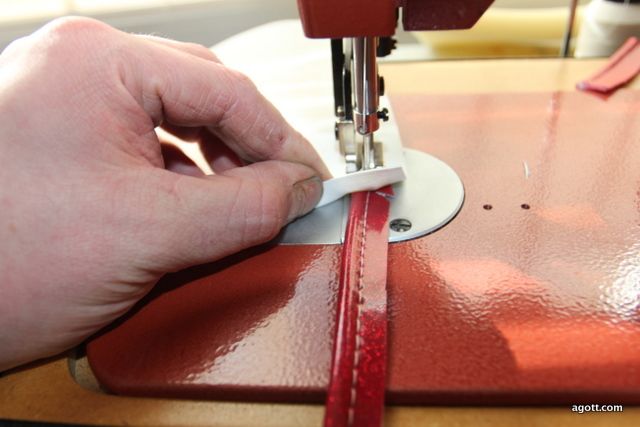
Lay the cord down on the strip-

Then fold it over-
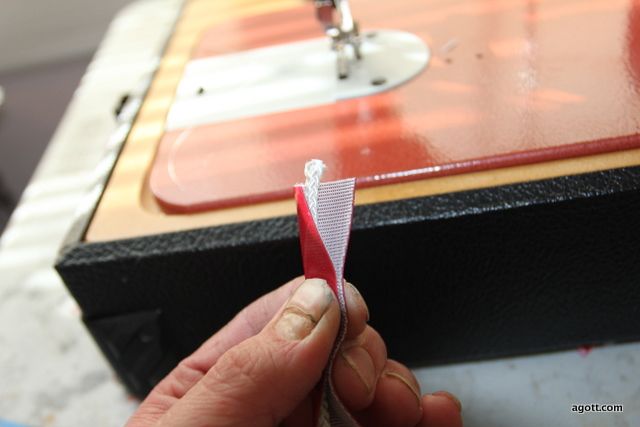
And place it under the foot-
You want the needle to be as close as possible to the welting cord- which you can only do with a welting or zipper foot. The closer, the better-
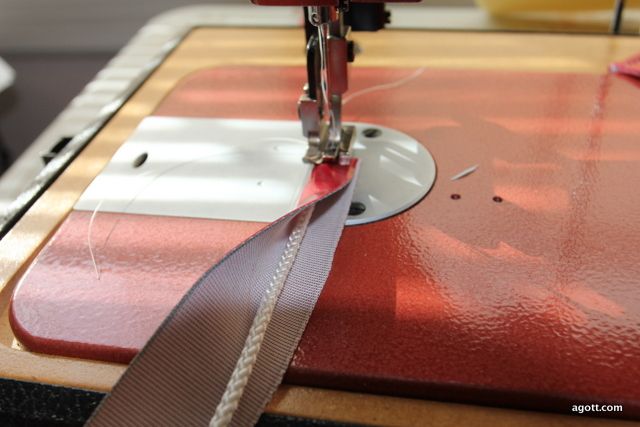
Start sewing it, feeding it into the foot as it pulls it along. Use a relatively long, straight stitch. With a piping foot, it'll pretty much feed itself, your job is to keep it even and lined up. Go slow, you'll be fine. This is the end result-
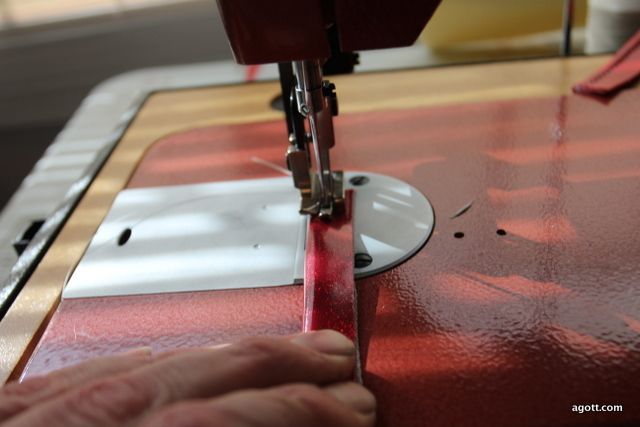
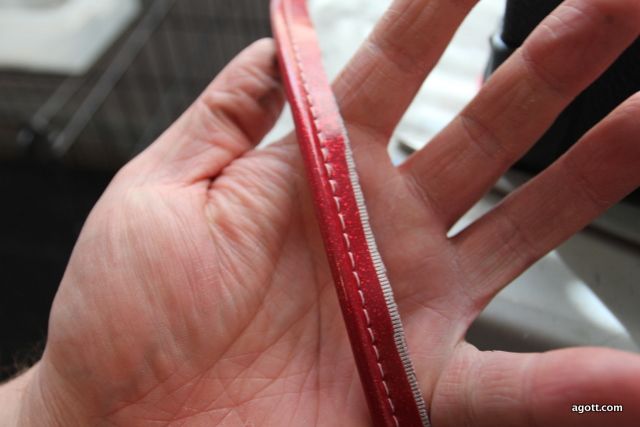
Before I begin a project, I like to make up enough piping to get me done... I make it in 20 foot long sections.
Next, We'll need to cut the material out for the top of the cushion... The 'technical' term is the PLATE. We'll use our template-
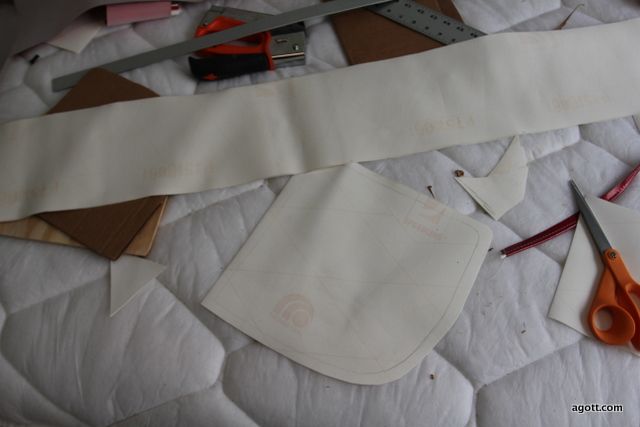
Mark it on the BACK of the vinyl. I like to use pencil. You can also use permanent marker, but make sure it's not going to bleed through! Some 'migrate' over time and will show up on the outside of your finished work.... That'll ruin your day.
You'll notice that I did NOT cut it on the outline- That's because I need a SEAM ALLOWANCE in order to join the pieces together... It needs to be at least 1/4", up to about 1/2". It's better to cut a little too much, since you can always trim it later.
The sides of the cushion will be made from a 7" wide strip of vinyl. This gives me plenty to work with to sew it on, and then stretch it over the foam and plywood when I staple it.
Now that we've got the materials cut, its time to start assembling it...
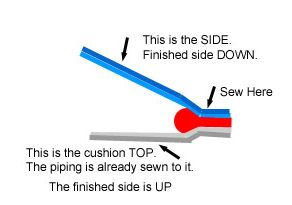
This is where it can get a little confusing... But, it'll make sense once you've worked it through and tried it a few times, I promise. First, you are going to sew the piping on to the cover, or plate material. You are going to sew it on to the finished side, with the piping facing OUT. But- You marked the shape of the cushion on the INSIDE- So you'll be sewing it from the back. Hopefully this diagram will help-
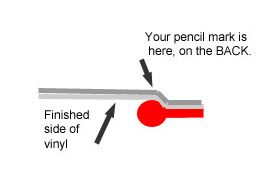
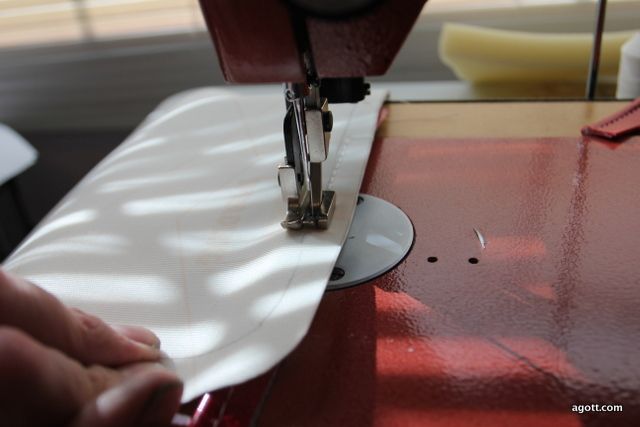
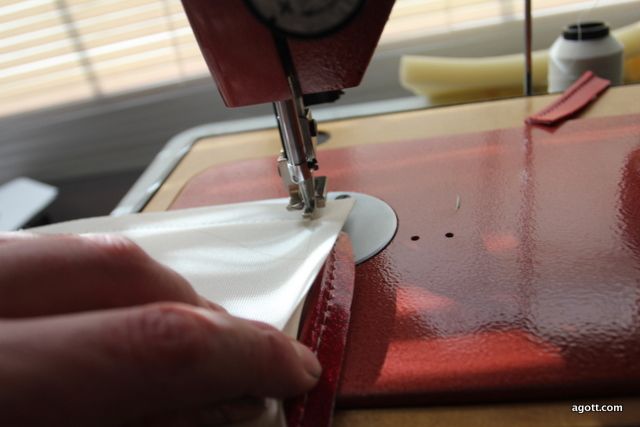
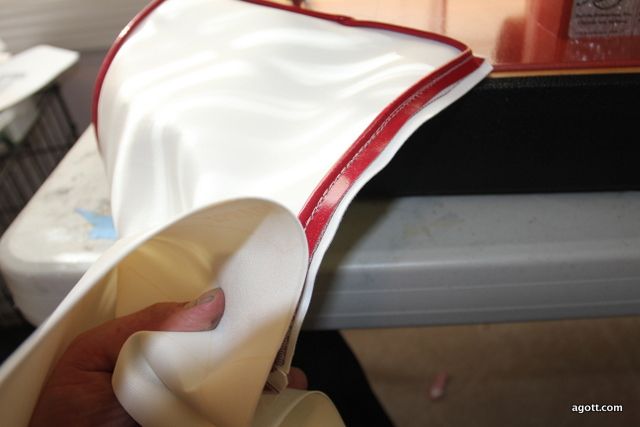
Start on one of the back edges of the cushion. This is how you'll run it through the machine-
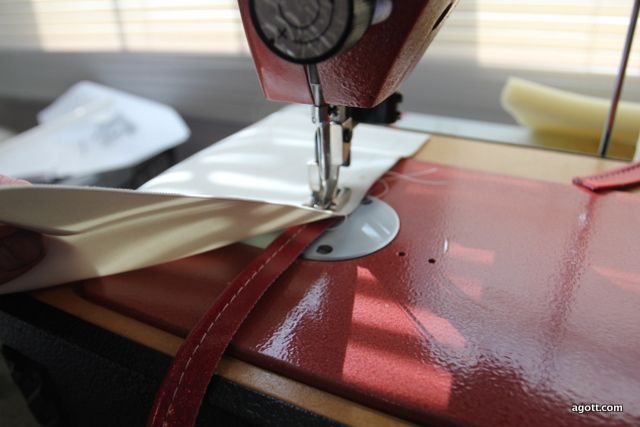
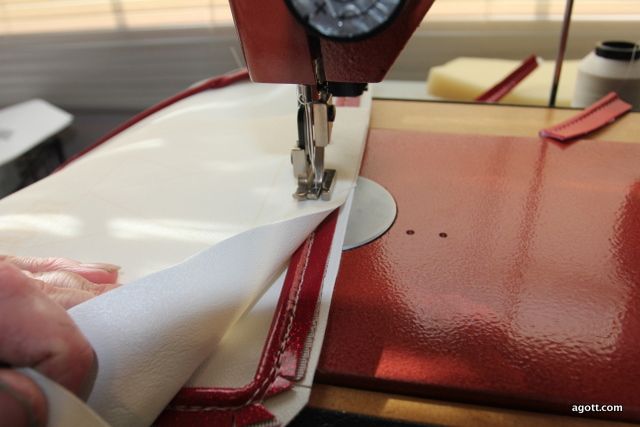
The finished side of the vinyl is facing DOWN, the piping on the bottom, and the line to sew along is on the top. The piping foot is still being used- It'll 'feel' the piping through the vinyl and help you to guide it. You'll need to feed the piping cord into the foot, and keep it all aligned on the line you marked as it feeds into the needle.
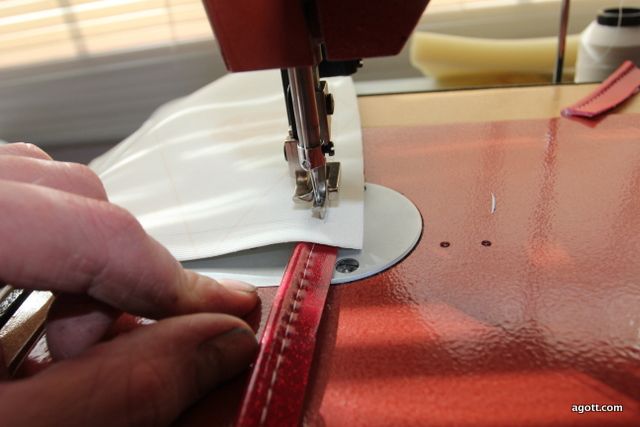
Don't start at the very end of the piping- Leave a small (2" or so) tail. You'll be tucking this inside later to hide it.
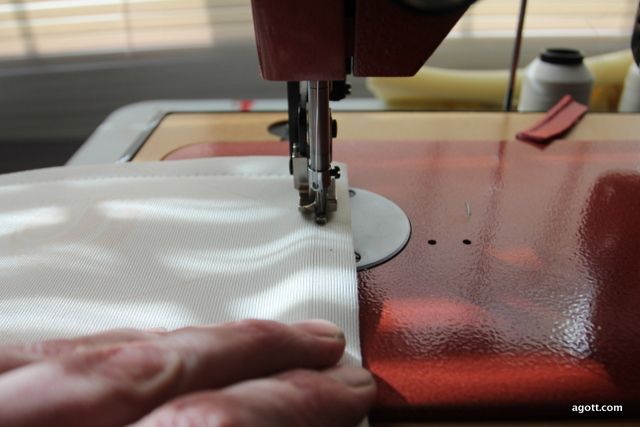
Keep sewing down your line. Use a straight stitch, with a medium length-
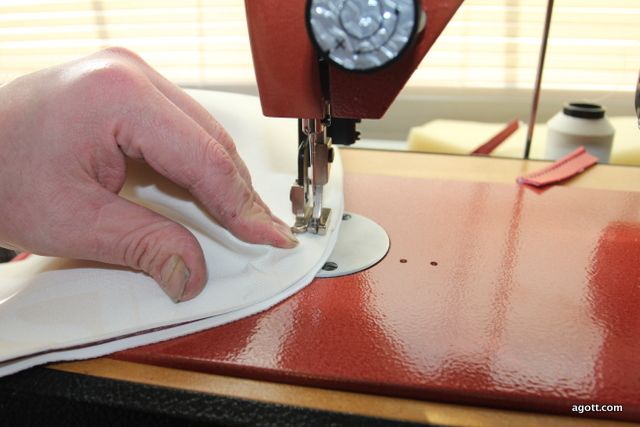
The 'straightaways' are easy, but curves and corners are a bit tougher. This corner is the gradual curve, which isn't too difficult. Just feed it into the foot, keeping the piping lined up with the pencil mark... just turn your work as you go.
The sharp corners are a BIT tougher, but still not bad. You'll want to cut a 'relief' cut in the piping, as shown here-
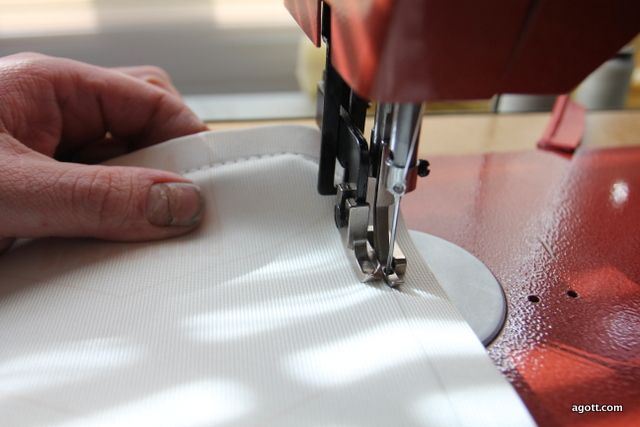
the cut is right at the corner, and it allows the piping to make a sharp bend. Sew right up to the corner-
With the needle still down through the material, lift the foot-
The needle will hold everything in place.
With the foot lifted, pivot your work 90 degrees as shown-
Now, you've got a 90 degree corner. Keep sewing down the straight edge-
Sew all the way around the cushion, doing all the corners in the same manner. When you get to the last side, stop about 2 inched short of where the joint will be in the piping. You're going to want the piping 'tails' to overlap, so you can tuck them in.
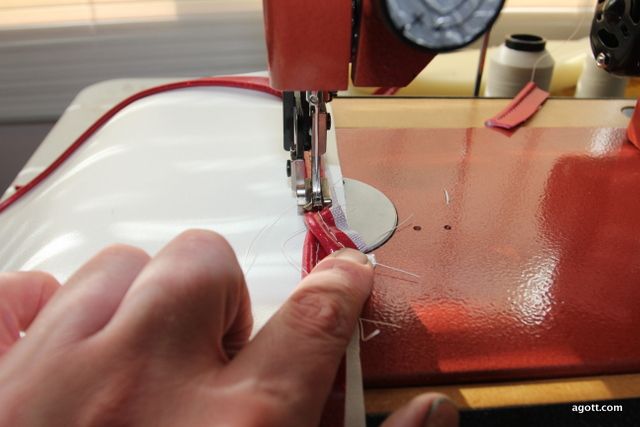
I find it easier to finish off the piping from the other side- So at this point, I flip the work over. Cross the 'tail' that you left when you started sewing with the other end of the piping, as shown here-
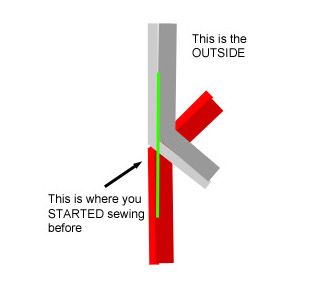
Then, sew across both,as indicated by the green line. This will tuck the ends neatly away, and also lock it all together. Here's how it'll look-
Now, you've got piping sewn around the outside of the cushion, following the shape you drew on the vinyl... Next, you attach the sides.
Keep in mind that some home machines will have a tough time sewing through this many laters, ESPECIALLY in the last step where you're going through the piping cord as well. You might need to simplify, or eliminate the piping all together, if you can't sew through all those layers.
Now we'll attach the SIDES of the cushion. This is how it's put together-
Note that the LIGHT side of the vinyl is the finished side. I used BLUE on the piece we're attaching now, for clarity.
Here's how it looks-
Just as with the piping, start on the back of the cushion, since you'll have a joint here. Leave a tail, just like with the piping, about 4 inches or so long.
Sew along the edge, to the corner-

Then, just like when you were putting the piping on, sew right up to the corner.... Leave the needle down, then pivot it around the corner like this-
Keep sewing it like that all the way around, stopping about 6" or so short of where you started.
Now we need to join the two ends of the side panel. Now, Some people will do this differently- They'll measure it accurately, add a seam allowance, and stitch it before hand. But, I find it a lot easier to do it this way.
Overlap the tow edged, mark them, and cut them like this-

Here's how it'll look when you're done-
Hopefully, it'll make sense to you. Once you've done it once or twice, it's easy.
then, continue sewing around the outside edge of the cushion, like you were doing before. Now you've got this-
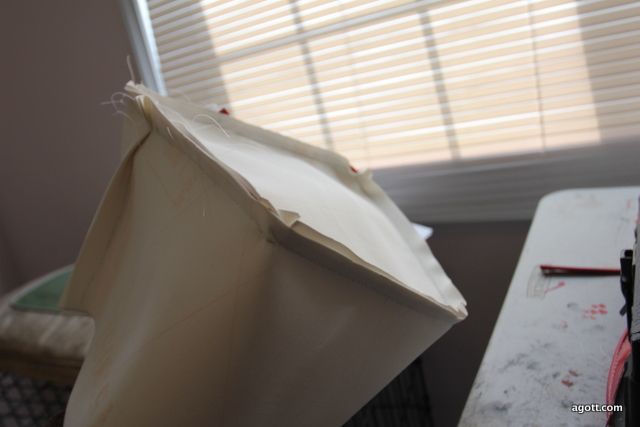
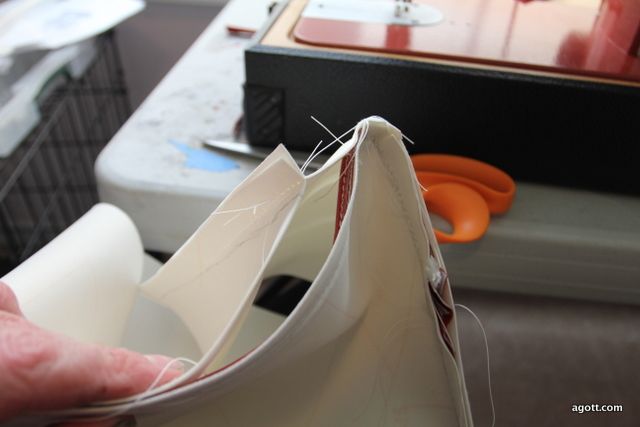
Now it's time to flip it 'right side out' and check our work. With luck, It'll all be perfect. But, odds are, there will be a spot or two that aren't quite tight, and look like this-
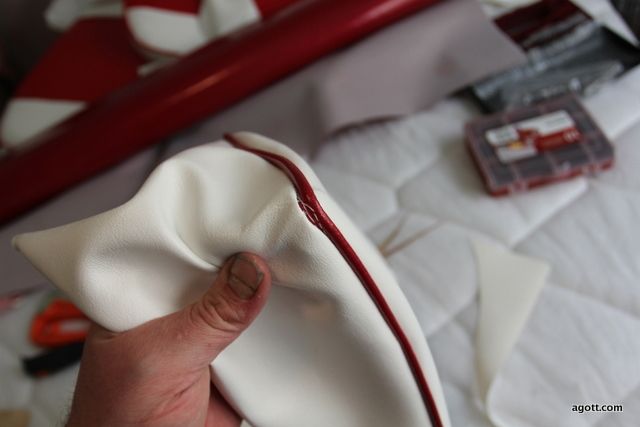
you can see some of the stitching on the piping, since the seam wasn't close enough to the piping. That's OK, though- Just flip it back over, stitch it closer, and flip it over again. Now it's right (and tight!)-
The sewing part is DONE. Give yourself a pat on the back- It wasn't THAT hard, was it??
Now we need to cut some foam.
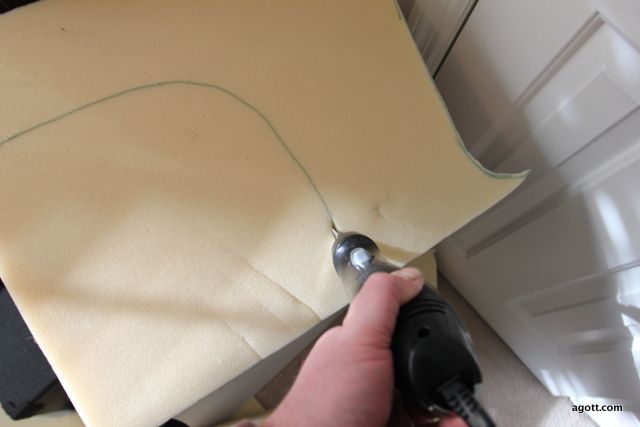
I'm going to use 3" foam for this. In a medium stiffness, it is great for seating- Firm enough that it doesn't bottom out, but soft enough to be comfortable. We'll use our template here, too-

A sharpie is the easiest way to mark the foam. Notice I didn't follow the outline- The key to a full looking cushion is to overstuff it a bit. Just how much will depend on the size of the cushion- for one this small, about 1/4" to 1/2" all around will be sufficient. For larger and longer cushions, you might want to use an inch or more.
The easiest way to cut the foam is an electric carving knife- So start scoping out the local thrift stores for one if you don't already have one around.
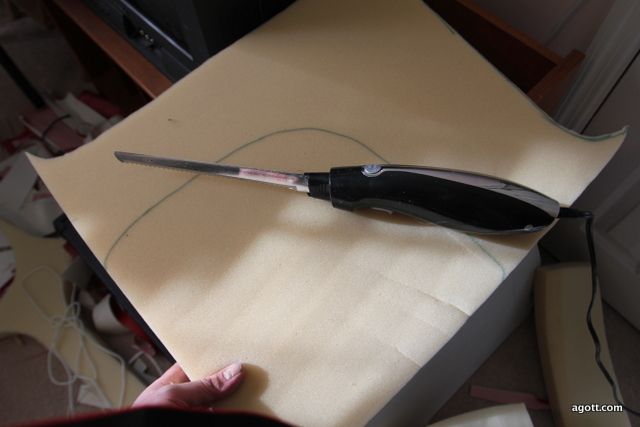
They aren't very expensive, about $15- $20 new, and WELL worth it. There is simply no better way to cut this stuff!
Cut out the foam insert, being careful to hold the knife at a 90 degree angle to the foam, so you have a nice, square edge-
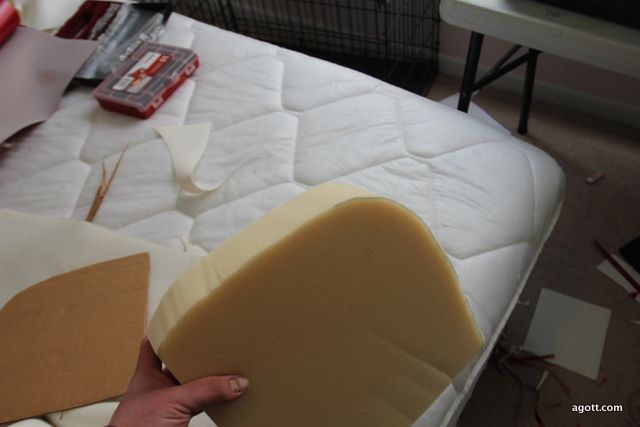
Once you're done cutting, you will have this-
Now, we're ready to put it all together.
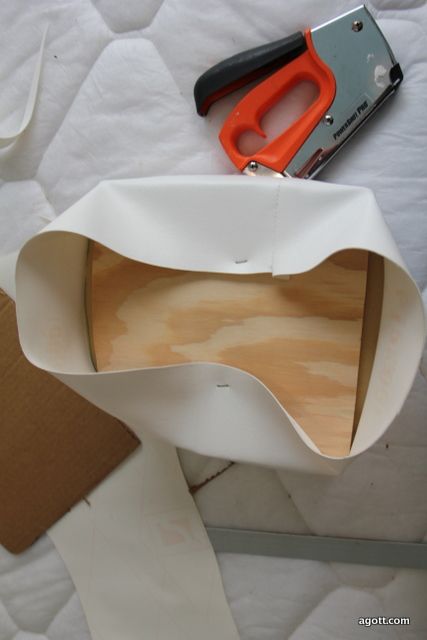
Put the foam in the vinyl, then put the plywood on top. Make sure you've got the plywood centered. Pull one side tight, and staple it to hold it-
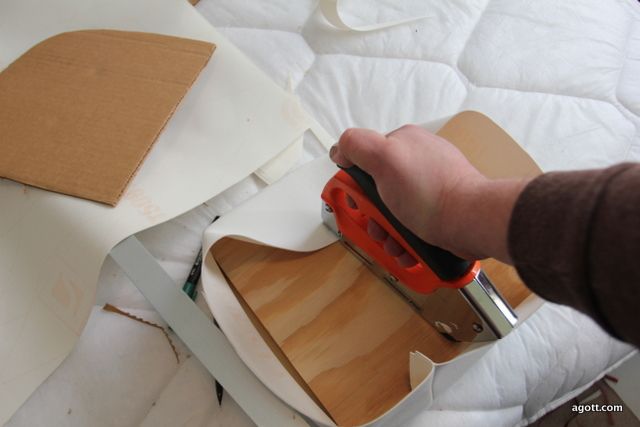
Start on the front of the cushion, since it's easier to get it tight and straight, and that's what will be showing.
Now, go to the opposite side, pull it tight, and staple it again-
Keep pulling it tight, then stapling, alternating sides to keep it all tight and even... You'll want to use plenty of staples, to hold it all in place... Then you can trim off the excess-
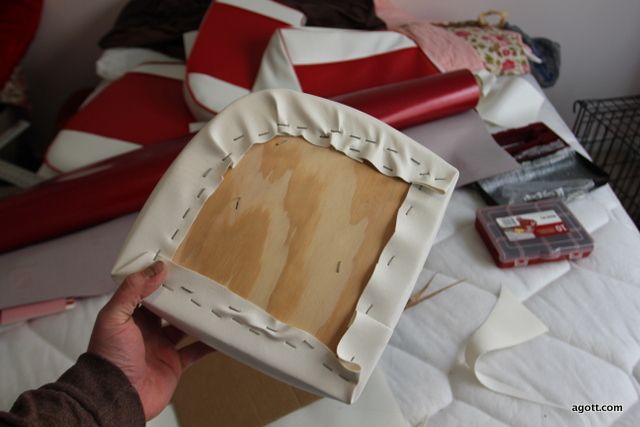
Now, it's DONE!
Wasn't that easy?
Here's how it looks-
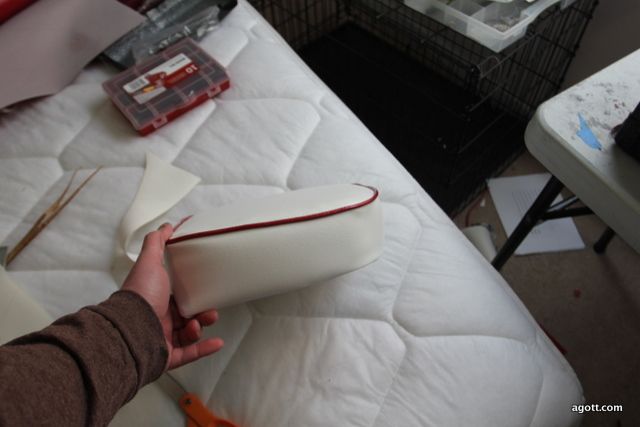

Now it's ready to install. HOW you install it depends on the application- You can screw into the plywood from behind, just make sure that your screws don't poke through the backing into the cushion.
Personally, I install stainless steel 't' nuts in the plywood before I put the seat together, and use machine screws to install the seating.
Hopefully this will come in handy for someone who wants to try to tackle their own boat upholstery projects... I'll get in to more complex items, like removable cushions, and some 'decorative' work later, if there is interest... And, if anyone needs anything clarified, post it! The odds are, if you don't understand it, someone else is having trouble with it, too!