Welcome, Guest
Username: Password: Remember me

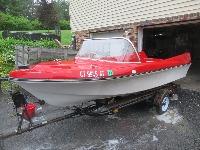
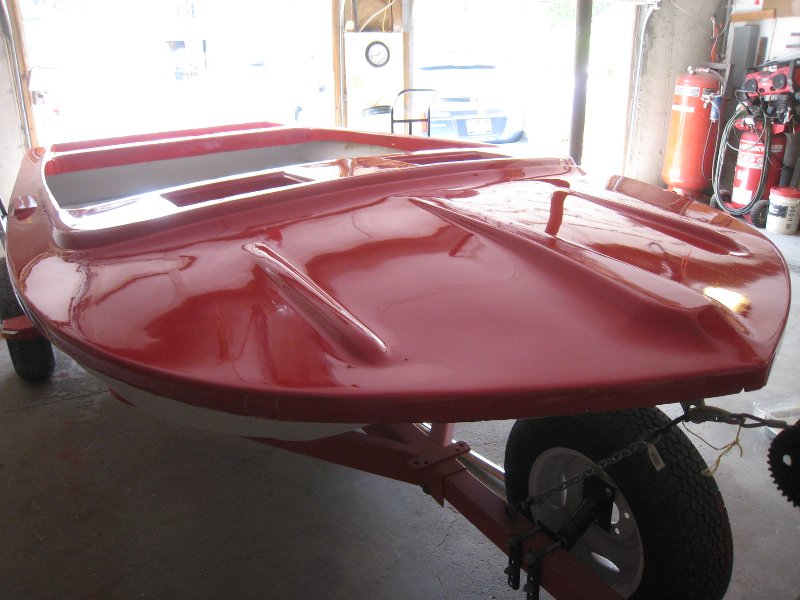
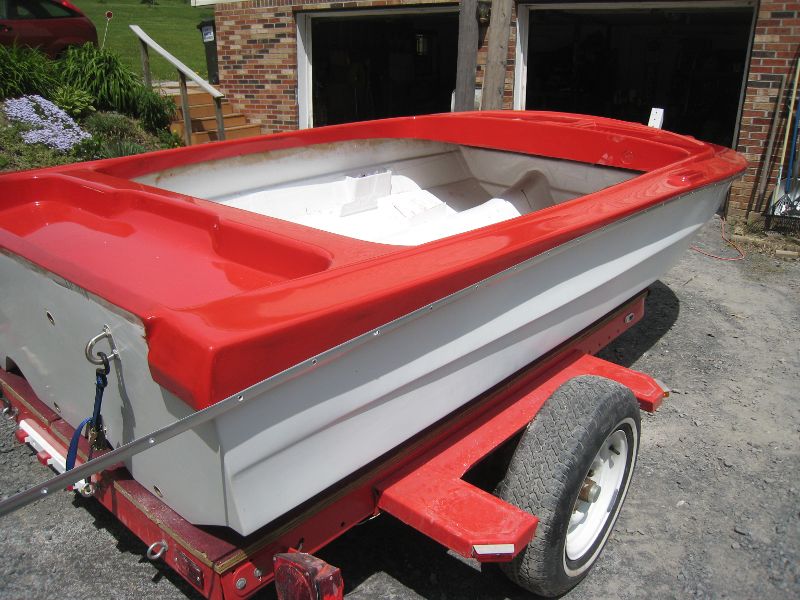
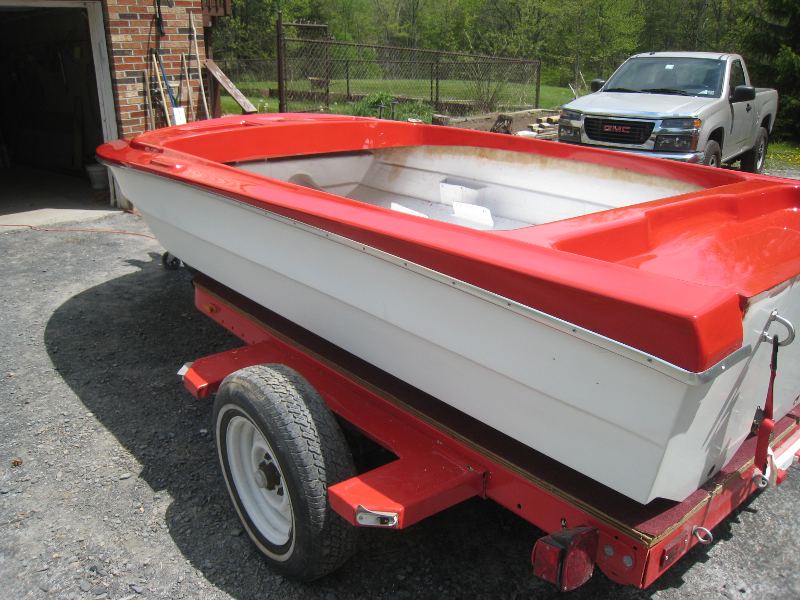
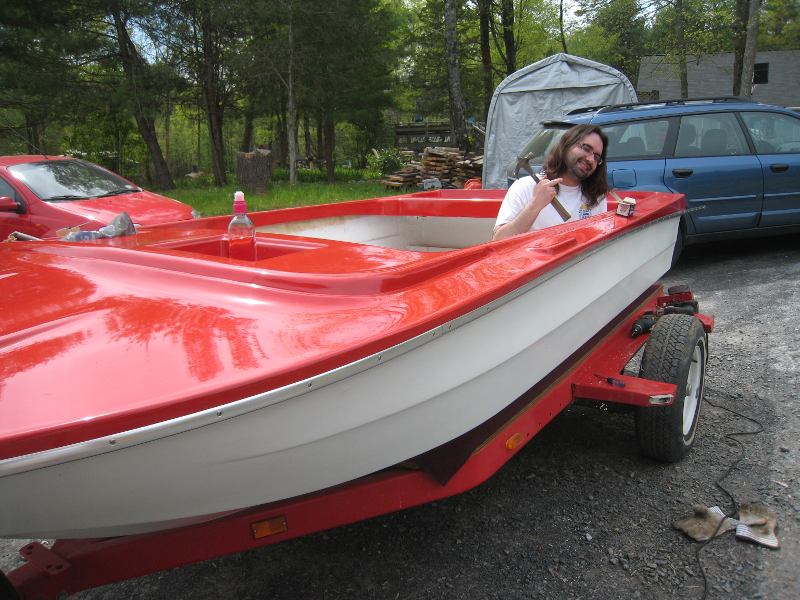
TOPIC: Progress on my Power Cat 14T

Can't get gray spots covered 13 years 11 months ago #5287

I don't think you would call this progress. I started wet sanding about 6:30 a.m., and other than breaks for food and resting my damaged shoulders, it's all I did all day. By the end of the day (about 5:30) I had another coat of paint on, but am getting very frustrated by not being able to cover gray areas. The pics show some larger area problems. I'm still getting small air bubbles all over my finished surface for some reason. Any suggestions?

By the end of the day, my back is so screwed up I can hardly walk. What I thought was a reasonable goal weeks ago to have the deck painted by the end of April was foolish. It's not gonna happen.

Frank


Attachments:

Please Log in or Create an account to join the conversation.

Re:Can't get gray spots covered 13 years 11 months ago #5288

Frank,
is this paint thinned? It acts like it's too thin. I don't have any suggestions for you. I've never brushed one, always spray, but it looks as if the paint is too thin.

Please Log in or Create an account to join the conversation.

Some people are like slinkies... Not much good for anything, but they sure are fun to push down the stairs.

Backward Progress on my Power Cat 14T 13 years 11 months ago #5290

I've tried everything Doug, thinned, not thinned, barely thinned. All I can think of when I'm doing this is I bet spray would cover. While I have all the "stuff" to spray, I have absolutely no experience. So set up for spray and have this be my first project? I am really at a loss.

Boy the things I know now I sure wish I had known when I started this project. I have a feeling I took a neat old boat and have screwed it up. I'm still going to have fitment problems, rub rail or no.

When you build a custom splash pan and 'glass it to the transom, glass the deck where you want it to sit on the hull first, then tie everything together back at the stern. Because I didn't do that, and even though I had the deck fastened to the hull with machine screws a number of places when I was tying in that new splash pan, it is still badly sprung on the starboard bow. I'm spending all this time painting a deck I don't know I can even get attached to the hull.

On top of that I went and sliced 18" of the hull lip away thinking the deck and hull met too tight for the rub rail, glassed in another piece of 'glass, and now realize it was all for nothing. I thought the bottom of the "j" rub rail had to fit up under the deck lip. Nope. And of course, it's right where I have the "sprung" problem and it looks like crap. Something else to fix that wasn't broken to begin with.

Finally, and I can't mention this often enough, don't change paint types unless you want to sand the old stuff all away and then still not know whether in the final analysis you're going to get away without compatibility problems. Plus expect it to take a whole lot longer than it would have otherwise. My back and shoulders can't take much more of this work. I was ready to give up a number of times yesterday. I'm not having much fun.

Frank

Please Log in or Create an account to join the conversation.

Re:Progress on my Power Cat 14T 13 years 11 months ago #5291

Frank, respectfully, I would give my sandpaper to my wife to lock it up where I can't get to it, then I would go get some visqueen and a box fan at Lowes, drape the garage and shoot three coats all 20 minutes apart, then STOP LOOKING AT IT for three days. If I felt the itch to sand it some more I would take a ride in that street rod at about 90 MPH until it wore off.

How much worse could it be?

Bernie

Please Log in or Create an account to join the conversation.

Re:Backward Progress on my Power Cat 14T 13 years 11 months ago #5292

Spraying is simple. Even if you've never done it before. The only thing I worry about now is if the paint you have already applied will stay down if you were to spray over it. I mainly say this because I have no experiance with the paints you have used and can't really predict how things would react.

With that said, I am going to say what I would do if I were in your shoes. And I've been in your shoes before. Not in the exact same situation, but I know what you're going through because I've had things go like this before. Anyway, I would do one of two things. I would either paint a test panel with the brush like you've been doing and then mix up some paint and spray it to see how it reacts.... and if the brushed surface held I would spray the piss out of it and go.

Or I would quit fooling with the paint all together, assemble the deck, put that sucker together, and go boating for the summer and have fun. It looks good, it has a few bad spots, but who cares? Take it out, play with it, enjoy it, and then come back in the fall or spring after the paint has set really well (and after you've had some time to think of what you want to do) and then sand it, maybe spray a coat of sealer over it, and shoot it red.

It's not worth stressing over and killing yourself over. It's just an old boat. I know you don't want to think of it that way because it's your baby, but sometimes I've had to do just that to keep from getting totaly burned out or walking way and never finishing something. If you put it together and put it int he water I promise you that you will almost totally forget about those bad spots. The feeling of being out on the water in something you saved and brought back is totally rewarding.

Anyway, those are the two things I would consider. Honestly I would probably just put it together and not even worry about spraying it for now. I'd just finish putting her together and go have some fun. :)

Wish I could help more. Why the heck do you live so far away? Don't you need to take a vacation to Louisiana for about 2 weeks? ;)

Please Log in or Create an account to join the conversation.

Some people are like slinkies... Not much good for anything, but they sure are fun to push down the stairs.

Are the gray spots only on the inner walls? 13 years 11 months ago #5293

Frank,
where are the thin areas that are showing through? Only on the inside walls around the interior area? If it is I'd cheat big time. I'd find me a close matching red spray paint in a rattle can, get down low inside the boat and spray those sides to cover those bad areas. I'd spray dry coats at first to get it to cover and then spray a little wetter after it was covered good.

You probably would end up with over spray on the top edges but that could be easily polished out and by spraying just the sides no one would notice if there was a color difference. Heck, I think I would just run a tape line around the top side and cover the deck and spray it. You would end up with a tapeline but no one would really notice it and you could always lightly sand it and polish it where it didn't show. Just an idea!

Please Log in or Create an account to join the conversation.

Some people are like slinkies... Not much good for anything, but they sure are fun to push down the stairs.

Re:Progress on my Power Cat 14T 13 years 11 months ago #5295

Good points all. I appreciate the ideas, and I'm going to try some out.

Doug, my concern with rattle can paint on those gray areas is compatibility. Who makes polyurethane red paint in a rattle can? Then again, what do I have to lose? Seems to me Eastwood sells some aftermarket spray thing that acts like a rattle can but you put your won paint in it. Of course, when I went to check, their site is down!

First I think I am going to stop painting for now and work at getting the deck glassed to the hull. I have a problem there and getting it out of the way (if that's possible) would be a load off my mine. Right now I'm obsessing about paint and that deck/hull seam. Taking one of those out of the picture (or maybe both) would help a great deal.

I have a mind to just say screw it if I can get that seam glassed together and just rig it and go boating.

Frank

Please Log in or Create an account to join the conversation.

Re:Progress on my Power Cat 14T 13 years 11 months ago #5296

Doug, I agree, at this point anything to get it past the deck paint.

Just an observation, I only use foam brushes for spreading stain on wood. It always gets little bubbles. The bubbles break with stain, but with a fast flash reducer in (much thicker) paint they probably don't. I know a lot of people who do their own paint work, and none who use a brush on anything smaller than a house. (Or larger than a paint by numbers painting.)It is an approved technique by people who know their brush work but it seems as if it has much more technique required than spray painting. I used a gallon of Imron on each boat I have painted and ended up with 1/3 gallon left over and complete coverage. With yellow I had to do 4 coats to cover, with red only three. How much paint have you brushed on and sanded back off?

I have no idea why the same paint would react badly when sprayed over a brushed coat. If I was worried, I would spray a 'tack coat' (VERY light coat) and let it sit for 10 minutes more than the paint can recommends, then a little heavier coat, then lay it on like asphalt. But only AFTER the brushed coats had FULLY CURED.

The deck is mostly a horizontal surface, hard to get runs on that. Lay it down a little thinner than asphalt on the interior vertical surfaces.

Just my.02, worth EVERY PENNY YOU PAID!

Bernie

Please Log in or Create an account to join the conversation.

Re:Progress on my Power Cat 14T 13 years 11 months ago #5297

Bernie, first of all this paint can says "dry to touch in 2 hours, sand and re-coat after 16 hours." It says nothing that differentiates brushing from spraying. That's about it.

I'm going to glass the seam and take more painting under advisement... ;)

Frank

Please Log in or Create an account to join the conversation.

Pre-val? 13 years 11 months ago #5299

I think I'll try one of these to cover those gray spots.

"Portable, Disposable, No Wire Or Hoses, Spray Up To 16 oz Of Paint w/ Perfect Pattern, Easily Cleaned By Spraying Appropriate Thinner Through Sprayer For 3 - 4 Seconds, Can Be Used w/ Glass Container Or Any Container"

770-5030 is the NAPA part #.

Frank
Attachments:

Please Log in or Create an account to join the conversation.

Re:Progress on my Power Cat 14T 13 years 11 months ago #5302

PC1000 wrote:

Bernie, first of all this paint can says "dry to touch in 2 hours, sand and re-coat after 16 hours." It says nothing that differentiates brushing from spraying. That's about it.

I'm going to glass the seam and take more painting under advisement... ;)

Frank


That sounds like a plan to me. Before you start brush some of your paint on some type of test panel so you'll have something to test your spray paint on before actually spraying it on the boat. Also, I've sprayed lacquer rattle can paint over polyurethane before with no problems so I don't think you'll have an issue with paint lifting. But do a test panel to be sure.

Now, I hate to throw a monkey wrench into things right now, but...... I saw on the powercat forum (i think it was there) that you had a gallon of fiberglass gel resin to use with the seam. I hate to even say this, but I have NEVER seen any application where the gel would hold in a structual capacity. I don't think it is designed for that. I may be wrong about this so check it out with some others if you want to. I know you want and need to glass that sean for strength, but I'm afraid the gel won't do what you need it to do.

With that said, if you decide to use regular resin instead of the gel, I know you are concerned about drips and runs with the liqued resin. Here's what I do.

I tape masking paper about 4" below the seam and down onto the floor a bit.

Then I cut my glass into 18-24" sections.

I lay a piece of glass into one of those big disposable tin proasting pans and dip a 2 or 2 1/2" paint brush into the resin and brush one side of the glass wetting it pretty good but not drippingly soaked.

Pick that glass up and spread across the seam and smooth hout with my hands. (I always wear latex gloves)

Then brush another section of glass and overlap the first one by about 1" and smooth it out.

I do this about 4 times and then go back to the start and brush resin over the top of the glass to finish wetting it out.

It's really easy with two people, one brushing the glass and one applying the glass. Then after you get 3 or 4 up one guy can brush on the top coat while the other starts brushing the next sections of glass.

The brush helps you to smooth up any bad runs or drips and the paper catches anything else. The main thing you have to be concerned with is to make sure you don't mix your resin so hot that it dries before you can get the overlayer brushed on.

Please Log in or Create an account to join the conversation.

Some people are like slinkies... Not much good for anything, but they sure are fun to push down the stairs.

Re:Progress on my Power Cat 14T 13 years 11 months ago #5303

Thanks again Doug, boy you're right at it today. I think my test panel for that preval sprayer will be a part of the boat that shows gray. At least that's how I feel right now. I'm about done caring what it looks like!

I get ya on the 'glass stuff. Thanks for the tip on the gel. I don't really need to use it, but got it for free from NAPA because the can was dented? I thought it was made for vertical stuff?

Don't know if I'll have the luxury of two people to do the deck/hull seam. At least I have experience with fiberglass work. I'm gonna copy those steps you lay out and follow it closely, though I will probably work out bubbles with my chip brush. I had planned to do short strips such as you suggest, overlaying with wider strips all at once. We'll see how it goes.

Thanks again, I sure do appreciate the help.

Frank

Please Log in or Create an account to join the conversation.

Re:Progress on my Power Cat 14T 13 years 11 months ago #5304

frank i dont know what kind of paint your using,but im used to straight enamel(from the old days)and base coat clear coat,but im used to using a siphon gun,now im going to be painting the sunray with an hvlp gun,i have never used an hvlp before ,but im going to do it,i have 2 vaper brand guns,one for primer and one for color,i then am going to use my moms fiances more expensive gun for the clear coat,i guess what im trying to say is even though you have never done it before ,try it,it may work better to spray it all with your new hvlp gun,and it may be easier on your nerves,just practice on the spray pattern first on any surface you dont care about like a sheet of plywood,its easier to use a vertical spray pattern and put the paint on lightly,as you spray start spraying it on by pulling the trigger ahead of your boat ,then spray all the way to the back and dont let off of the trigger until your gun is past the boat,or you might get runs.
you can also spray by left to right and at the end of each stroke let the gun angle away from the boat ,justmake sure you dont point the gun directly at the boat then hit the trigger,i guess what im trying to say is try to feather the spray when starting and stopping a stroke,boy its hard to explain this in writing,can anyone explain what im trying to say any better,i read what i wrote and even i wouldnt know what i am talking about,lol.good luck frank but you dont need it you just need confidence in your abilitys,and you have proved through your tenacity that you have the skill,john p.s. keep the gun about the same distance from the boat the whole time,im gueassing about 12 inches.

Please Log in or Create an account to join the conversation.

\"too soon old,too late smart\" my pap

Twenty years from now you will be more disappointed by the things that you didn’t do than by the ones you did do. So throw off the bowlines. Sail away from the safe harbor. Catch the trade winds in your sails. Explore. Dream. Discover.“

---Mark Twain

Re:Progress on my Power Cat 14T 13 years 11 months ago #5305

Thanks John. I understand what you're saying, but that's only because I read your stuff all the time... :laugh:

Seriously, I get it. That's the way I use rattle can spray paint too, so I don't doubt I would "get it." My concern with spraying from the (untested) HVLP gun is how to get the right consistency, i.e., how much thinner to use. I'm not set up at all for the HVLP either. I think I have most the pieces, but am not even sure of that!

Frank

Please Log in or Create an account to join the conversation.

Re:Progress on my Power Cat 14T 13 years 11 months ago #5307

frank if you have an hvlp gun ,a compressor with a water trap,(if not you can get disposible water traps that screw on the gun between the hose and gun)then you have all you need,if your used to rattle cans ,and spray the way i said above ,with just a minamal amout of paint,but more coats(let it tack up between coats).
as for the consistancy try it on scrap metal or whatever you dont care about getting paint on,your gun should have come with directions,im going to use mine,lol.
the way i usually start is go to the paint store or call the store and ask every question i can think of,and by the way you can get cheat sheets(instructions on working with and thinning your paint) from them. even if you didnt get the paint there a localpaint store will help out with questions you may have.
heck frank i think your brave by brushing it on ,i would never try it,i would have runs everywhere,lol,john,ps go the your local auto paint store and get paint filters to pour your paint into,if it doesnt go through ,then thin it until it does,the filter looks like a paper funnel with a fine mesh bottom.

Please Log in or Create an account to join the conversation.

\"too soon old,too late smart\" my pap

Twenty years from now you will be more disappointed by the things that you didn’t do than by the ones you did do. So throw off the bowlines. Sail away from the safe harbor. Catch the trade winds in your sails. Explore. Dream. Discover.“

---Mark Twain

Re:Progress on my Power Cat 14T 13 years 11 months ago #5311

Frank
I too believe the paint is too thin, much like candy apple paint ...transparent....which is why the red looks dull now over the grey primer as compared to the red which was over white primer that I read a comment you liked the color better.spraying this paint would not cover better, actually brushing it on makes a thicker layer
using an almost transparent type of paint means this means the primer coat beneath must be FLAWLESS unlike solid particulate paint, or enoughs coats to cover the discoloration blotches
and the color choice of the primer base coat is equally important
white will be brighter and vibrant red, and darker colors will dull it down
I bet if you spray some silver or gold paint on some scrap then a coat of your red youd see something similar to candy apple paint

Id say build that booth Frank shoot white primer and a color coat, If I lived close enough Id help you out buddy

Please Log in or Create an account to join the conversation.

Re:Progress on my Power Cat 14T 13 years 11 months ago #5320

Well guys, I'm going to try and get the deck/hull seam glassed together before screwing around with any more paint. That otter be a lotta fun given problems I'm having with my shoulders. Gotta be done though, and no reason not to do it.

I sure wish some of you were closer too. I have to work with what I have, which is mostly just ME!

Frank

Please Log in or Create an account to join the conversation.

Re:Progress on my Power Cat 14T 13 years 11 months ago #5337

F - I don't get it. I've painted several in red and was done in 4 coats. The 18DC is done in 3. I never thin Brightside, just use the 333 on a rag method. I am very sorry you're frustrated. Stop working on the paint, get it rigged, run it, and worry about the finish later. One is of a Yellow Jacket I owned and sold, the second a 1956 Yellow Jacket I did a few years ago...both in red Interlux Brightsides. B
Attachments:

Please Log in or Create an account to join the conversation.

Re:Progress on my Power Cat 14T 13 years 11 months ago #5342

frank if you in no hurry i could paint it for you if you bring it here ,after i get finished with the front porch and the sunray,im pretty busy now,but i would be happy to spray it if you prepare it for paint at no charge,but im going to be busy for awhile yet,im building a 12 x 24 concrete front porch now(honey do list)then work on the sunray,oh yeah and finish the sidewalk,lol,john
Attachments:

Please Log in or Create an account to join the conversation.

\"too soon old,too late smart\" my pap

Twenty years from now you will be more disappointed by the things that you didn’t do than by the ones you did do. So throw off the bowlines. Sail away from the safe harbor. Catch the trade winds in your sails. Explore. Dream. Discover.“

---Mark Twain

Re:Progress on my Power Cat 14T 13 years 11 months ago #5343

your a good man John :kiss:

Please Log in or Create an account to join the conversation.

Re:Progress on my Power Cat 14T 13 years 11 months ago #5344

lol,thanks mad,now tell my wife that,lol i think shes trying to kill me,lol,by the way sorry for the nbr pics guys.

Please Log in or Create an account to join the conversation.

\"too soon old,too late smart\" my pap

Twenty years from now you will be more disappointed by the things that you didn’t do than by the ones you did do. So throw off the bowlines. Sail away from the safe harbor. Catch the trade winds in your sails. Explore. Dream. Discover.“

---Mark Twain

Re:Progress on my Power Cat 14T 13 years 11 months ago #5345

Gee John, if you were closer, I could use that backhoe of yours! We have projects too. I'm building a 8 X 12 greenhouse for Gail, and have the sod removed, but now need to dig down so I have at least 8" of depth so I can get a good bed of gravel in there. That's gonna be when the boat is done, or it may be when I just get tired of working on a boat all the time and say screw it, greenhouse time!

Thanks for the offer John, I really appreciate it, but it looks like it's just going to be the way it is. I'll see if I can get the deck tied to the hull, then start rigging it.

Frank

Attachments:

Please Log in or Create an account to join the conversation.

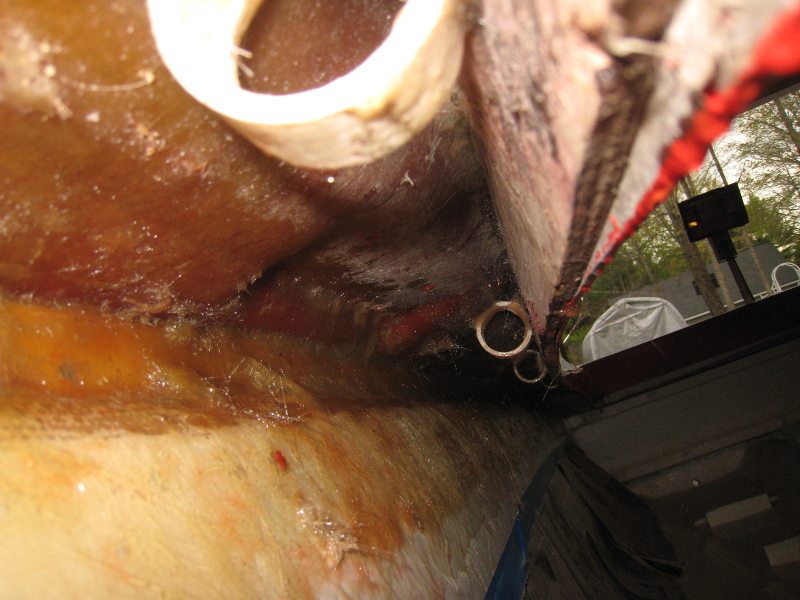
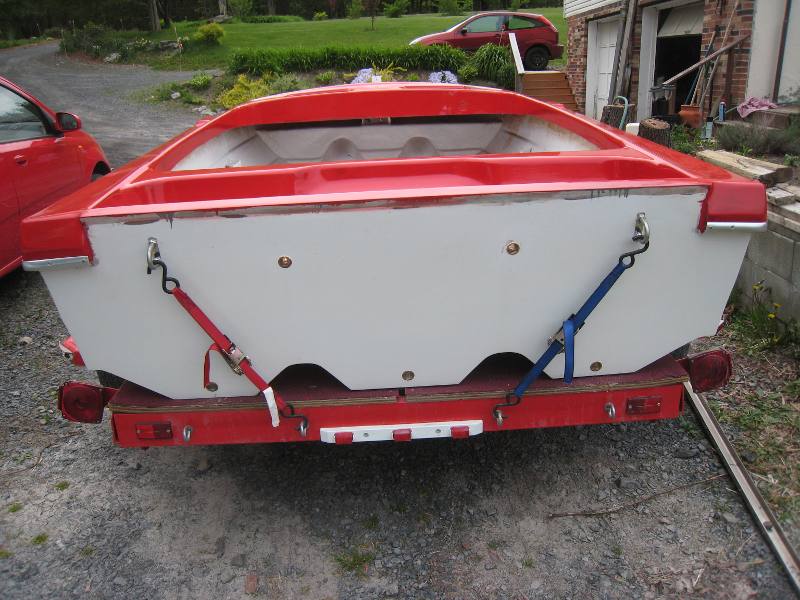
Got the deck tied down 13 years 11 months ago #5348

Took a lot of effort (i.e., my back is killin me!), but I got it about as good as she's gonna be. Had to cut some hull lip (where I had put a new piece in), and a bit of deck lip. Holding it in place strategically with the same stainless hardware the rub rail will be put on with. May need a bit more trimming on the deck lip, but I think it's proportional side to side, better than when I got it. I'll start on getting her glassed together this week. Probably start on it Wednesday after work, got a meeting tomorrow night, and it's too late for me to do this sort of stuff tonight.

First pic is of the starboard bow, my primary problem area.

So that may do it for now. I'll keep y'all posted as I move ahead, or back, whatever!

Thanks again for all the help, suggestions, and encouragement!

Frank


Attachments:

Please Log in or Create an account to join the conversation.

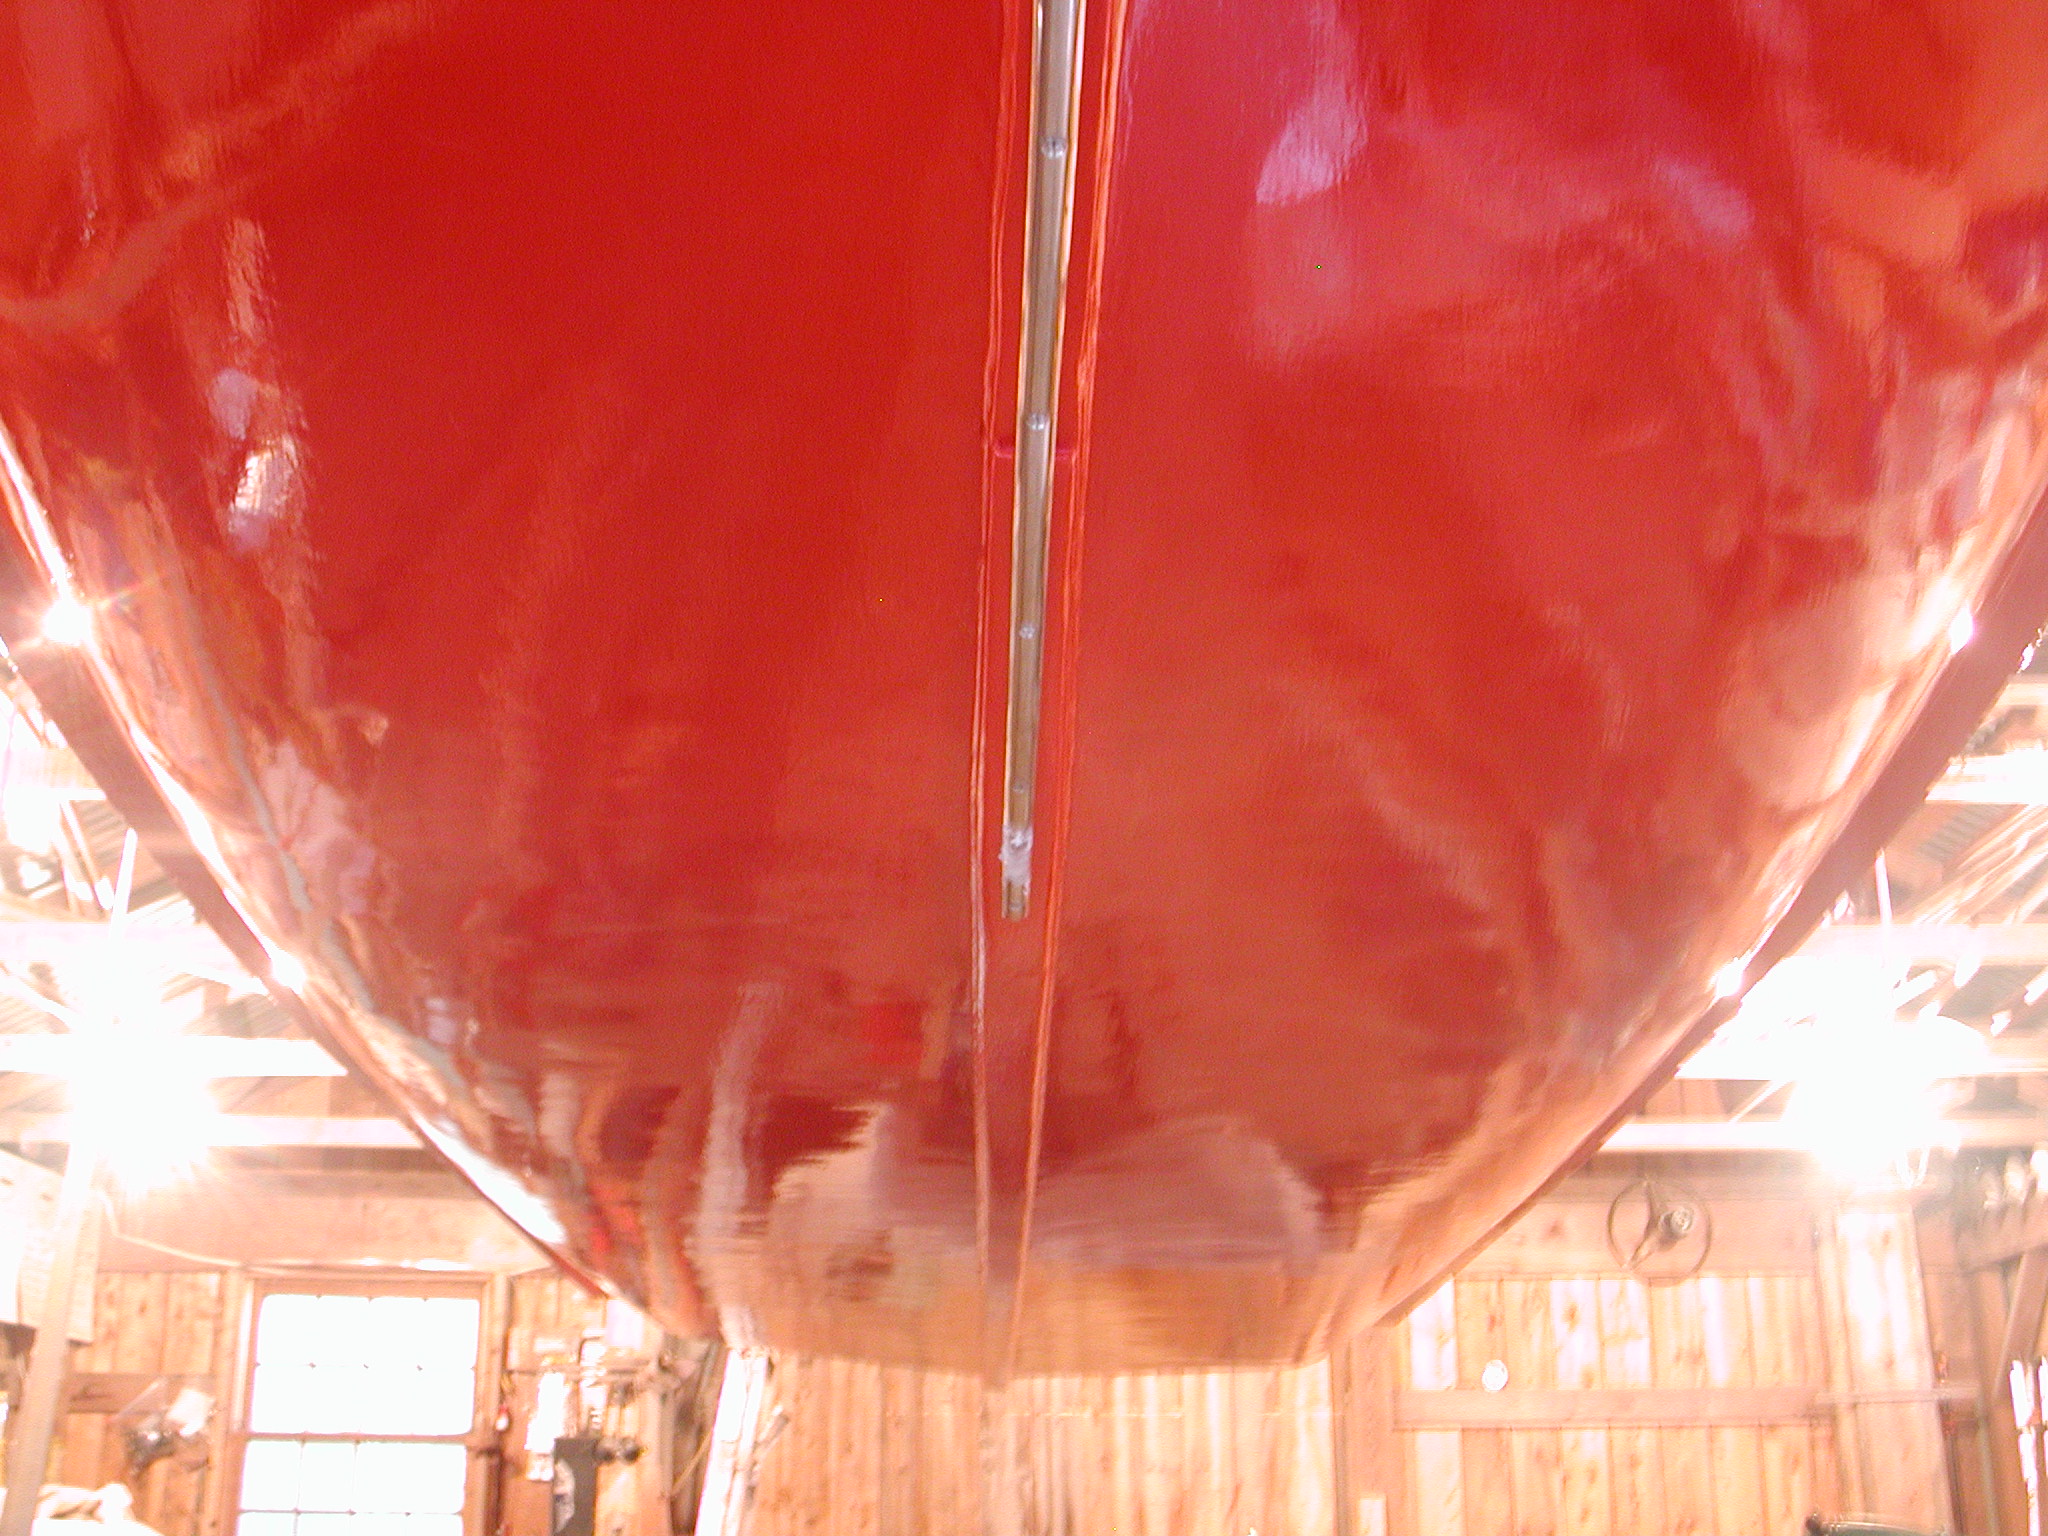
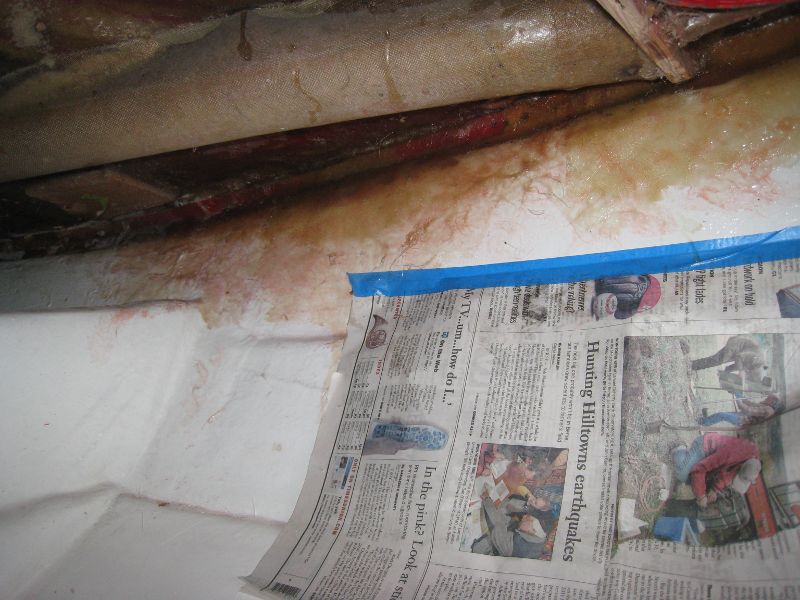
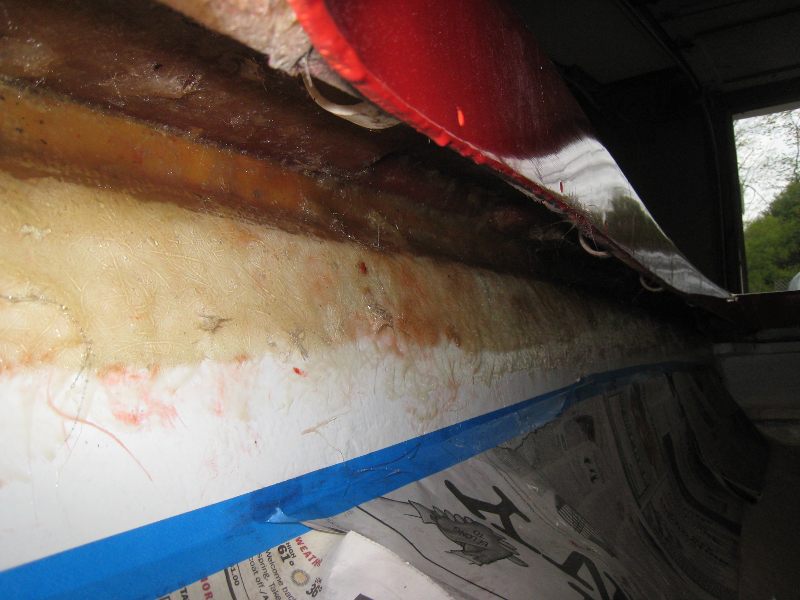
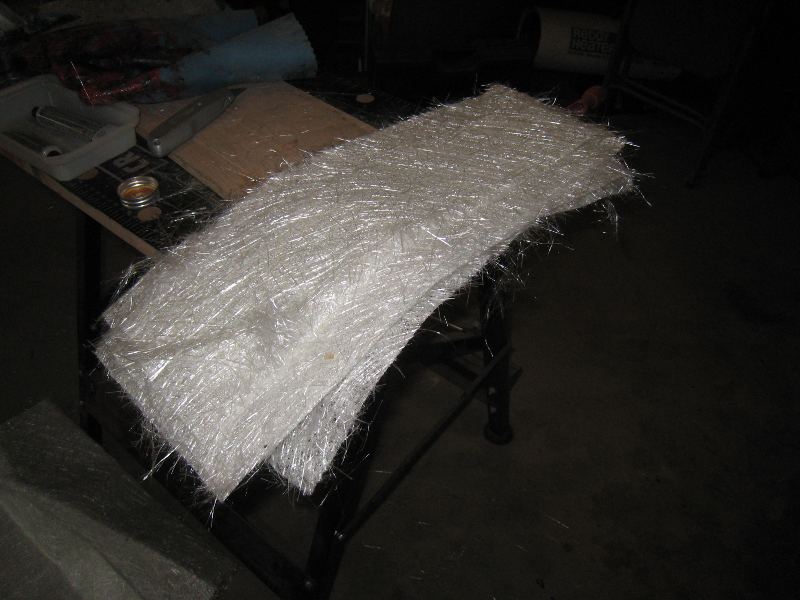
Deck/hull seam glassed 13 years 11 months ago #5688

Took maybe 2-3 hours from start to finish. That included cutting the matt to size (18" strips 3" and 5" wide), battling matt sticking to my gloves as I tried to get it in place, crawling around in a trimaran where the floor is the hull, brackets in my back, etc. and to top it all off, now my left shoulder is useless. :S

But it's done and came out okay. I.e., I took the screws out holding the deck in place, and it didn't spring back! Thanks particularly to Doug Young (classicfins) for his help and advice. I followed it to the "t."

Got resin/matt a few places on the newly painted deck, but acetone seems to clean it up okay. Guess we'll (emphasis on WE) wet sand it and give it one last coat for now. Then it's on to rub rail and all the other stuff.

Frank


Attachments:

Please Log in or Create an account to join the conversation.

Re:Deck/hull seam glassed 13 years 11 months ago #5692

  • Heather
  • Heather's Avatar
  • Offline
  • Contributing Member
  • Contributing Member
  • Posts: 243
  • Karma: 10
  • Thank you received: 0
Looks good frank. If you just keep plugging away at them, they somehow tend to get a bit closer to finished each month. sometimes it's overwhelming I know. Just keep at it. I think you will beat me on the SeaCamper with this one.

FROM: A big fan in Alabama.

Please Log in or Create an account to join the conversation.

Mrs Spookeay Bird

Re:Progress on my Power Cat 14T 13 years 11 months ago #5695

Thanks Heather. This is a step that has been botherin me for a while, so it's just good it's done.

I don't know about beating you on the Sea Camper. If I do, it's only because my boat is little and simple.

We're gonna have Alabama weather here tomorrow, 80's. I may attempt to wet sand the deck with 600 grit, clean it and give it another coat of paint before I attach the rub rail. Hmmm.

Enjoy the weekend.

Frank

Please Log in or Create an account to join the conversation.

Re:Progress on my Power Cat 14T 13 years 11 months ago #5698

Good deal Frank! I'm glad it worked out for you. That sucker will be in the water before you know it now. :)

Please Log in or Create an account to join the conversation.

Some people are like slinkies... Not much good for anything, but they sure are fun to push down the stairs.

Re:Progress on my Power Cat 14T 13 years 11 months ago #5711

  • MarkS
  • MarkS's Avatar
  • Offline
  • Moderator
  • Moderator
  • Posts: 5348
  • Karma: 118
  • Thank you received: 5
Congrats Frank, on getting another major "hurdle" out of the way. You're rollin' now buddy. Sorry to hear about the left shoulder, try to take it easy on that thing, k!? (Easier said than done, believe me I know.)

Please Log in or Create an account to join the conversation.

Mark

Re:Progress on my Power Cat 14T 13 years 11 months ago #5715

Thanks Doug and Mark. Down in the garage doing some clean up and some strictly right handed wet sanding with 600 grit for the last (for now) coat of deck paint. I wouldn't mind starting on getting the rub rail on today, but that will probably wait for tomorrow. We'll see. It's early yet.

I need to start taking my PT&T off the motor too and get ready to mount that stuff. Still not sure where the PT&T pump/motor will go. And my next obsession is how to get my steering wheel mounted correctly. It's been like 3 years since I removed it, and I forget if the bolts go in straight or at an angle.

Supposed to be a beautiful day, temps in the 80's, sunny. Would be a great day to get out in the boat, but I have an alternative, namely a little open roadster hot rod.

Enjoy your day guys,

Frank

Please Log in or Create an account to join the conversation.

Wet sanding my Power Cat 14T 13 years 11 months ago #5732

Boy, takes a lot of time to wet sand with one hand! Done though, after cleaning up a number of glass boo-boos on my deck from last night's work. Started cleaning up about 4:30, then started wet sanding, have only broke for breakfast. Just wish it didn't take so darn long to wet sand.

I've put up a number of pics with bright red paint. Well, here's some just before getting another coat. Wet sanded with 600 grit, all except the glove boxes. They're done!

Frank


Attachments:

Please Log in or Create an account to join the conversation.

Re:Wet sanding my Power Cat 14T 13 years 11 months ago #5735

  • Heather
  • Heather's Avatar
  • Offline
  • Contributing Member
  • Contributing Member
  • Posts: 243
  • Karma: 10
  • Thank you received: 0
OK, Now mask it and shoot it!
Lets see you swing that gun frank!

Please Log in or Create an account to join the conversation.

Mrs Spookeay Bird

Re:Progress on my Power Cat 14T 13 years 11 months ago #5738

Still wimpin out with a foam brush Heather. Not doin bad. Leastways the deck is glassed to the hull now, one less thing to worry about!

Maybe one more coat, then rub rail.

Frank


Attachments:

Please Log in or Create an account to join the conversation.

Re:Progress on my Power Cat 14T 13 years 11 months ago #5739

  • MarkS
  • MarkS's Avatar
  • Offline
  • Moderator
  • Moderator
  • Posts: 5348
  • Karma: 118
  • Thank you received: 5
Shinin' like a baby's hiney! Nice work buddy. ;)

Please Log in or Create an account to join the conversation.

Mark

Re:Progress on my Power Cat 14T 13 years 11 months ago #5740

Thanks Mark. Still having coverage problems, but it is what it is.

Enjoy the weekend buddy!

Frank

Please Log in or Create an account to join the conversation.

Re:Progress on my Power Cat 14T 13 years 11 months ago #5742

F - She looks great! Gotta love that Brightsides shine! You're painting one of the toughest colors to get good. You're almost ready for black. :ohmy: Keep smiling F! You're in the home stretch.

I've got a few spots I'm leaving on my Power Cat for now too. Couple of pin holes and a run that may be covered by the rub rail. For me it's more important to move on; get everything installed and running. Paint job is about 98% and certainly passes the 10' if not the 5' rule. There will be time to fuss with it if I want it perfect later. B

Please Log in or Create an account to join the conversation.

Re:Progress on my Power Cat 14T 13 years 11 months ago #5743

crosbyboat wrote:

You're almost ready for black.


Almost ready for black what B? Da merc?

I may have to do some VC work too. May put the rub rail on tomorrow. F

Please Log in or Create an account to join the conversation.

Re:Progress on my Power Cat 14T 13 years 11 months ago #5790

PC1000 wrote:

crosbyboat wrote:

You're almost ready for black.


Almost ready for black what B? Da merc?

I may have to do some VC work too. May put the rub rail on tomorrow. F

frank brian is saying that your almost ready for black,because its the hardest color to paint,it shows every imperfection.
and by the way your paint job looks great ,you really got it shineing buddy.

Please Log in or Create an account to join the conversation.

\"too soon old,too late smart\" my pap

Twenty years from now you will be more disappointed by the things that you didn’t do than by the ones you did do. So throw off the bowlines. Sail away from the safe harbor. Catch the trade winds in your sails. Explore. Dream. Discover.“

---Mark Twain

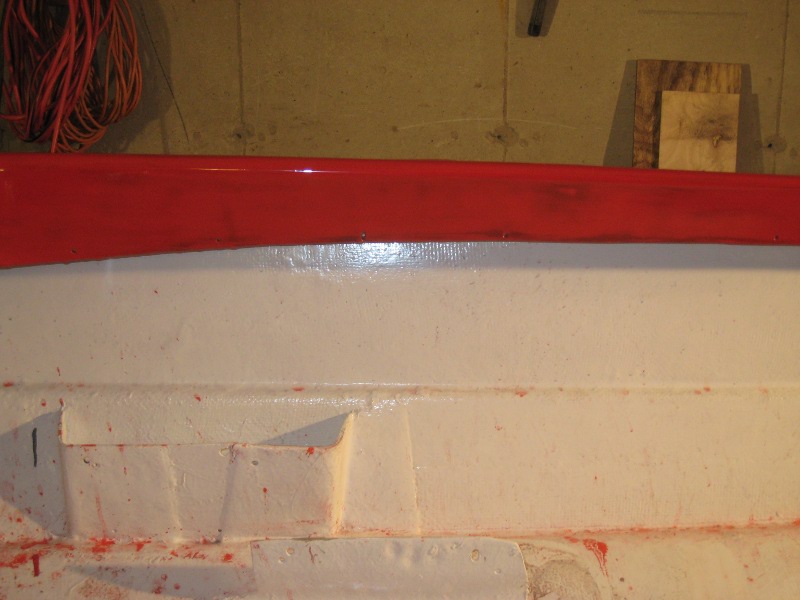
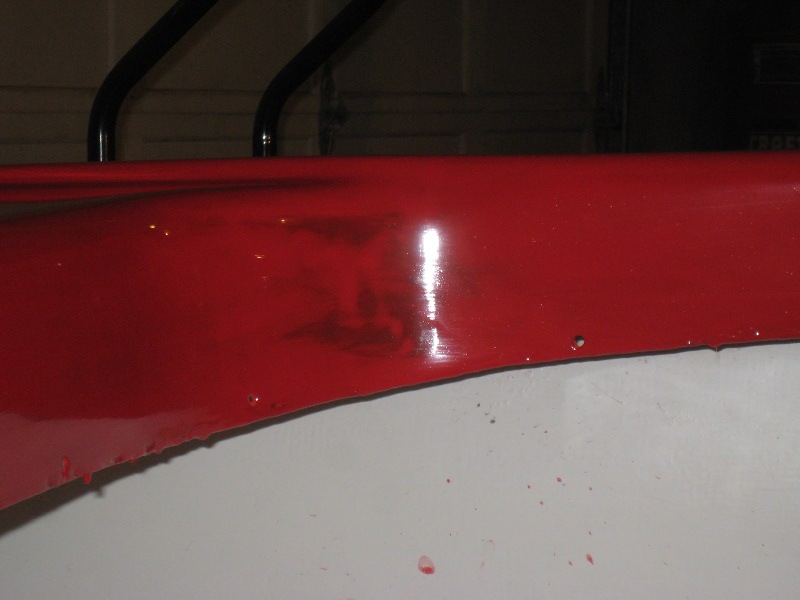
Rub rail install on my Power Cat 14T 13 years 11 months ago #5796

Thanks John, doing okay, but in pain sitting at the computer.

Rub rail install this a.m. All done with oval head stainless machine screws, flat washers and nyloks. Need a few more things, like 5 oval head stainless self tapping wood screws to go places no man with a socket can get to. You can see on the starboard stern I haven't wrapped it around yet. That's because I need those self tapping wood screws so I can put the last one in the side before I wrap it around.

Back is major screwed up from last couple days of working on da boat. Need to take it easy, but more may yet come today.

Couldn't have done this without the able assistance of my 32 year old son Gregg. Look how happy he is... :laugh:

Frank


Attachments:

Please Log in or Create an account to join the conversation.

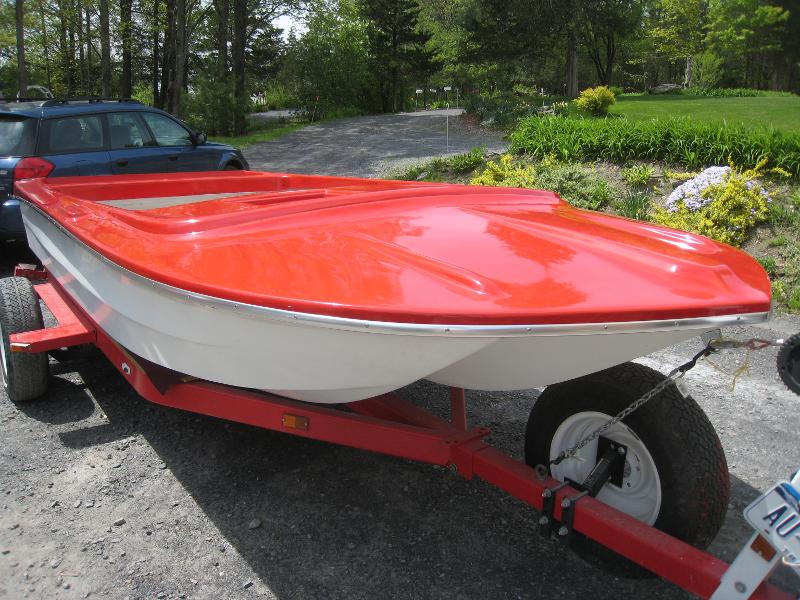
Rub rail on my Power Cat 14T done 13 years 11 months ago #5810

Still have more trim to do, stainless transom cap, couple small vertical pieces to cover transition from rub rail to transom cap. Otherwise, this is a stern shot, where we needed to finish up the rub rail.

Frank

Attachments:

Please Log in or Create an account to join the conversation.

Re:Rub rail on my Power Cat 14T done 13 years 11 months ago #5833

Really looks greta Frank! It's amazing what difference a rubrail will make. You're almost there now! :)

Please Log in or Create an account to join the conversation.

Some people are like slinkies... Not much good for anything, but they sure are fun to push down the stairs.
Time to create page: 0.404 seconds

Donate

Please consider supporting our efforts.

FG Login

Glassified Ads

FiberGoogle

Who's Online

We have 7616 guests and no members online